Reader Design: Angie's Cozy, Collected Family Room

Hi All! One of my favorite things about being a DIY / furniture refinishing / home design blogger is the opportunity to get to know wonderfully creative people from all over. Not long after I opened an Instagram account, I found Angie, @angies_deco_abode. Angie has a beautiful eye for design and I've found her home to be so inspiring! She's a thrifting queen - you'd NEVER imagine that her glamorous space is almost completely thrifted or clearance finds. 

Let's take a peek!

Stunning, right?! Here are some notes from Angie:

"This room is the first thing you see when you come in to my home. I wanted it to look nice and inviting. This room is used for everything. From storage for the kids toys to dads nicknacks that need to be out of the way. That hutch keeps things nice and organised. We love using this room on rainy or lazy days.Will lay on that lounger and read a book or just watch the rain out the window. Plus it also gets a lot of light so my plants love it too. All in all its a great room. Most of the things in this room were thrifted. Its nice to find things I love at a good price."

Hutch. $50
sofa/ lounger $90
Blue art frame $15
Gold table $15
White leather chair $12
Little table for planter $3
White rug/ikea $10
small side gold table $12

Thank you so much for inviting us in, Angie! Angie's beautiful room has now been added to our Spaces page. We really love any opportunity to peek inside a home. If you'd like to share any bits of your own home, please either post your pictures right to our Facebook page, or tag #stylemuttspaces on Instagram!

Dresser for a baby girl {Before & After}

The weekend is here and it's lookin' sweet. My girl, Shire, and I are heading north a bit to visit my sister for the weekend! It's a real treat to spend time with both of those lovelies and I know it'll be over too soon. So, we're gonna move slow and drink it in!

Speaking of girls, I've had the absolute privilege of getting to refinish a dresser changing table combo for a sweet baby girl due to arrive this Christmas! The piece is for my cousin, John, and his wife, Jen, who are the expectant parents of this little one. When they reached out to me about refinishing a piece for her nursery I got right to work before even responding yes! I adore nurseries. It's such an honor whenever I have an opportunity to refinish a piece for such a thoughtful room. It's a special place where sweet memories are made. Sigh.

John and Jen were particularly open minded and allowed quite a bit of creative freedom for this project. Here is their piece when I found it:

Great size, plenty of storage without being overwhelmingly huge, sturdy, and a piece that'll certainly grow with the child. Their request was for something light in look, which this piece was quite the opposite of before the work started! 

And after, in white lacquered glory!

Handmade rope pulls and pink glass knobs are the stars of this show!

Glidden's Trim, Door and Furniture paint does it again! This uber thick paint, which is ridiculously durable, settles to a smooth, glassy finish in a nice high sheen. Love how it bounces the light and adds to the visual interest of this otherwise boxy piece!

THE SET-BACK: Like any solid Love It or List It, (HGTV), show, many Before & After stories have at least one challenge to work through. I was planning to cover this piece in Annie Sloan Chalk Paint's Pure White and give it some gentle distressing for a cozy, weathered look. I suspected there would be terrible bleed-through, (an unsettling discoloration that seeps through layer after layer of paint - a dreadful, but typical occurrence with old pieces), so I sealed it with two layers of Zinnsers Clear Shellac before breaking out the chalk paint. Even after sealing the piece and then painting, this was the mess at hand: See all that brown? I decided to change course and see what the Glidden Trim, Door and Furniture paint would do since it's thick as molasses and oil-based. It worked like a dream; the best dream ever!!! A big bonus with this paint is that it wipes clean SO easily - highly preferred for a piece that will double as a changing table. 

Thankful that this crises was averted! I was getting ready for a tough break-up with this piece and nearly called Jen to deliver the bad news. Not recommended to do to a first-time expectant Momma. Second and on? It's your gamble. 

So excited to meet the little lady to whom this piece will soon belong!

Refinishing furniture is something I've enjoyed for about 4 years now. I've finished hundreds of pieces, many as custom orders! If you've got something in mind that you'd like for your own home, please email me at chelsea@stylemutthome.com. I'd love to hear what you have in mind!

Thank you all for stopping by and have a wonderful weekend!


Plain, white pillows ---> Three ideas!

Hey guys! I've got a good three-fer for today - three ideas for one product! Tis' the season for quick and easy design swaps to get your homes ready for the holidays up ahead. I don't know about you, but I've been swooning over the hundreds of decorative pillows overwhelming Pinterest, Etsy, and my inbox of emails from West Elm, Pottery Barn, Anthropoligie Home, and the like. There are so many. So, so many. One could easily drop several hundred dollars on seasonal pillows alone!

A few months ago I swooped into IKEA for a quick stop and grabbed a few plain white GURLI pillows while I was there. I didn't quite know what I was going to do with them, but at $4/pillow, I figured something good would come from them. After an in-n-out trip to JoAnns, I had just what I needed, (for an additional $4 as all items were on sale), to dress up my plain white pillows!

IDEA 1: Block printing

Block printing is one of my favorite techniques. There are so many creative ways to use block printing - curtains, tea towels, (which I gave as Christmas gifts one year), chair cushions, aprons, stationary, napkins, lampshades, (which I did on our old bedside lamps), and as we'll see today, pillows! You can use any number of objects as your shape and then you just need a bottle of fabric paint.

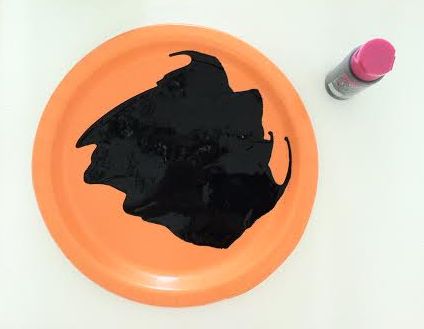
For my first white pillow, I used a green pepper, cut straight across about two inches from the top. Squirt some fabric paint onto your paper plate or paint tray, stick the cut end of the pepper into the paint, and stamp it right onto the fabric! 


When I was finished with the block printed pattern, I felt like my pillow needed a little something more.  I dabbed my finger into some red fabric paint and made a few dots in the center of each stamp. Now it looks like flowers!

IDEA 2: Leather Cord

This next idea was inspired by a pillow I saw at Target by Nate Berkus, (the 'Decorative Braided Pillow', now discontinued). I bought the leather cord from JoAnns, (on sale for around $1), and then measured and cut the pieces I'd need for my design. I layed the two criss-crosses side by side and stitched the ends. That's all!

IDEA 3: Leather fringe

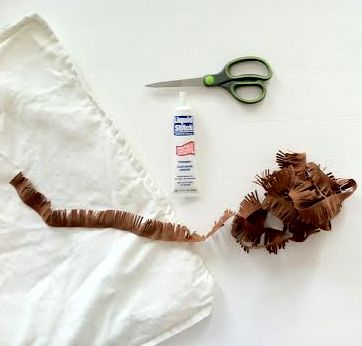
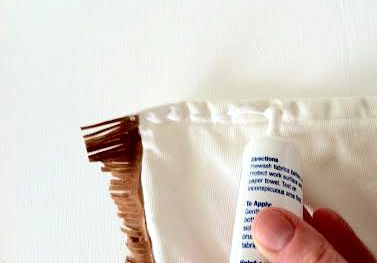
This last idea almost went in a different direction using chunky pom-pom trim instead. But, when I saw this camel leather fringe on sale at JoAnns, I couldn't resist and changed course right away! A simple, trimmed-out pillow is a great anchor to a long couch full of various patterns and textures. I used fabric glue for this idea and it has held up beautifully, but of course if you have a sewing machine that would work as well. I glued along the outer edge of the pillow, carefully lined up the leather fringe, and pressed down. Then I snipped off the end hanging over the edge of the pillow cover and started on the next side. 

Here they are all together - three identical pillows dressed up three different ways! For $4/pillow and $4 total for supplies, I now have three new custom pillows for a total of $16! This was an easy project to tackle in a single afternoon while my little ones napped. Estimated project time: 60 min!

Thank you for stopping by!