Large Botanical Gallery Wall {+ tips & tricks!}

Hi guys! I recently made a big, life-changing step when I overcame a personal fear; the fear of gallery walls.
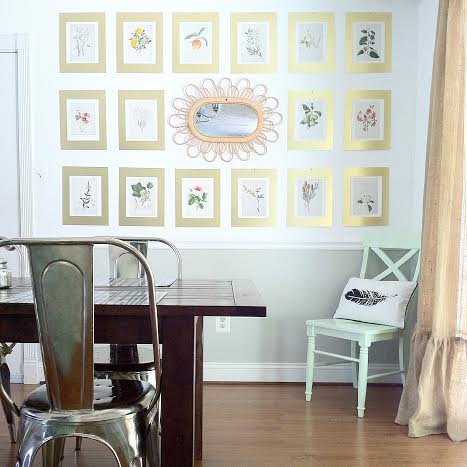
I've always been struck by large, organized, symmetrical gallery walls. I think they're stunning! However, it's always intimidated me to try to hang everything absolutely perfect. In the past this intimidation has lead to random, haphazard gallery walls which weren't supposed to be even or organized. Those were my safe zone where I felt comfortable. (Kind of like when I get home from church on Sundays and change into despicably ill-fitting sweatpants.)

After finding an entire book of botanical prints on Ebay for $4, I took a leap out of my comfort zone to create a big, structured gallery wall in our dining room! Since these prints were already large, (11 x 13), and I wanted to use a lot of them, (16), I decided to just mount them using mattes to keep the expense of this project low. I used painters tape to attach the prints to the mattes, which will peel off easily without ripping the prints should I ever decide to use them another way.

Drawn From Nature + Antiqued Gold Mattes from Matboardplus.com

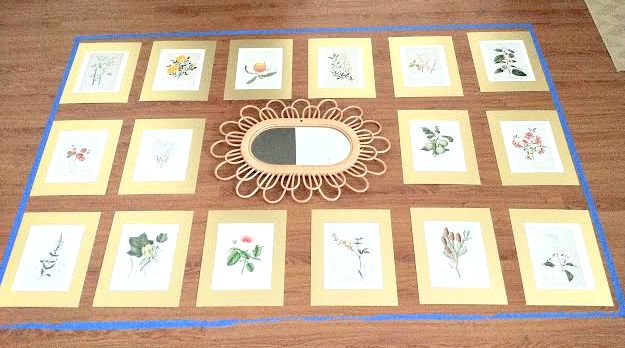
To begin, I measured the space I wanted to use on the wall and then taped those measurements onto the floor using painters tape. Then I added the mirror, ($12.95 on sale at Anthropologie), in the middle, measuring all four sides to be sure it was centered. Once the mirror was in place I filled in the rest of the space with the prints! Taking a picture of the finished product on the floor really helped when I went to hang everything on the wall. I liked the arrangement I had on the floor and didn't want to forget where they all went!
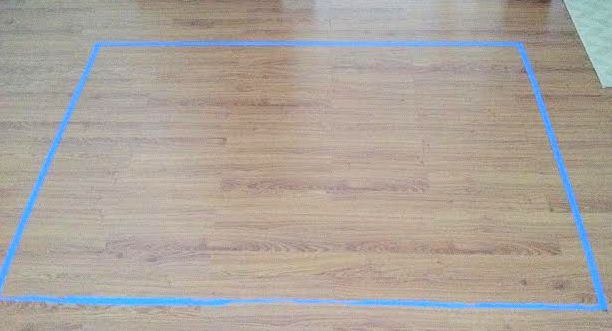
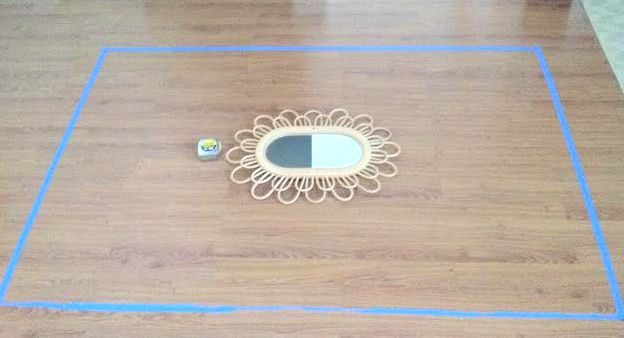
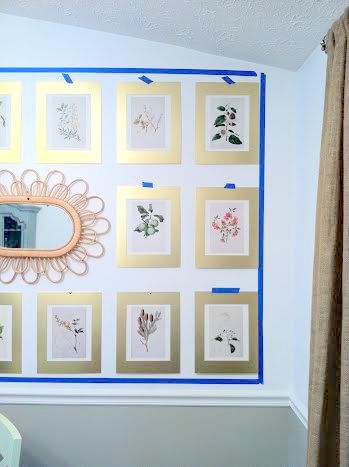
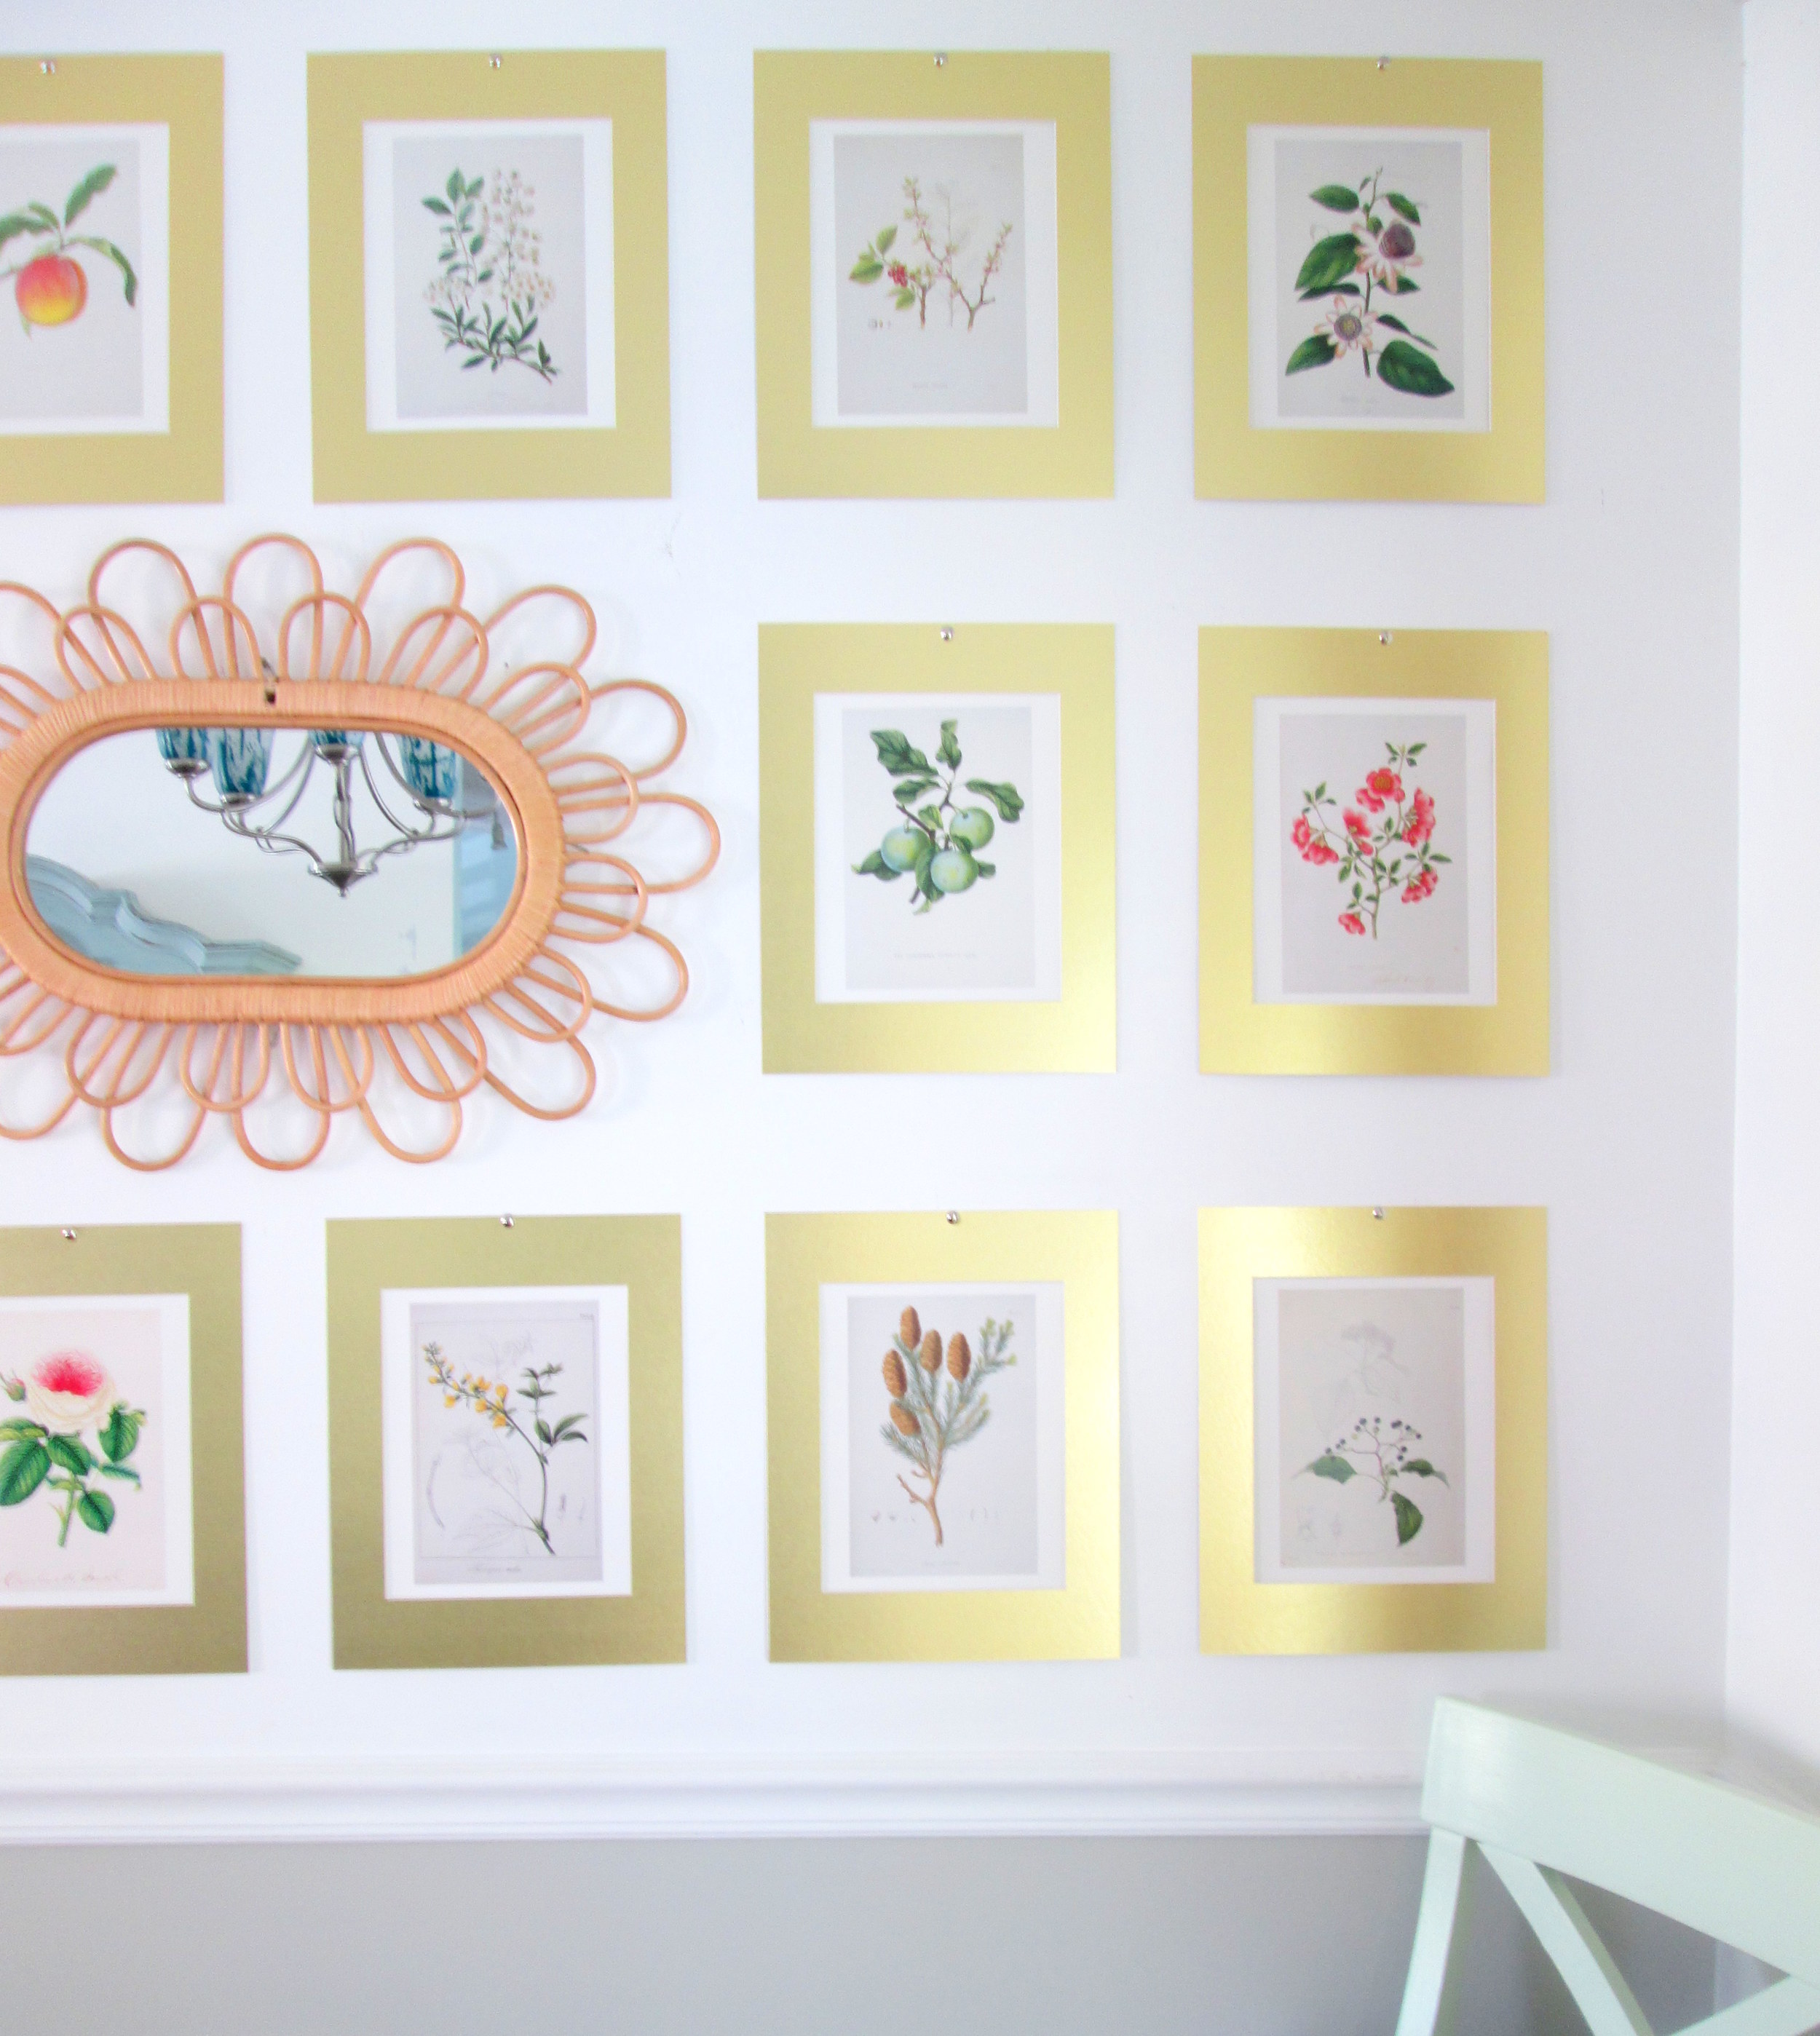
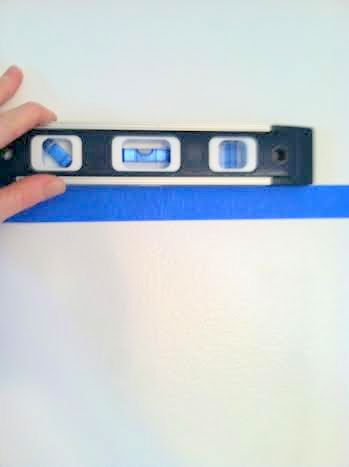
To get the gallery up on the wall, I basically followed the same steps as I used for the floor triall! I pulled the tape up off the floor and used those same strips to create my rectangle on the wall, (definitely grab a level to make sure your tape is...level). Second, I hung the mirror, measuring all four sides to be sure it was in the center. Then I filled in with the prints! I hung these with simple metallic tacks, which is way easier than measuring where to hang a nail for a frame. Baby steps.

All finished!

Another tip I've seen for hanging a precise gallery wall is to trace all the frames onto brown packaging paper and cut them out. Then tape each 'paper frame' onto the wall, moving them around until you're satisfied, (idea seen below from Young House Love).
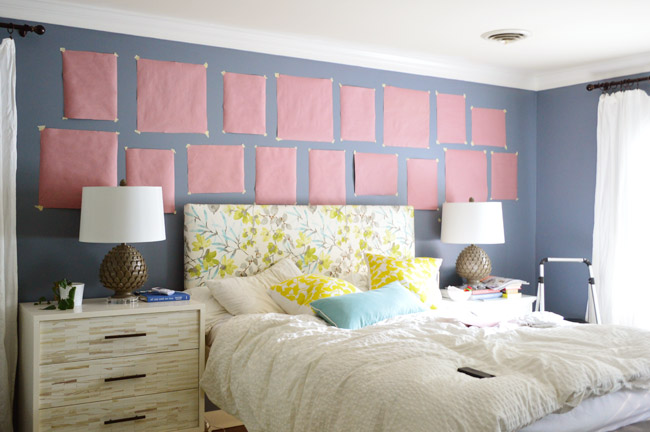
Have you hung a gallery wall in your home, (symmetrical OR random)? We'd love to see it and/or hear your tips! Just share right to our Facebook page or tag #stylemuttprojects on Instagram!

Thank you for stopping by!

It's good to be back!

Hi dear friends! It's so good to be back in touch with you and even better to be here on StyleMutt for my first time! Chelsea's Garage is officially non-existent. Just this past weekend we rerouted the Chelsea's Garage page to StyleMutt's homepage, so I hope ya'll got the closure you needed because that door is closed, baby! It was a good chapter and one I will always, always be grateful for. However, it was only made good because of the community behind it, and my heart is so uplifted that you all have joined us here on StyleMutt!

Cate and I still have a few kinks to work out and some more, (super fun), features to add in before this site is really functioning at the capacity we've dreamt it to be. But, we're really encouraged by StyleMutt's 'birth' and are looking forward to the direction it's going! One of the most frequent pieces of advice/comments I received when we first began talking about shutting down Chelsea's Garage and starting StyleMutt, was to maintain a personable site just as Chelsea's Garage was. We shared a whole lot of 'life happening' on CG and I promise you that's not going to change here.

You'll still see the same faces popping up here and there

And the ongoing happenings in, (and out of), our humble home

This isn't a family life blog, but Cate and I are going to be real and honest here. Consider that fair warning... :)

We've got some goodies on deck this week which we're excited to share, including StyleMutt's first official reader-shared content! 

Thank you so much for stopping by!


Glamorous Teal Bamboo Dresser

As you may recall, I have been slowly releasing the transformations of three thrifted finds:

No.1: a handsome globe & stand
No.2: a bamboo-front dresser
No.3: an old silver chest

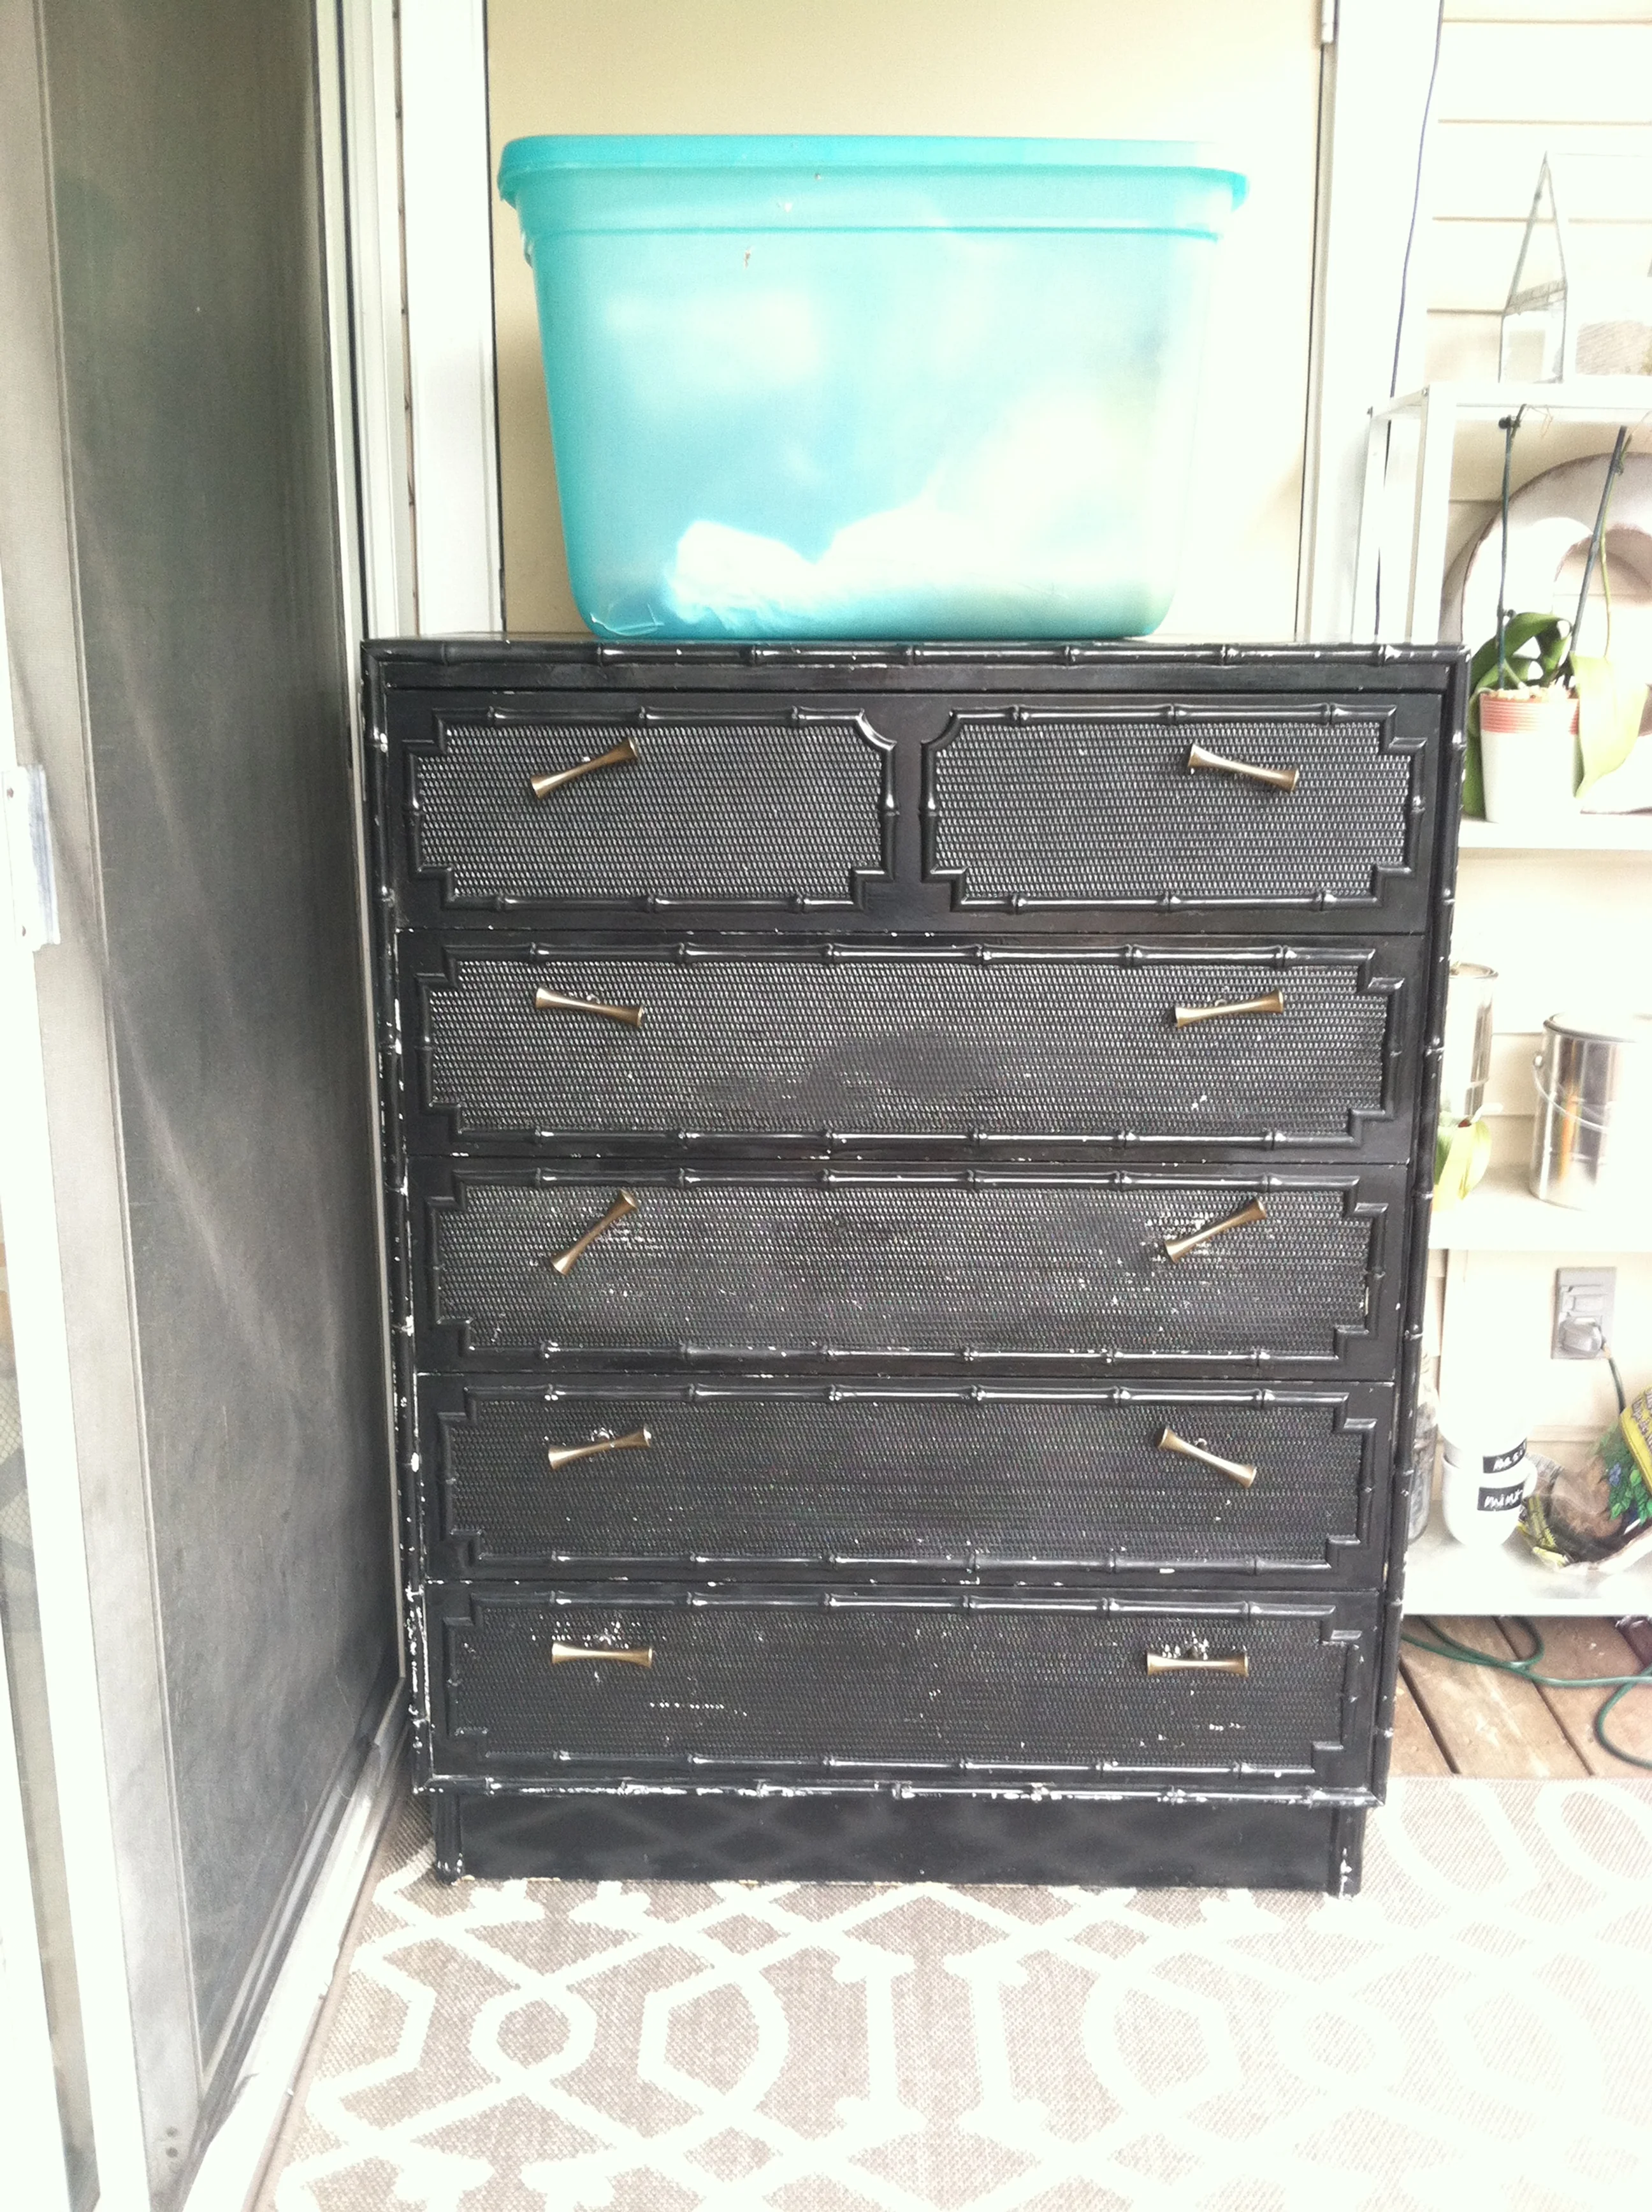
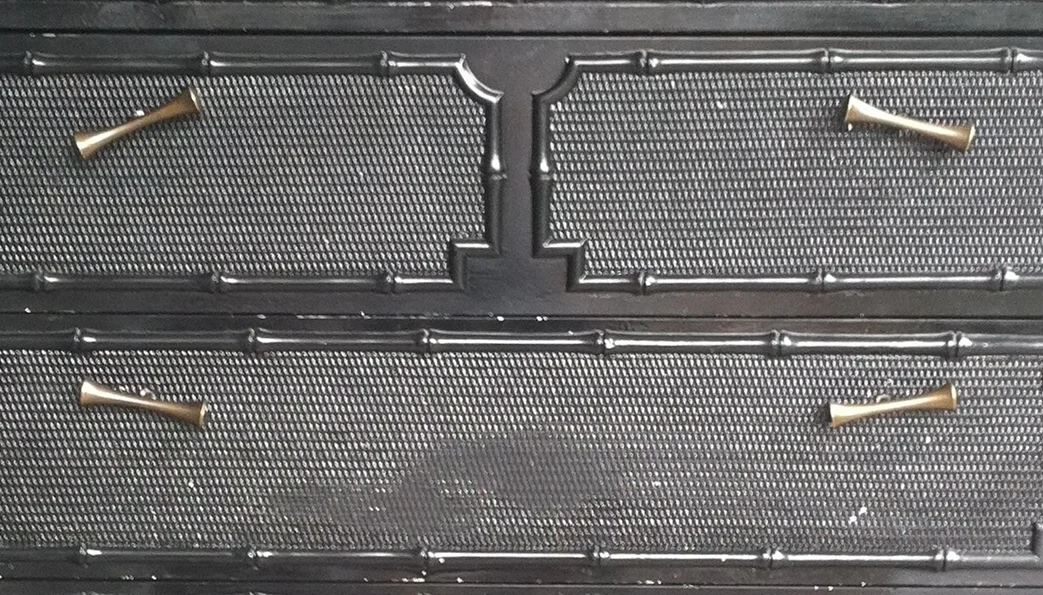
And guess what, we're due another debut!  But before I show you the finished product, let's take a moment to fully take in the starting point: 

Yikes.  You can't tell in this photo really but this dresser was covered in chipping paint (revealing that this once was a white bamboo dresser) and had been refinished in hodgepodge of high gloss and flat matte black paint. Double yikes.

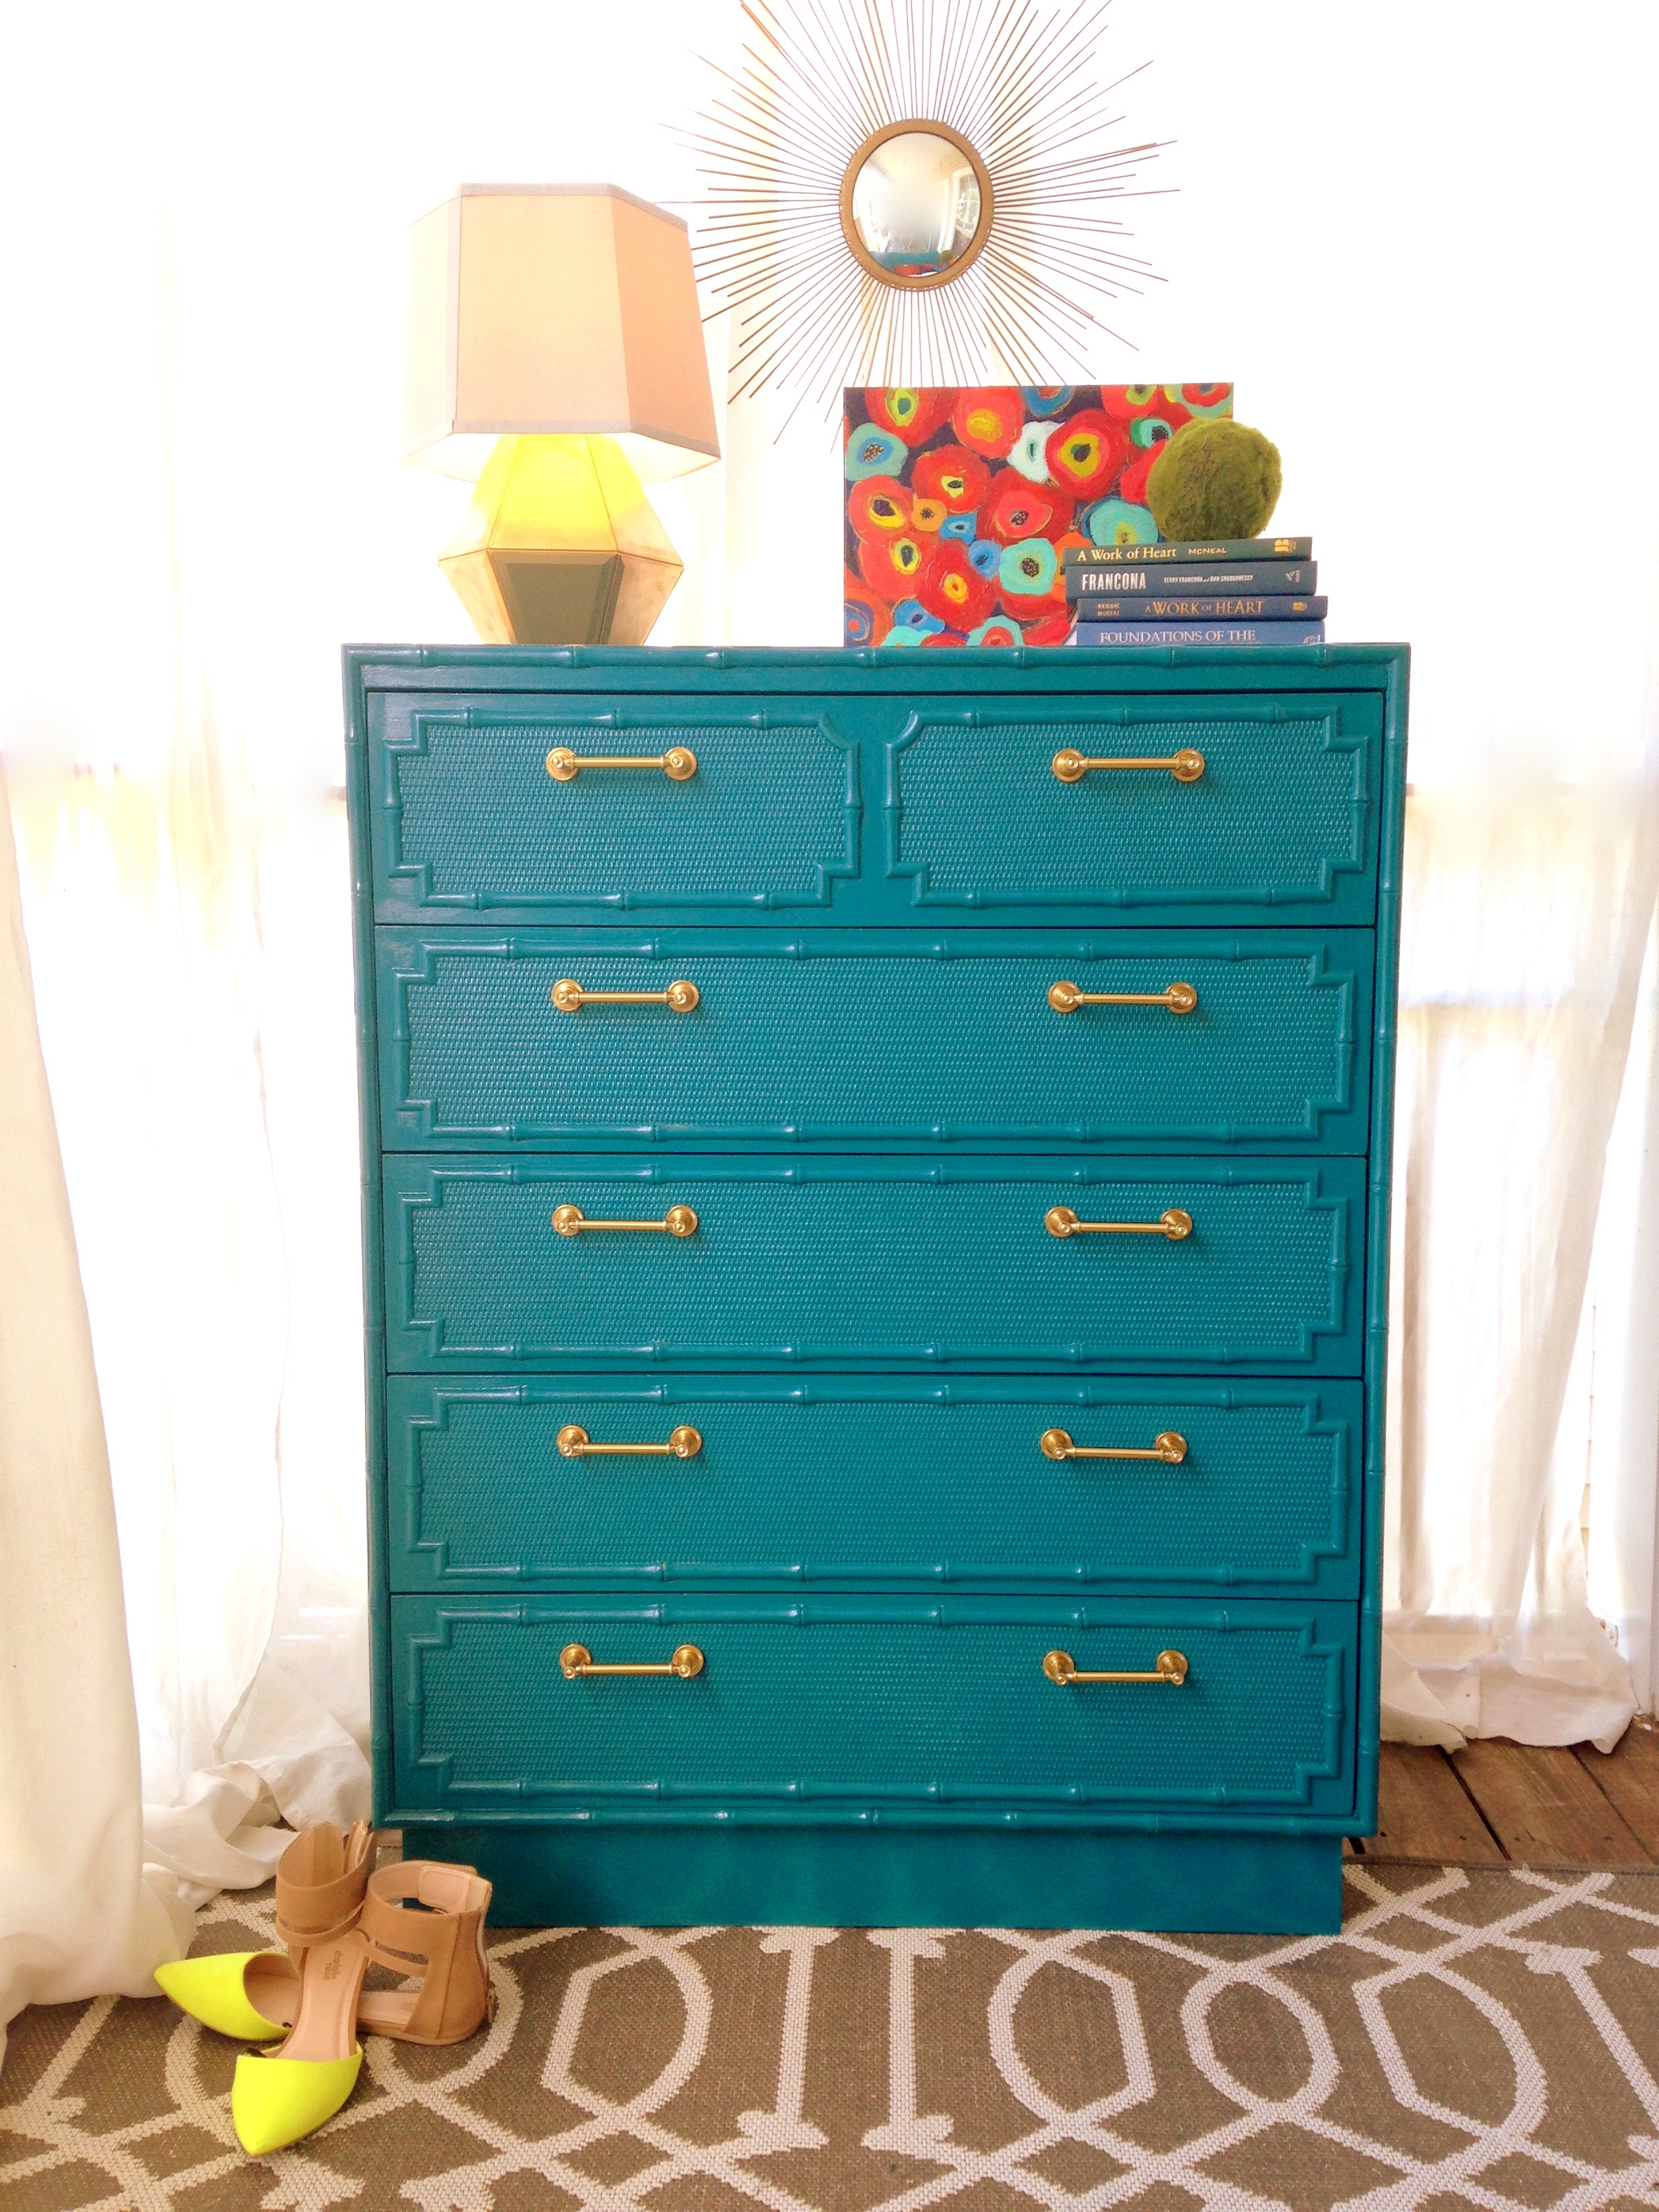
But that's a thing of the past.  May I present to you... drum roll please.... the Bamboo Dresser!  

I have been DREAMING of refinishing a bamboo front dresser since Chelsea did this custom order in Emperor's Silk Red.  This piece made me realize the regal-ness of the bamboo detailing.  I knew exactly how I wanted to refinish it if I ever got my hands on one: a sophisticated dark glossy teal and the sparkle of some high-end gold hardware.  So when I found this dresser hiding behind a clothing rack at Goodwill on a furniture sale day, I jumped at the chance to cross it off my furniture flip bucket list.

IMG_0921f.jpg

For the paint I chose "Peacock Tail" by Behr.  If you are tackling a project like this at home, normally I would not suggest a latex based paint for a furniture piece unless you're ready for some extra work.  Besides having to repair a lot of the damaged areas with wood filer, I had to sand the crap out of the entire beast in order to prep the surface for paint, roll the paint on carefully to avoid brush strokes, then sand and re-roll to get the final surface texture smooth, and finally seal it with a clear coat of polyurethane to give it that high-end sheen.  


The only reason I was so willing to use up so much of my elbow grease on this paint job was because it was the perfect shade of teal for my vision.  I included the color chip from Behr's website for your reference since sometimes I find that my photographs don't always accurately reflect the color of my pieces - especially if it has a reflective quality in the finish. 

 
"Peacock Tail" by Behr

"Peacock Tail" by Behr

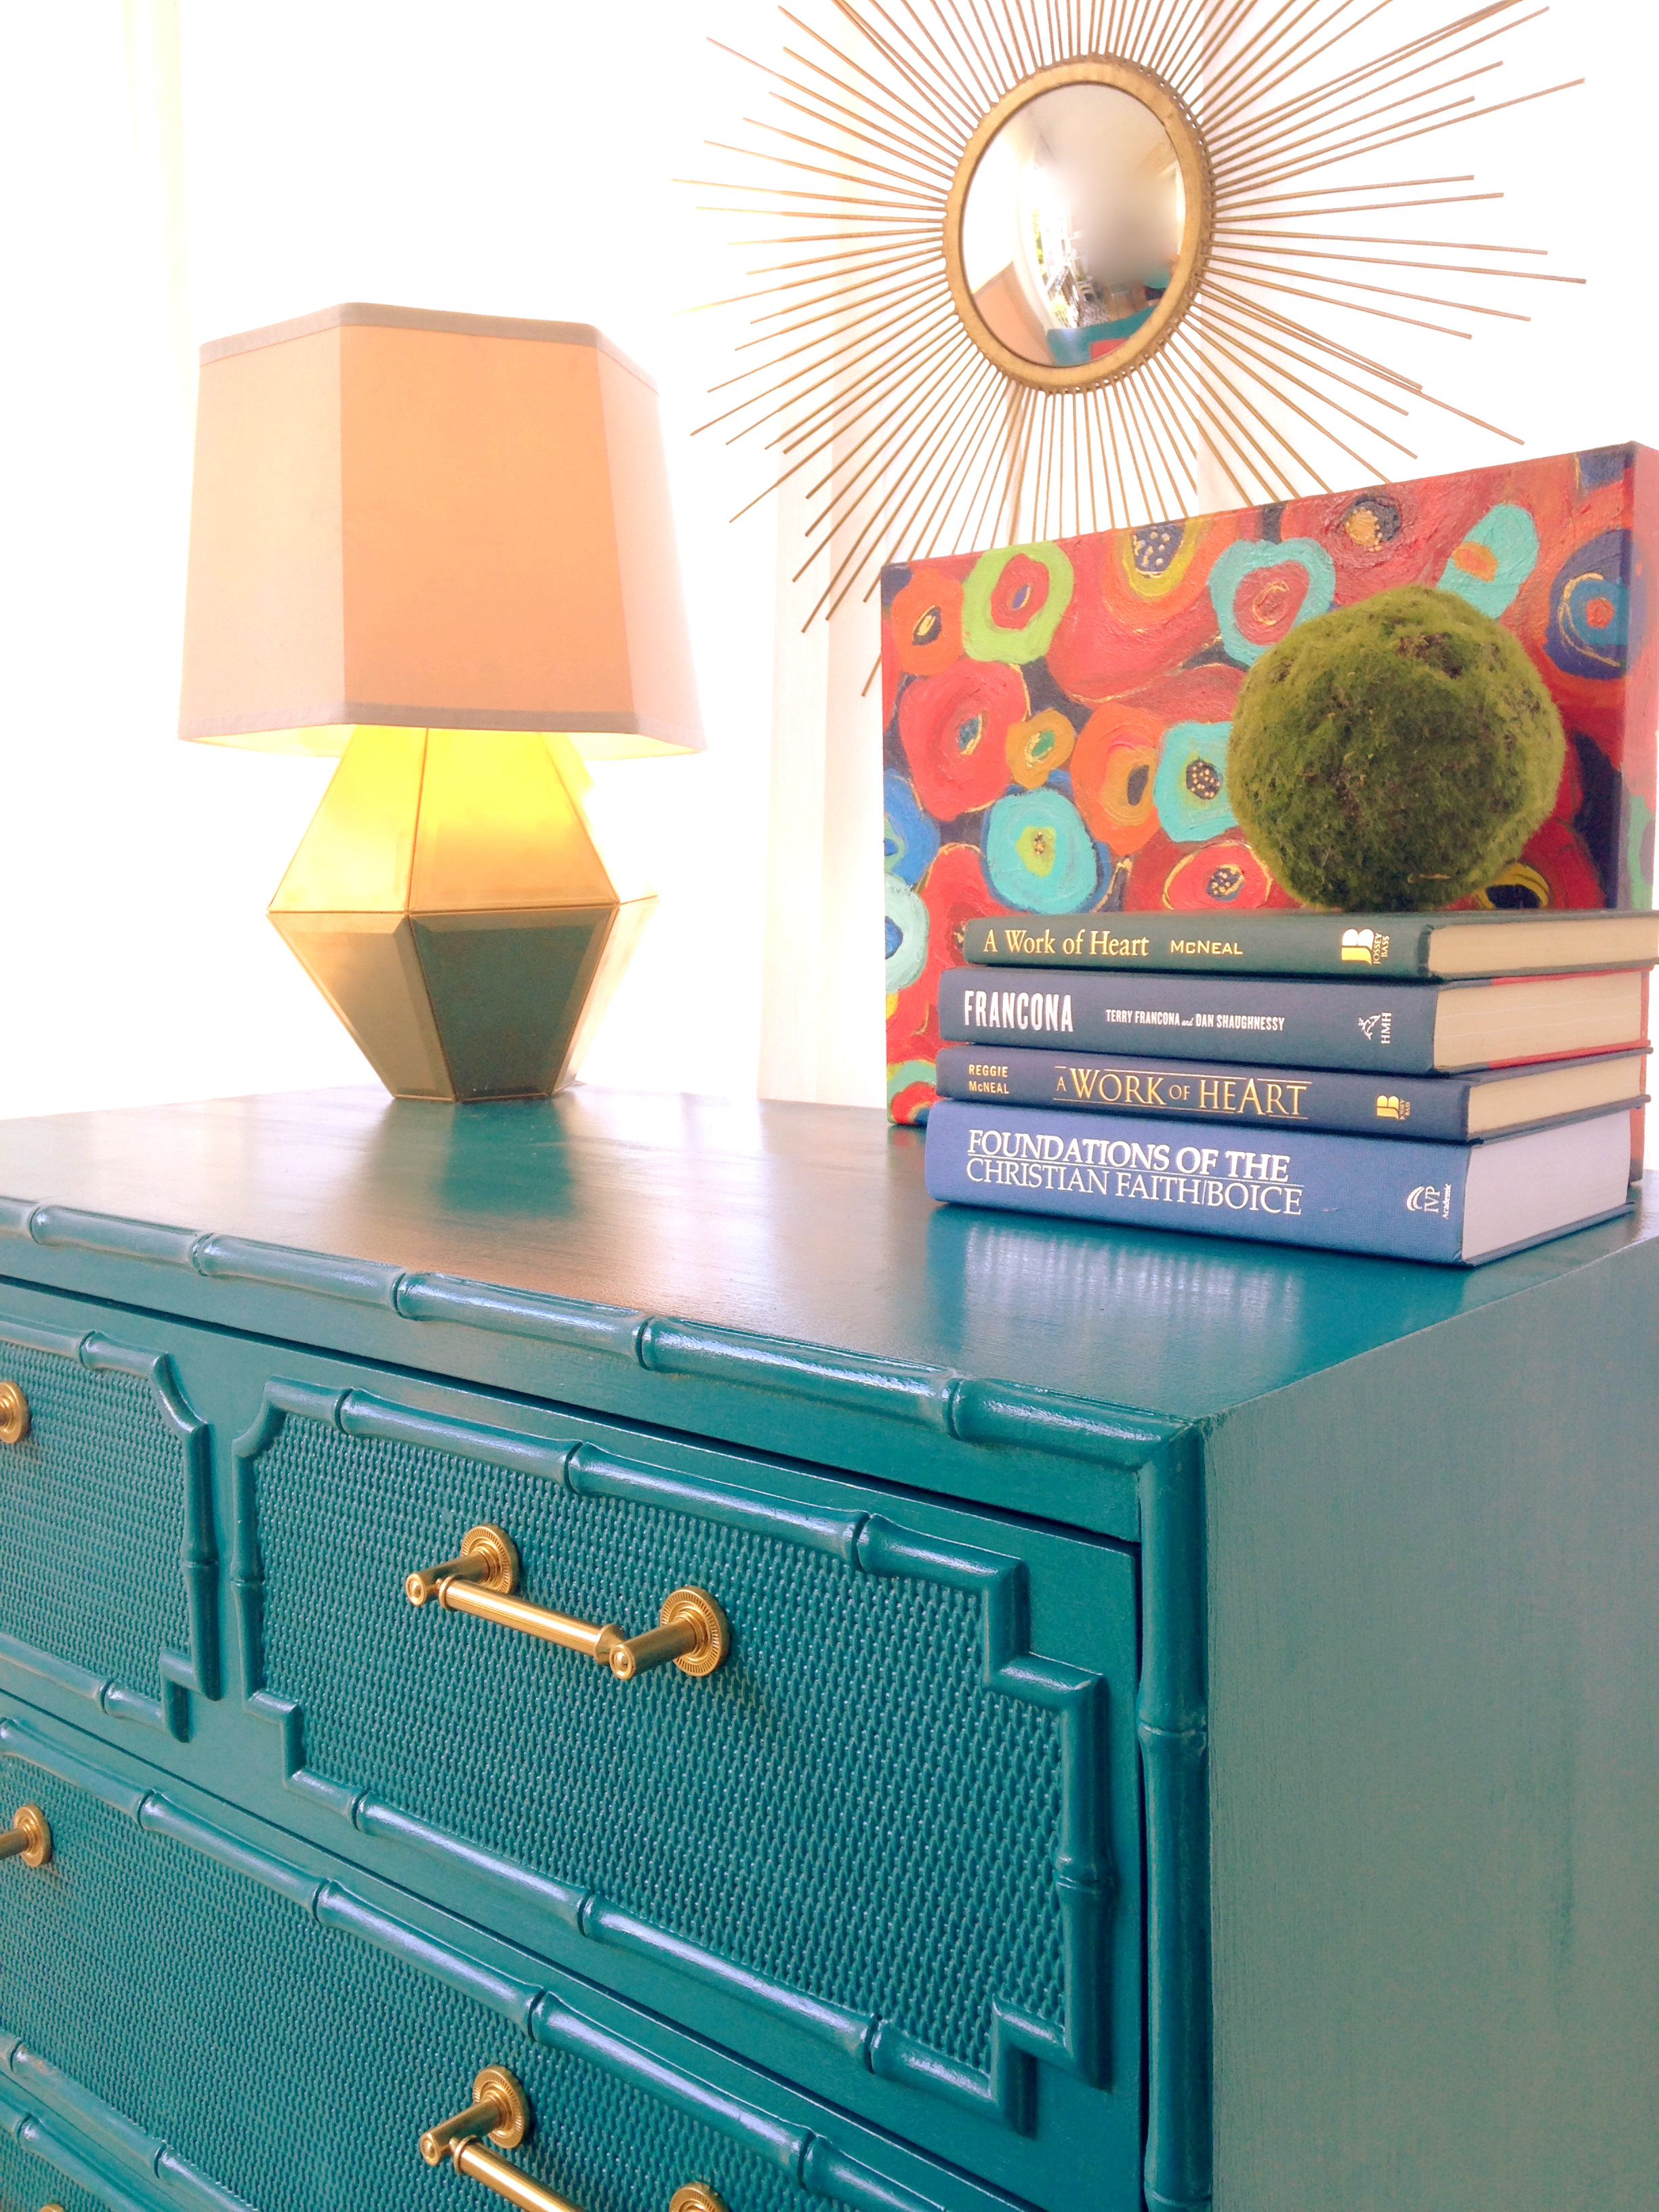
The faux bamboo trim frames out inlaid panels with a woven texture.

With the help of my geometric lamp copycat you can see how the polyurethane sealant gives the piece a hollywood-regency-style sheen.

IMG_7484-001.JPG

The original hardware was ok but my crow-like sensibilities wanted something... shinier.  And when I saw these brass bar pulls well, I really couldn't help myself.  They must've had to ship in from Siberia because the hardware took FOR-EV-ER to get here.  {Or maybe it just felt that way because I was too excited to wait patiently}.

Refinish a bamboo dresser in teal and gold... CHECK!

Available for Sale
36"W x 19"D x 46"H
SOLD

If you are interested in this piece or a custom order like it, please email cate@stylemutthome.com.


P.S. - You can now sign up to receive our latest posts directly to your inbox - just click the button and get our next post delivered to your electronic door step!