Back from vacay!

Hi friends! Gee-whiz, this last week away from the blog has felt so long, (to me at least. You probably didn't notice)! Usually when the blog is quiet for a whole week I'm either working on something HUGE, or absolutely nothing at all. In this case it was the latter. We spent a beautiful week at my grandparent's lake house with the whole family. We relaxed in the hot tub, drifted on inner-tubes on the lake, nearly died on inner-tubes on the lake, skied, played games, watched soccer, took walks, and ate lots of deliciousness. It was a wonderful time of being together and I am so grateful for the time away. Here's a little photo recap of our week; a glimpse into life happening.

This is where we were - Deep Creek Lake. My beautiful sister took this amazing shot!

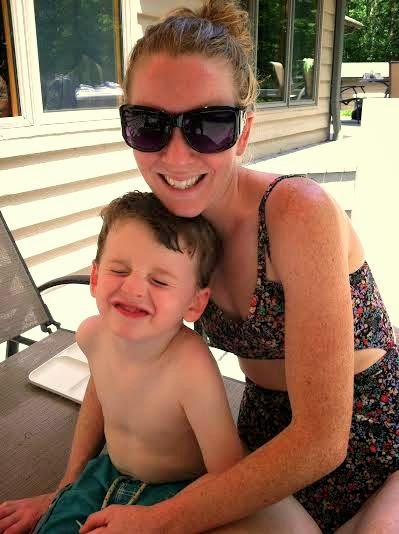
These guys. Doesn't get any better to this Momma.

That's a happy 4-year old face right there!

Every day, doing as we please.

Floating 'business' meeting with Cate

Cherishing time with these girls

S'mores. And s'more and s'more...

And where there were s'mores, there were dogs. :)
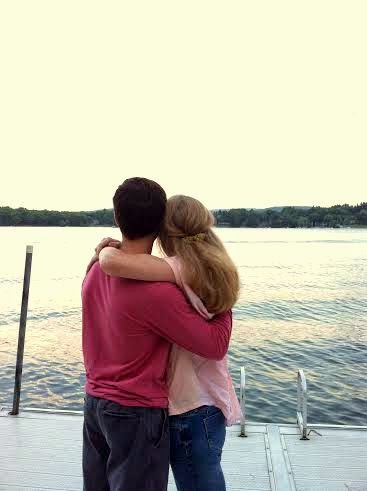
My love

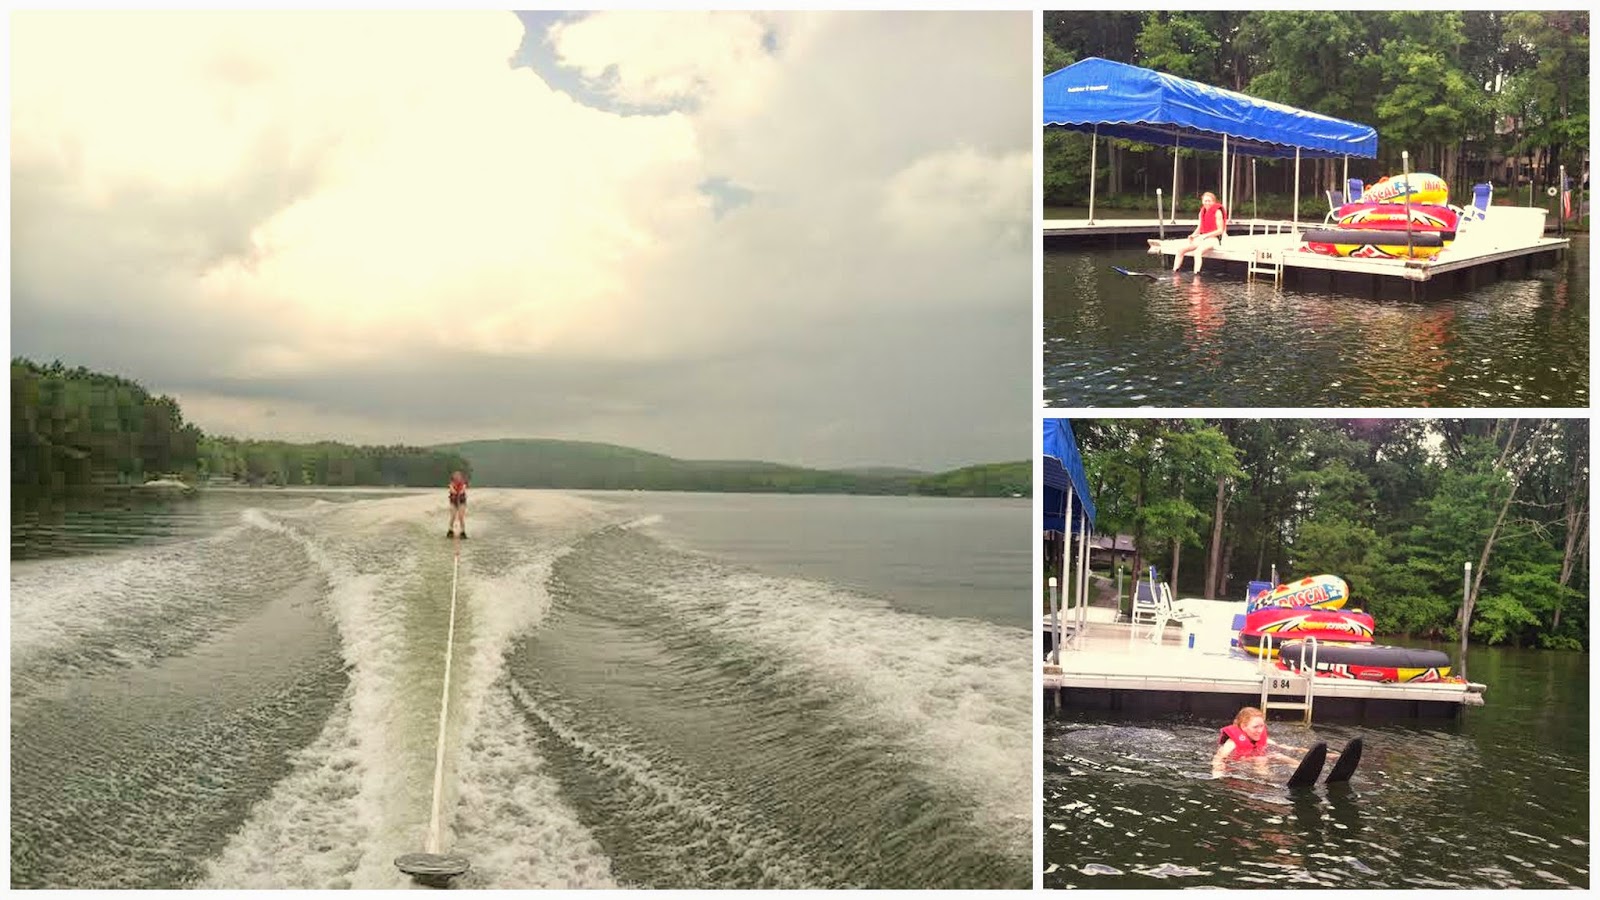
Skiing after the storm

Dad time.

Coming up this week, a simple dresser gets completely transformed thanks to ScotchBlue painters tape, and I've got a sweet and simple DIY hostess or birthday gift.

Thank you for stopping by! Missed you all!

~Chelsea

This post was published under Chelsea's Garage, now affectionately known as StyleMutt.

Our WWI Army cot

Hi guys! My favorite part of this blog, hands down, is sharing ideas. Ideas that I hope will inspire you to put your own creative touch on your home. Whether we share the same style or not, my wish for this little corner of the great wide web is to inspire you to fling the door to freedom and creativity within your own home wide open. You are one of a kind and completely unique, and so should be your home!

Today I'm really excited to be sharing a fairly unique idea. This one seemed kind of far-fetched a few months ago, mostly because I wasn't sure Matt would be on board. I really need to give him more credit! My guy, (usually), has a pretty open mind, and with his 'thumbs-up' I moved forward. I can't believe the day is here that it's a finished, functional, loved-on project! 

If you follow along on Facebook, you may have seen this photo a while back:

I asked if anyone knew what it was and wasn't surprised when, within minutes, one of my history buff uncles posted the correct answer: An old army cot! During a typical Craigslist search for some furniture to refinish, I stumbled on a listing for a handful of WWI Army cots. WWI, people! I was completely lost in curiosity. I drove out to take a look in person. It was love and intrigue at first site. The criss-crossing legs, the faded color of the wood, the old metal brackets...it was an easy purchase, (and for $40 nonetheless)! The seller, who had a handful of these, said they belonged to his grandfather who was a doctor during the war. 

Since my cot was used by a WWI doctor, (and you don't have to have a great imagination to guess what happened on these cots during those days), I really wanted to replace the original cover with something...cleaner. Vintage Army cot canvas covers are not quite a popular search, so the first company I found, Hoggan's, was basically my only source. I wouldn't imagine that WWI Army cot canvas cover replacements are in high demand, but for some reason it took almost two months for my cover to arrive from when I placed the order. But, the price was great and the quality is superb; worth the wait in my mind.

With the new canvas cover on, (an easy replacement that Matt and I took care of in 10 minutes), our WWI Army cot is being given a less eventful second life as a comfy reading, (or napping), spot in our living room!

I topped it with a pile of pillows that I made from mismatched placemats, ( how-to here), and a felt zipper pouch, all from World Market's clearance section. The whole lot of pillows cost under $15!

It's an honor to get to reinvent something with such deep history.

And it's quite enjoyed these days.

If you are local and interested in getting your hands on a WWI Army cot, please contact me! I've kept in touch with the seller and told him I'd refer any interest his way. I'd be happy to put you in touch; he's got quite a stash!

Thank you so much for stopping by!

~Chelsea

This post was published under Chelsea's Garage, now affectionately known as StyleMutt.

Pink trunk

Hi friends! I thought it fitting to ring in the weekend here by sharing this cheerful piece:

Isn't it delicious?! A friend brought this trunk over last week to have refinished for her little girl, Molly. She'd found it at a yard sale, and although the outside was in shabby shape, the inside is cedar lined; what a score!

Here it is before, in all it's stenciled, shiny veneer glory, (and this was after I peeled off all the matchbox car stickers):

The wish for this trunk is that it grows with Molly and that they have a long history together, (one which her future husband may or may not be grateful for; my trunk, which I was given on my 13th birthday, weighs a thousand pounds now and Matt absolutely loves loading it every time we move...). Since the vision for this piece was not just for the present time but for Molly's grown up life as well, I wanted to give this trunk a bit more depth. Sometimes children's furniture is very flat and one dimensional. But there are tricks to avoid that, even on the flattest, smoothest of pieces!

To start, I painted all the edges and corners in French Linen by Annie Sloan Chalk Paint. Since the plan was to gently distress this piece, we wanted something a bit richer coming through underneath the pink. French Linen is a beautiful, warm, taupe-y grey; very sophisticated and a lovely contrast to most colors by Annie Sloan Chalk Paint. It's almost always one of the two colors I choose when applying a layered color finish.

For this piece I painted 4 coats of Scandinavian Pink by ASCP. 4 coats is more than I usually use; chalk paint provides wonderfully thick coverage and usually two coats will suffice, (or one plus touch ups). There are many factors that go into how to refinish a piece through paint, but the first that I always consider is what kind of surface I'm starting with. There are many very talented furniture refinishers that have flat out said they do not work with veneer or laminate pieces; solid wood only. I understand completely. Any surface other than solid wood gets a little tricky. But, I believe that any surface can be properly covered and turned into something deeper and richer than it started. It's all about technique, folks.

So, for the first two coats on this trunk I painted like my 3yr old - brushing every which way and creating a hot mess of brush strokes. I even loaded the paint on thick in certain areas, letting it dry in ridges and peaks. Hang with me here, it's all for good reason!

Then for the final two coats I brushed the paint on in fairly smooth, back and forth strokes, right over the dried hot mess. It's very subtle but this technique created slight texture on the piece, creating a more sophisticated and richer look on what was once a flat and simple child's piece.

See what I'm talking about? I tried to capture the texture up close:

Finally, I used a thick brush and cloth and started clear waxing to seal the piece. When I wax, I dip the brush into the can and apply the wax in a circular motion across one section of the piece at a time. Then I follow with a back and forth motion. Wipe excess wax off with cloth. 

Using a fine sanding sponge, I gently rubbed the corners and edges where I wanted to reveal the French Linen underneath.

What a smart pink trunk she is now! Scandinavian Pink is a great answer for anyone looking to make a fresh, feminine statement without looking too girly or young. A cheerful color, indeed!

Have a piece you'd like to refresh and love again? Email me at chelseasgarage@gmail.com about a custom order! 

And on that happy note, have yourselves a splendid weekend!

~Chelsea

This post was published under Chelsea's Garage, now affectionately known as StyleMutt.