Geometric Lamp Copycat

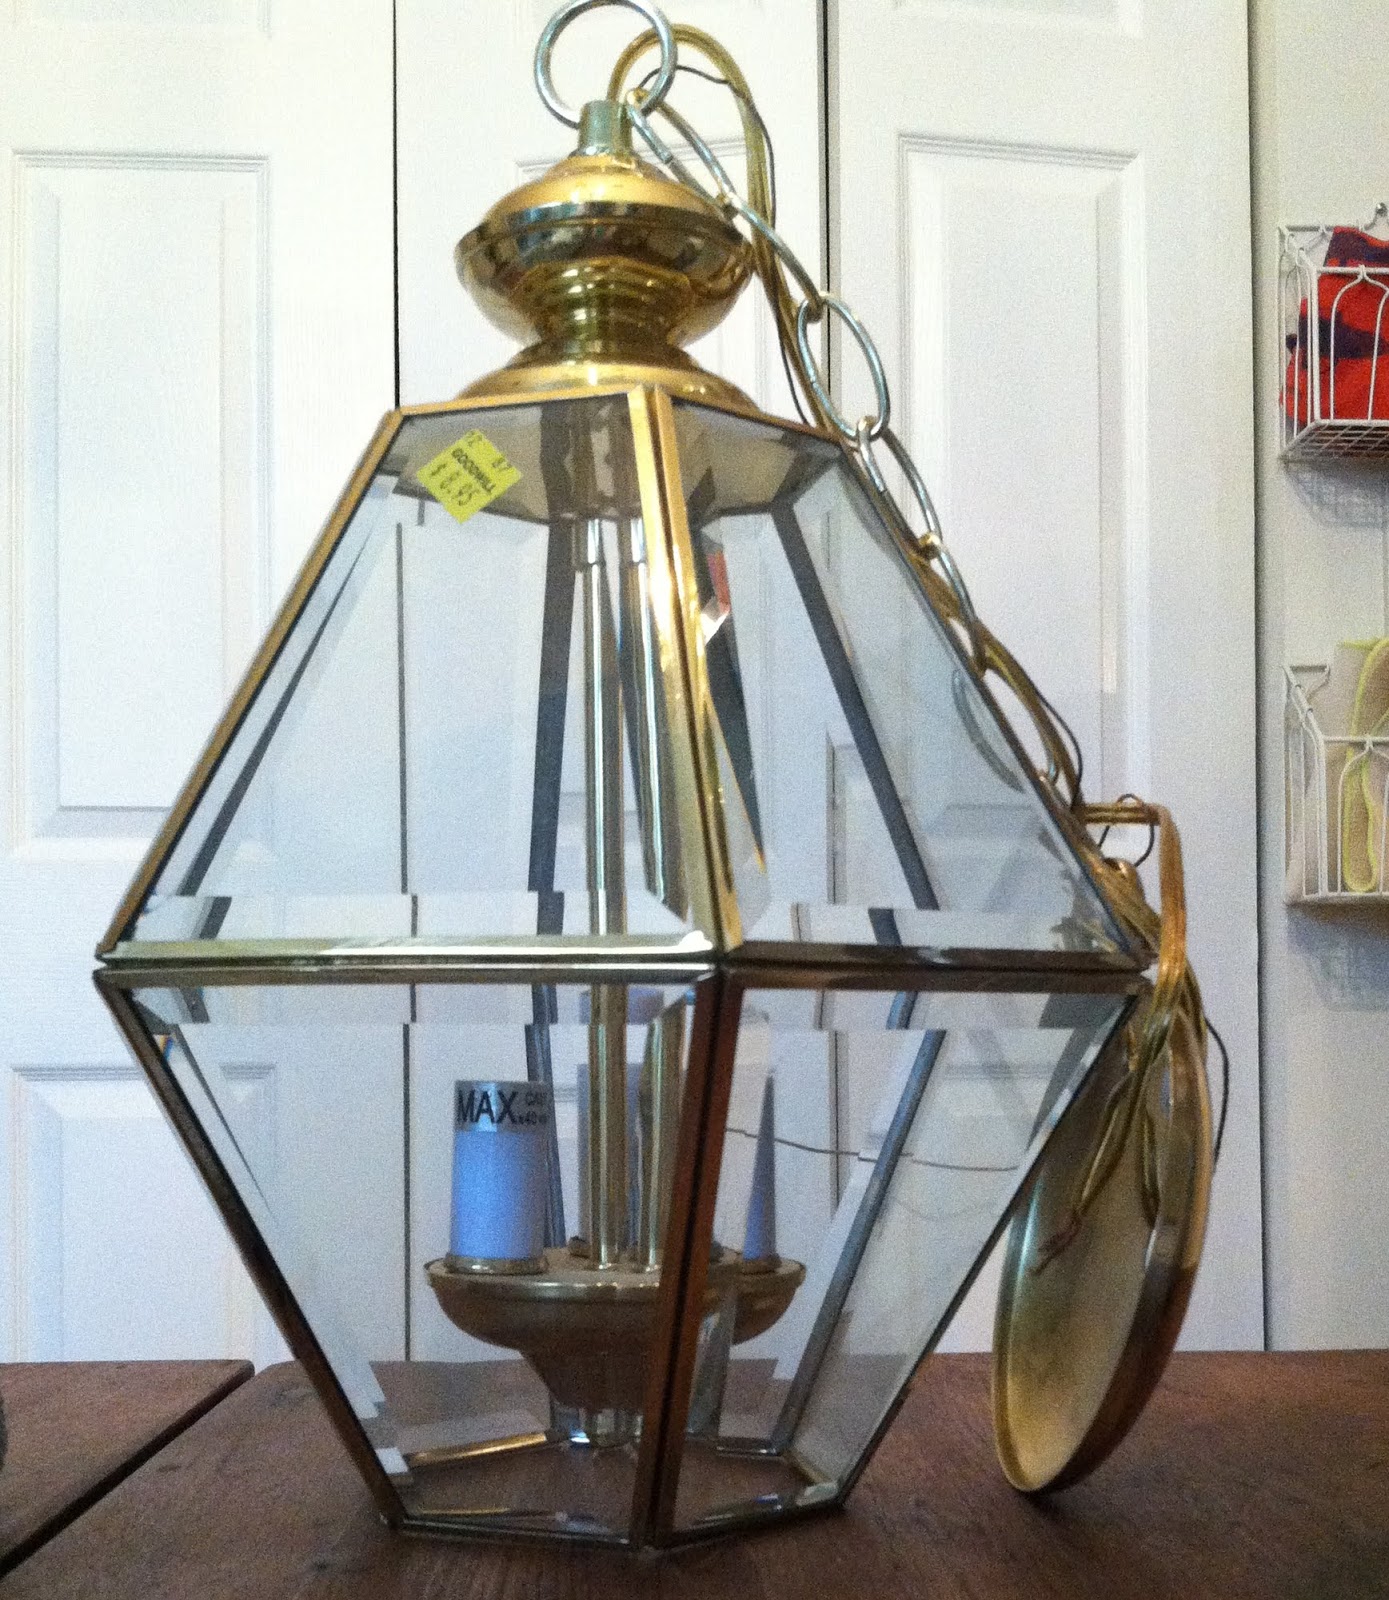
Remember when I converted this guy into a lovely terrarium in this post? Well, when it comes to plants I promise you I really do have the best intentions.  But without fail, they seem to always die on me.  So after I neglected to water my plant {oops} I once again had a gutted chandelier to play with.


And then I saw this... and a plan began to hatch

Inspiration Source: Land of Nod

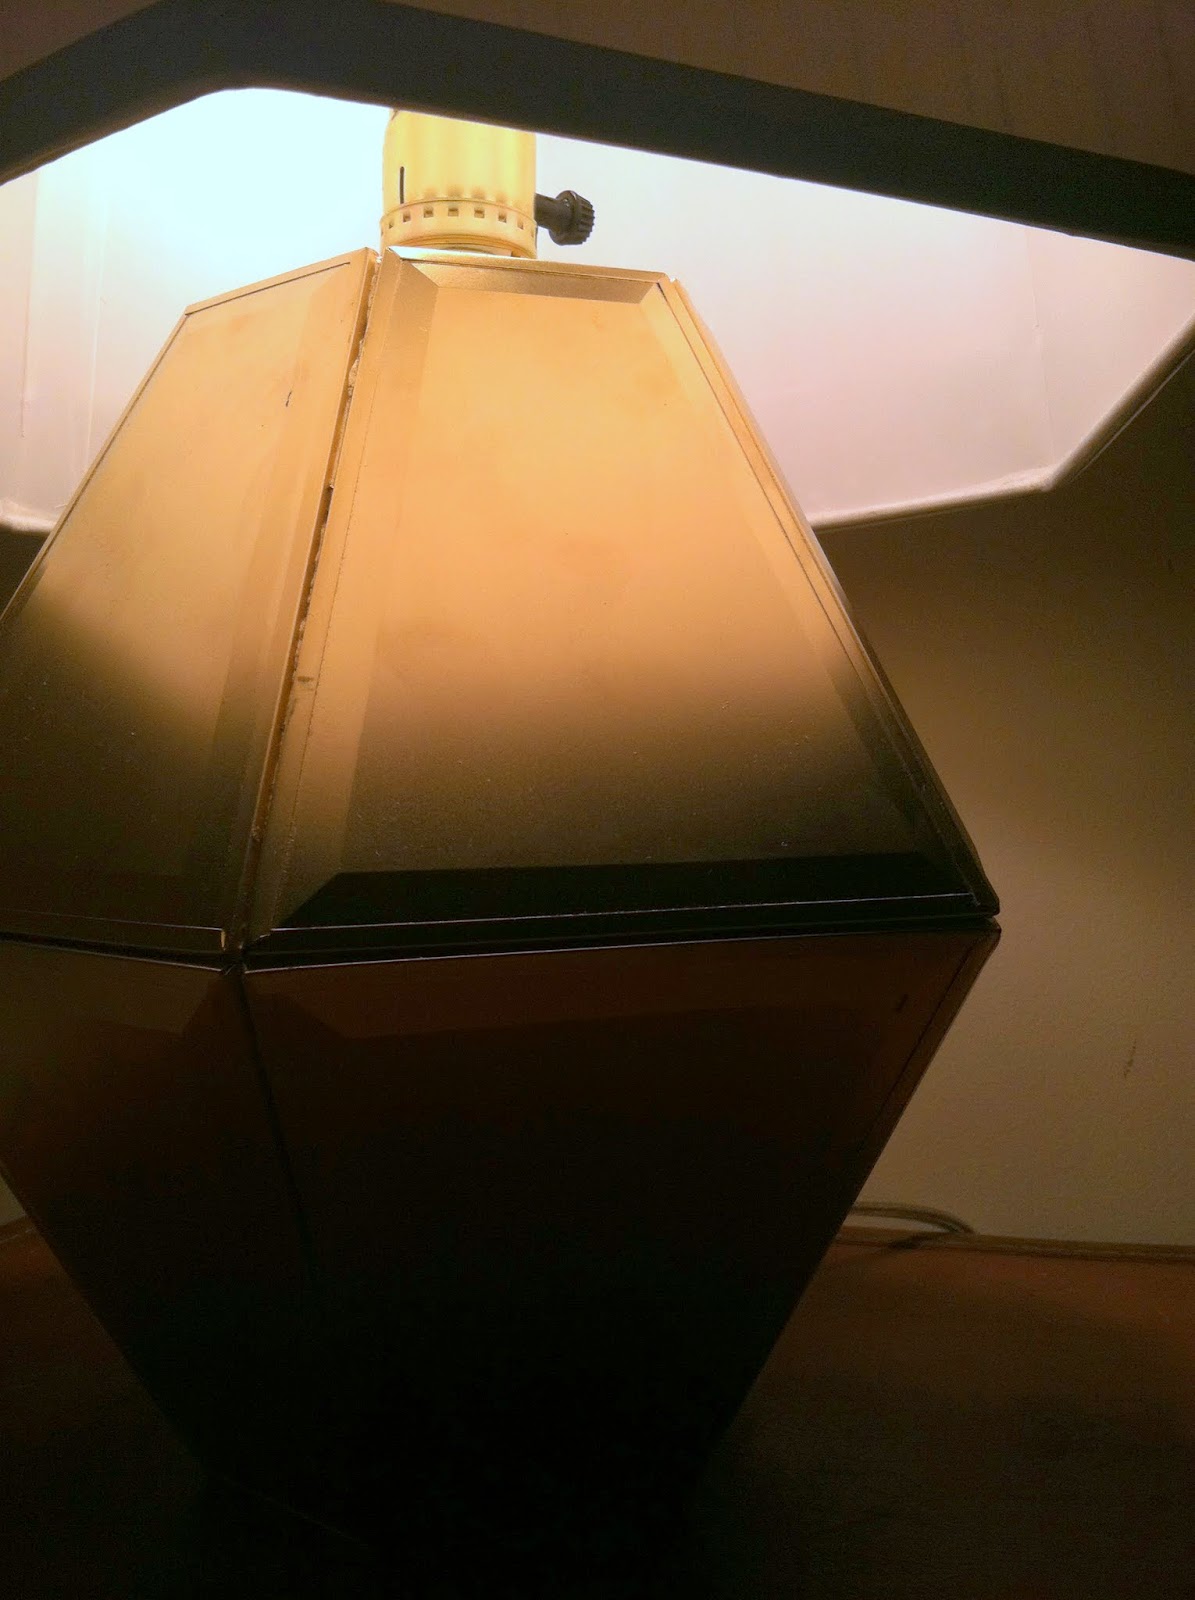
I sketched some ideas and took some measurements and started by spray painting the glass gold in my makeshift spray tent/ bin.  Painting the chandelier glass really brought out beveled angles and played up the geometric design.

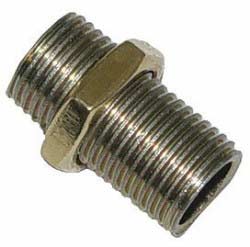
Next on the agenda was a trip to Home Depot to buy my supplies.  My shopping list consisted of 3 items: 8ft lamp cord, a socket kit, and a threaded steel nipple smaller than the base hole diameter with a hex nut.  I've included a close up of the threaded steel nipple since it's so small in picture {and so you know I'm not talking about something gross}. 

Start by unscrewing the hex nut from the threaded nipple and slide the split end of the lamp cord through it.  Then thread the cord through the base {since the chandelier already came with a convenient hole at the top this part was easy}.  Then I followed the instructions to assemble electrical wiring of the lamp.  Now I am not an electrician so I highly advise that you do your research before you begin and don't just take my word for it.  If you need a tutorial, I found this one to be helpful and was able to follow along/ adapt where needed.

1. Disassemble the socket according to instructions
2. Screw the socket base onto the threaded nipple
3. Thread the cord through the nipple and the socket base and tie the two ends into a underwriters knot {the tutorial has a great illustration to help}
4. One of the cords ends is called the hot {smooth} wire and the other the neutral {ribbed} wire.  Wrap the hot wire around the loosened brass screw on the socket and the neutral wire around the steel screw on the socket and tighten the screws until the wires are secure
5. Place the brass cover back over the socket top
6. Gently pull the cord taught until the socket top can snap into place on the bottom of the socket

7. Pull the cord through the base to get the socket in place.
8. The socket should sit flush on the base with the cord hanging through the threaded nipple and dangling down inside the center of the base.
9. This last step is a little tricky to explain: turn the base over and look inside to where the bottom of the threaded nipple is sticking through the hole at the top of the base.  Slide the hex nut up the cord to the threaded nipple and screw back on.  Tighten the hex nut until it secures the socket to the base.  

WHEW.  That was a lot of electrical jargon.  Hope you could follow along with me there.  Let's move along so we can get to the reveal.

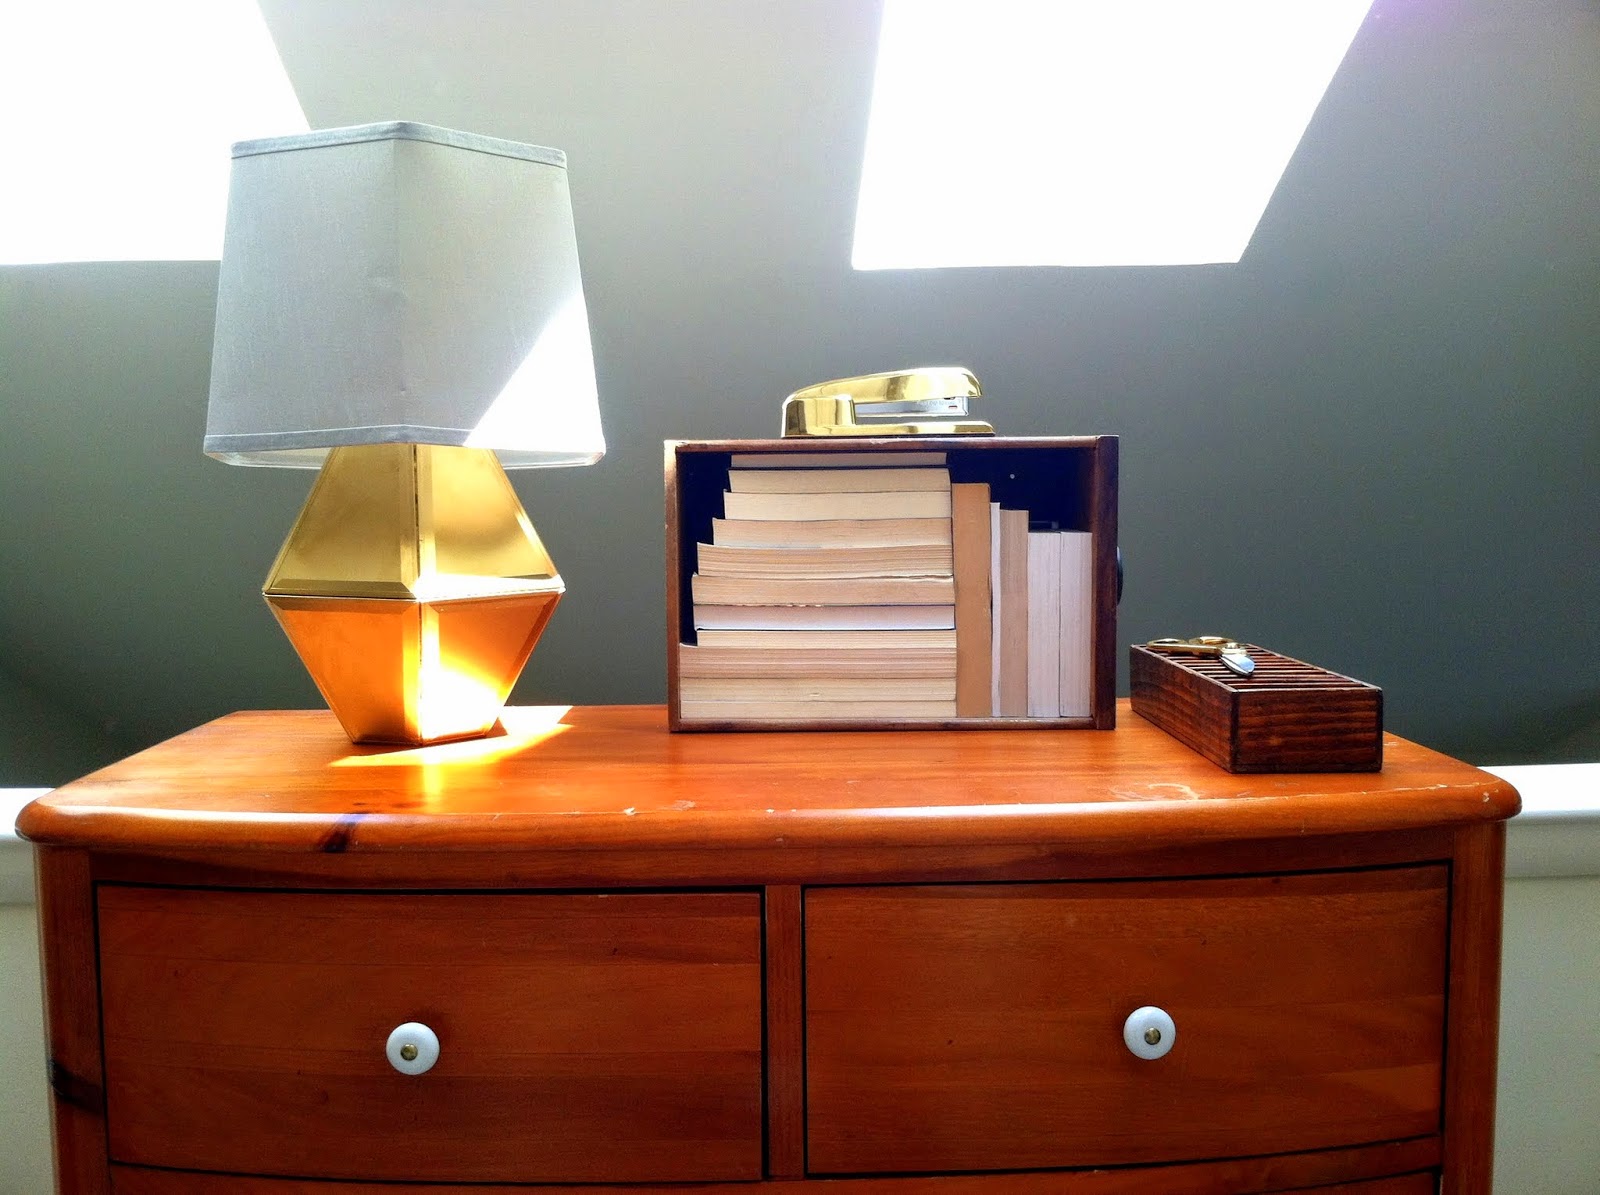
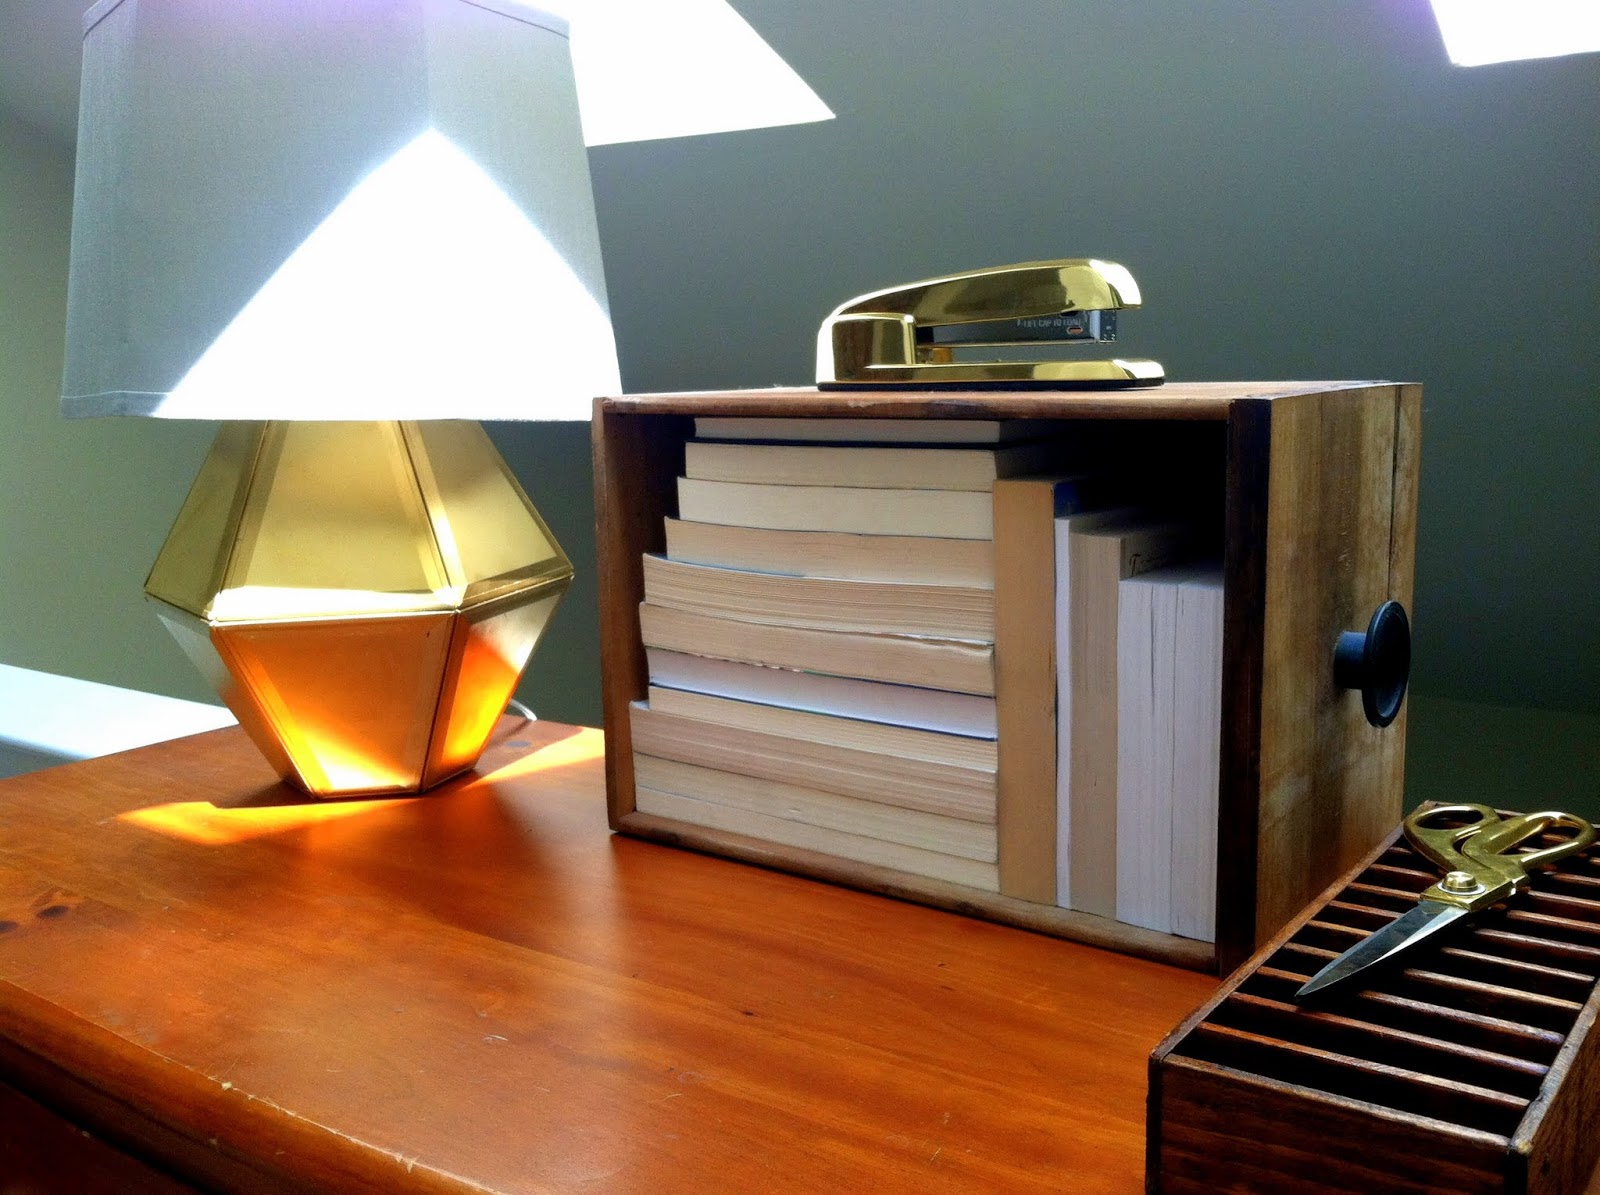
I was originally hoping for a tall drum shade, but when I saw this hexagon shade at Target, I thought can it get any better than this?

The gold base looks so glamorous.

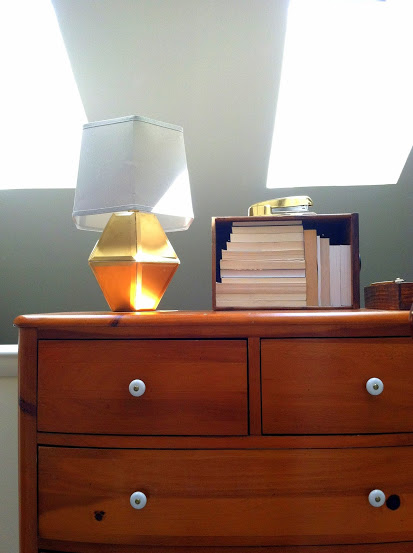
I am so excited with how it turned out.  And for a LOT less than the inspiration's sticker price of $79!  

Hope this will inspire an affordable copycat of your own.

Happy Wednesday,

This post was published under Chelsea's Garage, now affectionately known as StyleMutt.

UN-refinished table

Hi All! This warmer weather has had me reminiscing the days when Matt and I used to live at the beach. They were good days, indeed, but we also love where we live now near our home city, Washington D.C. Although we don't live at the beach anymore there's no reason we can't pull off a bit of beachy vibe in our home now! My interpretation of beachy is casual and laid back, use of natural elements, loads of sunlight, and snaps of happy color.

I had a beachy vision for a particular table in my living room. Funny thing is, this table was painted white already with distressed and weathered grey cabana stripes. It was super beachy! However, it's also smack in between two pieces of white seating in our living room and I wanted something to break up all the white.

I've had this table since my junior year of college when my Mom handed it down. I can't even think about the mice that likely lived inside when we had an infestation my Senior year in the M.A.C.K shack, (Hi, Margaret, Andrea, and Katherine)!

But I digress. Here is how I refinished this table the first time around: 

I used Old White by Annie Sloan Chalk Paint, and dry-brushed stripes in Paris Grey, also by ASCP. Then I sanded everything down for a time-worn, weathered finish.

And here's my second round with this piece! I went to town with my sander, removing the paint from most of the surfaces, and then gave it a light wash with equal parts Old White and water.

My favorite part of this make'under' is the leftover bits of white paint stuck in the cracks and crevices of the table! Wasn't expecting that but it certainly adds a sweet dose of age and history. I love seeing traces of a pieces' past, in one form or another; it's why I always aim to maintain the integrity and character of any piece I'm refinishing.

The rope pull was an impromptu DIY made from leftover sisal rope I had on hand. I had to drill the hole from the previous knob a bit bigger to fit the two ends of rope inside. Once the two ends were stuck inside I tied them in a knot to keep the rope pull secure.

Doing a light wash over almost any piece will make it appear bleached and sun faded. Very beachy. I'm working on this exact type of finish with a larger piece right now, and let me tell you, all that sanding to remove the original stain is not for the faint of heart!!! Which I totally am. So I'm taking it slow. :) But I sure am excited to show you! Progress pics will be posted on Instagram if you're interested in following projects along that way.

Thank you, as always, for stopping by!!

~Chelsea

This post was published under Chelsea's Garage, now affectionately known as StyleMutt.

Ricky. {And some more birthday loot}

Hi guys! I wanted to introduce you really quick to the newest member of our family, Ricky. He was on clearance at Home Goods and I had a birthday gift card to use, (thanks, Mom and Dad), so I snatched him up without a second thought!

Love his warm, not-too-shiny metal finish. He ties together the other various metals in our living room, so I can definitely say he's functional...

Not gonna lie, it's invigorating to sit on the living room sofa right under Ricky. I hung him myself, so it's on me if anyone gets speared!

On a separate trip out, this time to World Market, (thanks to another birthday gift card from Cate and my brother), I picked up some mismatched placemats and zip-around wool pouches from the clearance section. Almost ready to share what these turned into soon. 

Any guesses? (I ended up coming home with a slightly different assortment than the picture I took above)

There are some fun DIY projects and reveals coming up this week; if you follow on  Instagram or Facebook you've already seen a little peek!

Thanks for stopping by!

~Chelsea

This post was published under Chelsea's Garage, now affectionately known as StyleMutt.