A week of peeks!

Hi guys! Cate and I have less than a week until our 'garage sale' this coming Saturday, June 7. Let's do something fun! We have so many gorgeous pieces that it seems a shame not to share them here before they're, (hopefully), whisked away to their new homes. So, each day this week Cate and I will alternate sharing a piece that will available at the sale! And you guys, Cate has some major gems. I can't wait for you to see! There's so much more that we'd love to share, but it's also kind of fun to have a few surprises. :) We will definitely share photos of the sale and remaining pieces after the event!

Kicking off our final week before the Chelsea's Garage Sale #5, is this mid-century marvel. 

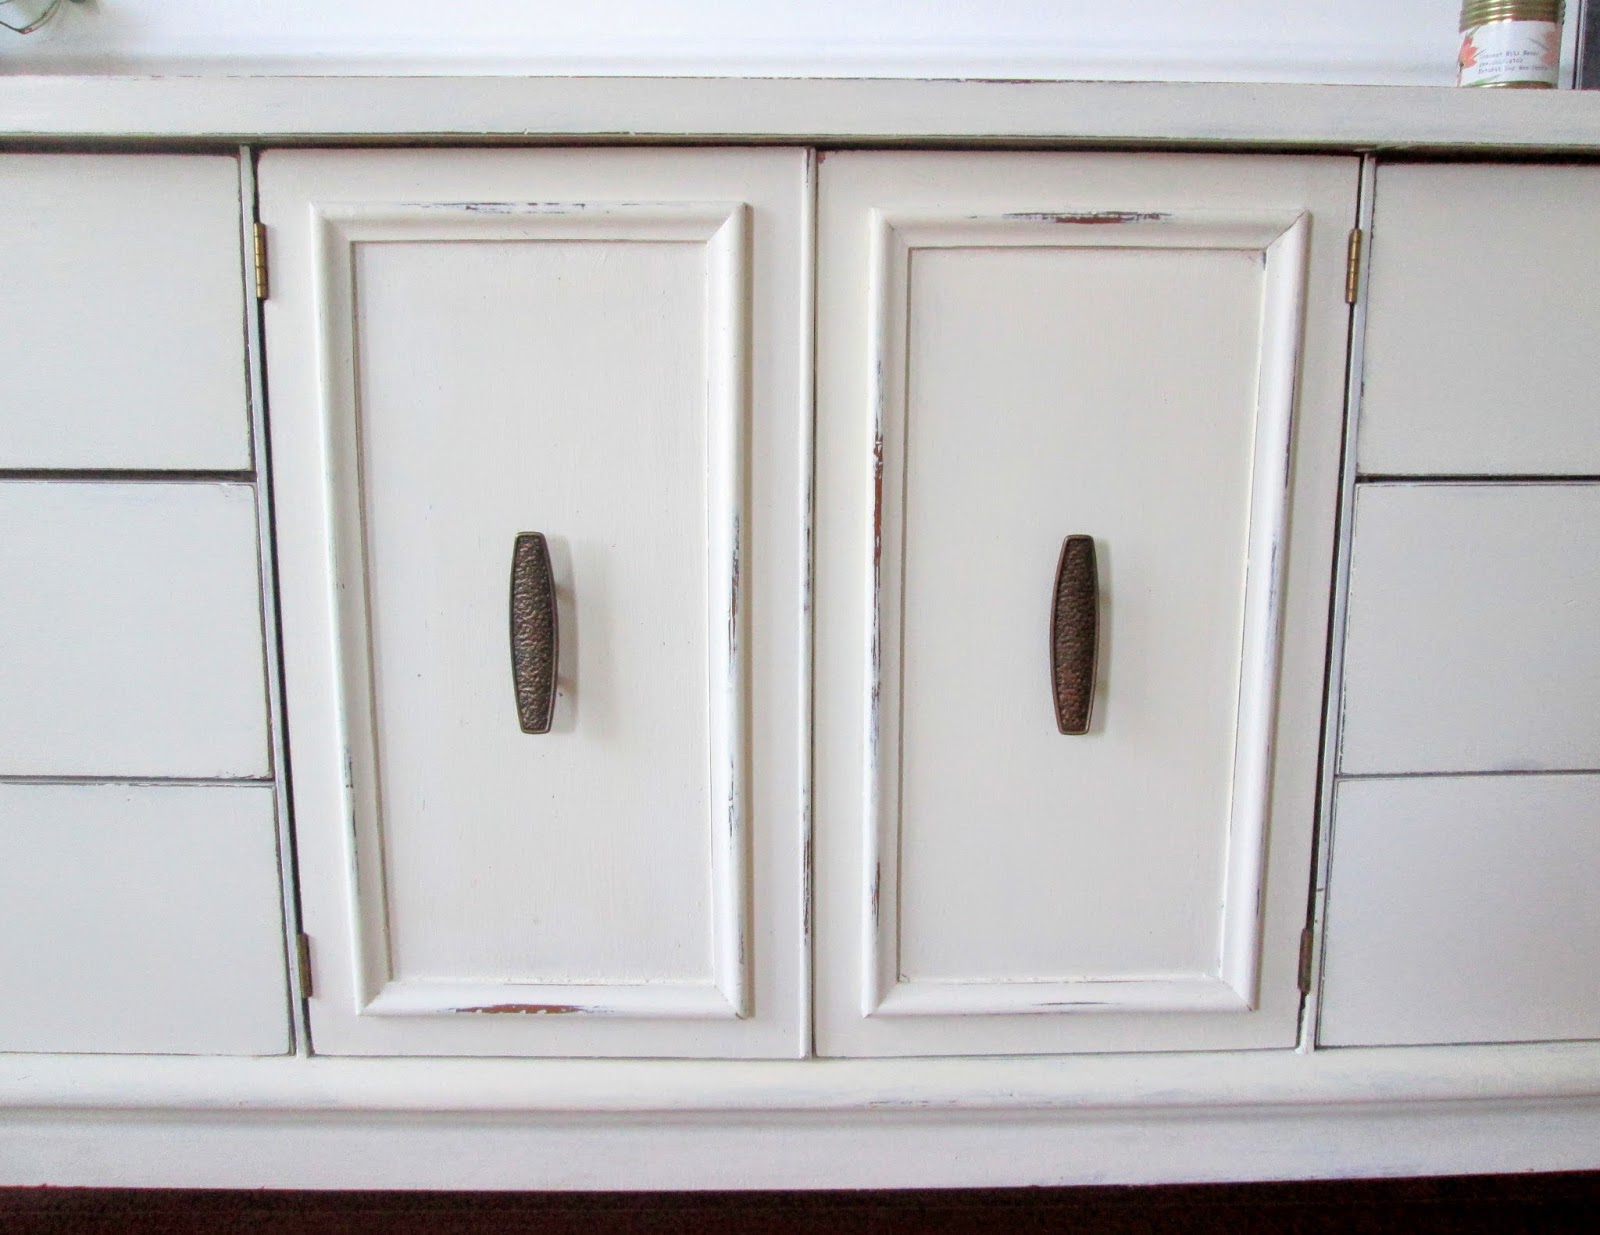
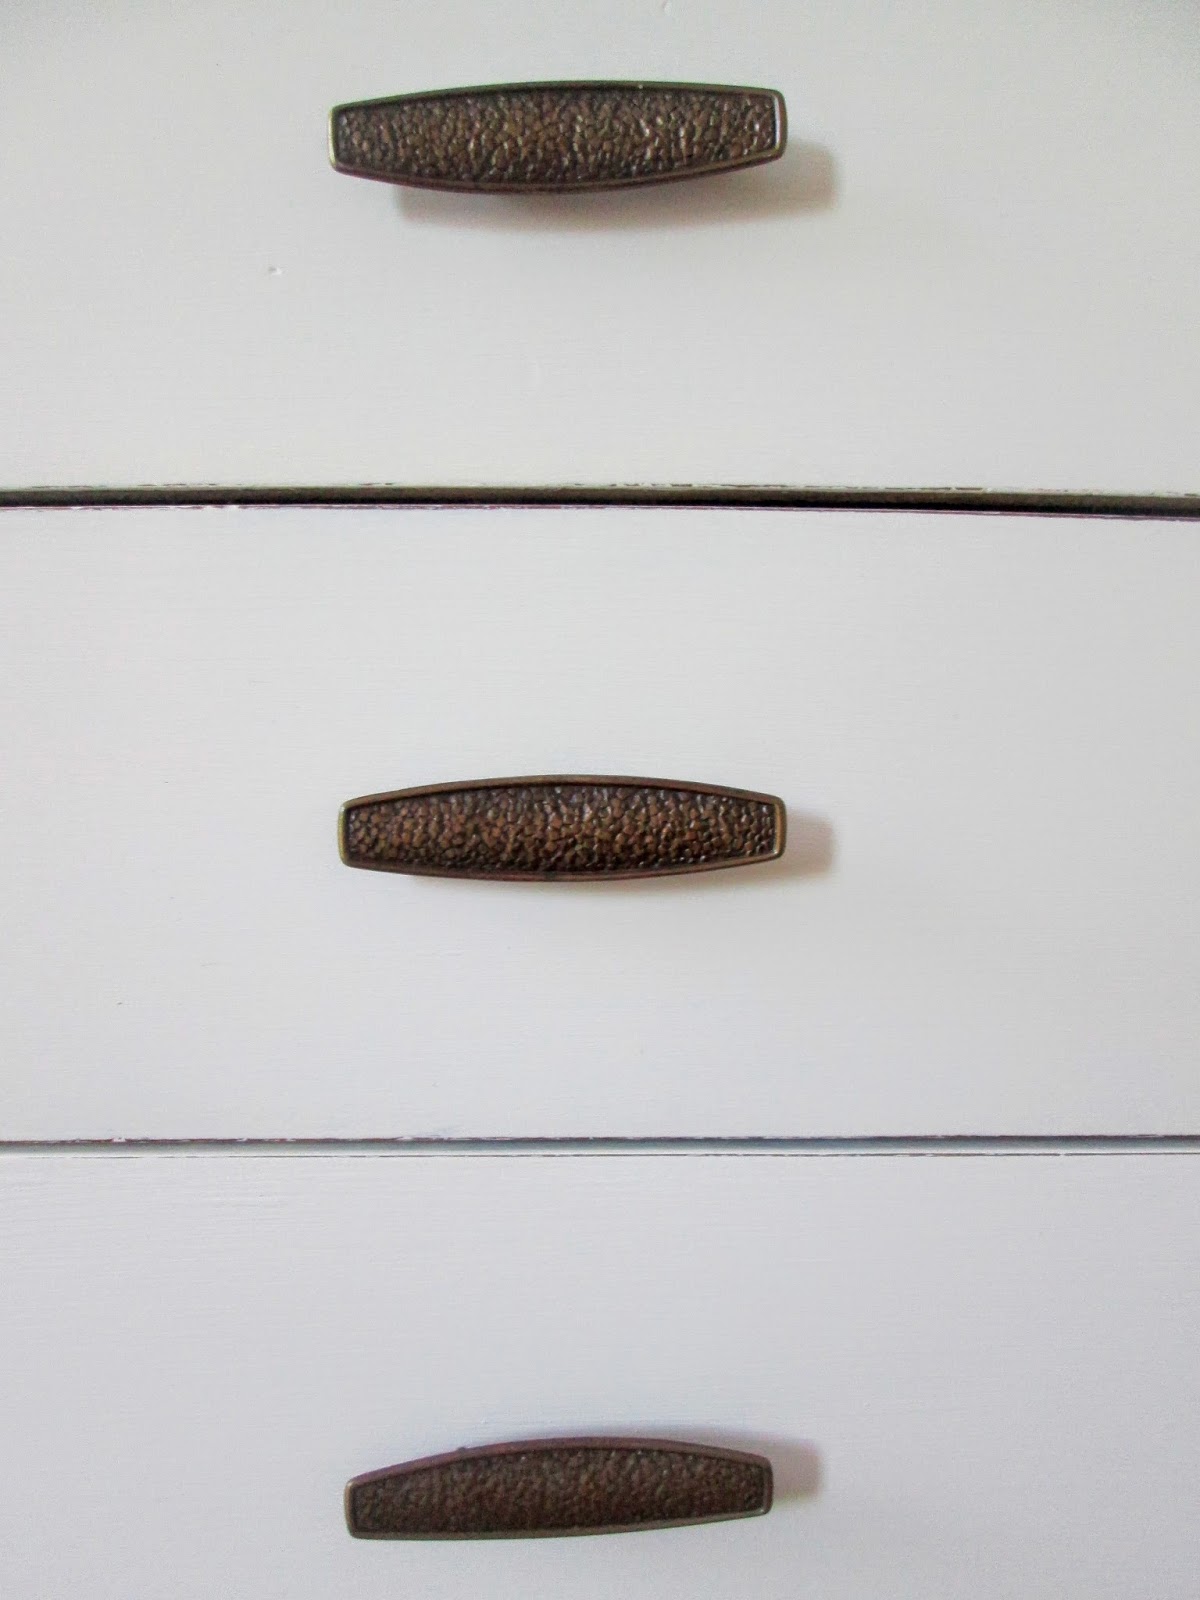
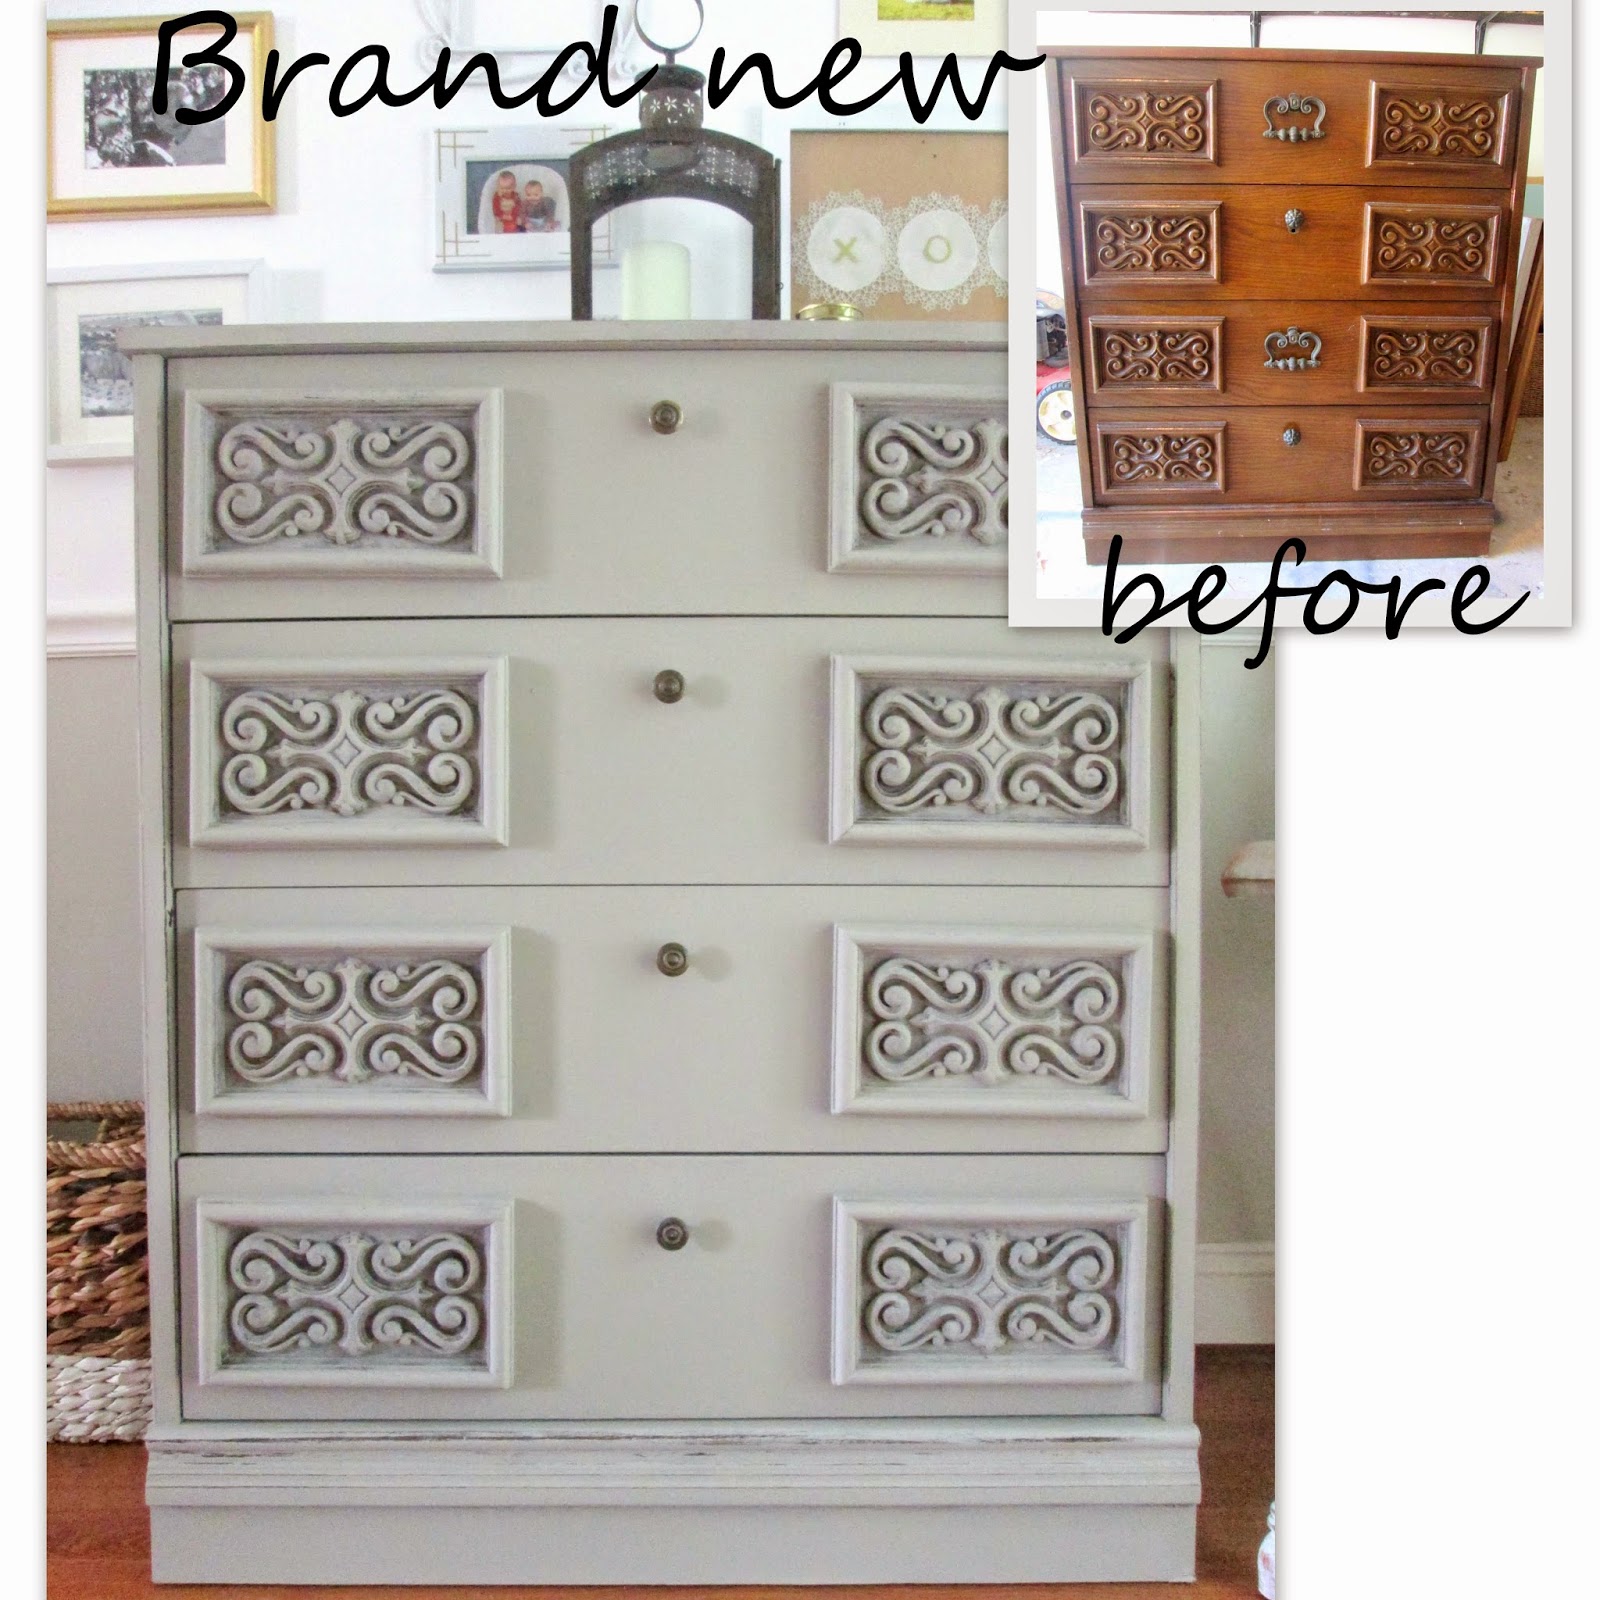
The hardware. There are no words. There's no denying the truth; I do LOVE this mid-century piece and I'm always a sucker for middle cabinets. But I would have bought any butt-ugly piece that had these most amazing metal pulls. They add something hard and edgy; kind of rocker-chic. This piece will be tough to say goodbye to, for sure. But that's what I love about a creative business!! You put a bit of yourself into every piece. Each and every piece I work on is something I would put in my own home. It should be hard to see them go!

A little unexpected Duck Egg on the inside. Love this surprise punch of color.
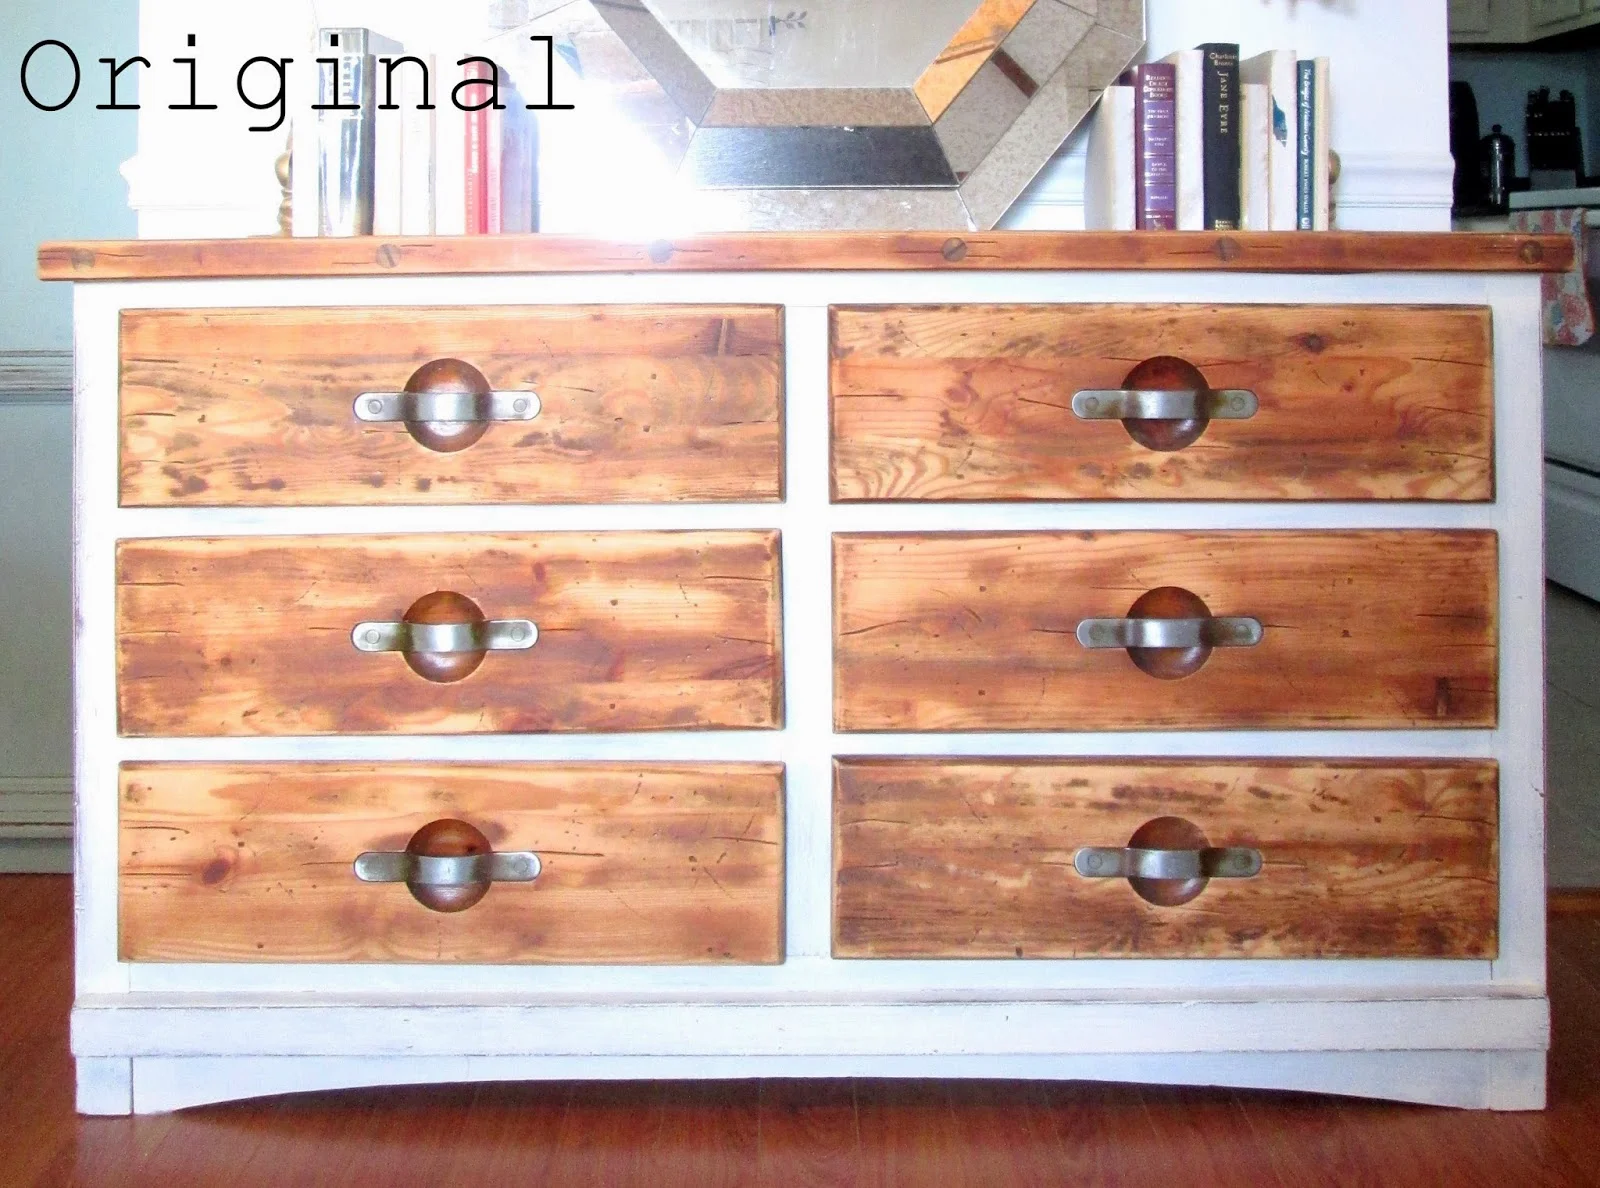
Our MCM gem before:

This work never gets old.

Cate will be by tomorrow to share a piece I myself would buy in a heartbeat! I'm definitely swooning! 

Which reminds me, we kindly ask that you don't contact us regarding the prices of specific pieces. No prices have been calculated yet as we are still working on refinishing and getting the garage all spiffy for Saturday. The price range will be broad and well under what you'd find in either a big box store or antique market or barn, (a perk we're happy to offer by selling right out of my garage)!

Nova locals, please come visit!

Chelsea's Garage Sale #5
Saturday, June 7
9am-3pm
**Herndon, VA,
**(please email chelseasgarage@gmail.com for the address)

Thank you so much for stopping by!

~Chelsea

This post was published under Chelsea's Garage, now affectionately known as StyleMutt.


Quick boho lighting

Whew! Finally Friday and now we're one week away from the Chelsea's Garage sale next Saturday, June 7! When I saw this pin by Mandi of Vintage Revivals, I was instantly inspired to make some unique, hanging lights for our garage during the sale, (I'm a picky pinner, but if you follow me on Pinterest you'll likely find me attempting many of my pins here)! Illuminating a garage is tricky and I'm always looking for new ideas that are quick and inexpensive, but still complimenting the unique and beautiful gems that will be available on sale day.

While throwing my version of this light fixture together I didn't intend to feature the final product. But it turned out so much cuter than I thought! It was a super easy, ridiculously cheap project; totally worth sharing.

First, I just want you guys to know that I understand so many of you are starting with absolutely nothing. It's incredibly touching to receive emails from those of you who are just getting out on your own for the first time, or are starting fresh, whatever the reason. It is absolutely a pleasure to share and inspire unique design ideas that truly are inexpensive and easy for the average person with a real life budget and not a lot of time to DIY. This post is most definitely dedicated to you, for what it's worth. :)

So here's a budget friendly, time friendly hanging light idea that doesn't skimp on style, (staged in our guest 'nook', see full room tour here)!

What you need:

-Embroidery hoop, (found in the $2 range at Michaels, JoAnns, and Walmart
-Pendant light cord, (the kind that plugs into the wall is easiest, less than $10 from most hardware stores)
-Beaded necklace, (free if you have one you want to sacrifice - optional for this project)
-Gold spray paint, ($3 at most hardware or craft stores - also optional for this project)

Instructions:

Spray paint the light cord, (spray the whole thing, unlike me. I was at the end of my can of gold spray paint and it sputtered out with 1/3 of the cord left, as you can see). You'll have to do this in several steps, letting one side dry, then rolling it over and spraying the other side. Wrap the necklace around the neck of the light socket and tie and tuck into place. Tie the cord around the embroidery hoop about 5" above the neck of the socket. Screw in a white light bulb. And voila! You're done! How you want to hang this is completely up to you - you can either hang a simple command hook on your wall, (they have metallic ones now!), and loop the cord over the hook and plug into the closest outlet. Or you can screw a hook into your ceiling, hang the cord from there, then tap in some wall staples to hold the cord into place along the ceiling and down the wall. (Tasteful) exposed cords are in, baby! Especially bright or metallic cords. I'm totally embracing this trend.

I've got a couple of these made already to hang around the garage on sale day. Are you stopping by, local friends? Please do! My sister-in-law, Cate, and I have been refinishing up a STORM and will have gorgeous pieces available for browsing and taking home. You'll find dressers, buffets, desks, coffee tables, accent tables, accent chairs, benches, lighting, rugs, and various homemade home decor accents. If you follow CG on facebook you may get a few more sneak peeks over the next week ;) So save that date, June 7, grab some friends, and come on over for a fun time!

Chelsea's Garage sale
Saturday, June 7
9am-3pm
Herndon, VA, (email chelseasgarage@gmail.com for the address)

Have yourselves a wonderful weekend!

~Chelsea

This post was published under Chelsea's Garage, now affectionately known as StyleMutt.

5 tips for picking the right hardware, {or making your own}

Hi guys! I just couldn't talk about choosing the right paint color for your piece, (see yesterday's post), without bringing up hardware. It's like accessorizing! Accessorizing...I used to accessorize in my previous life, BC, (before children). Anyways, I believe it's just as essential to choose the right hardware for your piece as it is the right color prior to refinishing. Here are some options!

1. Keep the original:

This is the easiest option, and sometimes the best! Whether the piece has such unique and specific hardware that you can't or don't want to replace it, or you're simply content with the hardware as-is, this option is fuss free and can be a beautiful choice.

2. Spray-paint the original hardware:

If you like the style of the hardware, but not the finish, just remove the hardware and lay it on a flat sheet of cardboard, shake a can of spray paint, and spray an even coat over all your pieces, (don't forget door hinges, too, if you have any). You don't even have to choose a flat color; there are various metallic spray paints available, too!

3. Paint the original hardware:

For a warm and cozy monochromatic look, you can also paint your hardware the same color as the piece. This is a popular choice with those wanting a vintage, french-country look.

4. Make your own:

Sometimes it's worth thinking outside of the box and using materials you have at home in place of hardware! Scrap fabric, leather belts, and sisal rope are a few materials I've used in place of hardware before. The great thing about trying this option is you can use the existing hardware holes rather than having to create new ones!

5. Buy brand-spankin new:

Sometimes you gotta take the plunge and it's totally worth it to do so. That happens. Just make sure to compare prices so you're finding the best deal. There are sources online that offer fantastic but inexpensive hardware. I've used ATG Stores online and Ebay, primarily.

If you've got more hardware ideas you'd like to share, (or fabulous sources for finding inexpensive hardware), please fill us in in a comment below! 

Thank you for stopping by!

~Chelsea

This post was published under Chelsea's Garage, now affectionately known as StyleMutt.