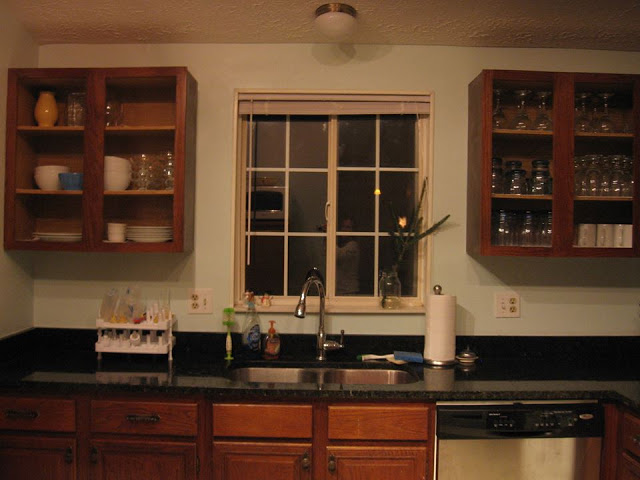
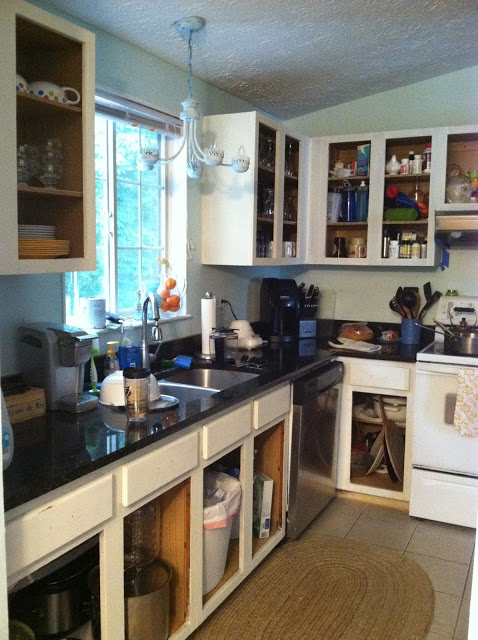
Hello friends! Yesterday I posted about our major kitchen transformation when, by the power of paint, I turned our kitchen from this....

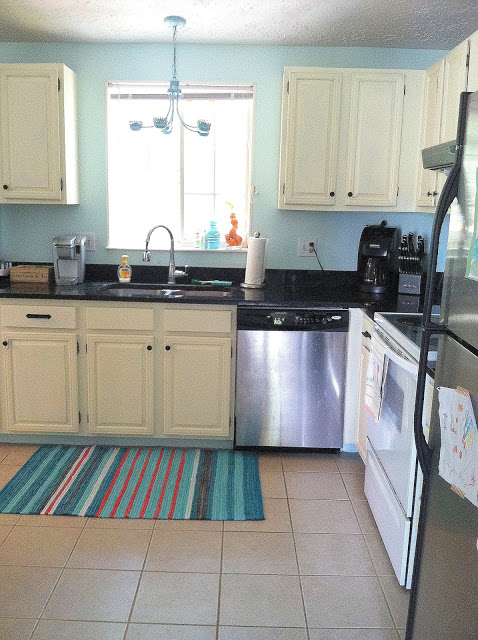
...to this!


It's one of my most dramatic before and afters, but the in-between was more drama than I had anticipated, (but nothing abnormal for a project like this).
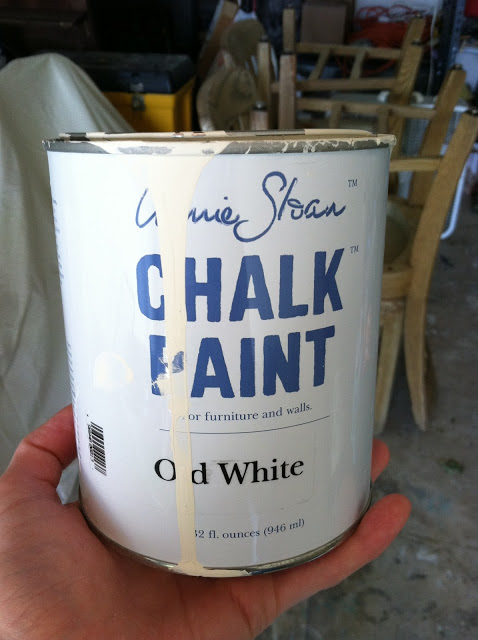
I decided on using Annie Sloan Chalk Paint in Old White. For those of you who have not heard of or used chalk paint, it's kind of a dream to work with for a few reasons. 1) It adheres to anything.
The reason that is so important is because it saves you lots of prep time. You don't have to sand your surface down to a rough or raw texture as you would have to do with latex paint. For this project, all that sanding would have surely added an extra day or two of work. To prep my cabinets, I simply wiped them clean with a water damp rag and smoothed out any really rough dings or nicks with a medium sanding block. 2) The paint dries fast. I ultimately used 5 coats of paint, which sounds like it would take forever to do on an entire kitchen, but it goes quick when you can start on your next coat as soon as you're done with a previous coat!
As you can see by the single drip running down the can, Old White is not a 'white' white. It is a creamy white, which I just love. Not a typical kitchen cabinet color, but typical isn't what I was aiming for. Our kitchen in it's original stain finish had always had a warmth to it. I wanted to lighten things up but retain the comfort of the coziness I had grown to enjoy over the last 3 years.
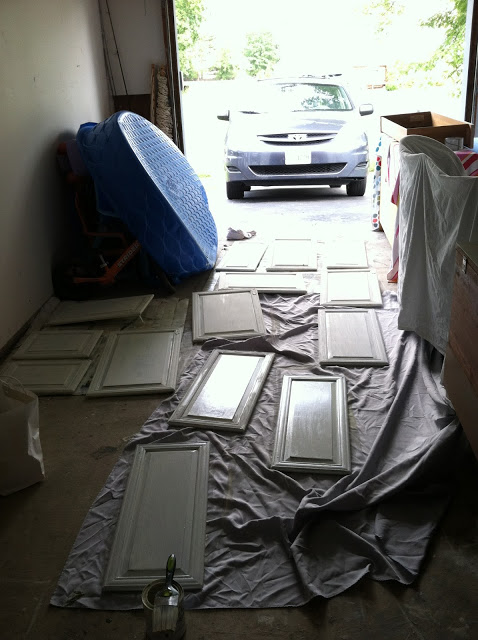
Our cabinets are original to the house, so they're about 30 years old. That's 3 decades of grease and grime splatters all over the place. I knew I would have major bleed through by trying to paint over them in such a light color, so after removing the cabinet doors and laying them out in the garage over broken down cardboard, I started by spraying a thin layer of shellac over everything before beginning to paint. I'll get to why I did such a thin layer in a sec. Before you Shellac, cover your counters in towels or plastic and open all your windows. It's potent stuff!
After reading some reviews, and a recommendation by my SIL, this is what I went with to prevent bleed through on my kitchen cabinets: Zinsser clear shellac.

So, I sprayed the shellac all over everything, then began painting. For about 5 seconds I painted with a brush, then hated the way it was going on and immediately switched to these handy sponge brushes, which worked beautifully to prevent brush strokes. The paint went on soooo smooth and even using these, (I took this pic after the whole job was done, so they are looking a little rough):

I did 2 coats of paint and then took a really close look over every square inch for areas of bleed through - which there were many. I basically just sprayed shellac over areas of bleed through whenever I saw them, even after 4 coats went on. I'd see bleed through, shake my can and 'spritz' the shallac over it, and then paint again.
Some photos of the awesome fun time I was having...
One coat:

Three coats:
(I kept everything in my cabinets and just pushed stuff back and towards the middle. The drawers I emptied):
Garage taken over by cabinets:
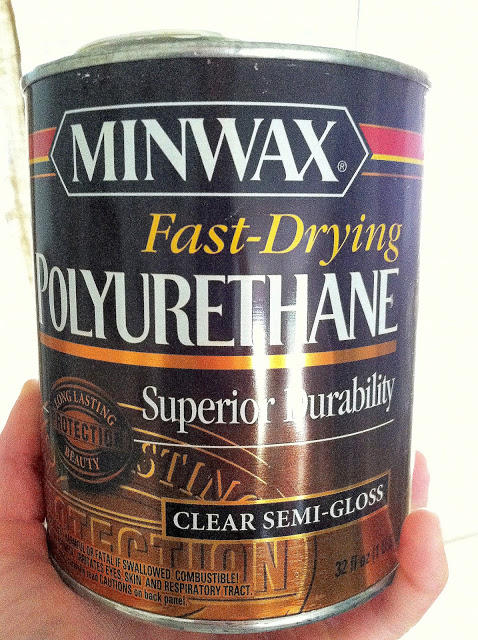
After 5 coats plus touch ups, I sealed the cabinets, drawers and all in 2 coats of Minwax Polyurethane clear semi-gloss. My favorite way to apply this stuff is with a lint free rag, (and be sure to wear some sort of protective gloves over your hands; I like to pull on disposable latex gloves).
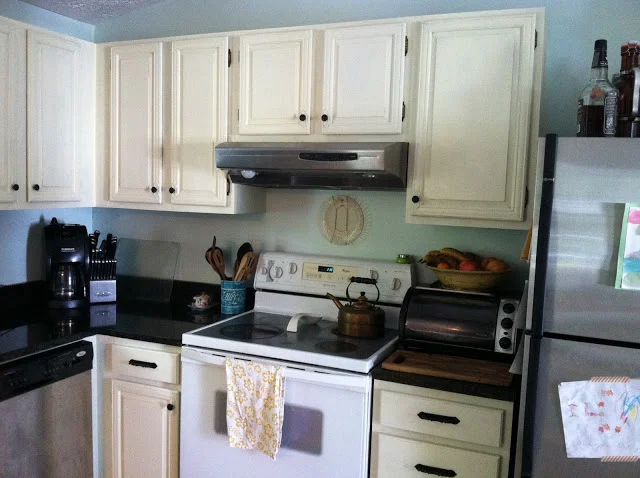
SO, once all was said and done and the cabinets were reattached and hardware added, I snapped a few pics of the imperfections I mentioned in yesterday's post.
Upon closer inspection...
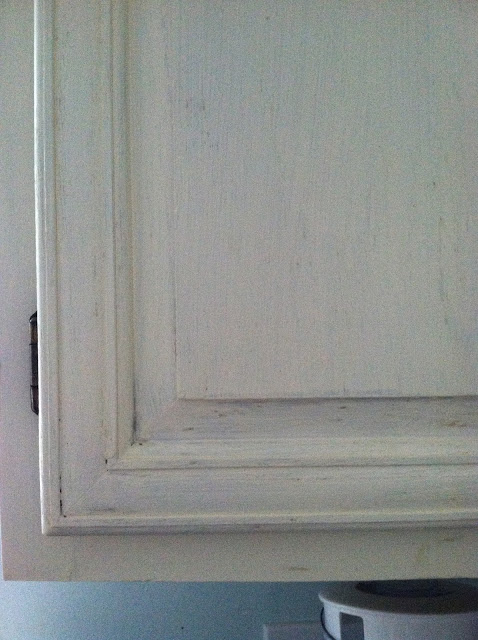
This cabinet is our worst, but I really wanted to show you what bleed through looks like. This cabinet is not dirty. Every brownish mark that you see is bleed through, even after several layers of shellac and four coats of paint, plus touch ups. The cabinets were very difficult to spot bleed through since I was working on them in the garage which doesn't have the best lighting for such detailed work. There were some drawers that looked like this, but when I really tackled them with the shellac and then repainted, they turned out perfect. So if you take anything away from this post, it should be to work in a well lit area!!!
Also, I must admit that not only did I stop at two coats of paint on the other sides of the cabinets, (rather than 4-5), I did not even touch the insides of the cabinets. Left those in the original wood.

The whole job, from start to finish, took 3 days. I worked during my kids' sleep time, (early in the morning, nap time, and late at night), and meal times for those 3 days.
So, as you can see it's definitely a homemade job. But a job that resulted in a major feeling of relief and accomplishment. I absolutely love being in our kitchen now. Who knows, maybe I'll start cooking gourmet meals in there!
Coming up tomorrow are some of the unique details that didn't make it into my reveal post yesterday - these are the personal touches that make the room feel truly special and personal to us, (not to mention functional)!
Thank you for reading!
~Chelsea
This post was originally featured under Chelsea's Garage, now affectionately known as StyleMutt.