Paint inside the lines {DIY custom canvas}

Hi guys! As promised at the beginning of the week I'm sharing a really awesome DIY art project today! This will surely change the way you look at art when you're out perusing.

We bought these canvases at Ikea within a few months of moving into our home, (about 3.5 years ago). They were right for us at the time because, well, I had no clue what I was doing in our home and wanted something large scale for a wall in our dining room. They were neutral and soft and worked for a while.

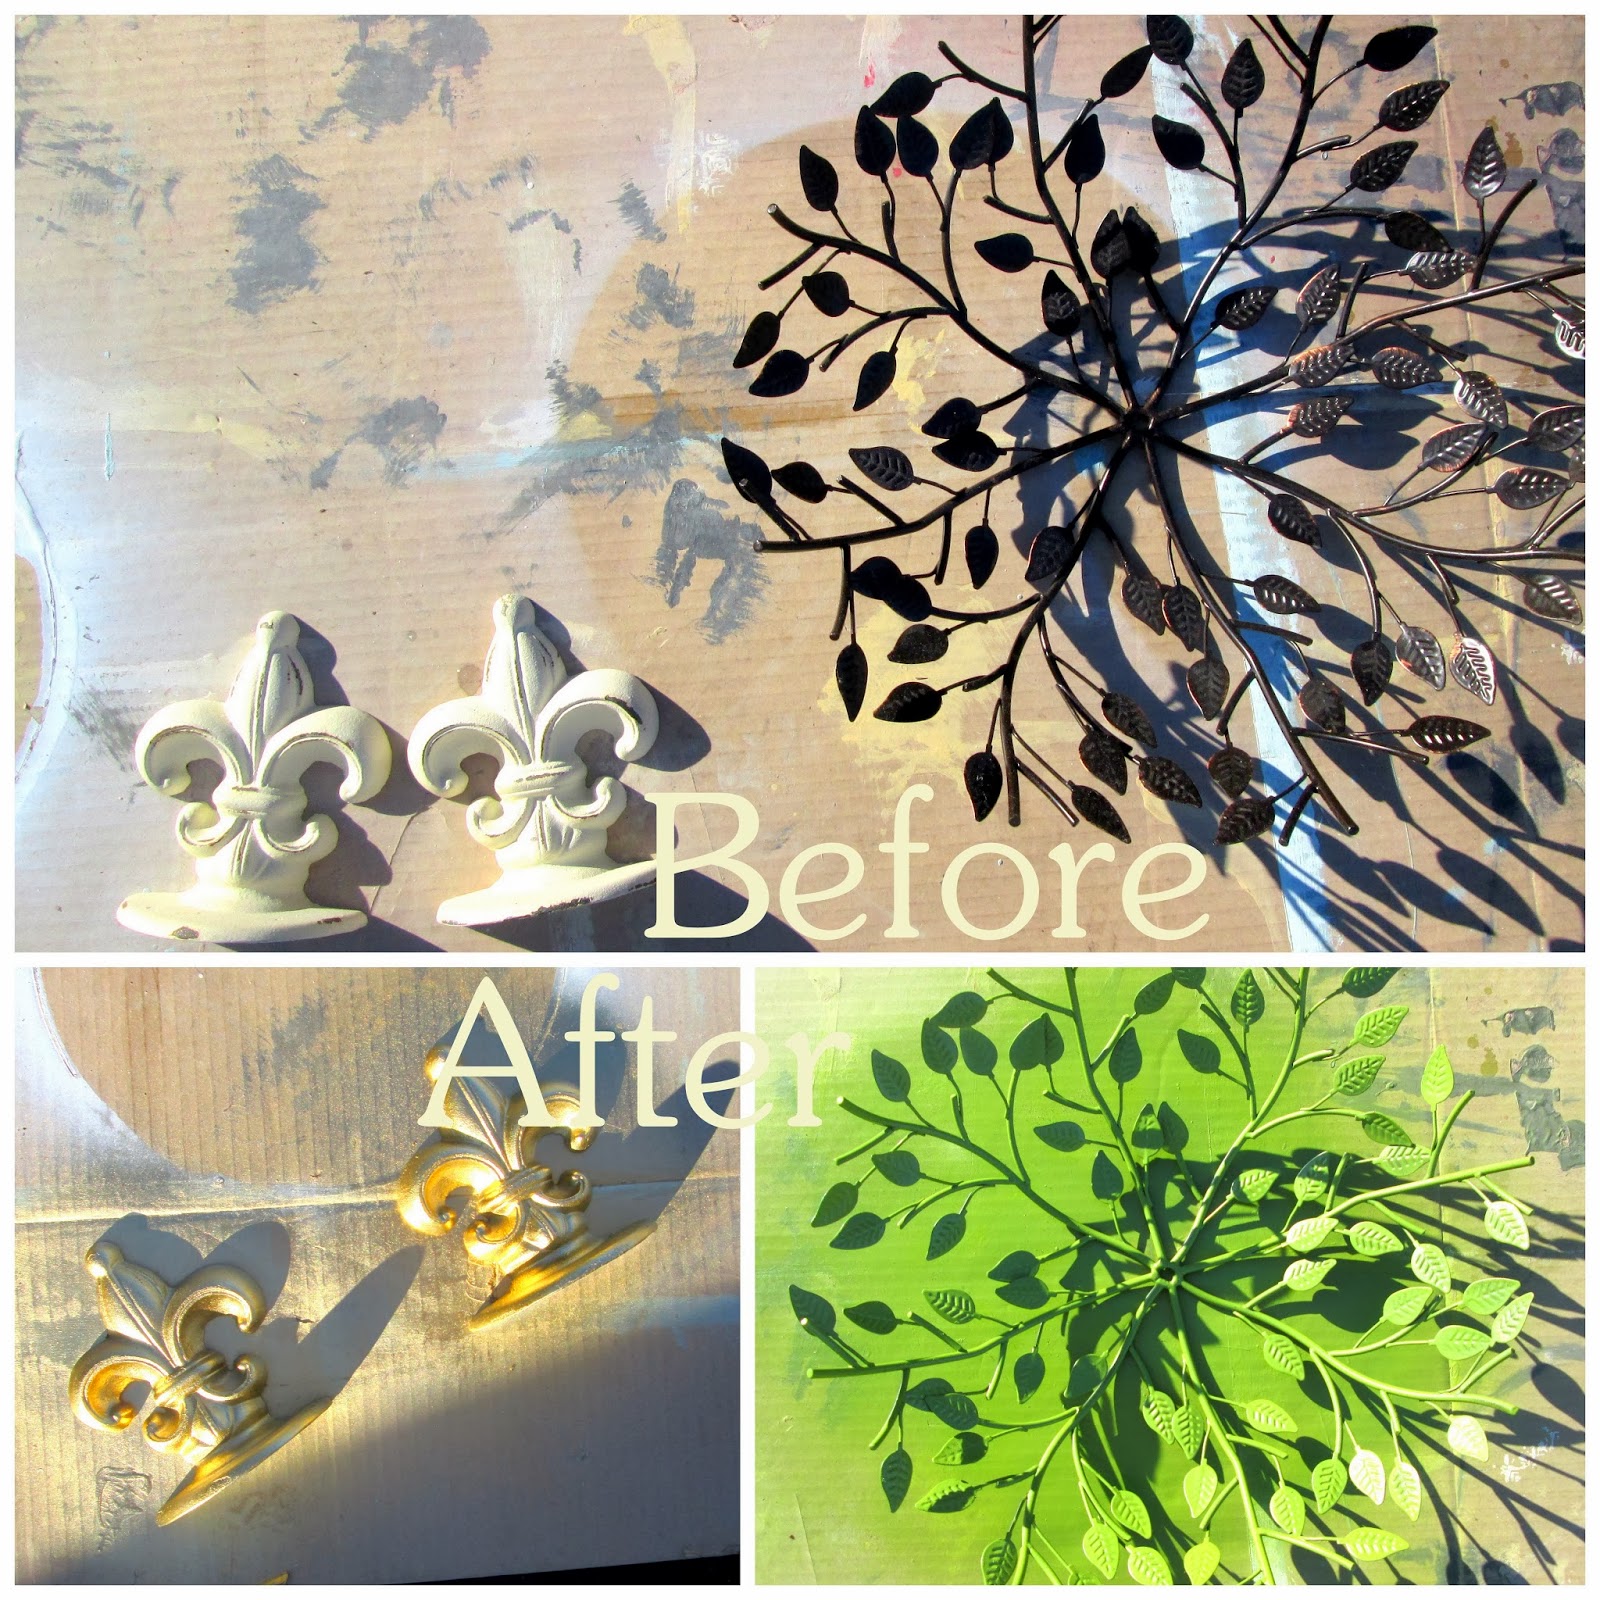
Before - a little too timid for our updated space

Fast forward to now. I wouldn't say my style has changed so much as it has finally developed, (through lots of trial and error). Needless to say, these soft taupe-y lovelies just didn't have a place in our home anymore so I stuck them in the garage. They're just such a nice size, especially when hung together, so I held onto them in case something came to mind.

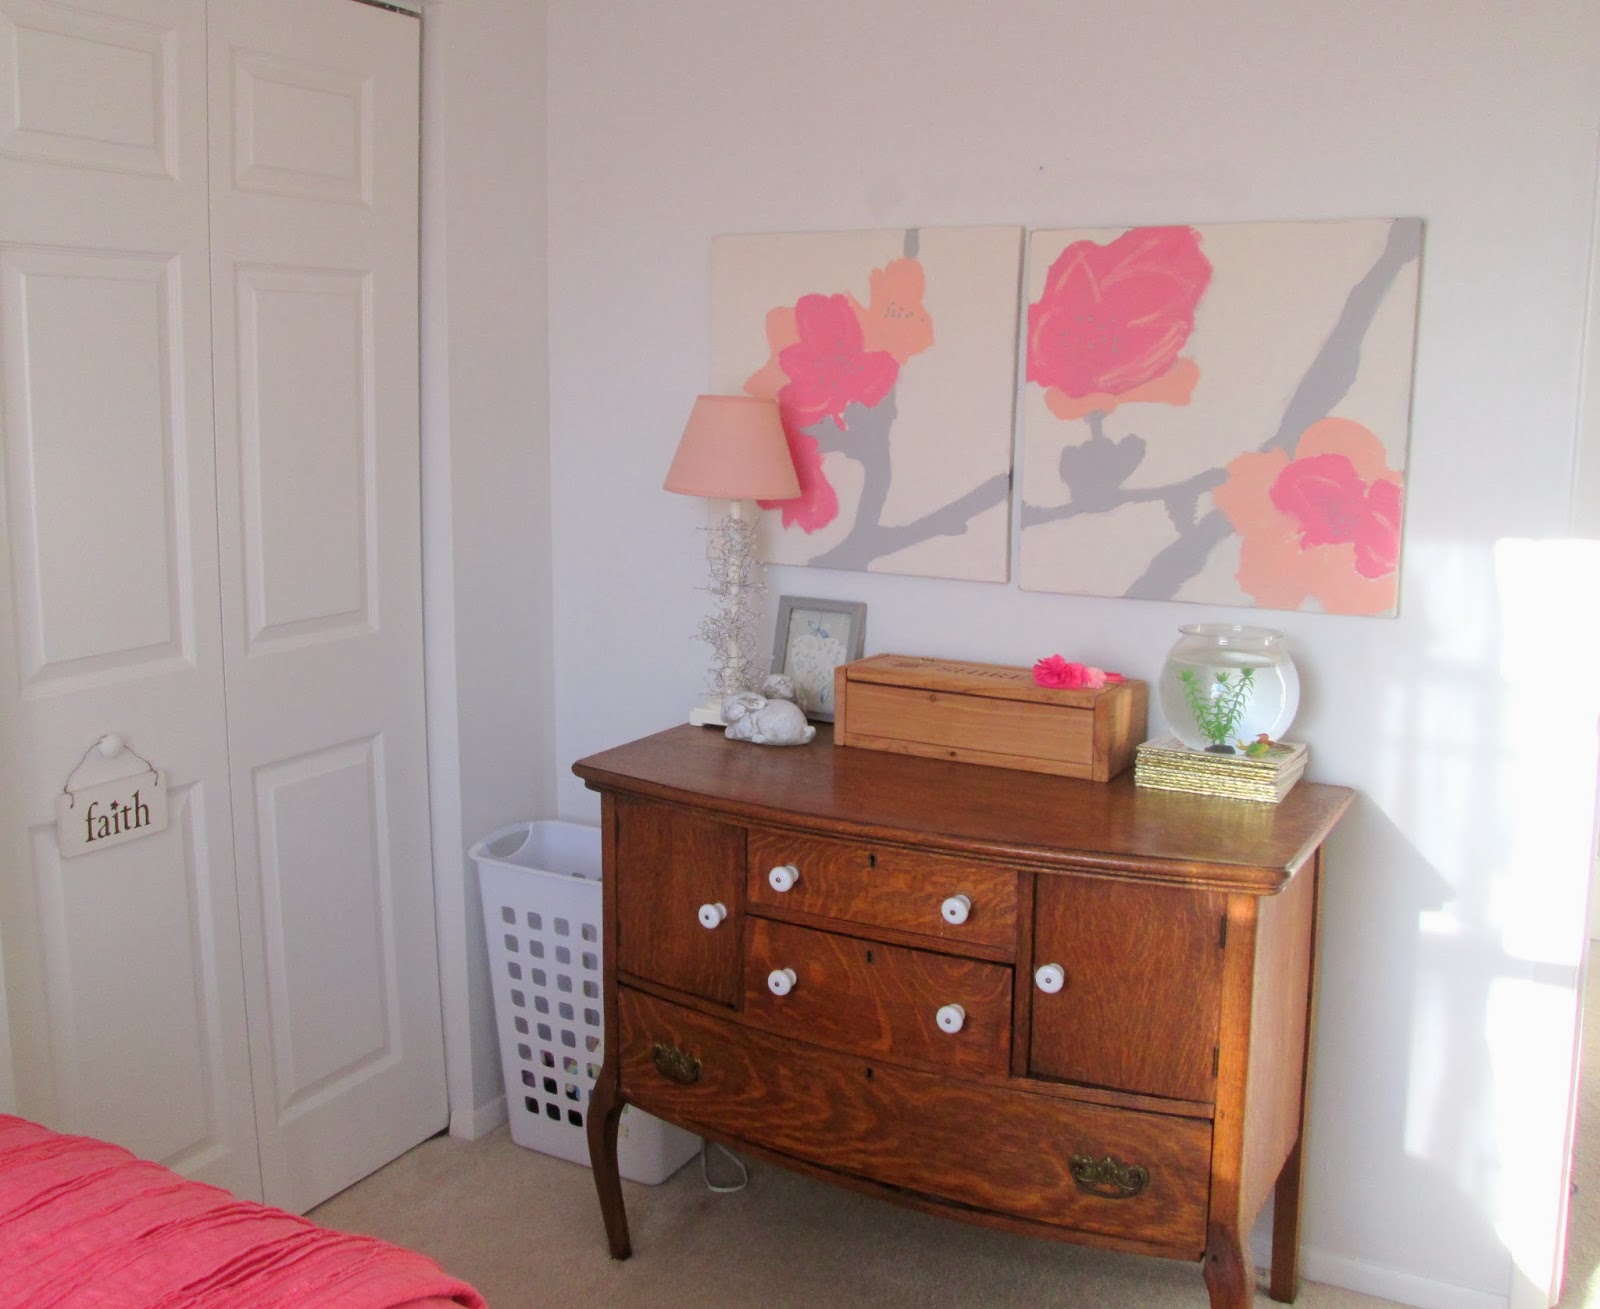
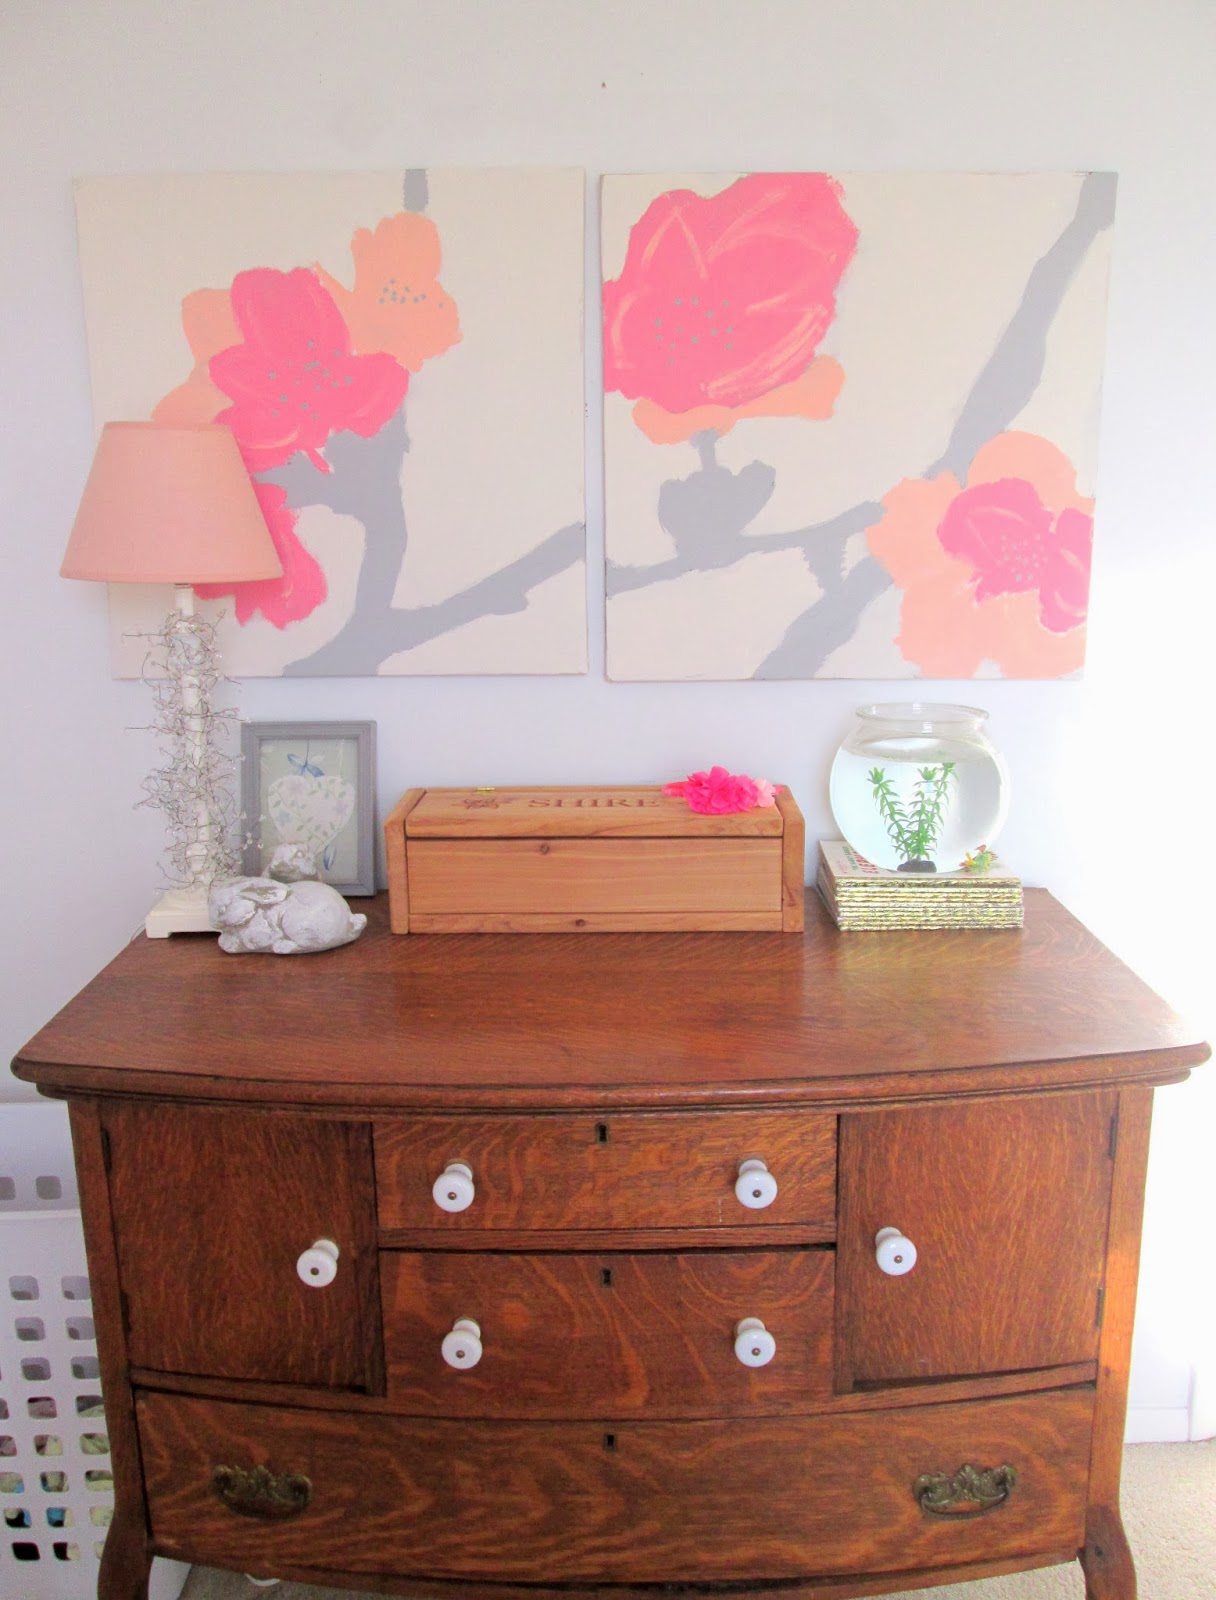
Then something came to mind. Paint over the painting! I needed some large scale art to hang over Shire's bedroom dresser, but wanted it to really pop. I picked a few paint colors, mixed a couple of my own, and painted 'in the lines' of these canvases.

Now customized and full of life!

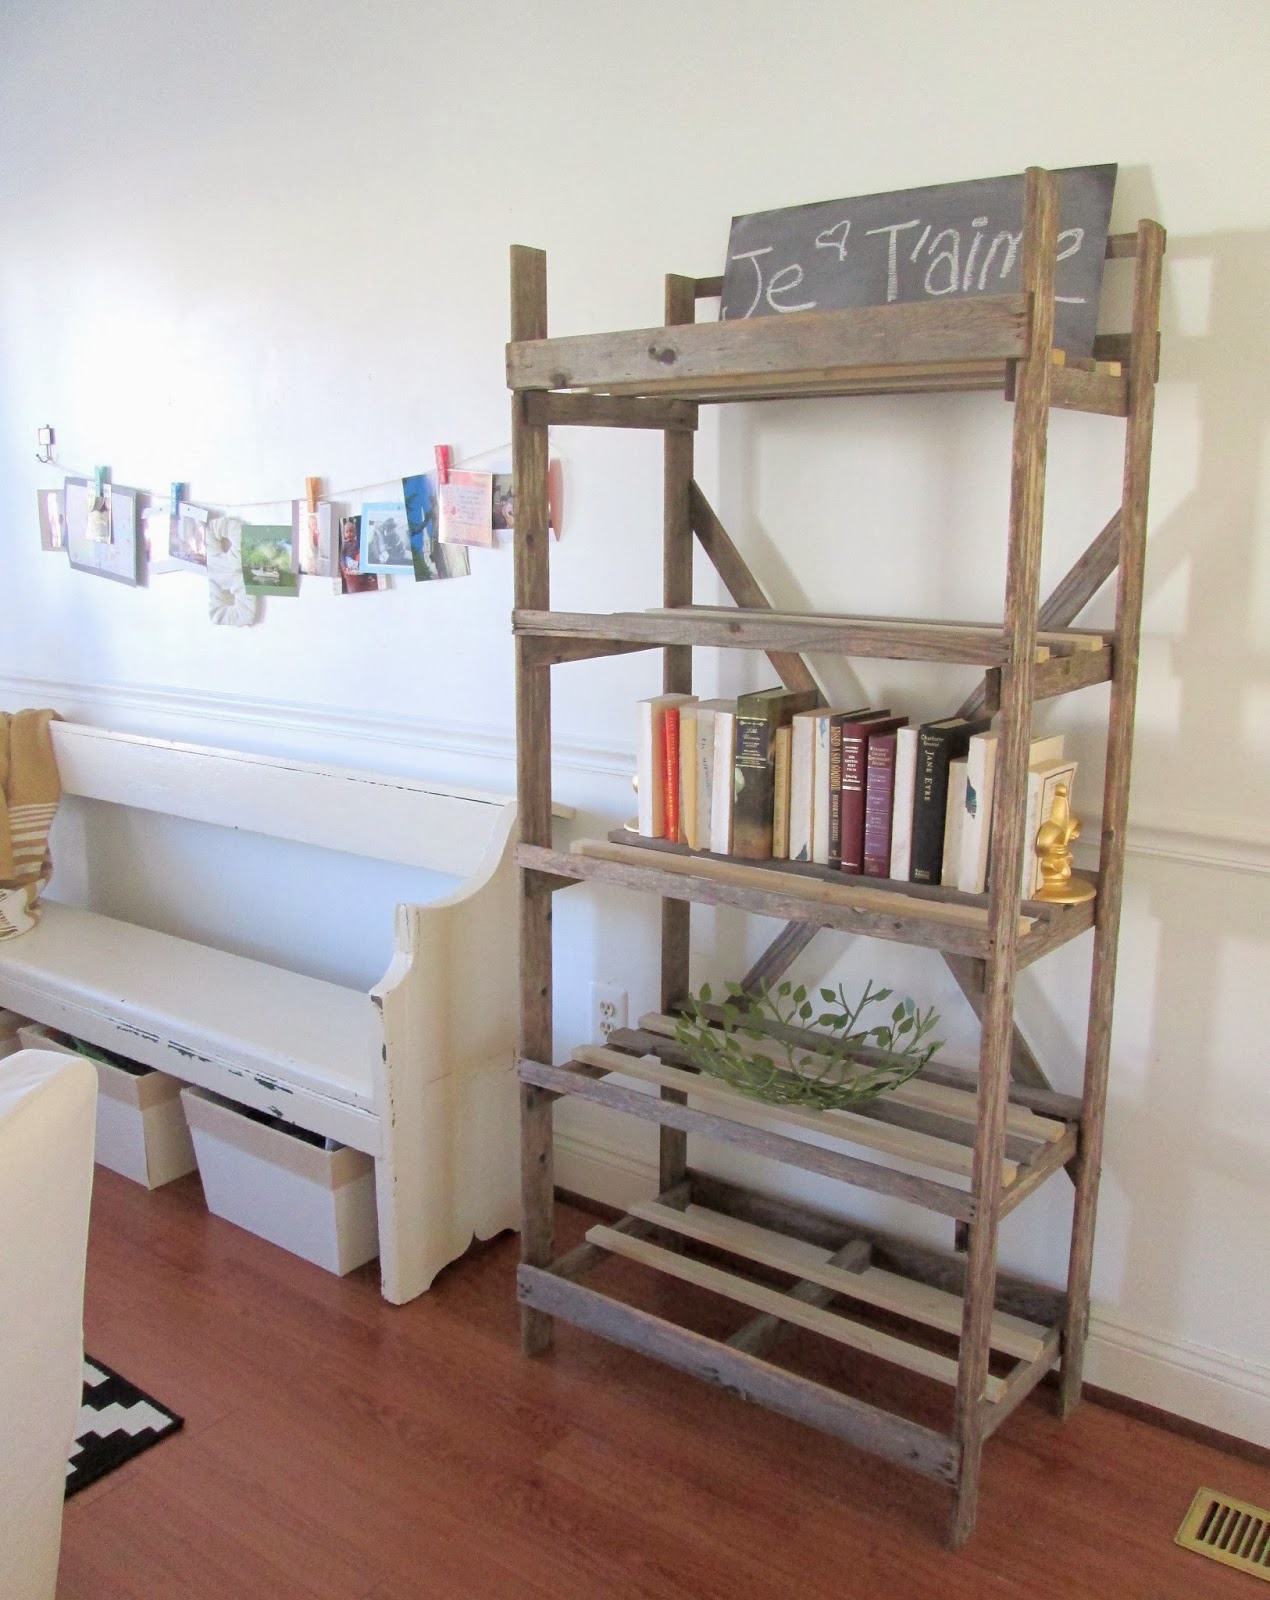
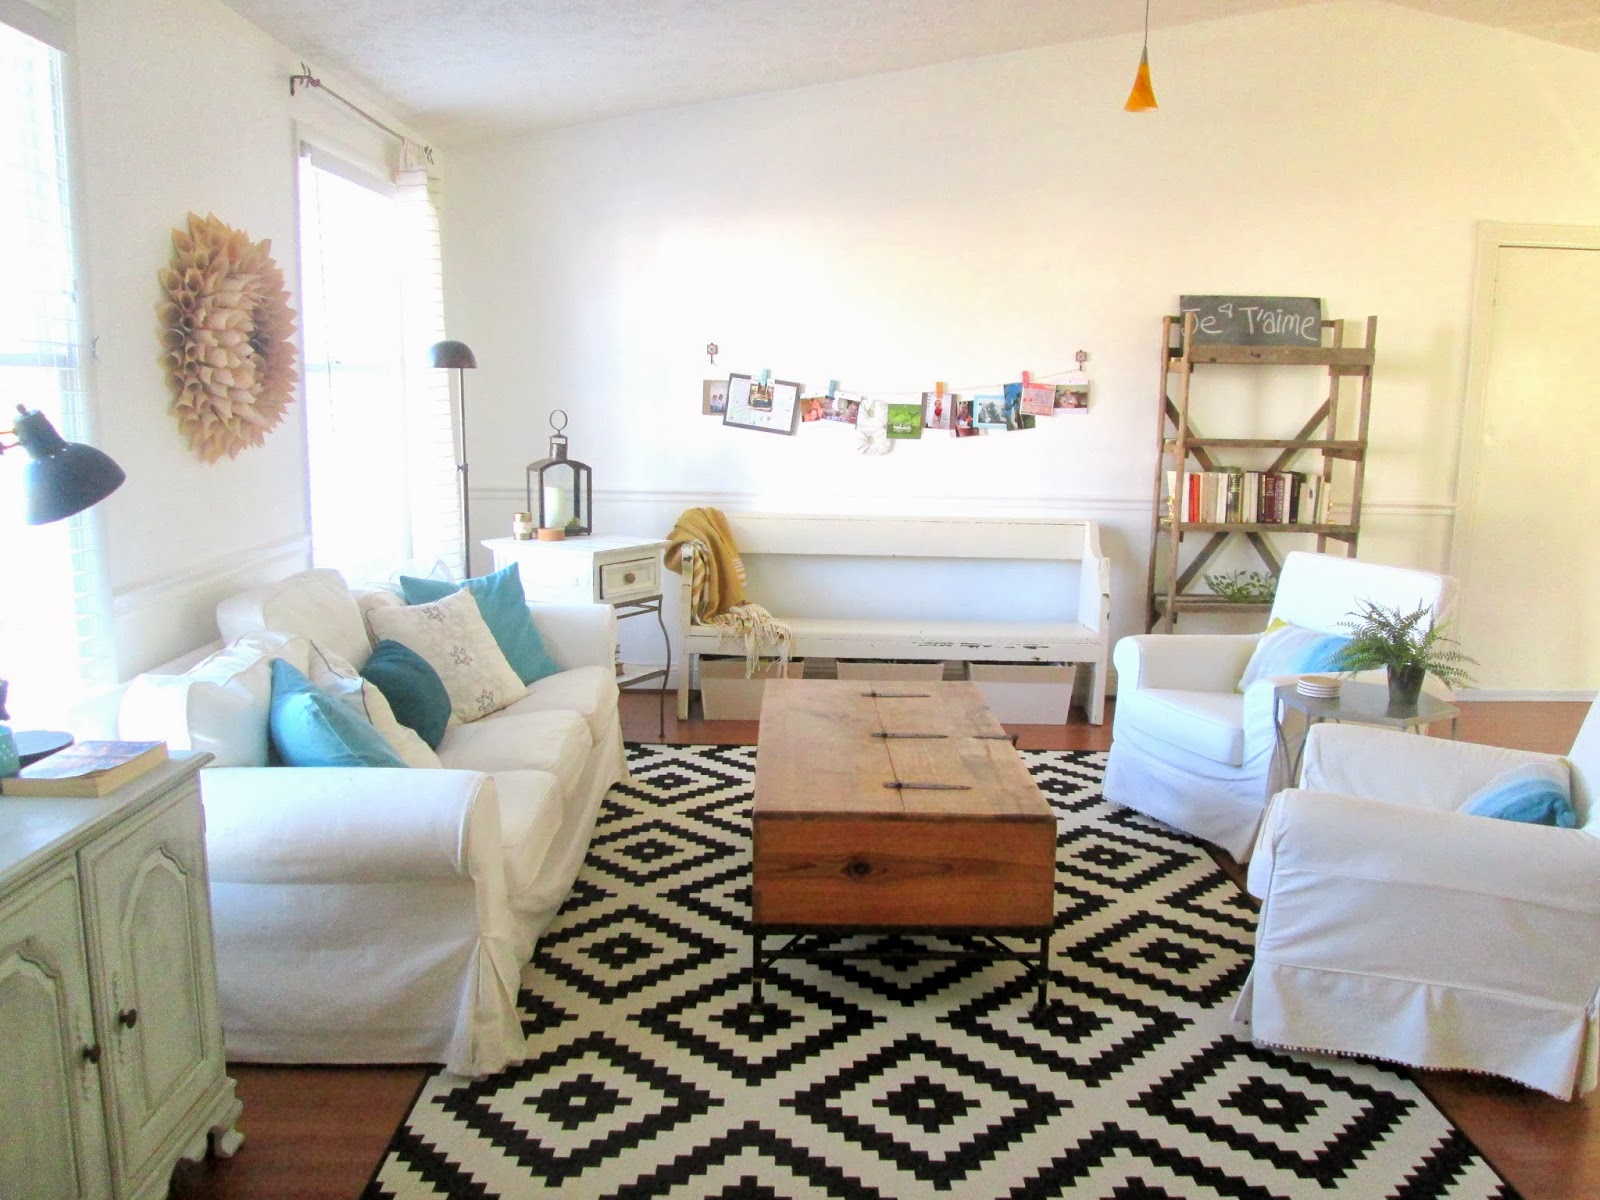
(More pictures of Shire's room HERE)

Doesn't this just change everything?! If you can color in the lines you can do this project. One tip I have, as a non-canvas artist, is the larger the scale, the easier it'll be. Less room for error, (or is it more room for error??? I always get that confused). But really, all you need is a painting of a picture you like. Then just customize it with colors you want to see in your home!

Side by sides are always fun:

(A bit more abstract now, but I think that's charming in this case)

Doesn't this just make you want to run to your closest thrift store and find some lonely art?! I'm looking forward to trying this again for sure. 

And just to officially open the door, I always love seeing what YOU guys are up to! If you've finished something you're excited about in your home please share via email, (chelseasgarage@gmail.com). You're such a creative bunch and I love passing around inspiration. You may see your project featured here!

Thank you for stopping by!

~Chelsea

This post was originally published on Chelsea's Garage, now affectionately known as StyleMutt.

Use what you have, Do what you can {Instant home improvements}

Hi guys! I shared this quote a couple weeks ago on my facebook page but it's totally relevant for today's post, so I'm sharing here too.

This time of year is all about perseverance. We're ready and waiting for Spring and Winter feels like a party crasher overstaying it's welcome. It's this stretch of the year that I think we tend to crave some instant gratification; to see something done, finished, complete. Cleaning the house can be gratifying but it's temporary; it doesn't stay clean, (some shorter than others). So many of us have projects that we are itching to begin but it's not really the right time of year to dive in. This is when those little itty-bitty projects can make a big difference, if to no one but ourselves.

Let me introduce you to a couple new buddies I just picked up the other day:

I've forgotten how satisfying it is to spray paint something! I just love it. 

In this case I felt like adding a few little snaps of color to our bakers rack. Here it is before:

And after!

I just took the leaf bowl and the wrought iron book-ends outside, layed them on a piece of cardboard, and went to town. Oh how satisfying! 

This project was definitely not for high impact. It's not a very noticeable change, especially from across the room...

But it's a little improvement and it's done. And that's a nice feeling!

But this really isn't about spray painting little accessories around the house. I really just wanted to encourage anyone out there who's in the Winter slump to think about the small things you can do, no matter what the forecast outside!

Here are a couple other ideas:
~Swap some pillows around, (or make a new one! HERE's an easy tutorial using placemats)
~Switch out a knob or two with something fresh, (THESE are my favorite)

Do you have any quick and easy go-to ideas you use to refresh your home? Feel free to share in a comment!

Thank you for stopping by!

~Chelsea

This post was originally published on Chelsea's Garage, now affectionately known as StyleMutt.

Hello, Apartment Therapy {plus Shire's room makeover}

Hi friends! What an absolutely gorgeous weekend we had here in Northern Virginia! I didn't think it could get any more beautiful...until Apartment Therapy featured one of my favorite furniture transformations on their site! How completely flattering, to say the least. I love their site and am constantly finding inspiration there!

You can find the article HERE or check it out on their facebook page HERE, (it's made a surprising splash on their fb page). It's an incredible honor that they picked a piece of mine to feature, but the biggest bonus has been some new friends to Chelsea's Garage! So, if you're new to my blog I am so glad you're here and hope you enjoy! I think we'll become fast friends. I have a good feeling about us. :)

If you check into my facebook page now and then you may have noticed a Before / After art transformation I did for my daughter, Shire's room last week. Later in the week I'll share the low-down of the DIY art pieces, but today I'm sharing the full room! It's not a full blown makeover of what it once was before, but when you add a 72"H x 51"L piece into a tiny room, the difference is dramatic.

I purchased this Ikea Aspelund wardrobe used via Craigslist for a great price. It's the riskiest purchase I've ever made. It's a large beast and my daughter's room is tiny, (8.5' x 8.5' with a little nook that her bed tucks into). I have mixed feelings about big furniture in small rooms. The concept can either soar or sink. But if there is one thing you should know about me and my decorating style it's this: I have no fear of trying new things and don't ever take decorating too seriously. If the piece didn't work I would have put it up for sale asap.

Ikea Aspelund wardrobe
(no longer in stores; I found this on Craigslist)

After our Cate, (sister-in-law who guest blogs here now and then with her fantastic creations), helped me assemble the beast and we got it in Shire's room, I was beyond happy with how the room blossomed. I have learned a few things the hard way from having three young kids. Most recently I've learned that they surround themselves with lots. of. little. things. Bits and bobs here and there, all over the place. While her room was fun and cute before, it just wasn't as functional as I had expected. What you see as a neat and tidy 'Before' picture above, turned into an explosion of baby clothes and dolls strewn all over with no place to go. Now my Shire's things all have a spot. Prime real estate in our house run by wild little boys.

More of this sweet little room...Shire is so happy to be sharing her space with you today. :)

How to make a wood pallet bed found HERE.

The paper globe light is Ikea but I found it at a thrift store, unopened, (and I just wrapped the cord in twine for a fun exposed look). The butterflies were from an antique shop. The window headboard I made from scraps of fabric, how to HERE.

There's the DIY art - more on that later!

Bits and bobs on the dresser. (my brother-in-law made Shire that beautiful jewelry box out of recycled cedar!)

My old doll bed from when I was young got another coat of paint and then gently distressed. And wouldn't you know it - this funky gold and cream cloth napkin found on clearance at Anthropologie a while back is the perfect size for a little blanket! I added the pink and teal pom-poms to the corners to tie it into the room a bit more.

A couple small touches: a pair of vintage pink and cream cloth napkins get made into fabric tassels and hung on the wardrobe knobs.

Tissue paper poofs made of various shades of pink adorn the top of the piece. Love making these things, (and now Shire makes them with me, bonus!)

So there you have it! A big piece in a little room. It could have gone either way but when I walk into Shire's room now I think I hear the faint sound of angels singing. It's amazing how even a large piece can translate so light and airy, and I think that was key for this room. Bottom line, Shire's loving it so I'm a happy Momma!

Thank you so much for stopping by!

~Chelsea

This post was originally published on Chelsea's Garage, now affectionately known as StyleMutt.