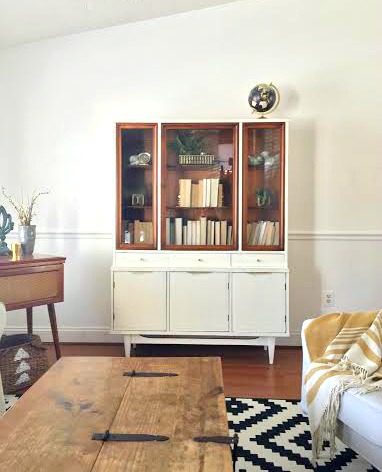
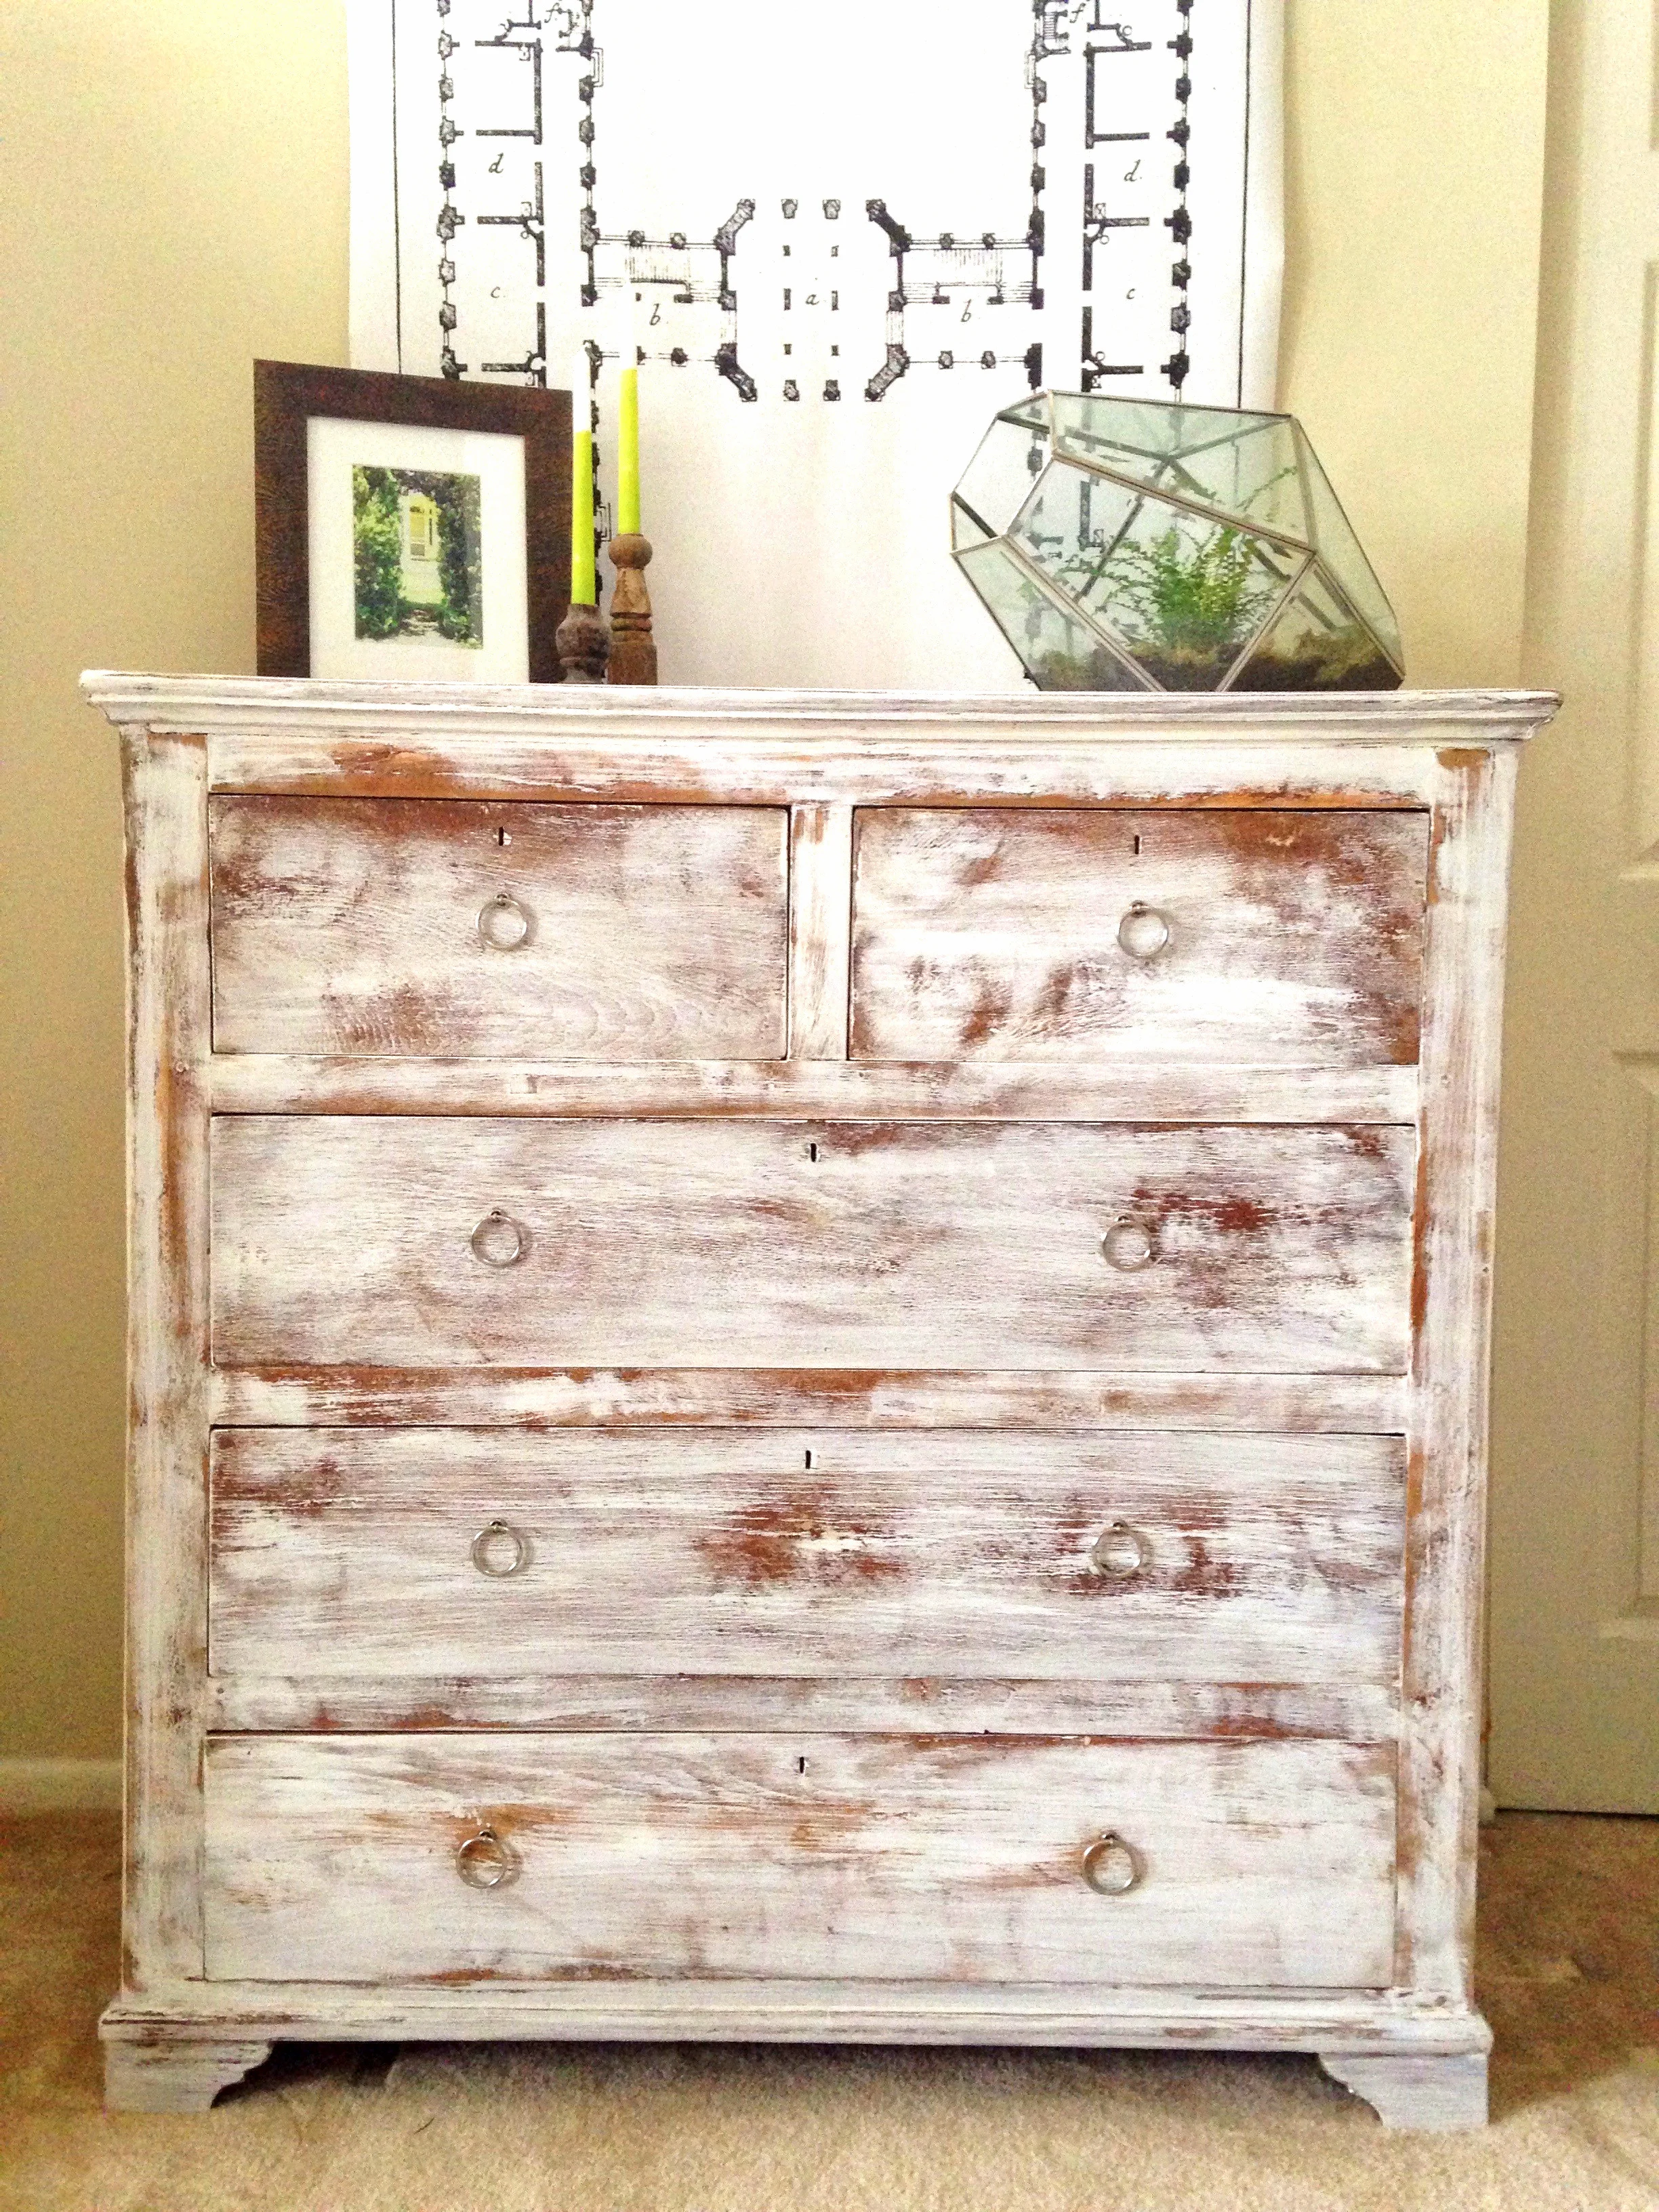
The other week I scored this great dresser on Craigslist for a great price. It's solid wood and the seller had bought it and brought it back from India. {How cool is that? I love pieces with unusual history}. , But she was selling it because it had some damage to the finish - so it became my first opportunity to cross something off my Flipper's New Years Resolutions. Can you guess which item I went for first? That's right! I went for No.6 the paint-stripped dresser.

Except it didn't actually turn out the way my inspiration piece looked... it came out WAY BETTER.
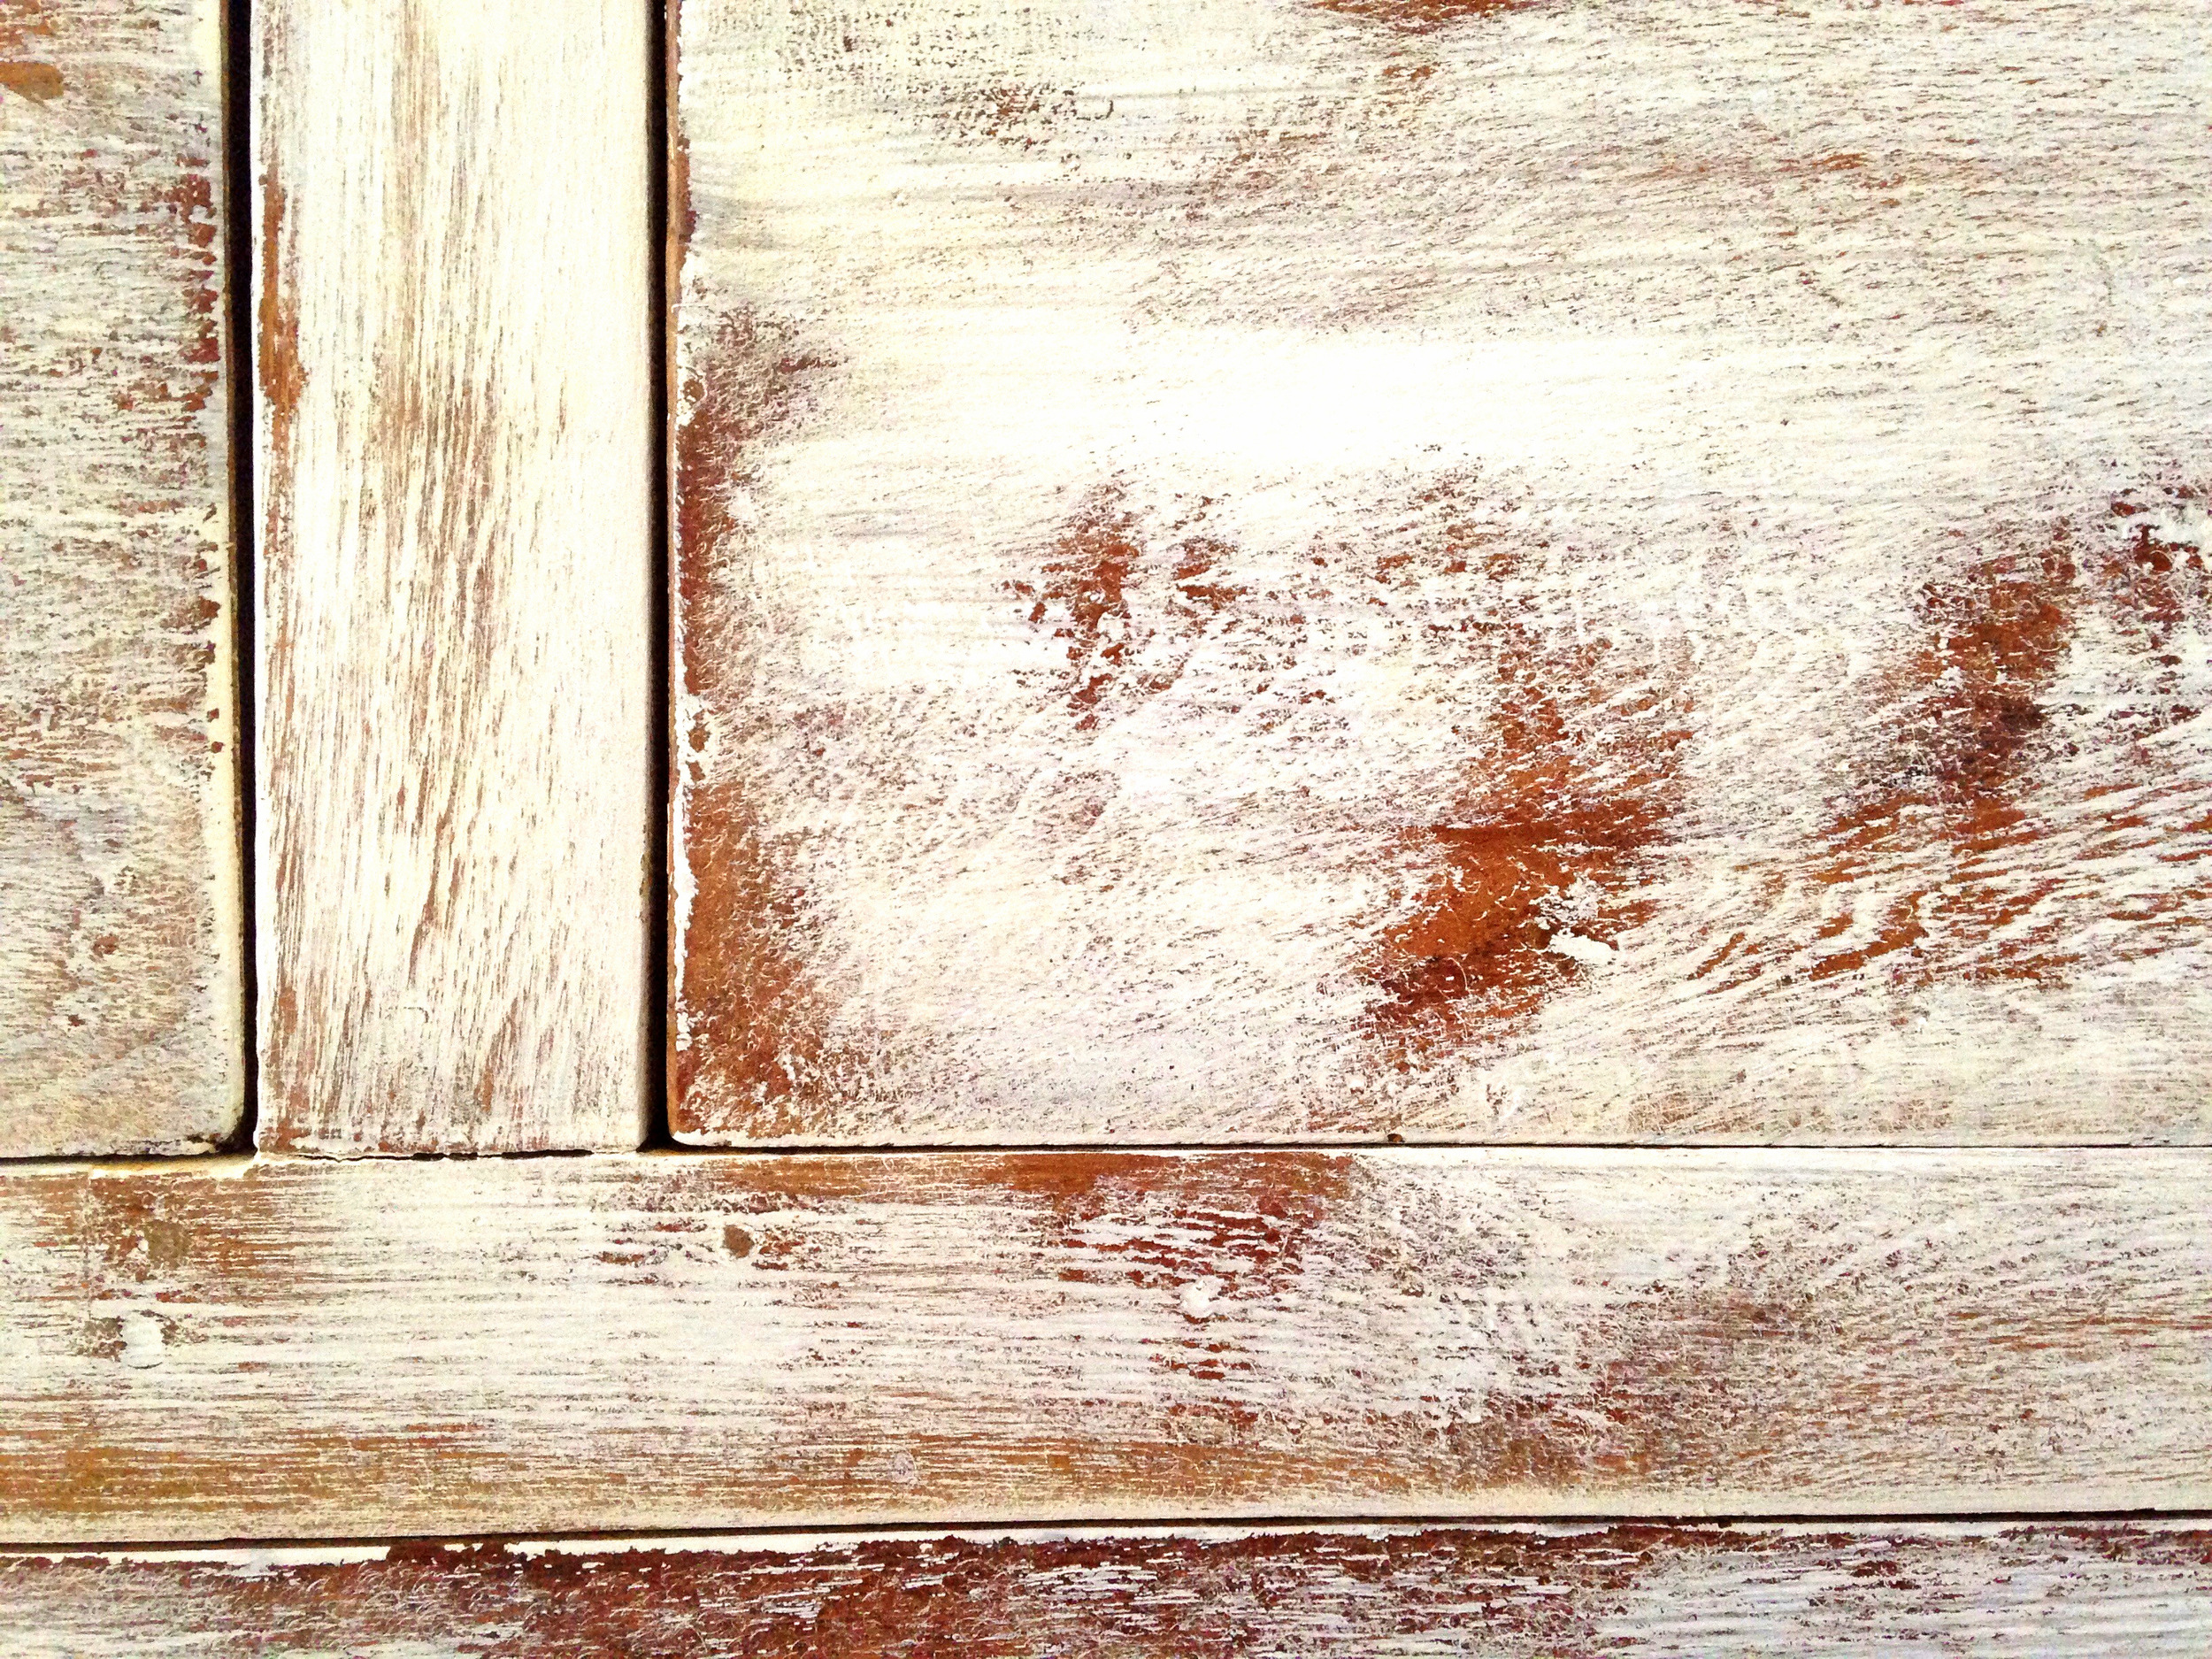

I wasn't really sure how to go about re-recreating this effect from my inspiration piece other than just stripping off most of the paint finish on a piece to reveal the naked wood underneath. My piece was already naked and part of me felt like it was a waste to paint it just to strip it off again. So I decided I would only cover the piece with a thin coat of paint.
But first I had to start by sanding the piece to prep it for paint. Then on a whim I decided to wipe it down with some fabric softener because, as I discovered while painting my box trunk, it can keep the paint from taking in some areas. Then I painted on a light coat of home-made chalk paint I had left over from my two-toned coffee table.
After the paint dried, it was time to TAKE IT OFF BABY. Using a fine grit sanding pad on my orbital sander {thanks for the xmas gift Scot & Joanie} I gently sanded some of the paint off.

I could have kept sanding to reveal more of the naked wood, but I liked how the white was bringing out the natural wood grain.

It kinda ended up like a dry-brush effect but without the dabbing-paint-on-a-rag-or-paper-towel process.

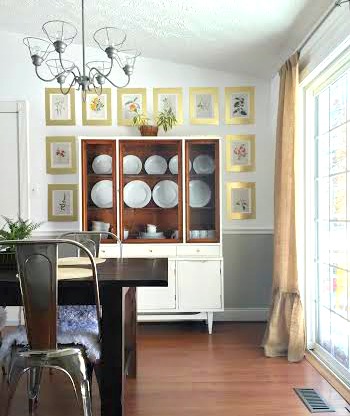
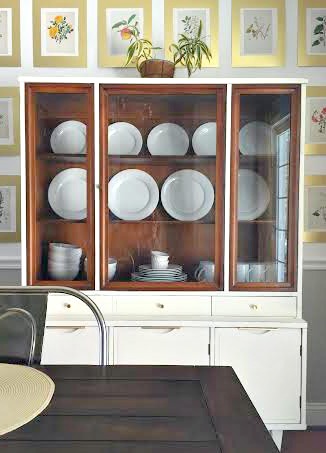
For the hardware I also tried something new - DIY ring pulls! I can't take credit for this idea however - I found this post on Sarah M. Dorsey Designs, but no disrespect to Ms. Dorsey, I needed a little bit more info on where to find the parts: cotter pin, 1" ring, and washers. I had never heard of a cotter pin before. I had no idea if I was in a plumbing thingy or electrical do-hickey and therefore had no clue where to look for it in the store.
Turns out it's in with the screws, nuts, and bolts aisle. And more specifically, it was in a drawer at Home Depot with a tiny picture on the front so it was kinda hard to spot at first when you have shopping tunnel vision on. You can also find the finishing washers {which are beveled} and regular washers {which are flat} in this aisle. The trick was finding the ring for the DIY pull. There was nothing in that aisle that resembled Sarah Dorsey's find at her local hardware store so I had to expand my search. I actually ADORE going to the hardware store and perusing all the aisles I really have no business being in to find odds and ends I can repurpose for something else. And my aimless wandering did not disappoint. I ended up striking gold in the window treatment aisle with a set of curtain rings for $7.97 that would be perfect understudy.
I'm gonna go ahead and assume I'm not the only one who did not know what a cotter pin looks like so here's a visual aid:

Supplies Needed:
Curtain ring {with removable clip}
Cotter pin {size 1/8" x 1-1/2" should do}
Finishing washer {I used size #8}
Washer {doesn't have to be pretty because you won't see it inside the drawer - just make sure the cotter pin can fit through the inner hole}
Pliers

1. Remove the clip from the curtain ring. It was really easy to unhook the clip with just my fingers, but you can use the pliers just in case.
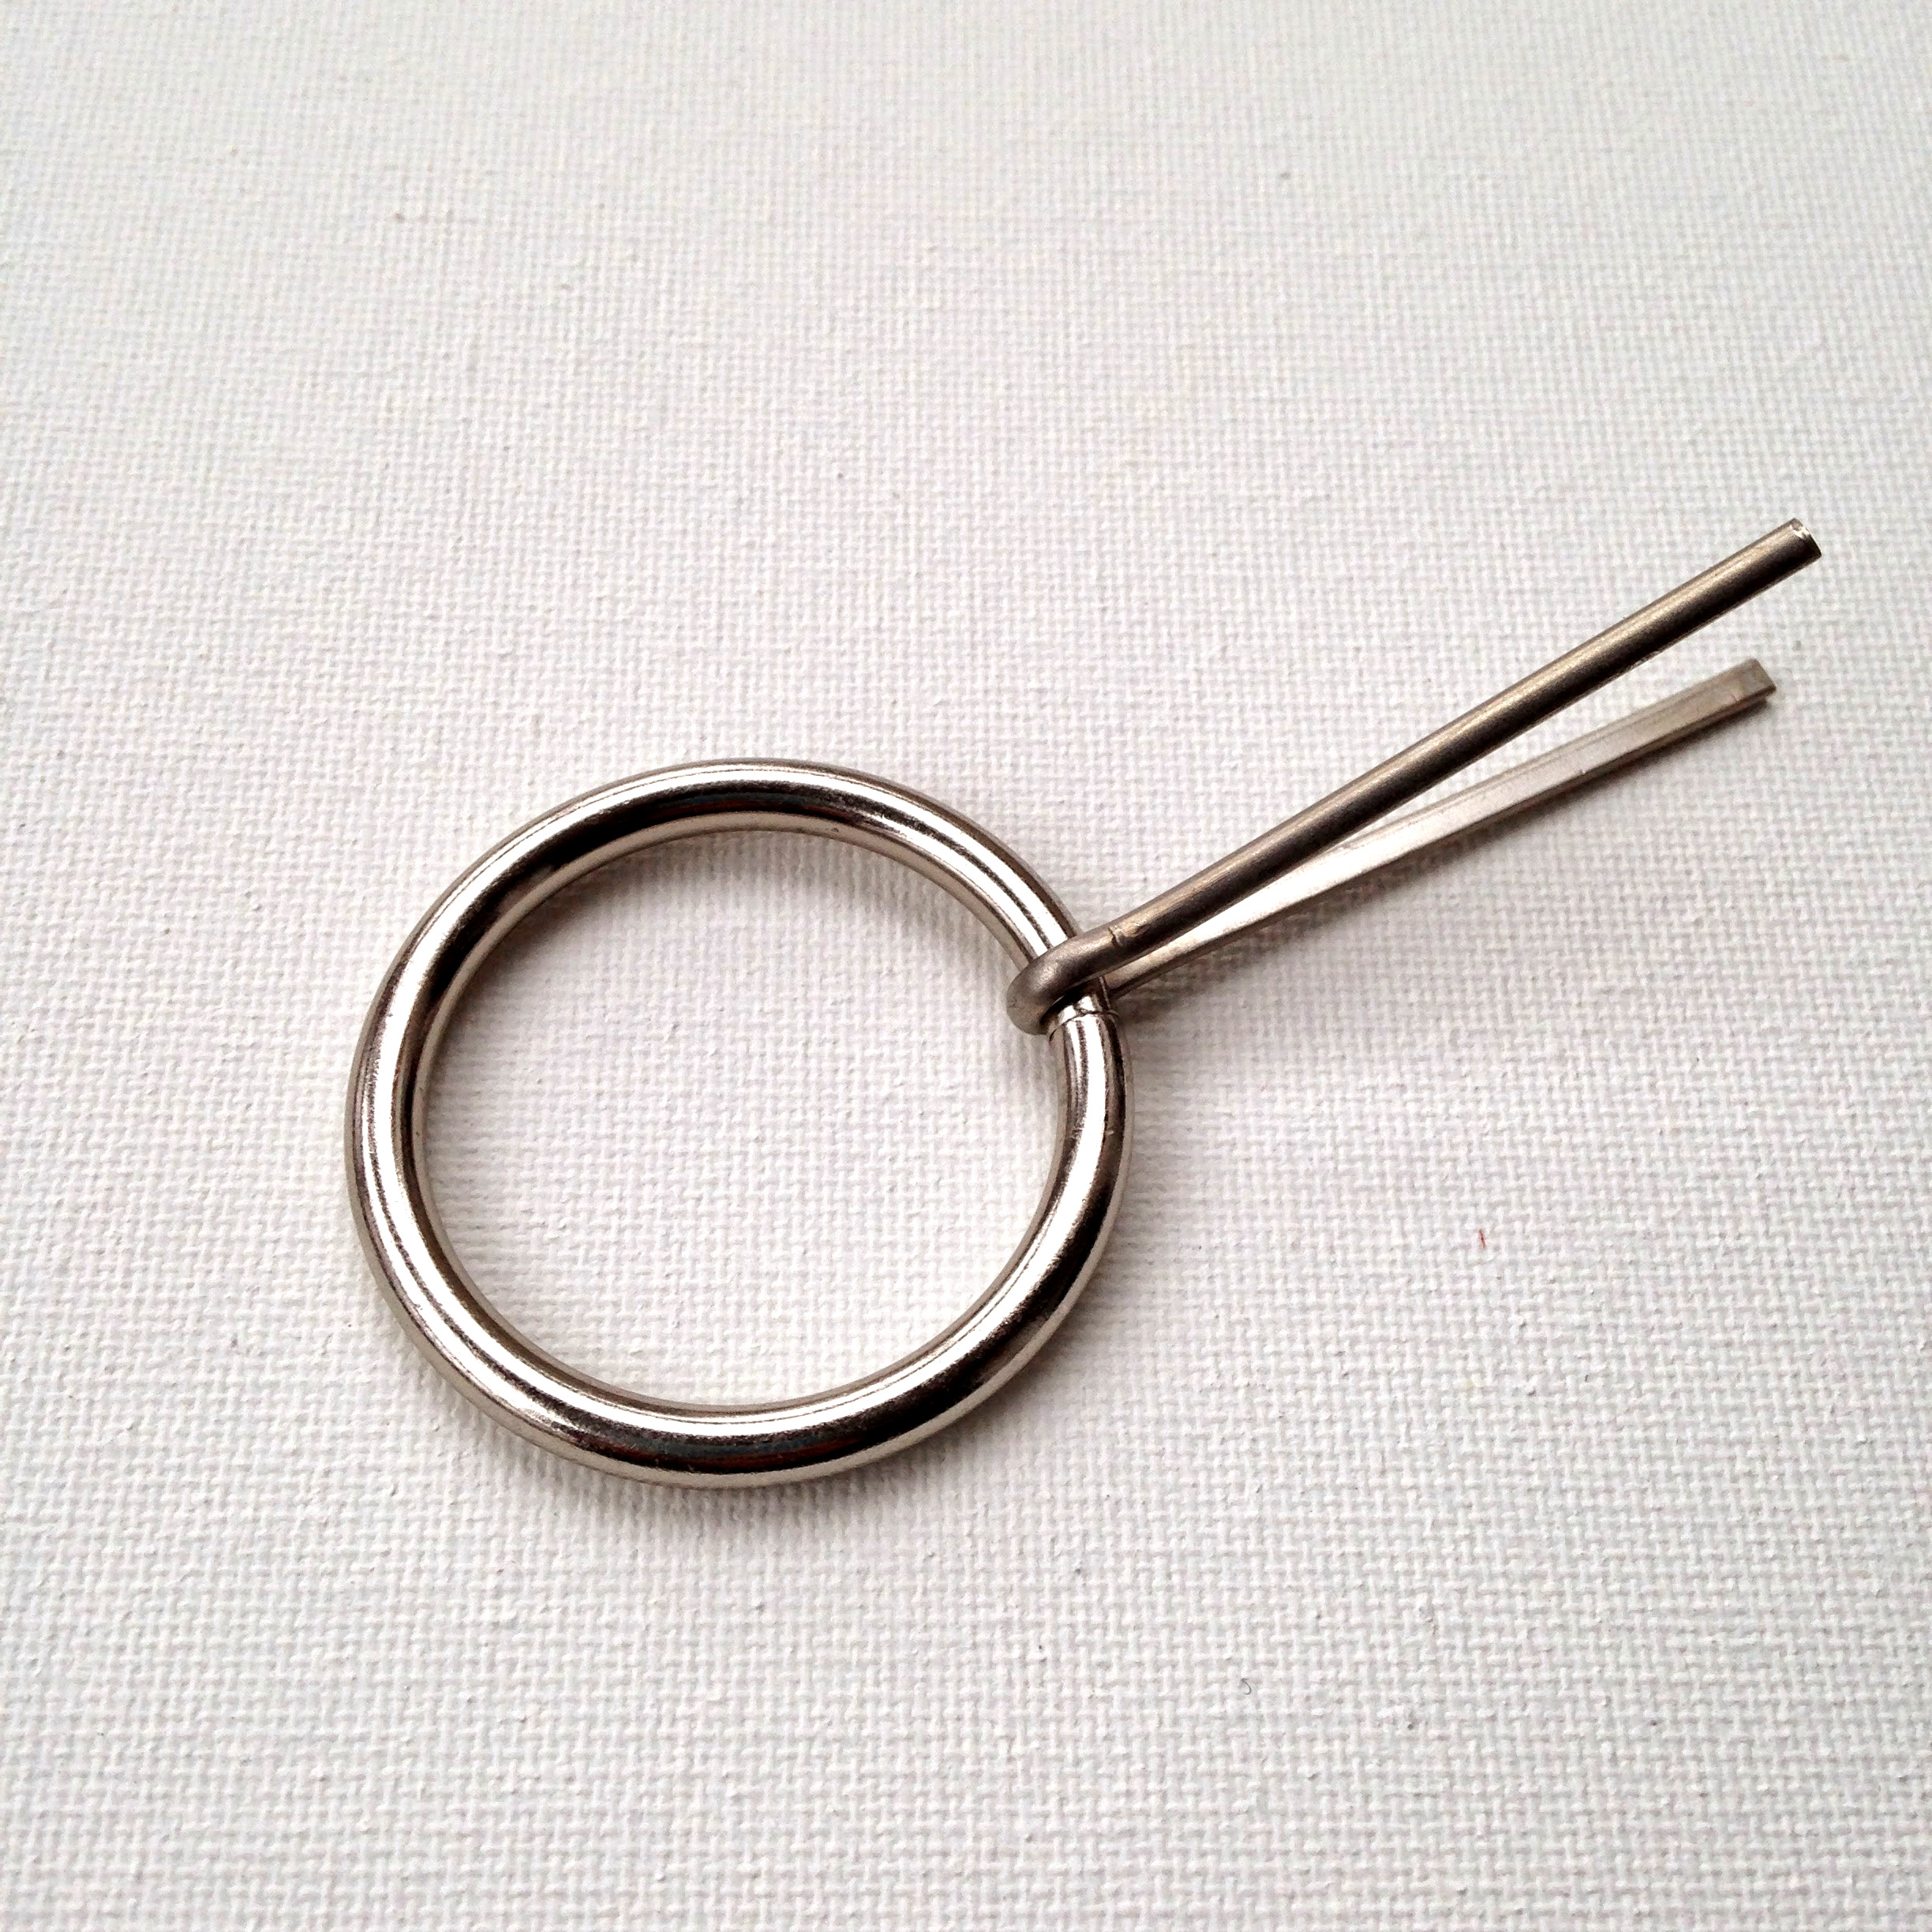
2. Much like sliding your finger through a bobby pin, slide the ring between the two prongs of the cotter pin until it reaches the eye at the end. Cotter pins are made from much tougher metal than bobby pins {which is good because you want something stronger for furniture pulls}. So this is really where you want to use pliers and put some elbow grease into it.

3. Once the ring is on, pinch the prongs of the cotter pin and slide on the finishing washer with the beveled side facing the ring.

4. Now you've got the makings of the ring pull. To secure it onto the drawer, thread the prongs through the hole in the drawer and slide the regular washer on the inside of the drawer. Then bend the ends of the cotter pin like a brad to keep the pulls in place.

Mighty fine looking for just about $2.11 a pull!

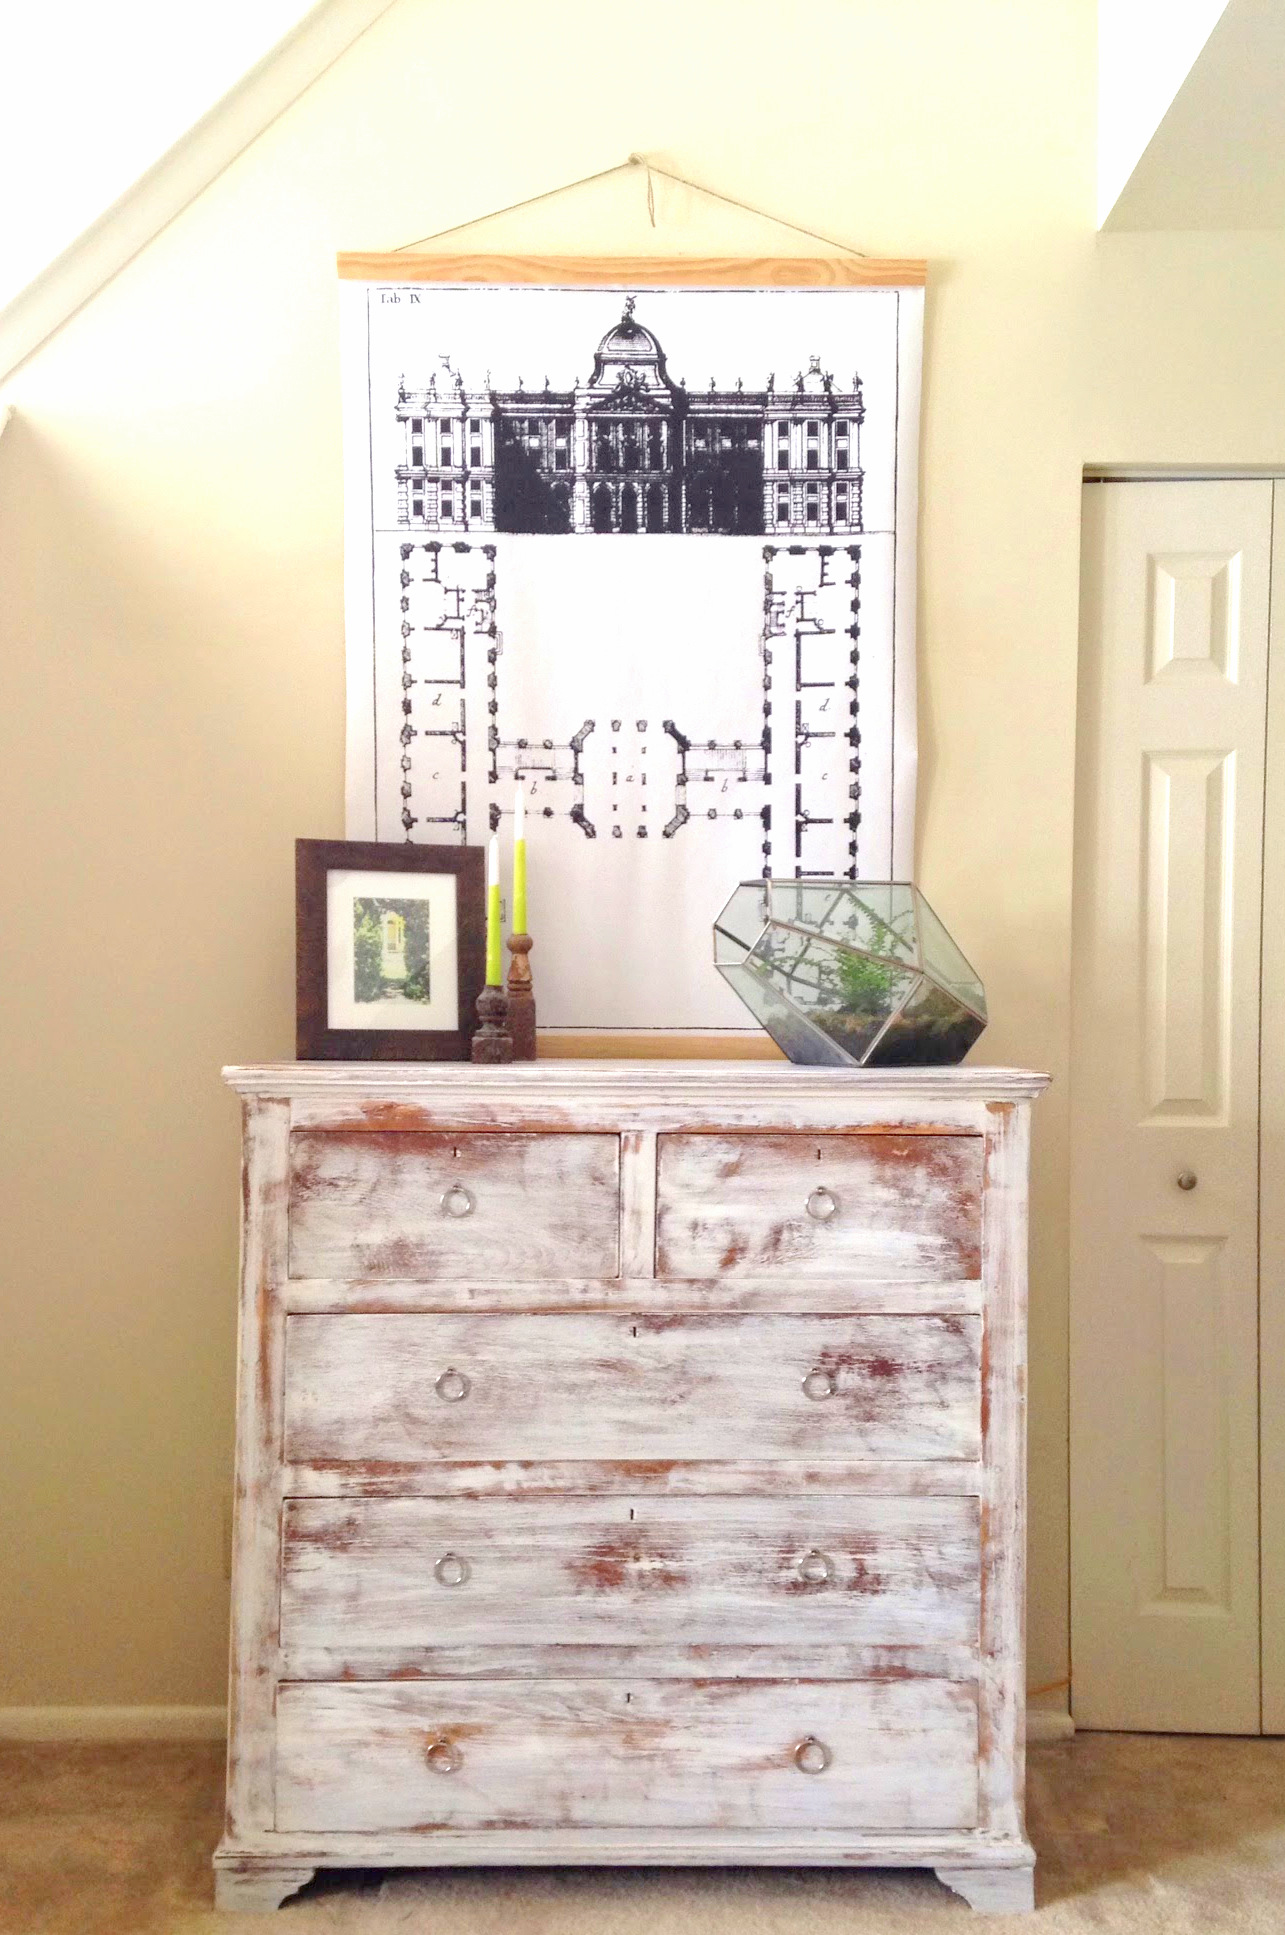
Could't help snap this pic of another of my chandelier terrariums. If you want the tutorial on how to make your own, check out this post from last spring.

The only thing I was disappointed by is that Home Depot doesn't seem to carry cotter pins or finishing washers in brass. If any of you readers have ideas on where I can get some please share!
43"W x 19.5"D x 43"H
Sold

If you are interested in this piece or a custom order like it, please email cate@stylemutthome.com.