Glamorous Teal Bamboo Dresser

As you may recall, I have been slowly releasing the transformations of three thrifted finds:

No.1: a handsome globe & stand
No.2: a bamboo-front dresser
No.3: an old silver chest

And guess what, we're due another debut!  But before I show you the finished product, let's take a moment to fully take in the starting point: 

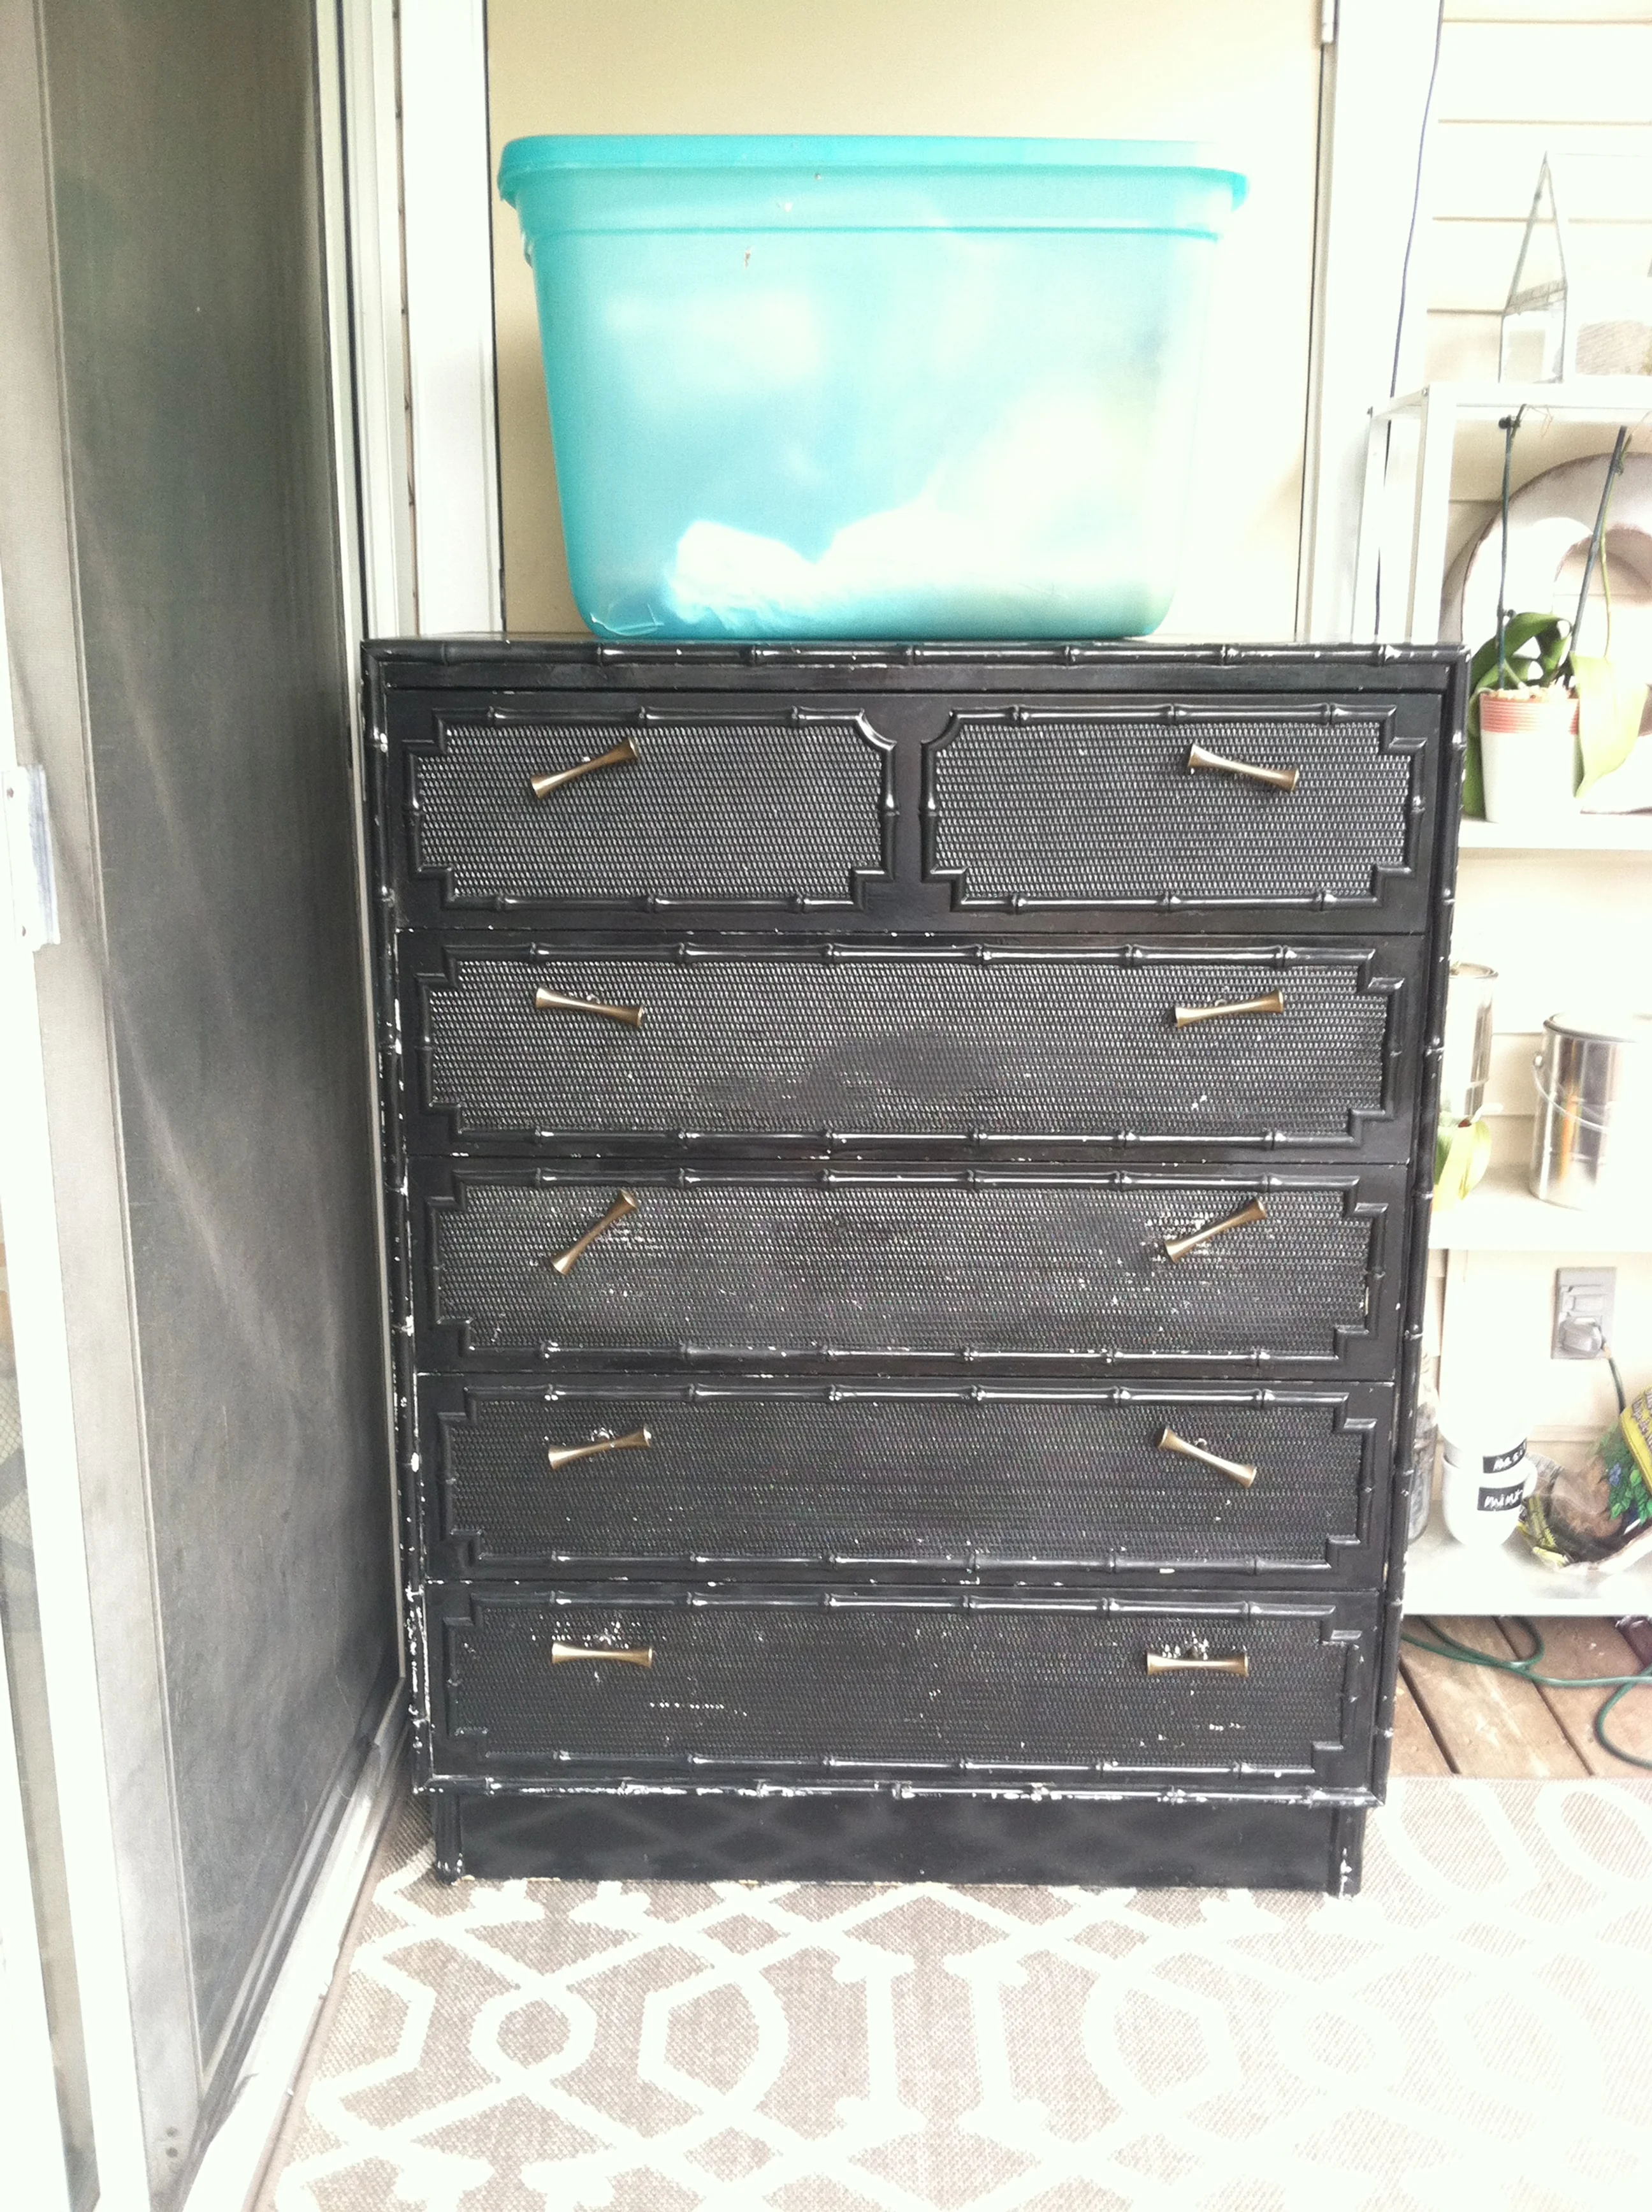
Yikes.  You can't tell in this photo really but this dresser was covered in chipping paint (revealing that this once was a white bamboo dresser) and had been refinished in hodgepodge of high gloss and flat matte black paint. Double yikes.

But that's a thing of the past.  May I present to you... drum roll please.... the Bamboo Dresser!  

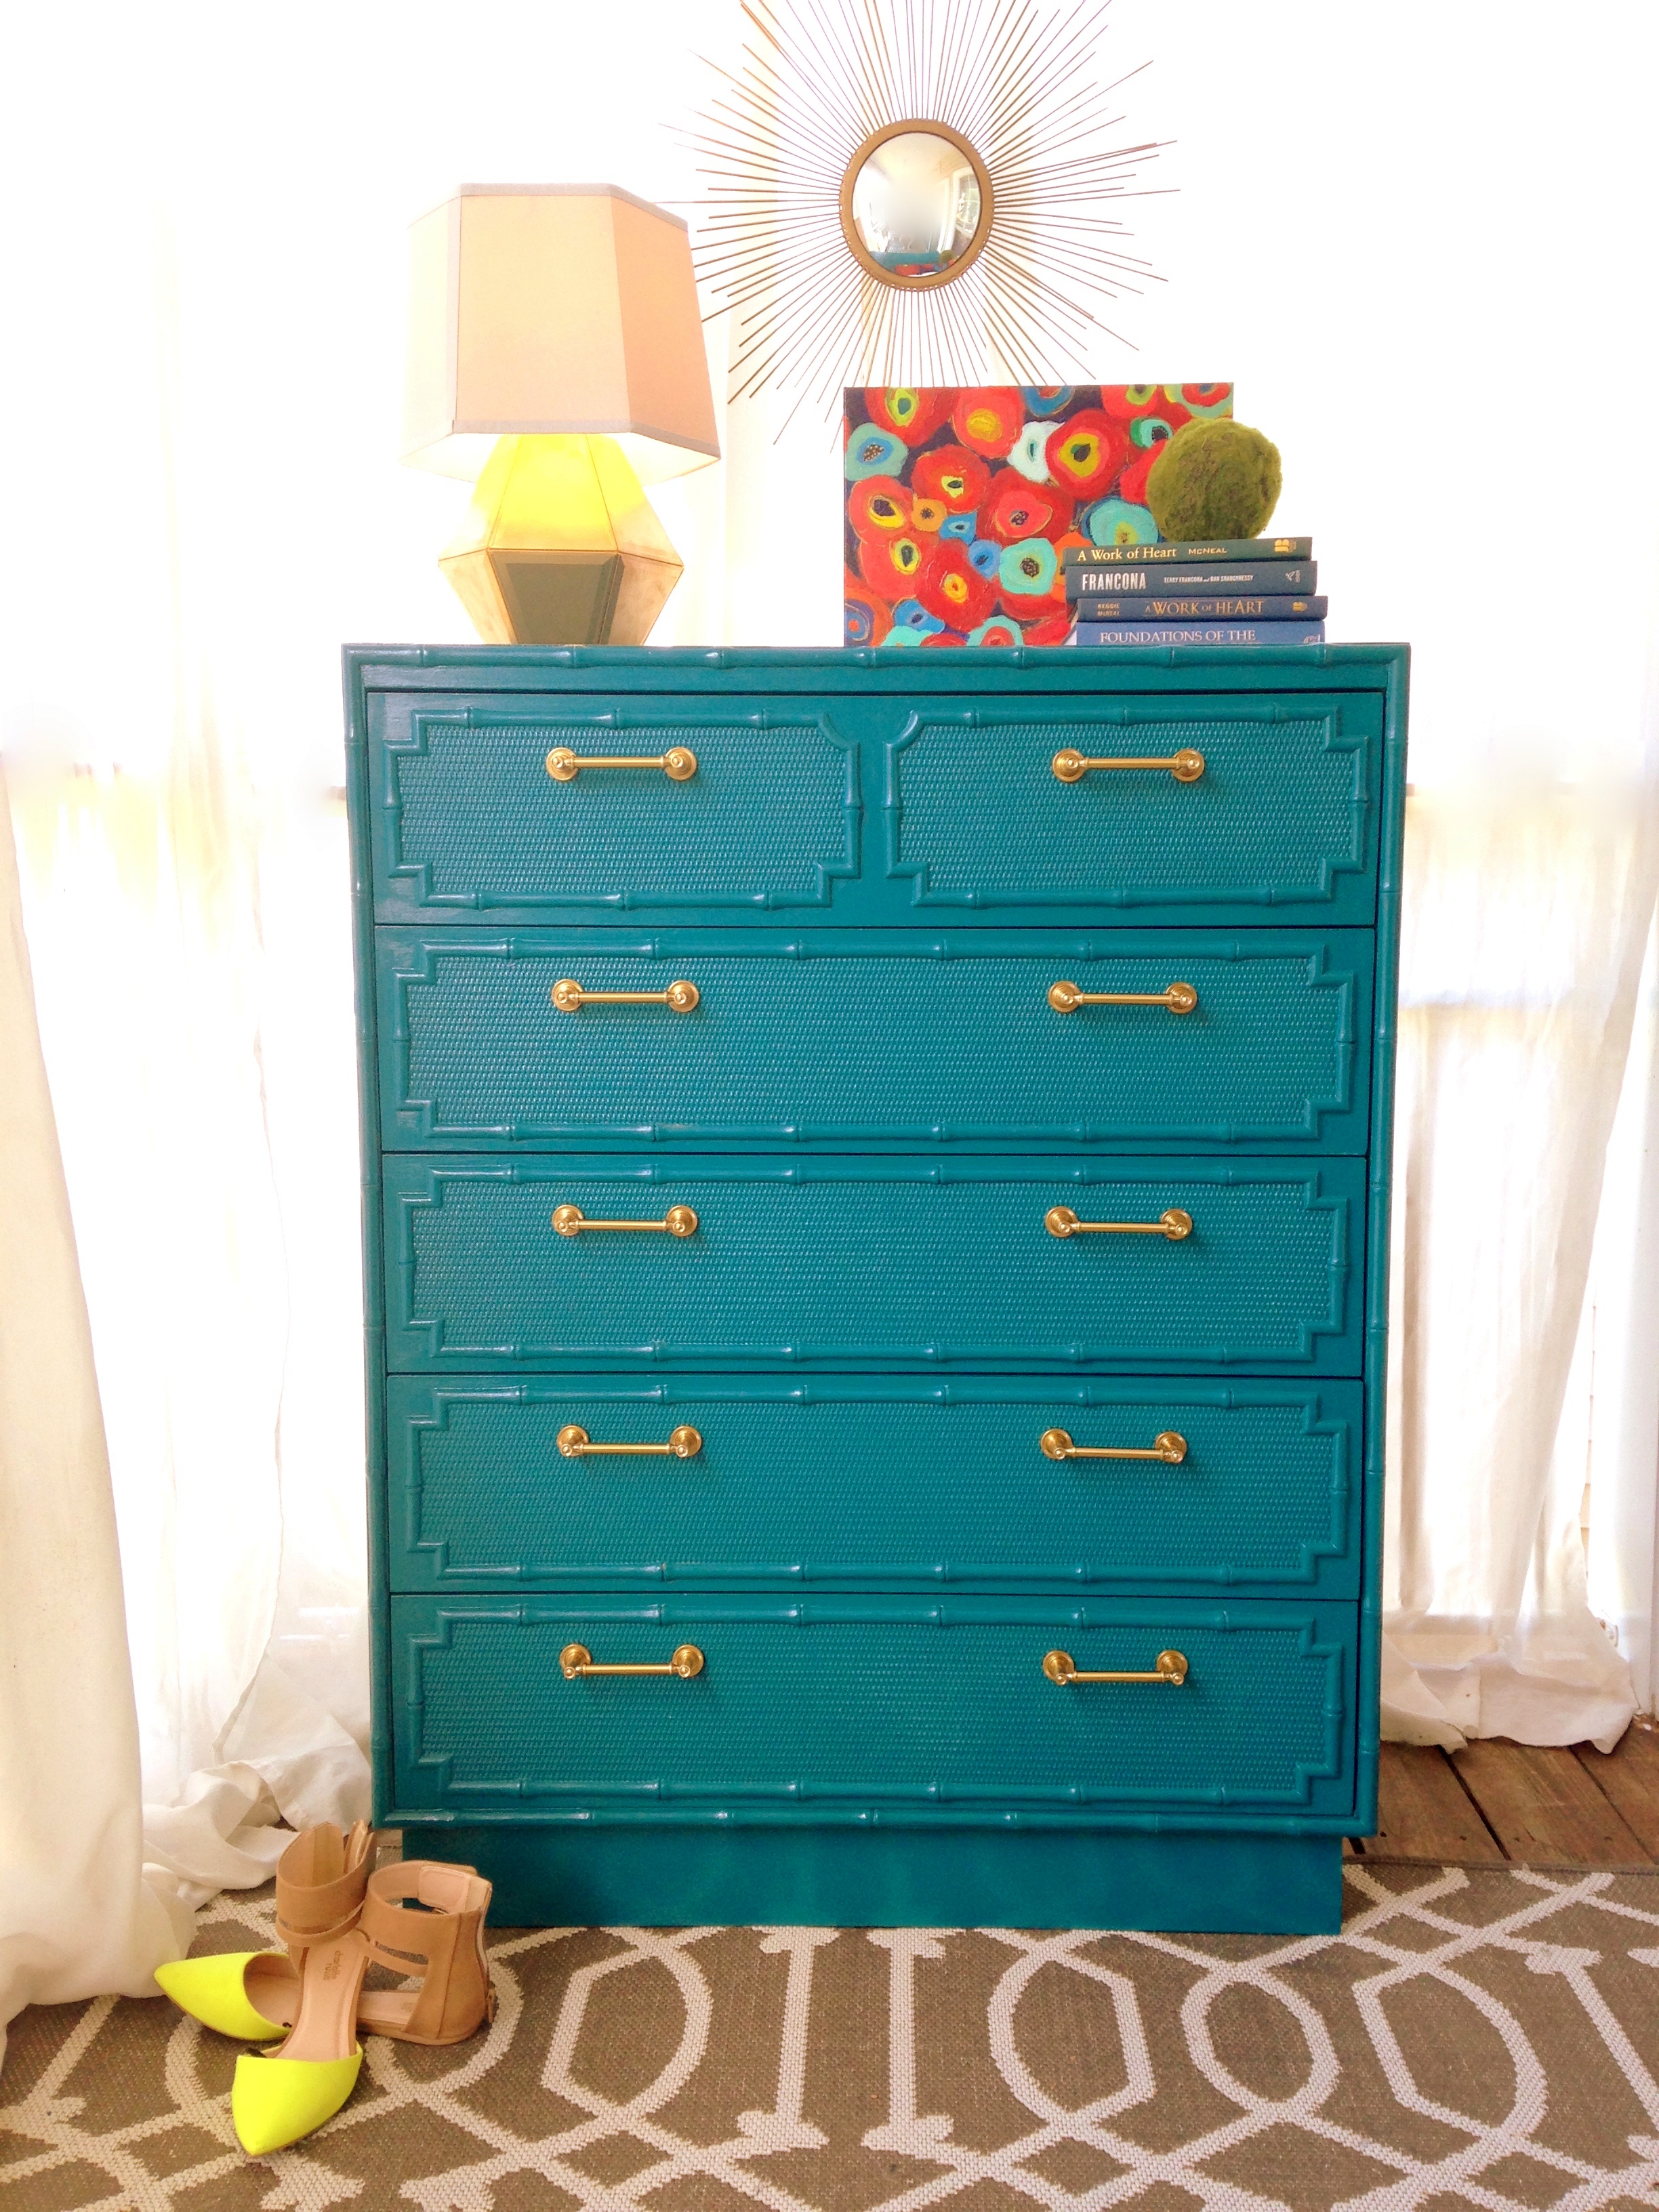
I have been DREAMING of refinishing a bamboo front dresser since Chelsea did this custom order in Emperor's Silk Red.  This piece made me realize the regal-ness of the bamboo detailing.  I knew exactly how I wanted to refinish it if I ever got my hands on one: a sophisticated dark glossy teal and the sparkle of some high-end gold hardware.  So when I found this dresser hiding behind a clothing rack at Goodwill on a furniture sale day, I jumped at the chance to cross it off my furniture flip bucket list.

IMG_0921f.jpg

For the paint I chose "Peacock Tail" by Behr.  If you are tackling a project like this at home, normally I would not suggest a latex based paint for a furniture piece unless you're ready for some extra work.  Besides having to repair a lot of the damaged areas with wood filer, I had to sand the crap out of the entire beast in order to prep the surface for paint, roll the paint on carefully to avoid brush strokes, then sand and re-roll to get the final surface texture smooth, and finally seal it with a clear coat of polyurethane to give it that high-end sheen.  


The only reason I was so willing to use up so much of my elbow grease on this paint job was because it was the perfect shade of teal for my vision.  I included the color chip from Behr's website for your reference since sometimes I find that my photographs don't always accurately reflect the color of my pieces - especially if it has a reflective quality in the finish. 

 
"Peacock Tail" by Behr

"Peacock Tail" by Behr

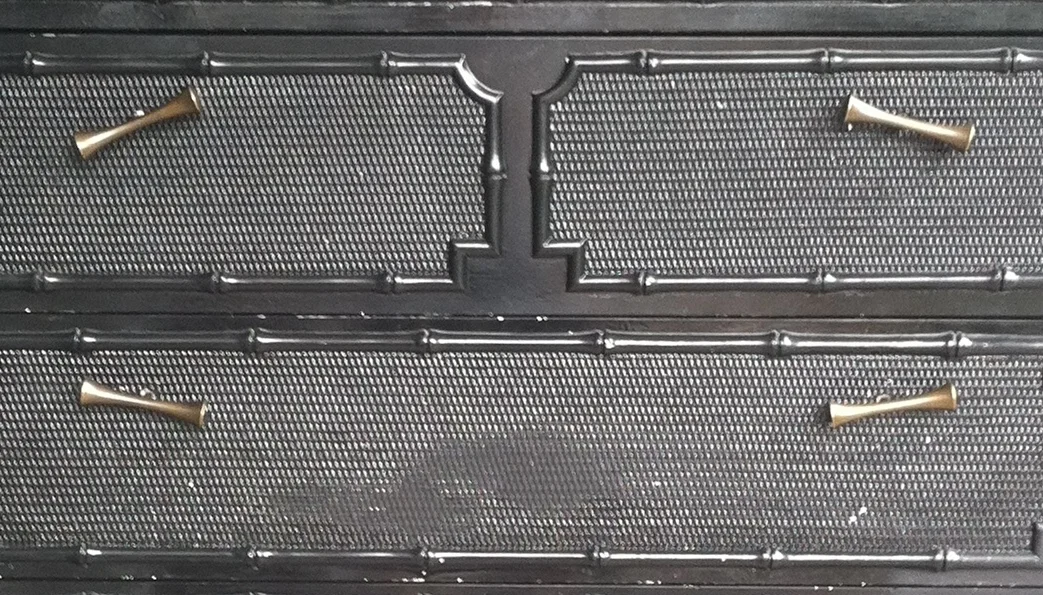
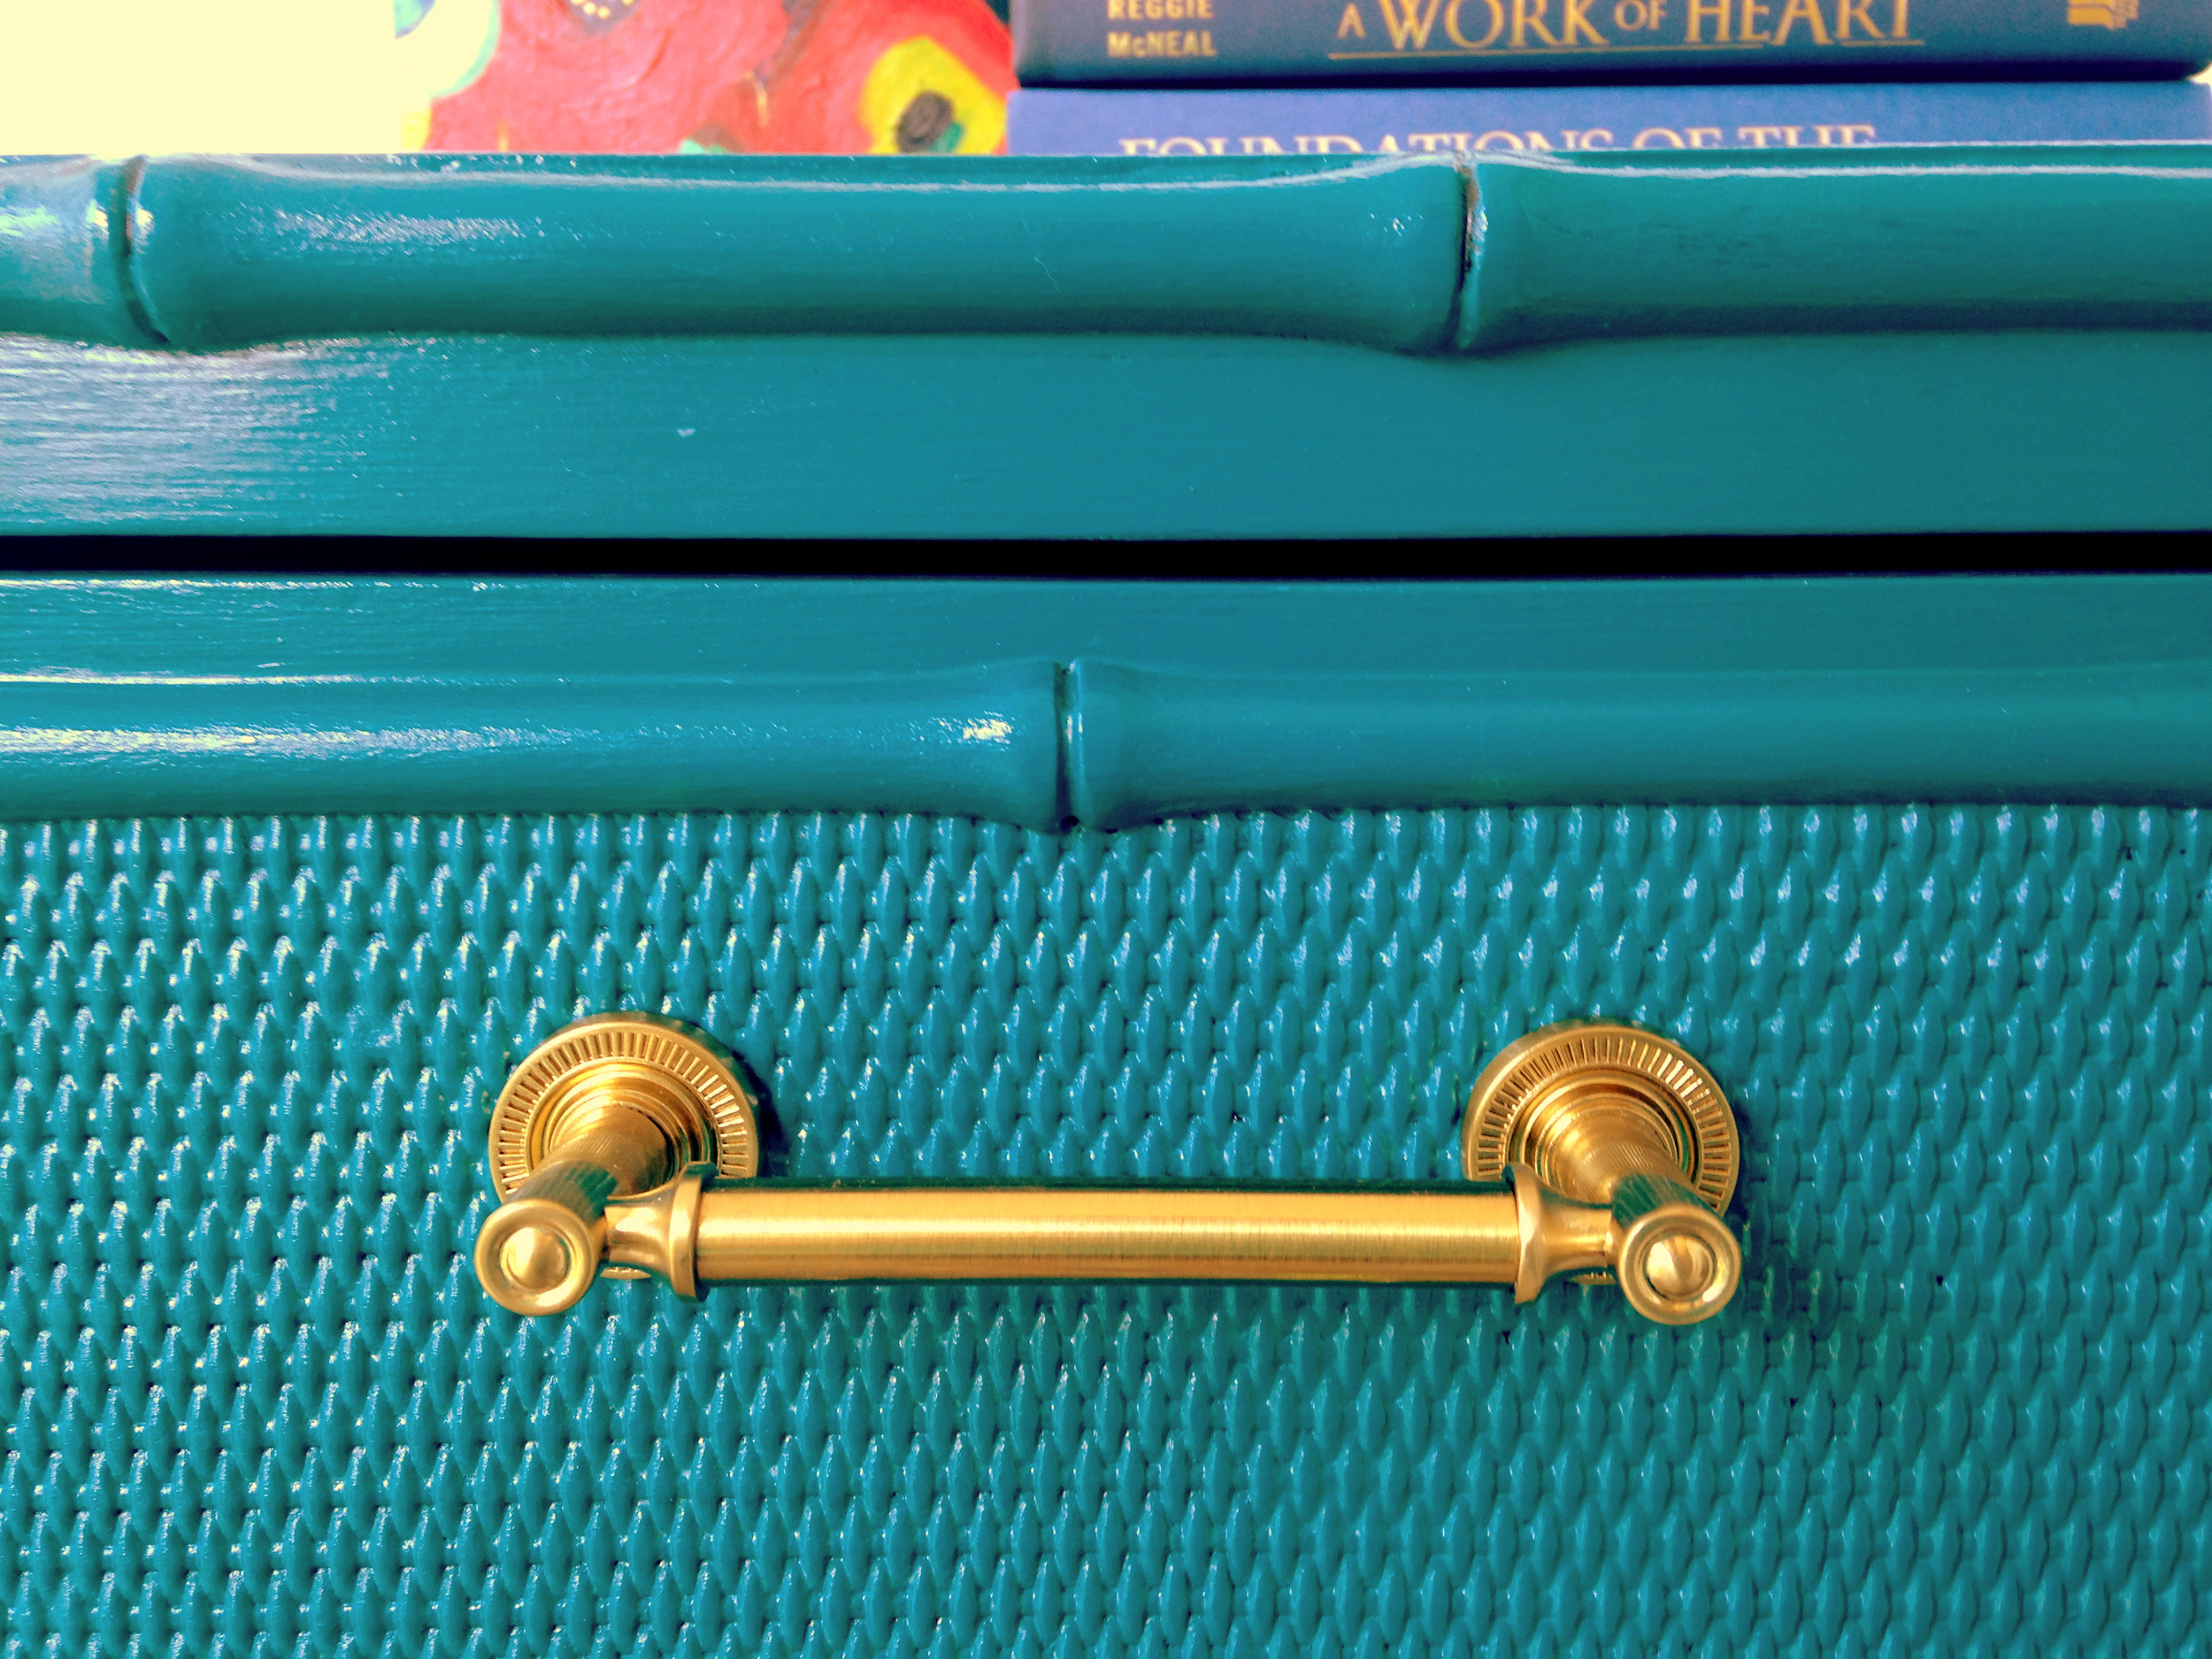
The faux bamboo trim frames out inlaid panels with a woven texture.

With the help of my geometric lamp copycat you can see how the polyurethane sealant gives the piece a hollywood-regency-style sheen.

IMG_7484-001.JPG

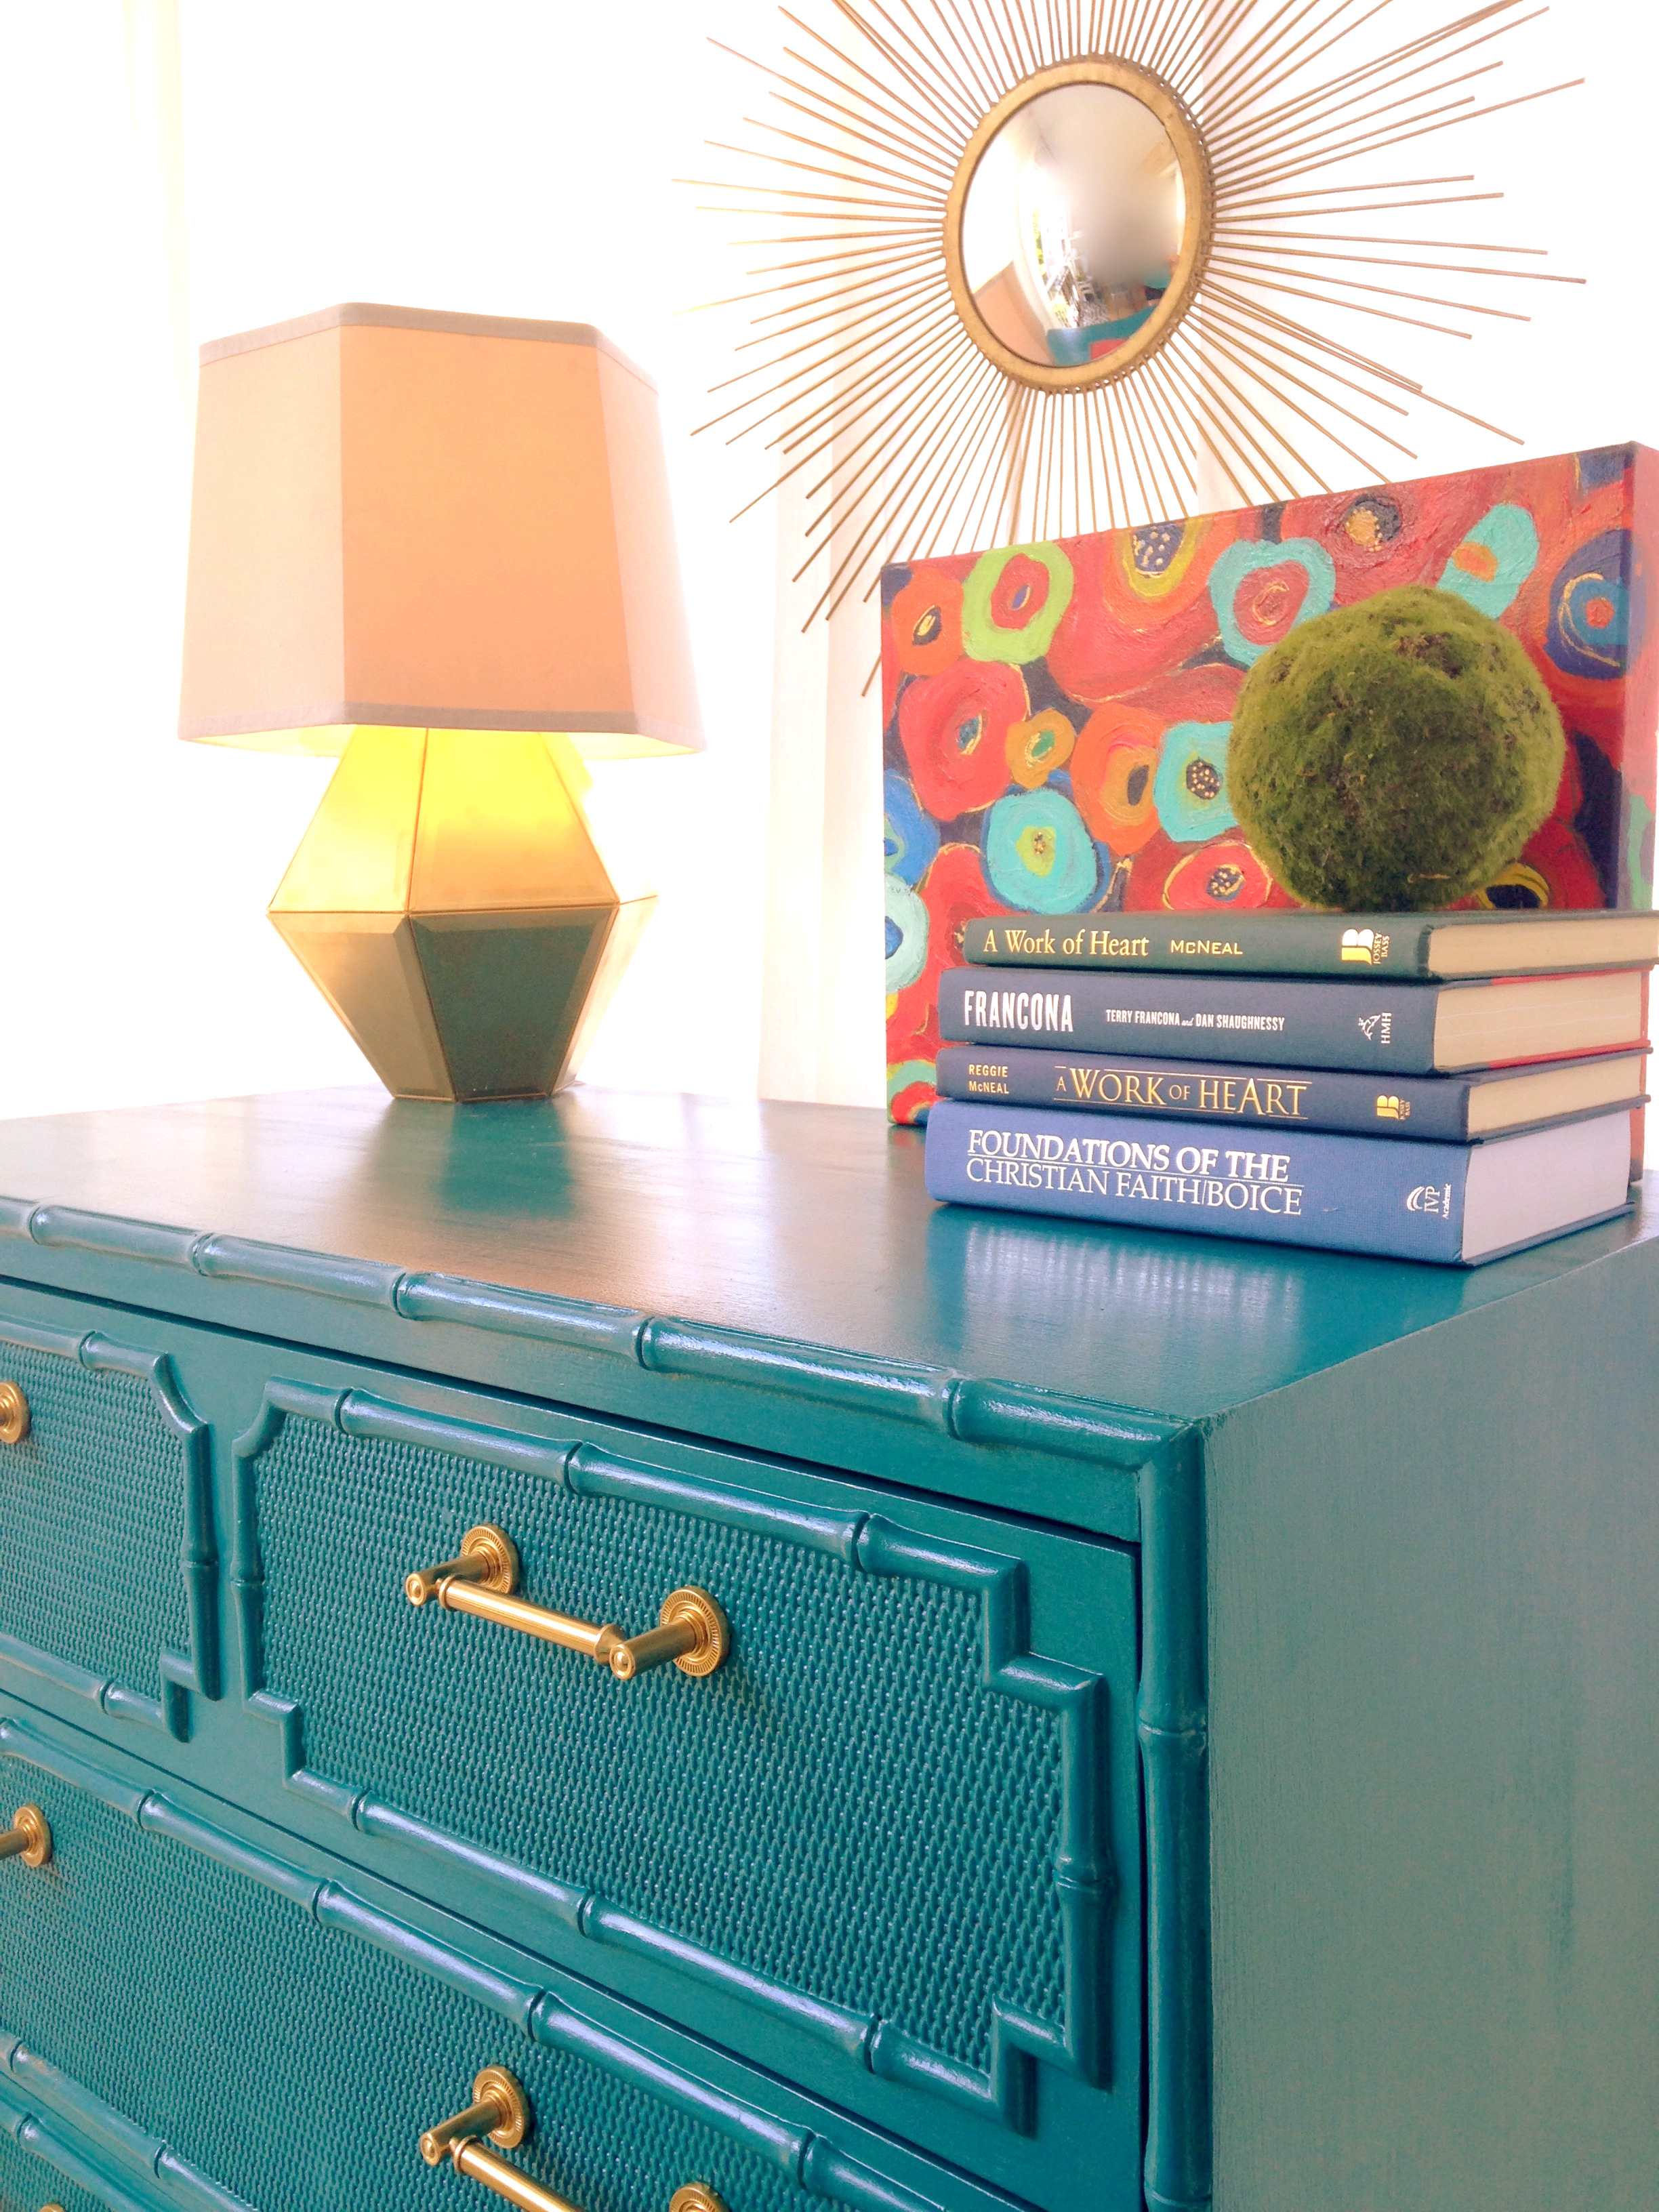
The original hardware was ok but my crow-like sensibilities wanted something... shinier.  And when I saw these brass bar pulls well, I really couldn't help myself.  They must've had to ship in from Siberia because the hardware took FOR-EV-ER to get here.  {Or maybe it just felt that way because I was too excited to wait patiently}.

Refinish a bamboo dresser in teal and gold... CHECK!

Available for Sale
36"W x 19"D x 46"H
SOLD

If you are interested in this piece or a custom order like it, please email cate@stylemutthome.com.

 
Receive Posts via Email

P.S. - You can now sign up to receive our latest posts directly to your inbox - just click the button and get our next post delivered to your electronic door step!

Mirrored Accent Table

Woot!  Can you believe we have the new site ready for use so quickly?  I can't!  At our strategic meeting last month, we put together a temporary timeline for this beast of a website and predicted we wouldn't really have things operational until closer to the holidays.  God has been so good to us in the process: working out kinks, giving us fresh ideas, keeping us excited even after HOURS of staring at the comp screen making ridiculously teedious edits.  But hey, God created the world in 6 days right?  Guess He decided to help us make a new website in 20.  Thanks Big G ;)

So let's get the StyleMutt party started!!!!!!!!!!!!!!!!!!!!!!!!!!!!!!!!!!!!!!!!!

I am so happy to have such a cute little furniture rehab project to debut to you today.  But I am even MORE tickled to tell you the story of how I ended up with this little table in the first place:

 I was trolling Craigslist on my day off {as per usual} and typed in the search bar: mirror.  I was looking for something that could work in a client's space at the time and while I was thumbing through picture after picture of wall hanging mirrors, I was surprise to stumble across one lone picture of an accent table.  It popped into my search feed because the seller also has a mirror and another table for sale, but the first picture of this table was so cute I just had to jump on the chance to snag this little gem.   When I reached out to seller, I was pleasantly to get an email back saying "Are you the Cate from Chelsea's Garage who did the geometric lamp copycat post?" Needless-to-say I was shocked!  I have never been "recognized" for something I wrote before.  Turns out the seller was a friend from Chelsea's church and an absolutely sweetie pie!  Christine: if I didn't make it clear when I was picking up the table, you totally made my day ;)

I must have still had mirrors on the brain on the drive home because I was struck with inspiration!  Replace the wooden shelf inserts with round mirrors?  Challenge accepted.  This whole thing was divinely orchestrated right?!

I measured the diameter and felt so lucky - all I needed was to track down a 14" round mirror and whatdoyaknow - my local Michael's had some beveled ones.  Even better!  

Now sometimes, when working on a project, you have to chose to do it the easy way or the hard way.  When I brought the table home, I thought I wouldn't have to choose slash that it would be breeze to unscrew the wood and replace it with round mirrors.  HA.  Nothing is ever that easy. 

Alrighty folks - I hit my first snag.  The one thing that I did NOT account for when measuring is that the wood shelves had 4 notches cut into them to allow them to sit snug around the metal legs.  In order for the mirrors to fit, they too would need notches.  So I found myself asking, how in the world do you cut a mirror?!?!  This was out of my area of expertise.  Either I abandon the pursuit of glamour and just refinish the wood, or I quickly educate myself in what was bound to be some sort of complicated laser cutting process with elusively expensive special tools that I would have to obtain somehow...

Then I found this fabulous mirror/glass cutting tutorial from View Along the Way {a great little blog Chelsea has often mentioned to me} and learned that about $13 would buy me all I needed to complete the project!  The answer is actually that toothbrush-looking thing {more technically known as a "cutter"} - turns out you just roll the cutting wheel on the tip of the cutter along the edges you want to cut. 

Since I was cutting notches into the mirror, I did have to adapt the tutorial a little.  I was able to break the notch off but not with very clean lines.  Either this is due to the notching itself or perhaps the beveled edge made it harder to cut clean.  Good news is, the brass frame on the table hides any imperfections and protects any fingers from jagged edges.  I believe the cutting tool simply allowed me to break off a piece {albeit uncleanly} without damaging the whole mirror.

Now for you folks trying this at home, full disclosure - I broke TWO mirrors trying to make this table happen.  I hope my lessons learned with spare you some money:

1.  Score the line WELL before breaking it off.  This will help you to only break what you want and not send spider cracks beyond your measured line.
2.  Measure TWICE ("duh" she says as she bonks her hand on her forehead).  On one of my discarded mirrors I cut the notch too deep and the edge was still visible when inlaid into the metal frame.  Whoops.
3.  FILE the edges.  This will relieve stress on the jagged edge and prep the surface for any future encounters with fingers.  I used a fine grit sandpaper and went slowly - it seemed to do the trick for me.

And the results speak for themselves: 

IMG_0190.jpg

Even in the background, he's still the star of the show. 

And no post is complete without a Thor montage ;)

  Out like a light

Piece now available for sale
15"W x 15"D x 22"H
$175
Please contact cate@stylemutthome.com if interested


This post is dedicated to the two mirrors that laid down its life for the making of this table.


Updates on StyleMutt!

Hey gang! It's been a little while, eh?! We sure have missed connecting with you here via Chelsea's Garage over the last few weeks but are crazy excited about the progress we're making on our new site, StyleMutt! If you're visiting for the first time, please read this; it explains everything about why Chelsea's Garage is soon retiring and a brand new site, StyleMutt, will be taking it's place! We are a lot further along than we thought we'd be at mid-September and anticipate StyleMutt being ready to launch by October/November! So, to help get everyone pumped up for the cool new blog on the block, we thought we'd share a few elements of the new site that have us dancin' with joy! 


1) We've got a logo! What do ya think?!


2) And a short n' sweet tagline to explain who we are: "A home decor resource for all breeds of style"

3) A few favorite components:

-Favorite Supplies -This is where we'll list our favorite tried and true go-to supplies to make it easier to plan ahead for upcoming projects.
-Spaces - A page where we'll share not only our favorite rooms in our own homes, but some pretty doggone inspiring rooms that you guys have to share, too!
-Repurposed - Along with an organized selection of DIY project tutorials, we'll also have a list of ideas that simply turn one thing into something totally different and way cooler.

Since the basic bones of StyleMutt are nearly complete, we will likely launch the site before all of the features are complete. Then, over the first few months of existence we'll debut cool new elements as they're finalized!

As we begin closing the door to Chelsea's Garage and start this awesome new adventure with StyleMutt, we are so grateful for your encouragement and shared excitement! Just like Chelsea's Garage, StyleMutt will be nothing without you! A few more weeks of working on the website and we should be ready to announce the big launch! Thank you so much for your patience and hanging with us while we make this transition.

Thank you for stopping by!

~Chelsea & Cate

This post was published under Chelsea's Garage, now affectionately known as StyleMutt.