DIY - Rustic Rope Footstool

Hi friends! I'm back with another DIY project today that I really enjoyed seeing come together. There are many reasons to take a project on yourself versus buy new or hire someone to do for you. Sometimes budget is the driving force to DIY, sometimes it's an itch for creativity, and sometimes it's simply seeing something inspiring and wanting to make it your own. Inspiration was the reason behind today's project!

Long story short, I noticed a particular footstool at my parents' beautiful home while visiting for dinner the other week with my family. It's quite a simple stool, but the rustic effect it had in their living room really caught my eye. I love seeing natural elements mixed into home decor, and this particular footstool is such a perfect example of something small that creates that natural bit of warmth.

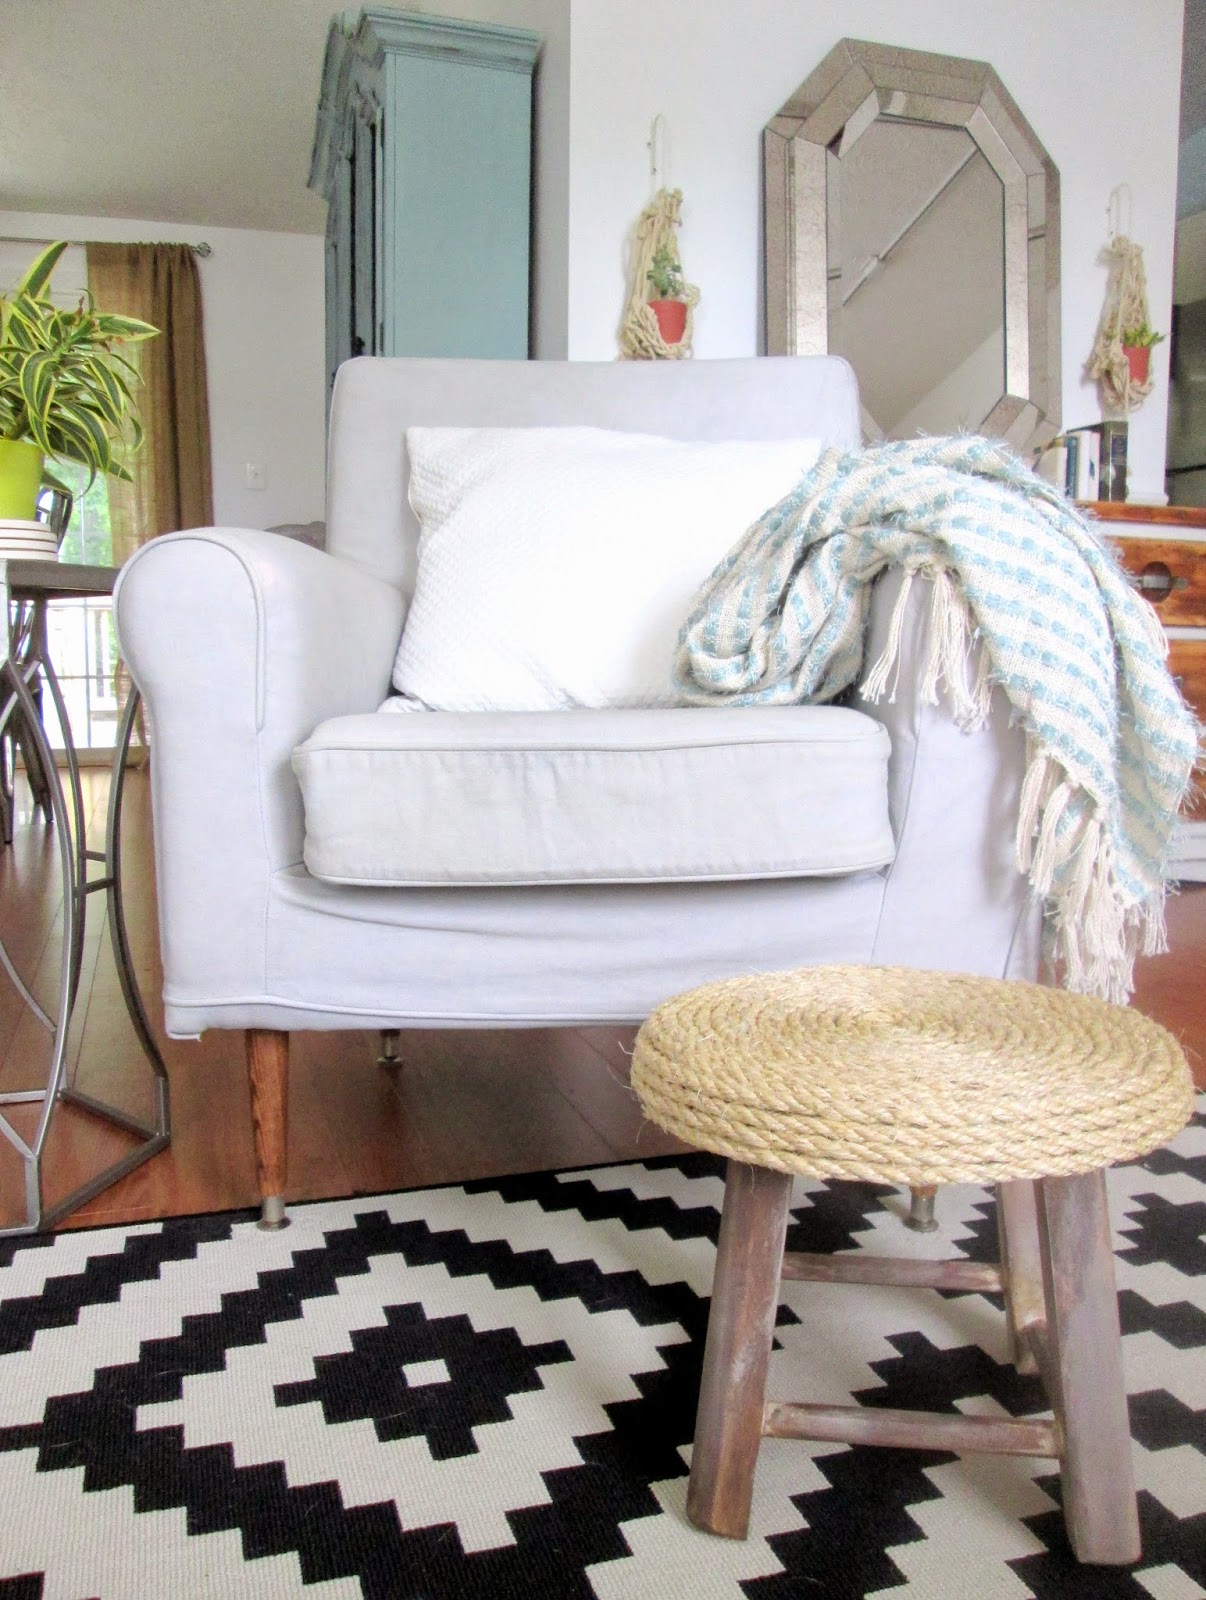
I couldn't help but snap a photo:

And after a little fun, here's mine:

Want to see what it started as?

Not a bad deal, eh?! Let me show you how!

Supplies needed:
Stool, preferably unpainted
Rope
Hot glue gun
Electric saw, (I used a circular saw)
Sandpaper, (120 grit)
Stain, (I used Ash)
White paint

(To note: I only included the price of the stool, $5, and the price of the rope, $8, in the overall cost of this project, since the rest of the supplies are either common household items, (hot glue gun, sandpaper), optional, (stain and white paint), or easy to borrow, (the saw).

The Low-down

1. Measure each leg accurately, (I used 9" from the seat), and mark where you want to make your cuts, then cut. Be sure to sand the legs at the cuts so they're smooth. 120 grit sandpaper would be ideal.

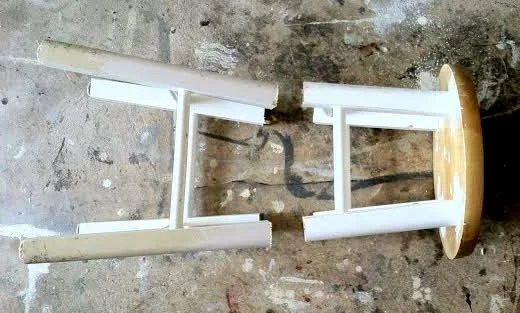
 At this point, because my legs were painted, I had to remove the paint. If I wanted to remove every bit of it I would have used Citistrip, but because I was going for a salvaged look, I just sanded it off and left bits of the paint here and there.

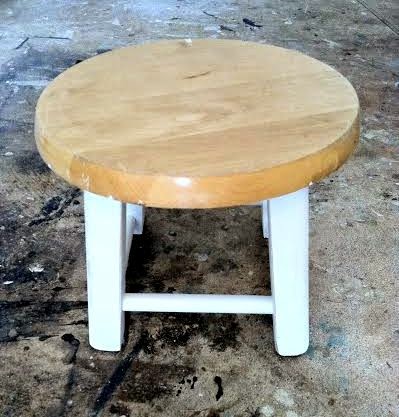
2. Stain the legs using a clean cloth or staining sponge

3. Dry brush a bit of white paint on the legs once the stain is dry, (which should only take a few minutes). Dry brushing gives a lovely, multi-dimensional effect to a piece so it isn't so flat, but it takes a smidgen of practice. First, I set the can of paint aside and use just the lid. Dab the brush into the paint collected on the lid.

Then wipe it off on a clean cloth, and brush quickly over your surface back and forth with the grain of the wood.

4. Now it's time to rope your seat. Start in the very middle, (best to measure so it's accurate), and stick a big glob of hot glue in that spot. Place the rope firmly into the glue and start gluing around a few inches at a time, followed by placing the rope over the glue. The middle is the toughest spot to get started, but once you get a few rows in, it gets much easier to handle the glue and the rope.

Finished product!

That's it! This stool would make an adorable child's step stool, plant base, or use it just as a footstool! You decide, that's the best part. I actually have a second one of these which I plan to refinish a little differently. Stay tuned! If you try this or any other projects you've found inspiring on Chelsea's Garage please tag them as #chelseasgarage on Instagram or share on Facebook. We love seeing your handiwork! In fact, check out this Swiss Cross rug, (inspired from this post), that a dear reader, Beth, made for her classroom:

So awesome! Thank you so much for sharing on Facebook, Beth - it's perfect in your room. Best of luck in the new school year!

Thank you all for stopping by!

~Chelsea

This post was published under Chelsea's Garage, now affectionately known as StyleMutt.

DIY - Hanging Leather Planter {from a tote!}

Whew! Well we just sailed to Friday, didn't we here. I thought I'd have some more goodness to show you this week but wouldn't you know it, in a span of 5 days we lost AC, hot water, and our washing machine was down. All issues were quickly resolved within a few days and I was so reminded of how extremely fortunate we are that those were our challenges this week. Needless to say, these hiccups put a hold on some of the week's to-do's, (a familiar story to all, I'm sure).

But, I was able to finish one sweet thing to share with you before the weekend!

Hanging Leather Planter

This was one of those quick satisfaction projects. The kind that doesn't suck a whole lot of time or energy from you, but the result is exactly what you had hoped and pictured. Those are so necessary sometimes, yes? I found this camel leather tote last week at a thrift store for less than $8.

If you're into accessories this would be an awesome find! I used to be an accessories girl. Then I had a bunch of kids and they became my accessories... Funny how that happens! I still know a good deal on leather when I see it, though.

I actually bought this tote just to use it for it's leather. The hanging planter is just the first project to come from it, but I've got another that I'm looking forward to sharing soon as well! The first thing I did was lay the tote front-side-down, (with that cute pocket facing the floor), and stick my plant right in the middle of the backside. I needed to make sure that what I cut from the tote would be enough to securely hold my plant, which is on the larger side. Then I set the plant aside, took out a strong pair of scissors, and cut along the perimeter of the tote. I removed and relocated the shoulder straps and the braided pieces along the sides to use for hanging the piece. That's it folks!

The last piece was how to hang my planter. I chose a brushed nickel closet rod hook from Home Depot for $6 because I wanted the plant to hang away from the wall a bit, but there are of course other options depending on where and how you want to see your plant hanging, (from the ceiling, closer to the wall, etc).

If you're fired up to try this yourself, just know that the process and end result will look a little different depending on the bag you use. That's the fun of it, though! I would recommend finding a bag with long-ish shoulder straps so you can cut them down to use for hanging the piece. This is just a simple idea with which to expand on and make it your own! If you happen to try it out please hashtag #chelseasgarage on Instagram or feel free to share photos on Facebook! We LOVE seeing your handiwork!

Thank you all for stopping by and have a splendid weekend!

~Chelsea

This post was published under Chelsea's Garage, now affectionately known as StyleMutt.

Nursery Themes Using Engineer Prints

Why hello there!  As some of you may already know, last month I shared how to make a faux pull-down chart from an engineer print.  Well since then it has become increasingly more obvious {mainly to my husband because they're multiplying in our home} that I am OBSESSED.  I mean, have you noticed how I've been sneaking them in to all my post pictures lately...?

Like here

annnnnnd couldn't help myself here either

Can't stop won't stop.  I simply must share some more...

So because they give such a strong nod to those vintage school house pull-down charts, I can't help but feel they would be so cute for kids!  You can so easily 

do something custom, cute, cheap, and even educational for any baby's nursery theme {not that Caleb and I are looking for ideas - just because we're married and I mentioned the word baby doesn't make me pregnant people.}  ;)

I mean, couldn't you see this vintage car print in a boys room?

Source:  The Graphics Fairy

How about this sweet alphabet print?

Source: Just Something I Made

Source: Just Something I Made

Are you seeing the potential yet?  Maybe this will help...

This hot air balloon print could take any nursery Up Up and Away...

How about a  sailing ship for your Little Sailor...

Or a noble stag to watch over your Woodland Adventurer...

The possibilities are endless!  I think that last one is my fave...  

Have another great idea for these cheap black & white engineer prints?  We'd love to see how you do it!  Tag us in your projects #ChelseasGarage!

Happy Wednesday ya'll,

~ Cate

This post was published under Chelsea's Garage, now affectionately known as StyleMutt.