DIY headboard {With coffee filters!}

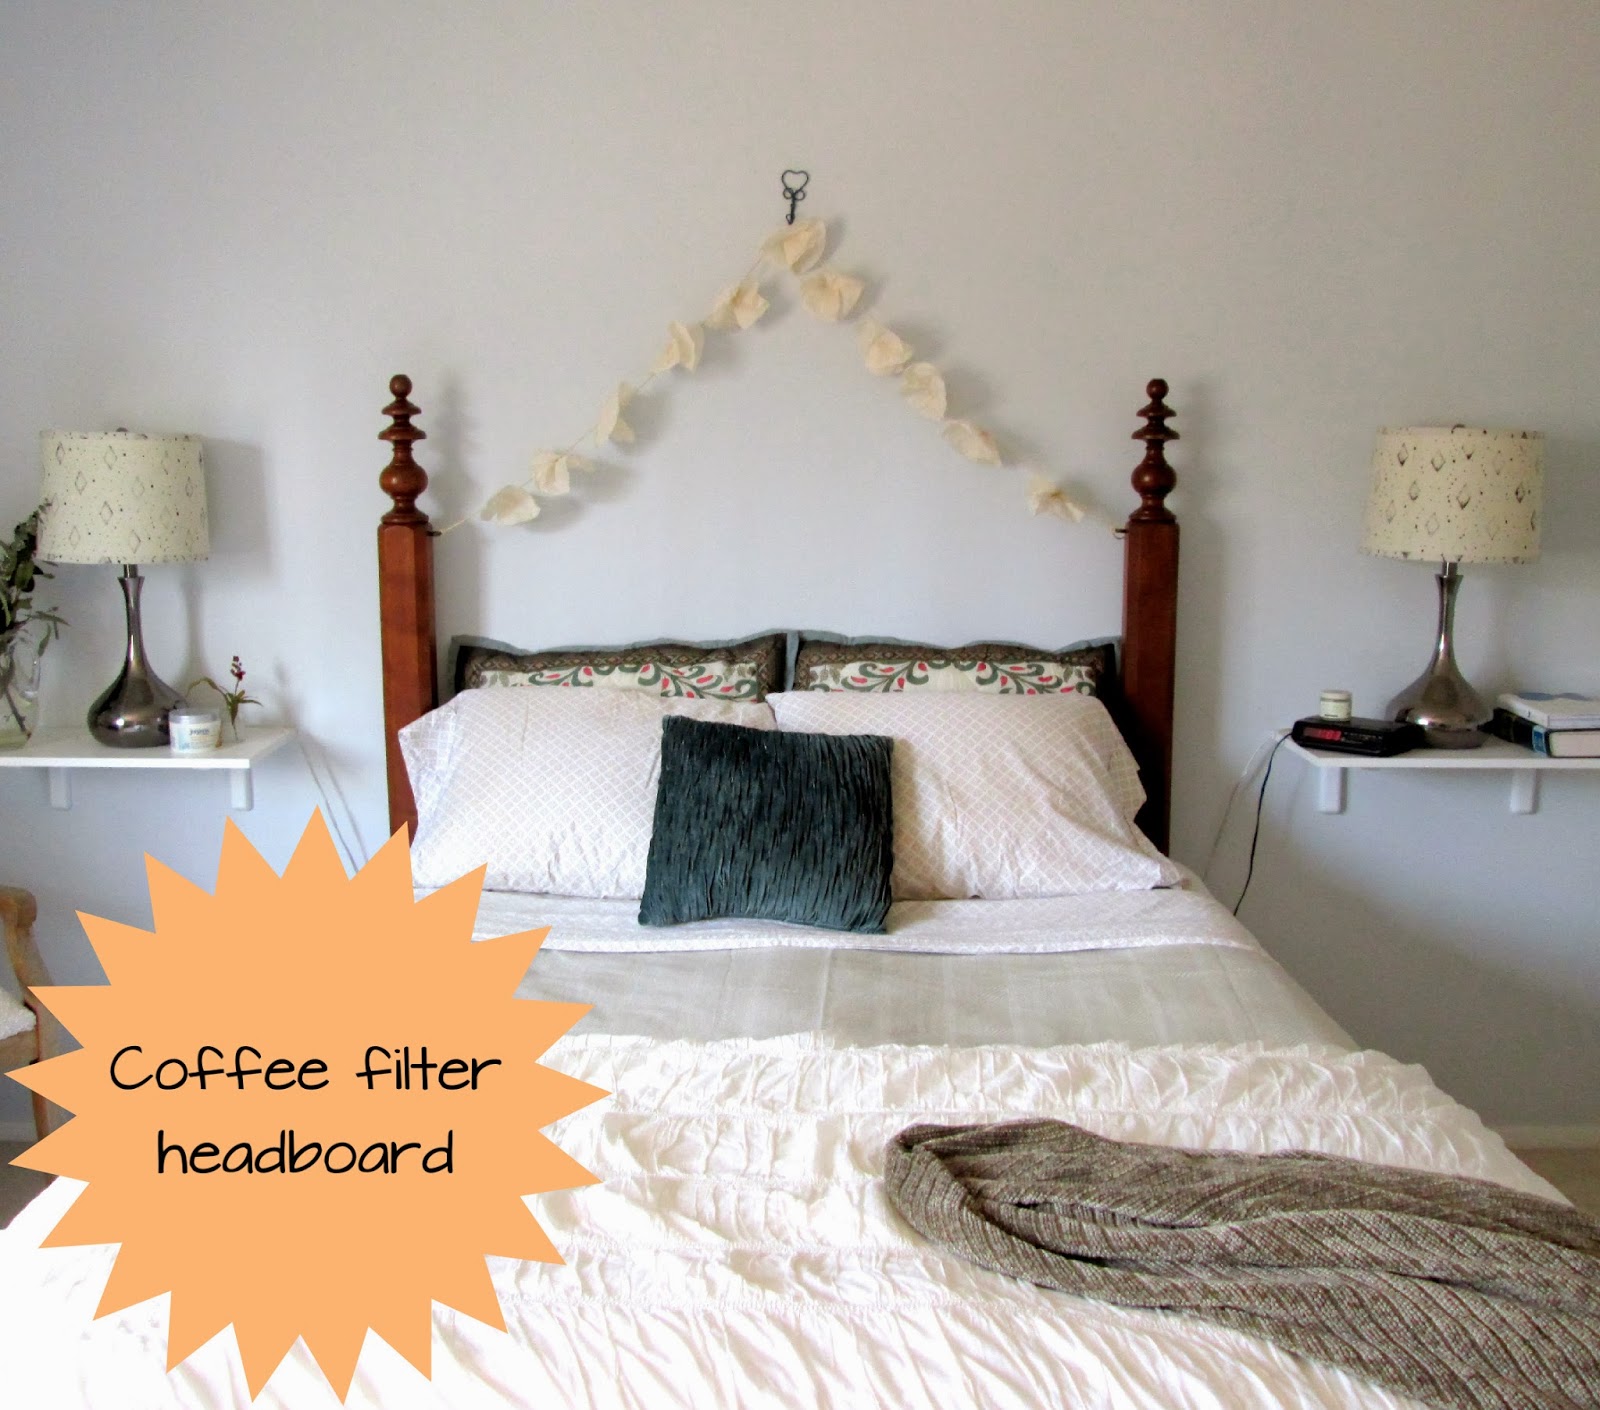
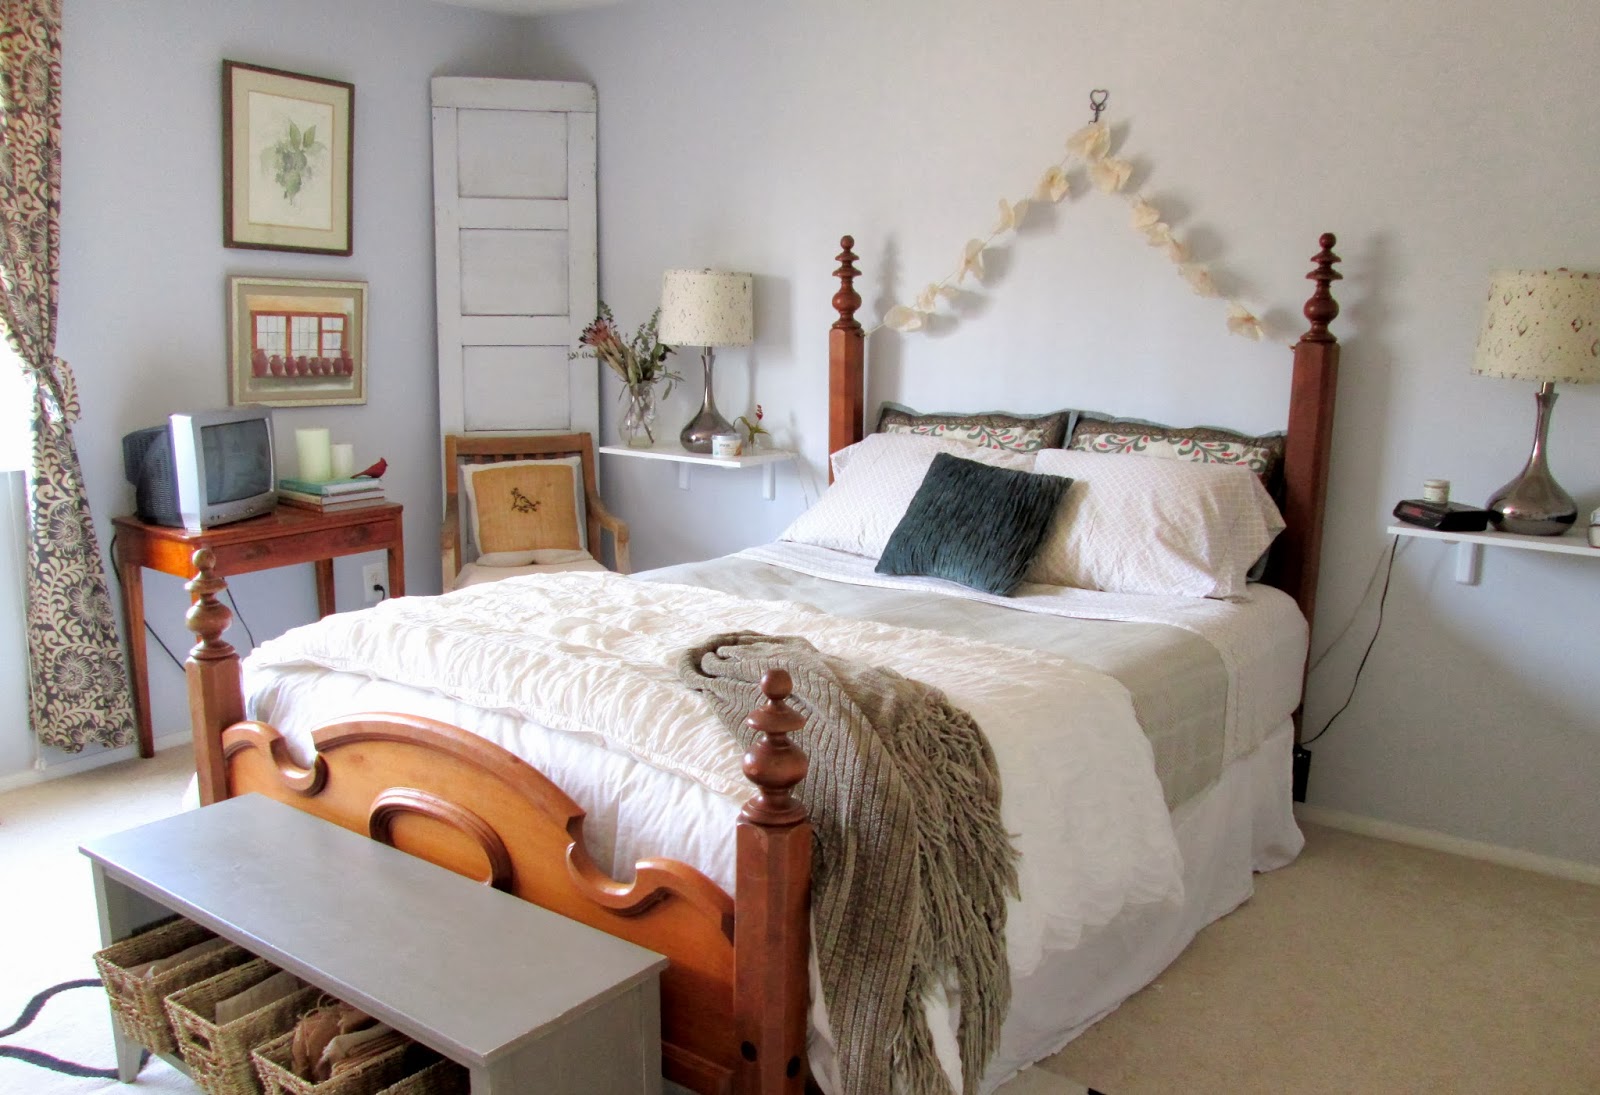
Ok coffee lovers, I've got a good one for ya: a DIY headboard made from dyed coffee filters! This was super easy and I love the airiness it brings to our eclectic bedroom.

To begin, you'll need at least one hook and two nails, or 3 hooks to create a triangle above your bed. I actually already have hooks screwed into my bedposts so I used those and then a wire heart hook from World Market, ($1.99). You definitely do not need bed posts for this project! You can attach your lower hooks, (or just use a nail for each side), right into the wall. Tie the ends of a length of twine to each side, looping it over your upper hook in the middle, (top of the triangle).

Now you're ready to work on your filters! First, grab as many coffee filters as you think you'll use, (I used 11), and let them sit for an hour or so in a sink or pot full of warm water that is brown with either tea or coffee, (I used a bunch of tea bags from a few teas that I don't care for...see, careful what you throw away)! **This first step, (and the one following), is definitely not necessary! You may want to keep the coffee filters white depending on the colors in your room, your style, etc. I wanted to give the filters a deeper, aged look for our headboard, so I dyed them in the tea.

Second, as you pull each one out give it a good squeeze over the sink to remove excess water and then either lay them out to dry, (I spread them out over a couple cooling racks), or hang them on cabinet knobs.

Once dry, you are ready to make your florets. Simply pinch your filter from the middle, fold a bit until you have something resembling a flower, and then pierce where you pinched with about 1.5" of floral wire.

Finally, attach your filter florets by wrapping the wire around the pre-hung twine above your bed!

Instant headboard!

Have you ever made a headboard? What did you use?

Thank you for stopping by!

~Chelsea

This post was originally published on Chelsea's Garage, now affectionately known as StyleMutt.

Pretty succulent centerpiece

January 28, 2013

What a difference a year makes! We had daffodils popping up in our garden due to the mild temps, so we transplanted the bulbs and brought them in to unleash. Definitely no daffodils trying to emerge this year...

But we're not without any popping fresh greens, either.

During a quick trip to Home Depot with my littles, (and my Mom!), we picked up 3 different real succulents, (because the fake ones are over 3 times the price)! 

These three ranged from $1.99 - $3.99ea.

I did a bit of research beforehand to learn how to take care of succulents. They like dry soil, sun, and do well in a shallow dish. I wanted to use a pretty green glass bowl I found at the thrift store a while back, but since it doesn't have holes for drainage I poured some rocks in first so the soil could sit on top of those, allowing water to drain into the rocks.

I had plenty of help ;) And I scooped a couple handfuls of rocks out after this picture. That was too many - I really just wanted a couple layers of rocks.

Then I added soil on top of the rocks

I dug three shallow holes and stuck the plants in. I haven't watered once, and it's been a week! I read that in the winter they go dormant, so they only need water 1-2 times a month. I don't know how I feel about that but I will trust those who know (wayyyyyy) more than me!

I love how this centerpiece turned out but only time will tell if it was successful! Anyone green thumbs out there have any suggestions to keep these babies happy?

Thanks for reading!

~Chelsea

This post was originally published on Chelsea's Garage, now affectionately known as StyleMutt.

Featured by One Kings Lane!

Hi friends! I've got some exciting news to end the week! Now, some of you have been following this blog for a couple years, others of you may have just stumbled on it recently. Regardless of how you found Chelsea's Garage or how long you've been checking in, it means a lot to me that you do - which is why I get so excited to share fun news with you! You are kindred spirits who enjoy creativity and have inspired me greatly.

It's such a pleasure to share with you that One Kings Lane featured the statement chair I wrote about in this post in their Home Decor article, DIY - Sitting in Style, which went live on their site this past Wednesday! Their design team selected me along with five other super creative DIY-ers, giving me the top honor!

When OKL reached out inviting me to write about my favorite statement chair to help them promote their new Home Decor Resource, I never imagined they would feature my project on their site! To have my little blog recognized by such an inspirational company as One Kings Lane is astounding to me, and I couldn't be more grateful to them for the encouragement they've expressed to the work I'm doing.

The featured chair:

This news sure warmed up the frigid week and I'm already looking forward to another possible project with One Kings Lane coming up this Spring! 

I see 40s and 50s in the forecast for this weekend, so unless someone wants to claim this piece, (which I introduced in this post) as a custom order now....I'll be starting on it in French Linen, (by Annie Sloan Chalk Paint). :) Can't wait to show you once it's finished!

 *Nevermind - piece has been claimed! Stay tuned for it's awesome transformation - it'll knock your socks off!

Have a great weekend!

~Chelsea

This post was originally published on Chelsea's Garage, now affectionately known as StyleMutt.