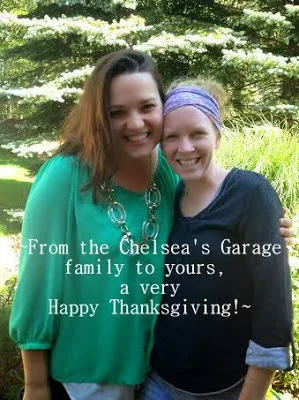
So thankful for you for reading, sharing, and supporting Chelsea's Garage.
~Chelsea and Cate
This post was originally featured under Chelsea's Garage, now affectionately known as StyleMutt.
Your Custom Text Here
So thankful for you for reading, sharing, and supporting Chelsea's Garage.
~Chelsea and Cate
This post was originally featured under Chelsea's Garage, now affectionately known as StyleMutt.
Confession time. Serious confession time. When Matt and I were pregnant with our twins and we found out they were a boy and a girl, for a few weeks longer than I'm happy admitting, I wanted to name our daughter Garland, (I'm a huge Judy Garland fan). Don't judge me. I had a double dose of pregnant brain and I honestly thought it sounded pretty! Needless to say I'm in debt to my husband for saving our daughter from that one. But this story has so little to do with today's post...
Today's is the perfect touch of whimsical if you like a little twist on a traditional decoration. I happen to like garland of every kind used in almost every way. Garland is so versatile and lots of fun to string any which way you want! This week is how to make Pom-pom garland! The steps are identical to the Pom-pom wreath, so if you tried that one already you're an old pro!

Supplies:
1 spool of yarn
pair of scissors
Step 1: Wrap yarn around your hand about 30-40 times...it doesn't really matter that you do it the same every time.
Step 2: Remove the bundle from your hand but keep it together, like a donut, and snip the yarn about 7" from your bundle.
Step 3: Snip the 'tail' right at the bundle. Lay the tail out flat and then place your 'donut' bundle right on top of it, (sorry the picture for this step is inaccurate. You want your 'donut' to be right in the middle on top of your snipped 'tail'. I must have been so engrossed in my sappy reality show that I wasn't paying attention to the other side of the camera lens...)

Step 4: Tie the tail around the center of your bundle. Tie it tight and in a knot
Step 5: Weave your scissors through the loops and cut them open. Repeat on both sides
Step 6: Snip any extra length from your 'tail' and now you've made a pom-pom!

Step 7: (not pictured) Tie your pom-poms down a length of yarn, equal distance apart. Now you've got pom-pom garland! Happy decorating!
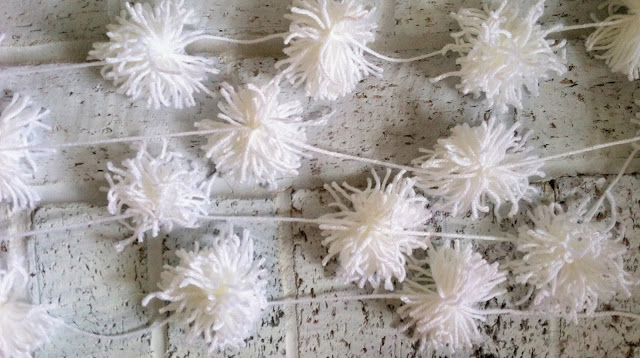


This garland would definitely add some winter fluff entwined with any real or faux green garland, too! If you try any of these One A Week Christmas decor projects please feel free to email me pictures; I'd love to see what you do!!
Thank you for reading!
~Chelsea
This post was originally featured under Chelsea's Garage, now affectionately known as StyleMutt.
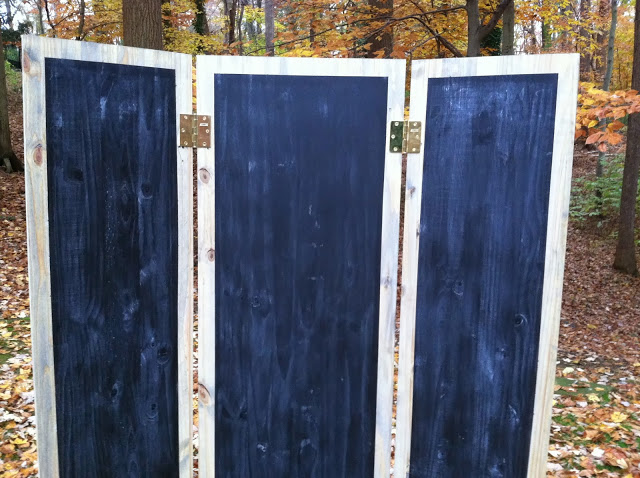
So as you may have read, I am marrying Chelsea's brother in January. Up until now I have been VERY secretive about my {outlandish} wedding ideas. But I have decided to share one element of my wedding with you lovely lot on Chelsea's Garage - this giant chalkboard program sign.


What Did I Use:
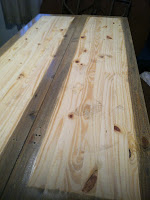
1} One 2'x6' pine panel
2} Two 1.5'x6' pine panels
3} "Weathered Oak" wood stain & stain brush
4} Sandpaper
5} Four brass hinges with shallow screws
6} 2" painters tape
7} Primer spray paint
8} Chalkboard spray paint
9} Chalk
10} Screwdriver
I started by staining the edges with my weathered oak wood stain and stain brush. I followed the can's instructions to brush the stain along the direction of the grain and wipe of the excess. I like the grayish effect it had on the yellow pine so I only bothered to do one coat.
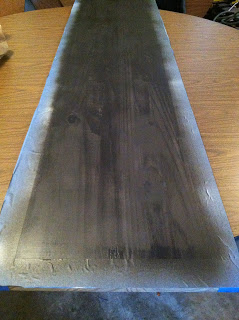
After the stain dried, I applied the painters tape right over the stained trim and primed the bare wood in the center. Raw wood {especially pine for that matter} is EXTREMELY thirsty when you first apply paint and will soak up a lot. A good starter coat of primer will help your final color go on thick in less coats because the primer will have already filled up many of the wood's pores. After the primer dried and was sanded, I applied the first coat of chalkboard paint.

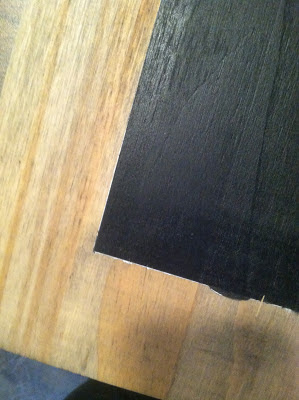
After the chalkboard paint dried, it was time to peel the painters tape off. And I must say, I LOVED the finished look - especially the messy edges where excess paint bled under the tape. If you are trying this at home and want a neater look, just go slow with the tape application and make sure you have smoothed down the edges as you go - this will prevent the bubbles you might get that would collect puddling paint.
I then went about using my screwdriver and short brass screws to install the hinges {the hinge kit I bought came with longer screws for traditional doors, but my pine boards were too thin - if this happens to you, be sure to also pick up a couple shorter screws with wide screw heads that will still fit your hinge}.


Now I have a wonderful statement piece for my wedding that will have my entire program written out in chalk. The kicker: after the ceremony, it will be erased and become the photo booth for our guests! I love repurposing items {as you may already know}. After the wedding, it could easily become a dress-up backdrop for Shire - who knows!

Now it's your turn,
~Cate
This post was originally featured under Chelsea's Garage, now affectionately known as StyleMutt.


