~Before and After~ Antique table

Hi guys! I was so grateful for the opportunity to work on this piece this week so I could show you before the weekend! The transformation is one of my favorites.

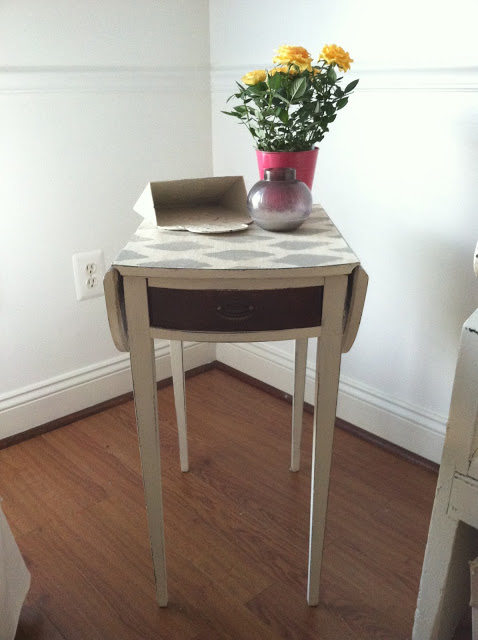
This table came from my grandmother, Mamoo. She's had it in her garage for years as a spot to keep all her gardening tools. The first time I saw it I loved it. While simple, it's still a unique piece which could be used several different ways; and I tend to gravitate toward versatile pieces. When Mamoo told me she was cleaning out the garage and generously offered it to me, I couldn't wait to get started!

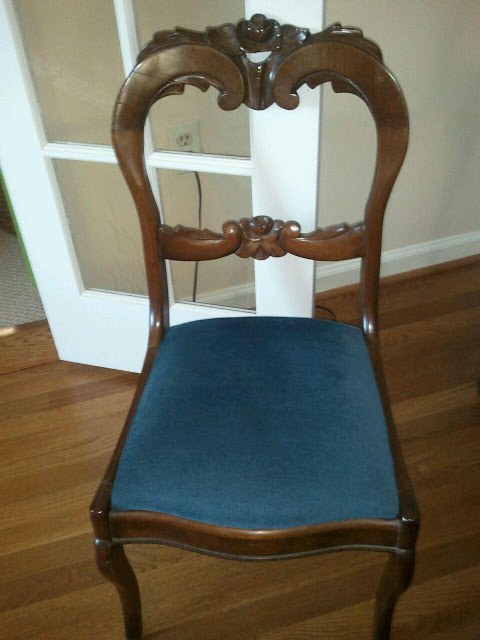
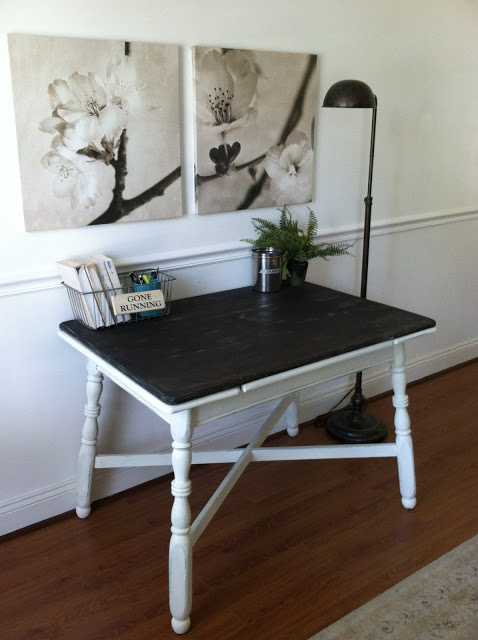
Here is her table before:
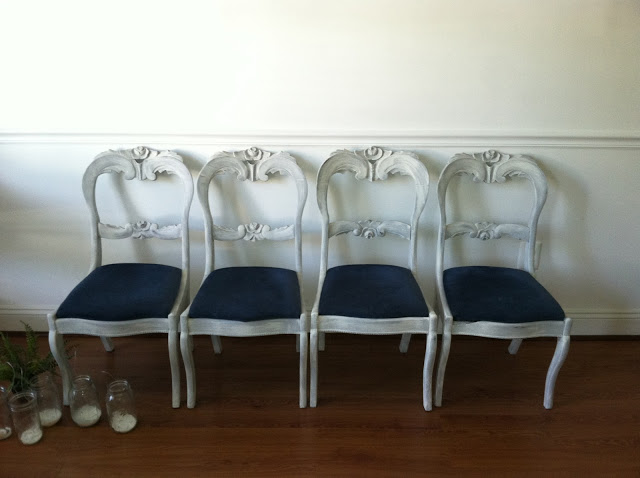
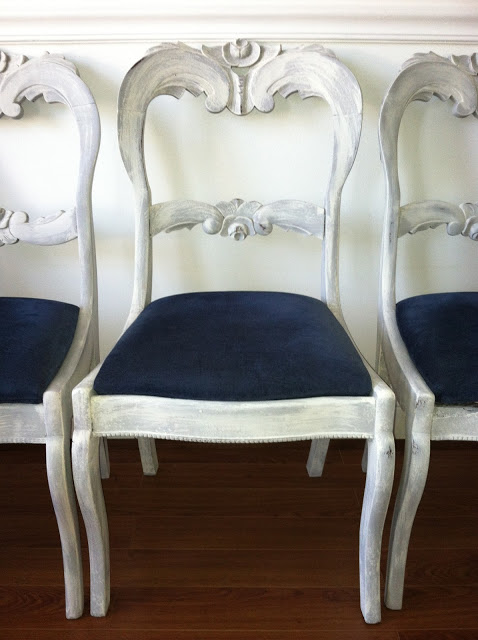
After:

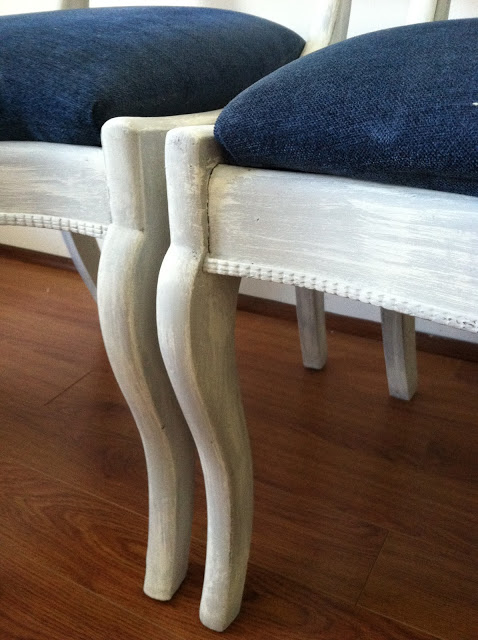
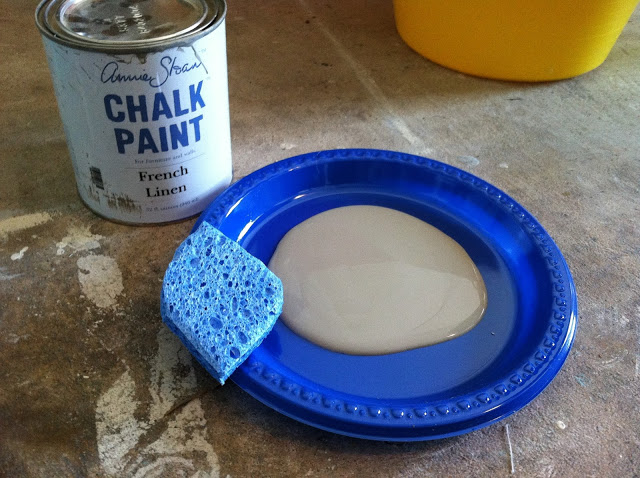
I sanded all the paint off the table top and stained it in Ebony by Minwax Wood Finish, (see the end of the post for a staining tip). Then I painted over the rest of the piece in Old White by Annie Sloan Chalk Paint. For these legs, steel wool was my distressing tool of choice to reveal some peeks of the original green, which is just so pretty. 

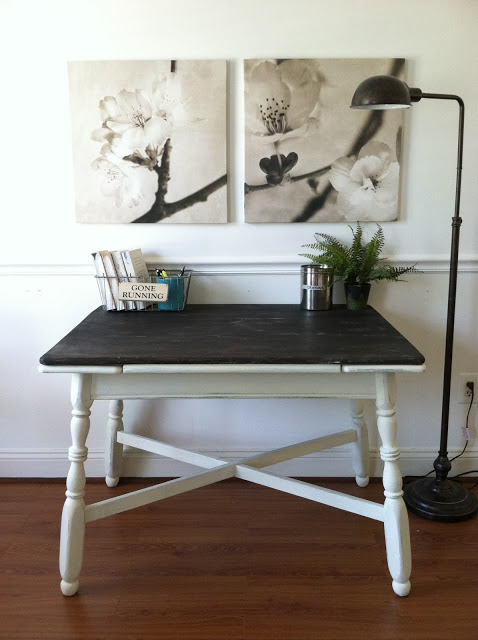
Once removing the layers of paint from the top I noticed tons of imperfections in the wood. The wonderful and horrible thing about using a super dark stain such as this is that any imperfections will make the tone of the wood look uneven. In this case, it was a wonderful thing. I think the table top looks like it was made from salvaged, weathered pieces of wood. Yet, it's smooth as a baby's bottom, making it an ideal spot for some handwritten notes, (people still do that these days, right?)

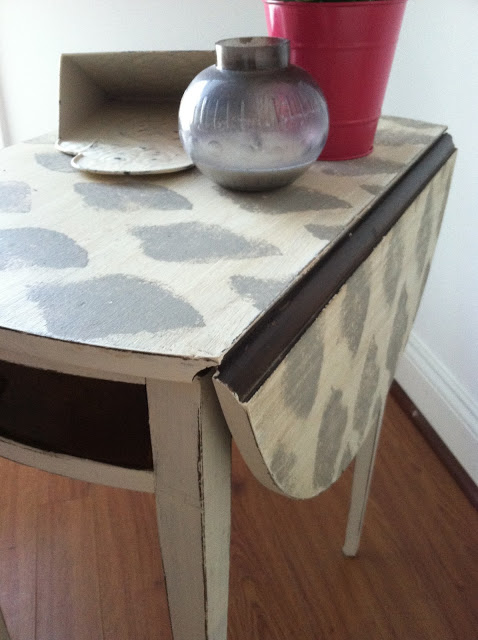
I've never seen pull-out table leafs like these. They fit perfectly under the table and pull out with ease. One could get pretty creative in how they use those extra 9" per side. 

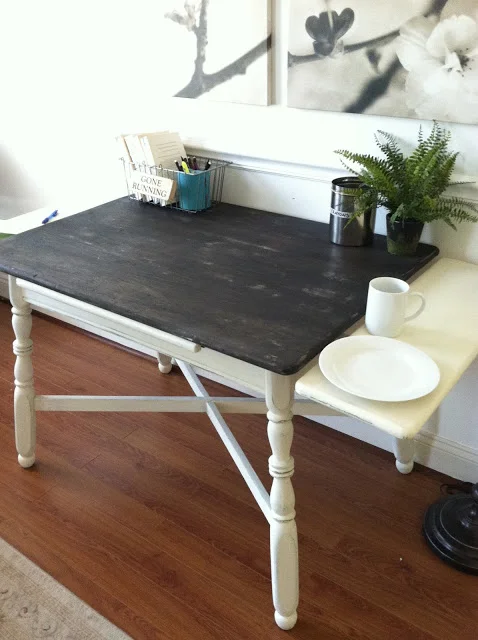
You can see here how the leaf tucks right back in when not needed.

SOLD

Staining Tip: I don't brush stain on, I wipe it on using paper towels, (so I don't have to spend my whole day running cloths through the laundry to remove the stain, which gets messy). I start by rubbing the stain on in circular motions to really 'sink' it into the wood, then follow that with even back and forth motion.

And as usual on a Friday, here are some highlights from our week :)

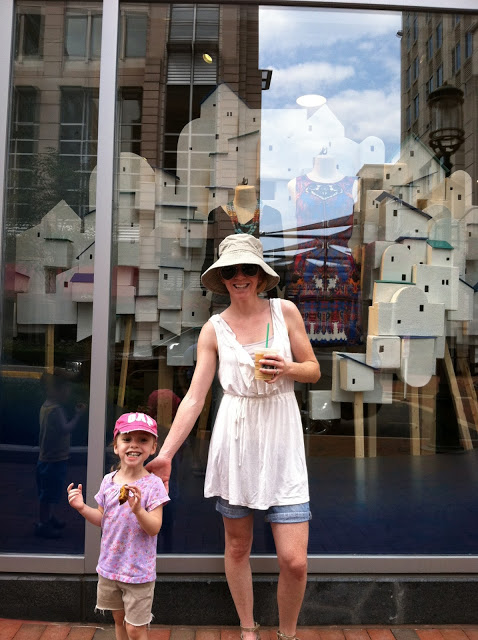
Enjoying the Anthropologie "bird house city" window display with my little bird.

3 fountain wishes. Ok, this shot of Mason, (middle), is killing me. What a goof!

Speaking of Mason, he and I had our first ever time out alone with each other. He was born into a chaotic household, (the twins were 16mo), and did a beautiful job jumping right into the thick of it with the rest of us. But I soaked up my time alone with him like a sponge. His gusto and thirst for adventure is contagious and sometimes I need a good dose of that!

Sometimes we all just need to be alone.

And speaking of alone, this is where I found my precious little introvert the other day when he wasn't downstairs playing with his siblings. Chillin in his room making matchbox car traffic, as usual. I am so blessed by his sweet, gentle heart.

Thank you all so much for reading! Have a lovely weekend!

~Chelsea

This post was originally featured under Chelsea's Garage, now affectionately known as StyleMutt.

Royal blue parlor chairs

I couldn't help myself. This set of 4 turn-of-the century blue velvet parlor chairs just seemed like an appropriate project for this week as the exciting news of a little prince made its way across the pond. 

These chairs came with the blue velvet loveseat that I posted last week and are upholstered in the same fabric.

Before:

After: 

I painted two thick coats of Paris Grey and dry-brushed a thin coat of Old White, both by Annie Sloan Chalk Paint. See my dry-brushing tip at the end of this post.

SOLD

Painters tip: Dry-brushing is a great way to achieve a weathered, layered look with your paint. Make sure your first color goes on thick. Then for your top color, just dip the very tip of the brush in the paint and wipe off the excess across the edge of the paint can. Cover small areas at a time with your brush, moving back and forth swiftly and evenly.

Thank you for reading!

~Chelsea

This post was originally featured under Chelsea's Garage, now affectionately known as StyleMutt.

I can Ikat; you can, too!

Try saying that five times fast!

Every now and then a piece which is up for sale will stick around a little longer than I anticipate. And as they sit lonely in our garage awaiting a new home, fresh ideas for how to refinish them start to bubble up - not all the time, but sometimes. I've posted 're-do's on here before and I've got my favorite re-do to show you today! It's not really a re-do as much as an add-on. 

Here is a very simple little drop leaf table I did a few months ago. I painted the top and the legs in Old White by Annie Sloan Chalk Paint. Drawer left in original finish with original antique hardware.

After it sat and collected dust for a while, I felt like playing with it a little more

Ikat is a super trendy pattern right now; as it should be! It is fun, vibrant, and brings a laid back, relaxed vibe to traditionally formal spaces such as living rooms and dining rooms. There are a zillion variations of ikat when you google image the print. What's not to love? I decided to try my hand at creating an ikat pattern on my unsold table with a simple kitchen sponge, plastic plate, and one of my favorite Annie Sloan Chalk Paint colors, French Linen. I cut my kitchen sponge down to the simple ikat shape, (basically a diamond, but I left my long edges rounded). 

Then I dipped my sponge into the paint, wiped the excess across the edge of the plate, and pressed it onto my table in imperfect rows. I eyeballed my rows to stay consistent but it wasn't precise. (You can also see the dark wax I added to the top surface)

My little bird, itchin' to help.

And a very good help she was!

Our little table before rubbing it down using a medium grit sanding sponge - my favorite distressing tool. I wanted the pattern to look faded and worn, which was an effect the sponge already helped create with it's natural texture.

Then I took a pretty standard break for some twin love before sealing our table up and bringing it in for pictures.

{Wouldn't you know it, this table sold before I even had the chance to post it here}

So there you have it; an easy DIY ikat project you can easily do from home! This would also be cool to try on canvas to create your own custom art. Or tea towels. Hmmm...Christmas is 5mo away... :)

Thank you for reading!

~Chelsea

This post was originally featured under Chelsea's Garage, now affectionately known as StyleMutt.