Hi All! It has been a b.u.s.y. week, let me tell ya. I'm running my fanny off in the mornings training for a 10 mile race that's coming up on March 3, (check out this fundraiser I'm running for here or at the link to the left), and then after giving lots of attention to my kiddos, feeding them lunch, and getting them all down to nap, I'm mustering up every last ounce of energy to finish some projects in the garage each afternoon, (and that's just the first half of the day)! But it's okay. This is a phase of life I will never have again and I don't want to waste the abundance of energy the Lord seems to be supplying me with at the moment!
There's been a surprising flow of custom orders in this typically slow season of the year, but I'm also working on building a fantastic stock for the next Chelsea's Garage sale event! The date is not set and rarely ever is until about a month before, but at the moment I am looking at mid-April. Already we've got some ahhhh-mazing pieces that I am so stinkin excited about. That's what is the best part of our Chelsea's Garage sales. Every single piece is intentional; I only bring home pieces that I find beautiful, unique, functional, and totally something I'd want in my own home. In fact, at the last sale I ended up kicking myself for selling a particular piece that I suddenly realized I really should have kept! I refinish each piece exactly how I want so I can stand behind it and be proud of the work.
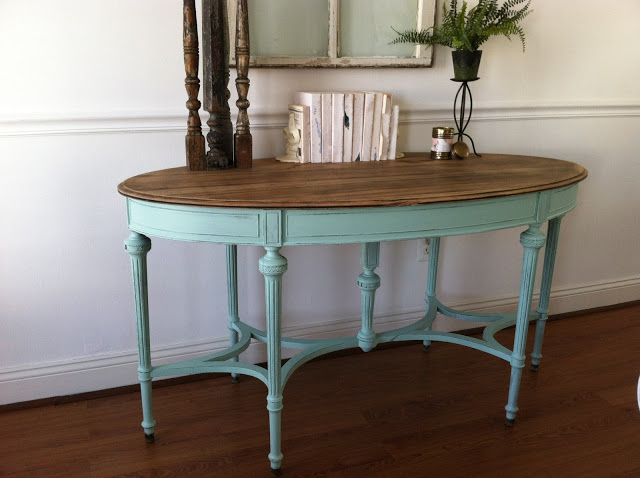
That's what this post is about today; standing behind each piece, no matter the size, and being proud of the job accomplished. A little while ago I posted this table that was really kind of a tester for a new paint color I was given at Christmas.
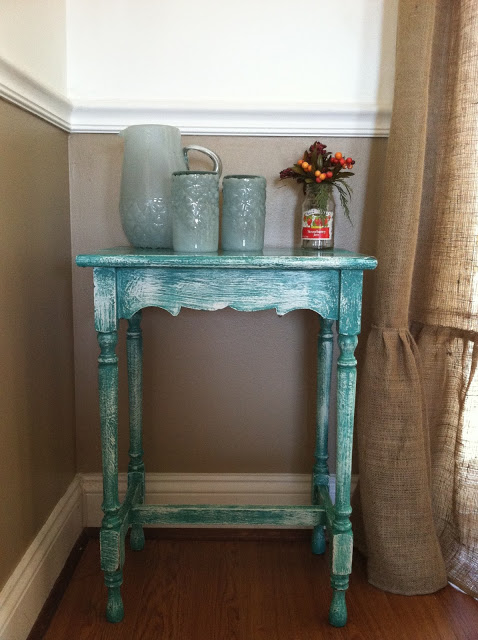
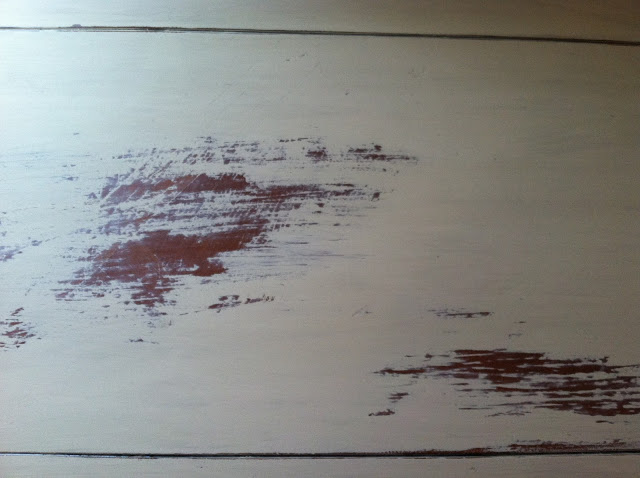
As soon as I started brushing on the paint I knew I didn't like it. But I kept going with it because, well, I thought maybe it would grow on me. As soon as I was done I knew it just wasn't me.

The whole thing looked too abrupt. The bright teal atop the bright white was not my best choice. I really prefer softer, more earthy tones. When a friend came over one afternoon and was looking around at some pieces in the garage, I heard myself making fun of this poor little table and laughing at it! Now, this table could very well sell this way. There have been a very small handful of pieces that have sold in the past that I didn't truly love...and I've learned that getting paid for a job that I'm not all that proud of does not feel good at all. I want my customers and clients to feel like they're getting a true gem with every piece of mine that they take home.
To me this was no gem, and certainly not something I would keep in our home. It's not horrible, just not my particular style.

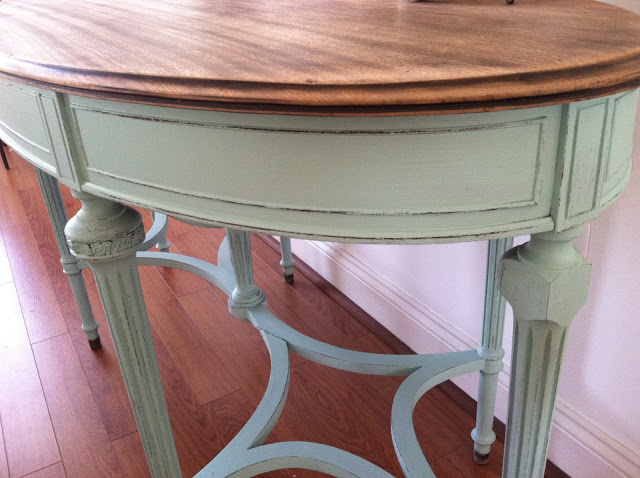
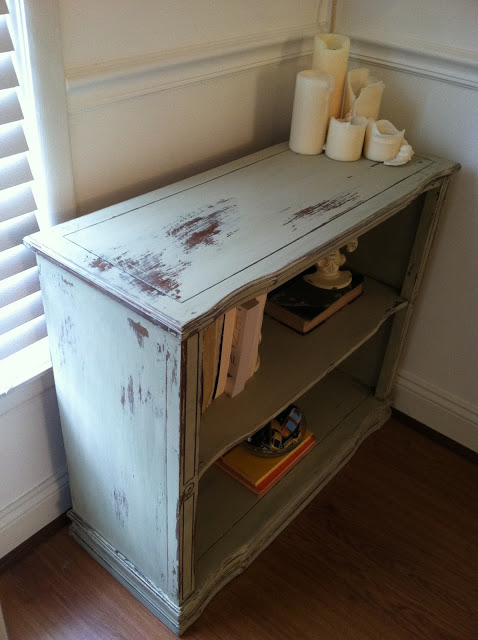
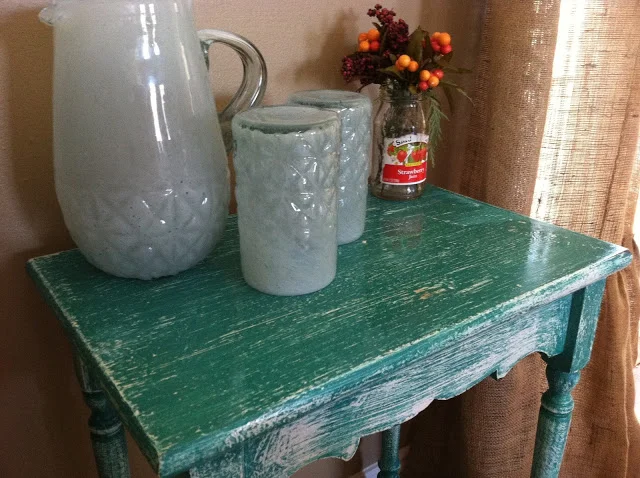
So, I set this table up in my work space once again for a re-do.
Now, I can stand behind it and feel so much better when someone deems it worthy of coming home with them.


It's not a large piece by any means, but anything that I'm going to stick a Chelsea's Garage price tag on had better be worthy of the space it takes up in my small garage! I think this softer monochromatic finish shows off the shape of the piece better. The muddy gray, distressed to reveal black undertones, gives this table a rich element of sophistication that I strive to achieve with all the pieces that I have free reign over.

A couple of my little ones enjoying a leisurely breakfast in the background.:)

The low-down:
-Spray painted in flat black
-Brushed on 2 coats of Paris Grey ASCP
-Mixed about 2TBSP of dark wax with about 1/4c Valspar Clear Mixing Glaze, (mix well until you've got an even consistency), and brushed over the entire piece for a richer, aged finish
-Used a very slightly damp sponge to wipe over my glaze mixture with clear wax to even out the finish and remove some of the dark wax where it was a bit much, (clear wax acts like an eraser over dark wax)
-Used a medium sanding sponge to smooth out the table top and lightly distress the edges, then used steel wool to lightly distress the legs
-Just because I really like the element of shine on such a small piece with such pretty detailing on the legs, I brushed on a coat of polyurethane clear high-gloss. This was not necessary for the purpose of protecting this table's finish since it already had clear wax; this step was purely for the shine.:)
Thanks for reading along as I thought out loud with this one! And please know that I appreciate styles and looks that are different from my own. I know many of you may even have preferred how the table looked the first go-around! I love that - personal style should be as unique as our DNA! If you liked the table before, the color used was Annie Sloan's 'Florence'. Go grab a can and have some fun!
~Chelsea
This post was originally featured on Chelsea's Garage, now affectionately known as StyleMutt!