WHITEWASHED DRESSER with 'unfinished' top

Howdy! Despite working on several projects that I'm looking forward to giving as gifts this holiday season, the garage has been filling up quite a bit since the November sale! It's not unusual to get a flood of custom orders following a sale, but I've never done a sale so close to Christmas before. While many of the recently dropped off pieces will be waiting until after the holidays, (thanks to my dear clients who insist they are not in a hurry to have them back), I'd better start showing you some of the newly finished pieces before they come and go without a proper adieu!

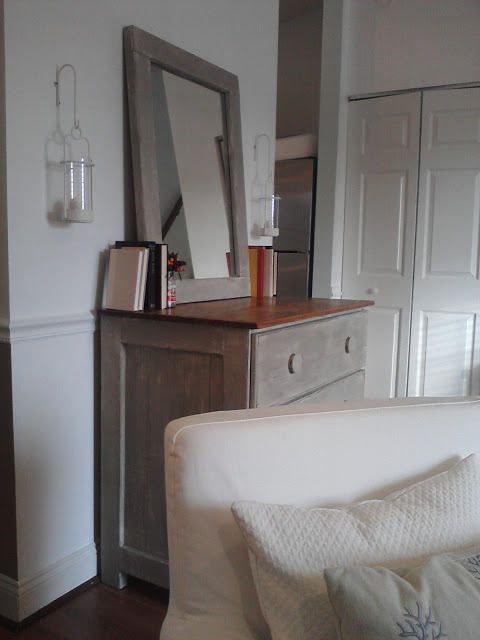
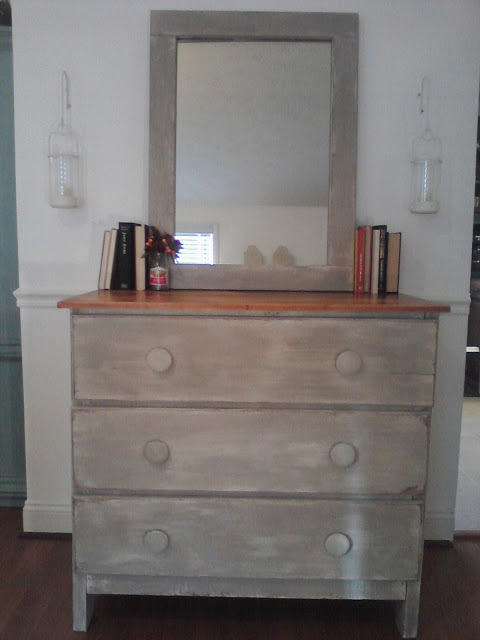
I thought I would start with this prize for today. The special thing about this piece isn't so much that it's very unique looking, but it's the vision that its sweet owner had. I've never had a request for an unfinished top but it is something I have been dying to try for quite a while! The dresser has a matching mirror which she wanted to be painted to match the body of the piece. When discussing her ideas, the words 'whitewashed', 'distressed', and 'rustic' all came up. She wasn't exactly sure on the colors she wanted, but once I popped open a can of Annie Sloan's French Linen, she was sold. This warm, khaki gray is perfect for a weathered driftwood look. With the paint color settled, I got to work :)

1. The first step was sanding down the top surface of this piece to within an inch of it's life. It had some crazy deep scratches and divots all over the place which needed to be smoothed over. Once the sanding was done... 

2. I got to painting. I painted on a nice thick coat of a creamy white. Once that dried...

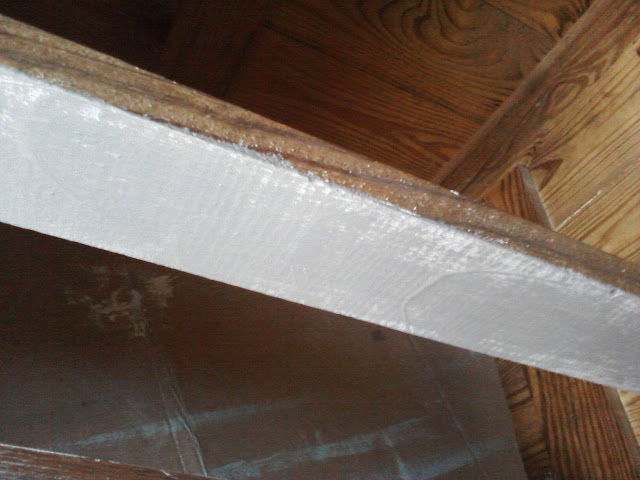
3. I dry brushed the second color. This is one of my most frequently used techniques for a worn, distressed look, especially when layering two colors. Dip your brush in just enough to get the tip of the bristles wet with paint:

Then brush it on in fast, short, even strokes so not to apply the paint too thick in one spot:

4. Then sand it down using medium and rough grit sanding sponges. I use the rougher sanding sponges for corners and edges to remove more paint where there would naturally be more wear and tear. The medium sanding sponges I use over every square inch. This doesn't remove enough paint to take you down to the wood, or even the base color, but rather smooths your brush strokes out for an even look.

5. Seal it up using a lightly dampened sponge and clear wax. This will give you a very thin layer and you can reapply as necessary. I have definitely learned it is much easier to reapply wax than it is to remove! Better to start with thin....

For an 'unfinished' surface:

First you need to make sure you have the proper wood stain. If you know what kind of wood you have, that is ideal, but if you don't you can take a drawer from your piece, (or something else portable), to a hardware store and ask an expert if they can match the stain. Once you have sanded down your surface, clean it well. 

At this point it is preferable to bring it inside so that it's room temperature. Apply the stain with a clean, quality paint brush, in long even strokes until the entire piece is covered. Follow the reapplication directions. Some instructions have you wait several hours between coats. I let the piece set for 24hrs before applying the protective sealer. I used a high gloss polyurethane sealer for this piece and used two coats. I think the glossy surface gives the entire piece a rich, vibrant appeal.

Questions or comments? Feel free to comment below or email me at chelseasgarage@gmail.com!

Thanks for reading!!

~Chelsea

This post was originally featured on Chelsea's Garage, now affectionately known as StyleMutt!

Holiday home tour

Hi there! Despite the warm front that we've been suffering through, we managed to transform our home into a festive Christmas wonderland! ;) Actually, the warm weather has just made it that much more important to get our home looking and feeling festive. I am probably very alone in this stance, but I really don't care for this weather!!! I know, I have issues. In my defense I lived some wonderful years in New England and was spoiled with some very beautiful, WHITE Christmas'. Aside from the snow we would get into late April, I loved our snowy, icy winters there. I miss snow. I miss a

good

winter.

Decorating our home was so special this year because our kiddos are at such an excitable, curious age! Shire, especially, has been enjoying every little detail with her beautiful wide eyes. I love watching them just soak it all in. It melts my Momma's heart.

Welcome to our home...

Merry and Bright!

One of my goals this year was to spruce up our usual, dusty old Christmas decor with something fresh. No single item really 'goes' with another since much of what we have was generously passed down to us from both of our families. I have seen, (online and in my decor mags), a lot of absolutely stunning homes and rooms decked out in a particular color theme for Christmas. Oh, how I have "oohed" and "aahed"! But really, just the thought of dumping what we have to start fresh breaks my heart! We have so many memories tied in with our various Christmas decorations, no matter how quirky. It is truly a pleasure to display our eclectic mix , some items even spanning multiple generations! So, back to my goal: Use what we've got, but make the 'big picture' feel fresh.

And what says

fresh

better than fresh greens?!! I put greens all over our home in every spot I could think of. I seriously couldn't stop. It was addicting once I got started. If you do a faux Christmas tree, you can head over to your local Home Depot, (and I'm sure other places do this), and fill your car with all their trimmed branches from the bottoms of purchased trees, for

free.

Our home smells DIVINE

I just used a large lampshade to display all these longer branches. It's a big, messy arrangement...perfect for our home :)

Thank you, Annie Sloan! I have several of these empty paint cans and was excited for this whimsical way to recycle them! I kept the lids on and made a hole in the middle big enough to stick a few smaller branches through.

I don't like leaving

any

ornament out of the Christmas decorating line-up. I used shutters this year, (here as well as on our teal buffet, above), to hang all our glass ball ornaments. I kept the buffet more monochromatic, using all the golds,  and brought the reds over here for a little shimmer over our collection of smaller trinkets.

These smaller guys are the things that can look like junk, to me. But, displayed all together on one shelf I think they come together well.

More greens :)

One of my favorite nativities I have ever seen. My grandparents gave this to us on our first Christmas married. With real straw on the floor and a packed clay roof, it doesn't glamorize the conditions our King was born into. It's a tender reminder of His humble life on earth with an unpretentious beginning.

A tour of our home would just not be complete without a shot of a baby gate in the background :)

Thank you for the candles, Grandma Livi! I love the festive touch they add to our glass jar shelf!

I've been working hard in our basement, too, but the lighting isn't great and I am having camera issues, (no flash, yikes!), so I think I'll hold off on taking you down there ;)

Thank you for stopping by, as always! I appreciate all of you!

~Chelsea

This post was originally featured on Chelsea's Garage, now affectionately known as StyleMutt!

UNIQUE gift wrap ideas!

Every good and perfect gift is from above, coming down from the Father of the heavenly lights, who does not change like shifting shadows. James 1:17

It's a Christmas miracle, folks. We got our holiday gift shopping done early this year! Well, early for us. And instead of waiting until 10pm on December 24, as is my typical nonsense, I decided to start wrapping my gifts early, too! For the past few years I have wanted to put a personal touch on the gifts given from our family, but have settled with the quick and easy, (though still fun and festive!), gift wrap found at the local supermarket or dollar store. This year, however, I've decided to finally put some of my gift wrapping ideas to use! I've got two in particular that I want to share with you:

Rustic, monochromatic gift wrap- with a unique tag!

Start saving your newspapers! I'm loving how this neutral patterned gift wrap tied with twine turned out. Add a hit of color by using playing cards as your To/From tags! Grab a deck for a dollar at a local dollar store and you've got 52 gift tags! For an extra personal touch, (and just a dollar more), grab a red deck and a blue deck and use red cards for girls' gifts and the blue cards for boys' gifts.

Custom initialed gift wrap - no tag needed!

This idea came to me recently as I was remembering last Christmas. We had two two-year-olds and a nine month old, and everybody was opening everybody else's gifts. After 20 crazy minutes my husband and I looked around and realized there were opened gifts lying on the floor because they were opened by the wrong little hands, (despite our efforts for some kind of order!) :) This year I thought of a fun way for the kids to distinguish their own gifts from everyone else's. Monogrammed gift wrap! They can (mostly) properly identify letters and colors, so I used different color inks and basic letter stamps to make customized gift wrap. I just used the white side of the wrapping paper, wrapped the gifts up, and went to town stamping their first initial all over. Now on Christmas morning we can tell Colin to find the blue 'C's, Shire the purple 'S's, and Mason the red 'M's. This idea doesn't just have to be for families with multiple children! You could do this for anyone! It's just a little personal touch that feels special, I think. An entire pack of alphabet stamps is $10 at Michael's, and ink is less than $5. And it literally took me about a minute to stamp an entire gift, especially since I wasn't trying to be perfect or precise :)

Please know that while I do enjoy offering you these ideas, I am also one who often appreciates convenience when it buys me more time to enjoy my family and the simple pleasures of this season. When I find myself with a long afternoon if the kids are napping well, it's fun for me to do these kinds of things....but it's also good to recognize the reality of your time constraints and prioritize what is most important. In other words, I am all for the cute wrapping paper at the dollar store up the road! Shoot, if I knew the person who invented gift bags, I would give them a huge hug!

Thanks for stopping by! And happy wrapping, (or gift bagging)!

~Chelsea

This post was originally featured on Chelsea's Garage, now affectionately known as StyleMutt!