I have been through battle and come out alive! And no, it was not with my kids ;) I met my first piece of furniture to nearly do me in. Nearly. I can honestly say I shed blood, (cut a fingertip), sweat, (the sanding alone), and tears, (when a cabinet door got jammed stuck and would NOT come out), over this beautiful beast.
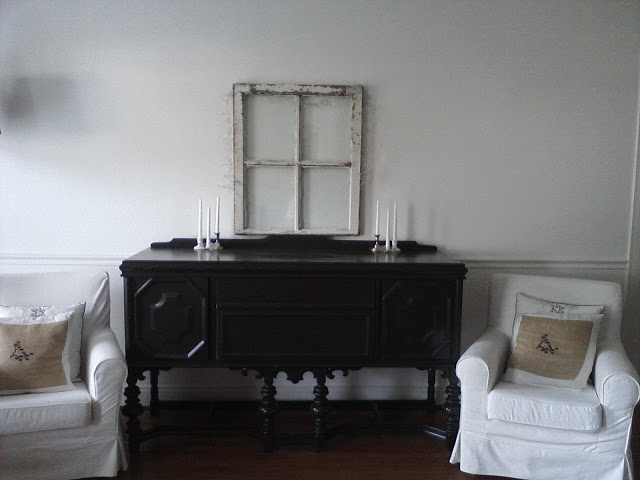
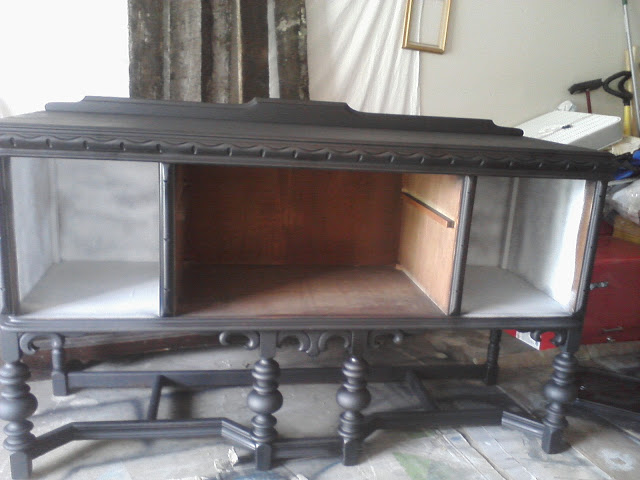
Looks like a pretty simple buffet to refinish, right? Large, definitely, but difficult? Nah...

If furniture had a mind of its own, I would have thought this grand buffet most definitely did not want to be refinished. It put up a good fight! But I fought back.:)
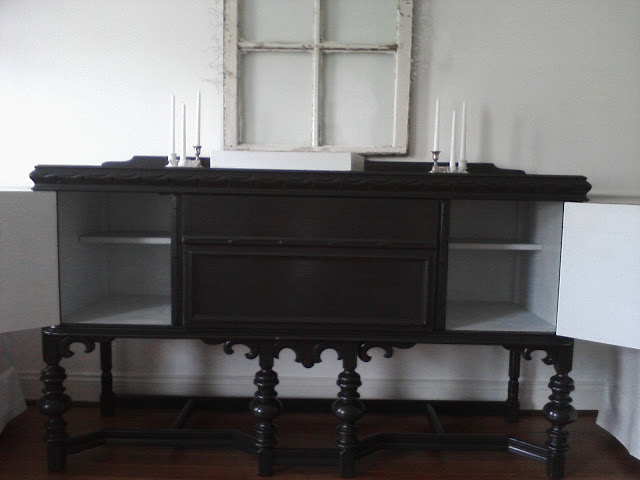
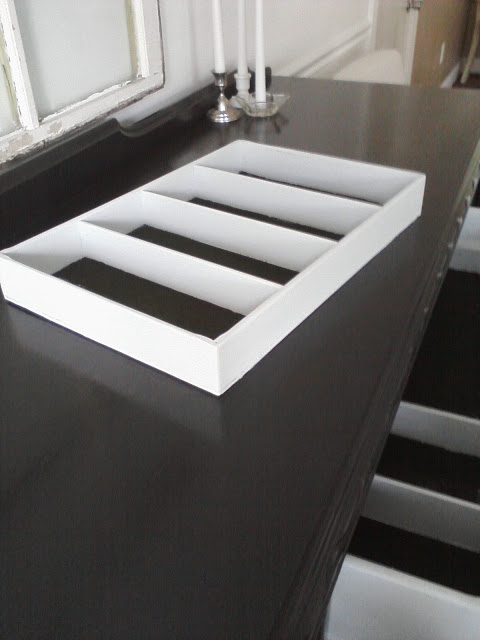
First, the sanding alone cost hours upon hours of back breaking work. But, that's only because of the sheer size, height and intricate detailing along the bottom and the legs. Once I started painting, it started giving me trouble. This piece was for a client - she picked it out herself and brought it to me with a somewhat unusual request. Glossy black exterior, whitish-blue interior. And when I say interior, I mean everything. The sides of the drawers, insides of the drawers, inside the cabinets, the backs of the cabinets, the little silverware tray... She loved the vision of the contrasting black and white. And when she was explaining it to me I was getting excited right along with her! But as I got to the painting, it became apparent that this request was going to be one of my biggest challenges thus far.
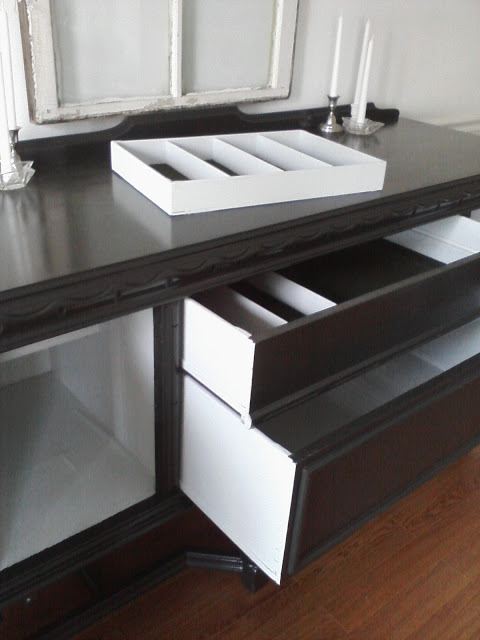
If you have never painted the sides of drawers, it is a tricky, tricky task - especially on old antique pieces such as this where the drawers do not run on nice metal tracks or runners. They simply fit right into the opening and slide on either wood rails or the floor of the shelf. Even when not painted, the shelves did not pull in and out very smoothly. So, I had to sand down the sides of the drawer openings and sides of the drawers so that there was a little 'wiggle room' between the two. Then I had to go out to the store and grab the color my client had brought over for this piece in flat. All I had was the color in semigloss, but that was just sticking too much and peeling whenever the drawers were pulled out. So I had to sand it back down to wood, and keep on sanding to create more space between the drawer and the sides of the opening. Between the sanding and the flat paint on the drawer sides, the drawers open and close like a dream now. Thank goodness!!
Then came the issue with the cabinet doors. Once those were done and I reattached the hinges, one of them wouldn't fit back into it's space. It was too big and too sticky. The paint had made it too wide. Mind you, this was after a lot of hours and frustration, so I pushed a bit harder than I knew better to, and it went right in....and kept going. The door was inside the cabinet. Over closed. I couldn't pull it back out. I got a wire hanger to try to pull it, but that didn't work, (of course it scratched up the paint). Then somehow I pulled it back out using blue tape. I'm still not exactly sure how in the world I managed it, but it worked. So, I sanded it all back down to wood and repainted in a thin coat of flat black, which I happened to have handy from another project, (I love it when that happens!) My client will be choosing hardware for this piece once it's back in her home, so until then I won't close the cabinets or drawers for fear they'll refuse to come back out.

Looks like a pretty simple buffet to refinish, right? Large, definitely, but difficult? Nah...
{Before}
If furniture had a mind of its own, I would have thought this grand buffet most definitely did not want to be refinished. It put up a good fight! But I fought back.:)
First, the sanding alone cost hours upon hours of back breaking work. But, that's only because of the sheer size, height and intricate detailing along the bottom and the legs. Once I started painting, it started giving me trouble. This piece was for a client - she picked it out herself and brought it to me with a somewhat unusual request. Glossy black exterior, whitish-blue interior. And when I say interior, I mean everything. The sides of the drawers, insides of the drawers, inside the cabinets, the backs of the cabinets, the little silverware tray... She loved the vision of the contrasting black and white. And when she was explaining it to me I was getting excited right along with her! But as I got to the painting, it became apparent that this request was going to be one of my biggest challenges thus far.
If you have never painted the sides of drawers, it is a tricky, tricky task - especially on old antique pieces such as this where the drawers do not run on nice metal tracks or runners. They simply fit right into the opening and slide on either wood rails or the floor of the shelf. Even when not painted, the shelves did not pull in and out very smoothly. So, I had to sand down the sides of the drawer openings and sides of the drawers so that there was a little 'wiggle room' between the two. Then I had to go out to the store and grab the color my client had brought over for this piece in flat. All I had was the color in semigloss, but that was just sticking too much and peeling whenever the drawers were pulled out. So I had to sand it back down to wood, and keep on sanding to create more space between the drawer and the sides of the opening. Between the sanding and the flat paint on the drawer sides, the drawers open and close like a dream now. Thank goodness!!
Then came the issue with the cabinet doors. Once those were done and I reattached the hinges, one of them wouldn't fit back into it's space. It was too big and too sticky. The paint had made it too wide. Mind you, this was after a lot of hours and frustration, so I pushed a bit harder than I knew better to, and it went right in....and kept going. The door was inside the cabinet. Over closed. I couldn't pull it back out. I got a wire hanger to try to pull it, but that didn't work, (of course it scratched up the paint). Then somehow I pulled it back out using blue tape. I'm still not exactly sure how in the world I managed it, but it worked. So, I sanded it all back down to wood and repainted in a thin coat of flat black, which I happened to have handy from another project, (I love it when that happens!) My client will be choosing hardware for this piece once it's back in her home, so until then I won't close the cabinets or drawers for fear they'll refuse to come back out.
This piece gave me a run for my money!
With it's fancy silverware tray and all - it thinks it's important ;)
But, thanks to my DNA, I do love a challenge. I know that sounds cliche, but it's absolutely true. I am competitive to a fault, (working on that), and admitting defeat to this piece was not an option.
I hope I gave justice to the vision this piece's owner had! Perhaps I'll be able to post some photos of the hardware attached once she picks it out!
Have you conquered any tricky projects lately? How did you do it?!
~Chelsea