Basket Art

Hey, All! A huge trend I'm seeing right at this very moment is ORGANIZATION! Perhaps the new year surfaces a desire for more order in the home...or maybe folks are just bored during the cold winter months and itching for things to do! Whatever the reason, there are lots of posts about how to organize and organizing challenges floating all over social media. 

I'm not a great organizer and am okay with a bit of chaos, but I do like for everything in my home to have a place to go at the end of the day, even if it is just random stashing. My favorite stashing is with baskets - especially big ones!

Obviously, using baskets to corral 'stuff' is nothing new. However, I do like to have a little fun with them before settling them into our home. Baskets are a great opportunity to create a custom piece!

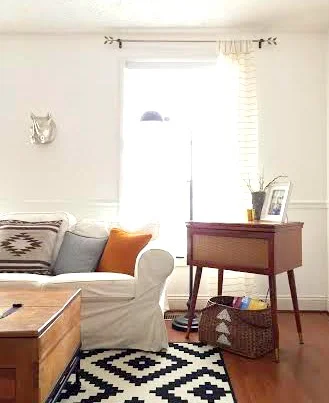
Here is a picnic basket we received as a wedding gift and now use for the kids' library books. I painted three triangles on it to fit it into our room and break up that corner of brown. To make the triangles, I carved a triangle out of a piece of cardboard and used it as a stencil. I just placed the triangle stencil where I wanted it, painted it in, then moved it down to the next one - easy peasy!

Since most of the kids' toys are stashed in the basement and procreating as we speak, we don't need anything too big on our main floor for storage. This basket, which I painted simple stripes around, is the right size, easily accessible, and is another source of pattern on that floor.

Our 'entry nook' was the perfect spot for this taller basket which keeps a lot of our shoes. I went for a color-blocked look and absolutely adore it! Gives it a little 'oomph', you know?!

baskets 8 DONE.jpg

So there you have it! That's how I like to do baskets in our house. :) If they're needed, (and boy do we need them), why not have some fun with them! 

Closing out the week I'll be back to discuss some staging tips for small pieces. Would love for you to dig up any pictures you have of staged end tables and accent chairs so you can be ready to share them to our facebook wall! We love seeing your handiwork and getting inspiration from you!

Thank you all for stopping by!

Staging Smart: Why it's important ||Plus a fresh piece revealed||

Hi All! With each year that I've been refinishing furniture, I learn something big. Early on, it was basic refinishing techniques. Then I started to discover my own style, and began applying technique to a particular look. This past year what I learned had less to do with the process of refinishing a piece of furniture, and more to do with the community of those sharing the same passion. 

Cate and I are still in the process of building StyleMutt and are in no rush to achieve every last one of our hopes and dreams for this small business. It's a brick-by-brick process and we are OK with that. But, the first thing we wanted to accomplish together was defining what StyleMutt would be. We desire for StyleMutt to be a helpful resource to its readers; a welcoming place to find inspiration, tips & tricks, and enjoy being a part of a community with similar interest.

With the furniture refinishing boom growing more popular each year, we see even greater importance in pulling together to share helpful information. Rather than simply share the 'Before + After' photos of newly refinished pieces, we'd like to share new tips and techniques that we're learning as well. There is a lot of information for how to refinish furniture floating around the web, but we'd like to extend our focus to include how to refinish, market and sell your furniture, if that is what you desire to do. With so many talented creatives refinishing and selling furniture, it can be difficult to make your work stand out and move your inventory at a comfortable pace. We have by no means perfected how to market and sell our pieces, but together we have sold around 225 pieces over our combined 7 years of experience, and have learned a few significant things that we feel help our pieces move.

To begin, we'll be using a few posts to discuss staging, starting today!

One of the most important things you can do for a piece you've put time and work into is show. it. off. Bring it inside wherever you feel you have the best lighting, and create a beautiful scene around it. Careful not to let the piece get 'lost', but don't be afraid to add a lamp, a stack of books, a vase of pretty flowers - simple items that help show your piece in context. I specifically like to show versatility with pieces I refinish. A dresser can serve as an entryway catchall, or a dining room buffet. A console table can function as a desk. Try staging your piece a couple different ways to show potential buyers that your piece would be a multi-purpose investment for their home. 

Here is an example of a piece hot out of the garage and currently available for sale, that I staged two very different ways:

This mid-century modern china cabinet could serve as a library in a study or living room, or as a traditional dining room storage piece. Help potential buyers to see value in versatility. Don't you? I know for me personally, I'd rather put my money into something that I could move around and use differently someday, rather than something that's going to be a one-trick pony forever. Take photos in both settings and share both when you post your piece to sell! 

Here is the mid-century cabinet in my living room:

mcm cab1 DONE.jpg

And in the dining room:

And don't forget the close-ups so folks can see the details that give your piece additional character!

It's can be difficult to imagine how a piece of furniture might look in your home or where you'd place it, especially if you're only looking at pictures of a piece in someone's garage or sitting on their driveway. Make it easy for people looking at pictures of your piece to really see its potential. Proper staging and a dash of versatility, (when possible), go a long way. It takes effort, yes, but if you feel your piece is worth $X, take the time to make it LOOK worth $X! If it doesn't look fantastic in your pictures, it will be hard to convince people to take the time to see it in person. Just my two cents. :)

Two-Tone Mid-Century China Cabinet
SOLD
Please contact chelsea@stylemutthome.com if interested in a something similar!

Thank you all so much for stopping by! Have a wonderful day!

Industrial Pipe Shelves ||Reveal + Tutorial||

Hi, All! I'm thrilled to finally be sharing this crazy fun and super big project with you today! If you're an Instagram friend then this post might be a little anti-climatic since I've been sharing pictures of these shelves for the past couple months. I decided to wait until after the holidays to post about our new industrial build, so we've had a bit of time to grow into it. You may have seen pipe shelves before - I've seen folks build small ones in bathrooms, as well as over entire walls as more of a 'built-in' look. Here is our version of these fabulously industrial shelves:

Aren't they rad?! We previously had a china cabinet on this wall which I enjoyed refinishing in a beautiful Duck Egg blue. But, as the kids got a little older it wasn't a practical piece for us and I needed way more open storage. I shared a few inspiring pictures of industrial shelves with Matt, he loved the idea, and we got to work almost right away! Building this was WAY easier than I had expected, and I'm going to show you how right now!

Let's have some fun, shall we?

First, we measured our wall and created this digital design of what we wanted to build. I wanted room at the bottom shelf to slide a stool or two under to use as a make-shift desk for our kids.

Then it was time to gather the supplies! I kid you not, gathering all the pipes and pieces for this project took longer than the actual build. I highly recommend calling your designated hardware store ahead of time and asking them to check their stock of each piece! Here's what we came home with:

Supplies pictured above:
3 x 24" 1/2" pipes
3 x 18" 1/2" pipes
3 x 14" 1/2" pipes
24 x 12" 1/2" pipes
3 x 10" 1/2" pipes
18 x 1/2" elbows
16 x 1/2" tees
6 x 1/2" flanges
Supplies not pictured above:
5 x 60"x16"x1" Pine Panel Boards
7/8" hole saw bit
Wood Stain for the boards, (we used Kona by Minwax)
Metallic spray paint for the pipes, (we used Rustoleum Oil Rubbed Bronze)
Lysol wipes to clean the pipes

TOTAL COST FOR ALL SUPPLIES: Just under $450

Once you have all of your supplies home, you'll want to clean the grease and oil off of the pipes before you spray paint them. Just give them a good wipe down with Lysol wipes, let dry, then spray them. Once the pipes are dry, it's time to build! Work from the floor up:

Following our digital design, we just started threading everything together like a good old fashioned erector set! At this point we have not screwed anything into the wall or floor. The pipes and fittings were screwing together so tight and were so incredibly sturdy, there was no need to anchor anything until we got up to the very top.

The panel boards, which we pre-drilled the holes on, just slid right over the vertical pipes, and rested on the horizontal 12" pipes with the elbow supporting the side closest to the wall.

Once we got to the top, (and again, at this point nothing is anchored to the floor or wall, but the sheer weight and tightness of it all kept it so sturdy), we used 3 x 14" pipes threaded into the top three elbows, (seen in the picture below without the pipes), and then threaded the other end of the 14" pipes into the flanges. We then screwed the flanges directly into the wall for additional security. The bottom flanges are just sitting on the floor, not screwed in. It's really not necessary once you see how sturdy the structure is.

A view of the finished product from the middle. It really was a quick build! The prep work took a bit of time, (gathering the supplies, cleaning and spraying the pipes, staining both sides of the boards and drilling the holes), but the actual structure went up pretty quick!

These shelves have been so much more functional for us. The bottom shelf is completely stocked with kids' activities and supplies and now that they're out in the open, we are doing way more activities together. That is such a gift in and of itself!

I hope if you ever want to give these shelves a go that this tutorial is helpful for you! Please don't hesitate to ask any questions you have! One discovered bonus to these shelves versus actual built in shelves is that these are transportable! If we ever move from this home, we'll be able to bring these with us, (and we can always add on if need be).

Thank you so much for stopping by and have a wonderful weekend!