Faux Pull-Down Chart - Under $10

Cate here.  I've been MIA since June because I was on vacation with Caleb, Chelsea & the rest of the fam followed by an epic week of Young Life camp. 

Caleb is currently on staff with Capernaum {the Special Needs ministry branch of Young Life} which means I got to spend a whole week bunking, laughing, stretching, and adventuring with as well as delighting in these lovely ladies.  Good times were had by ALL!  If you've never been to a Young Life camp I highly suggest you find a way to go.  It's not at all like the grimy outhouse and rainy campsites of my childhood.  Our little group got to go tubing, climb on a ropes course, and eat a giant cookie for dessert.  Awesome right?  And after such a great couple of weeks, I'm even more pumped to share with you all this week's guest post!

Ok.  So.  I've been seeing a lot of chatter about engineer prints on pinterest lately.  If you haven't heard, engineer prints are made on industrial printers typically associated with architecture and engineering plans.  They are printed in black and white on GIANT paper.  So what's the big deal right?  Well.  Rumor has it they are only $7 to have made at your local copy center.  BOOM!  $7 bucks for a 3ft x 4ft piece of potential wall art. Not bad right?  Well I was still skeptical.  

Often times I can get pumped about a new, intriguing project only to have the fun sucked out of it by a disappointing outcome when I DI-try it.  But I am happy to report this is NOT one of those cases:

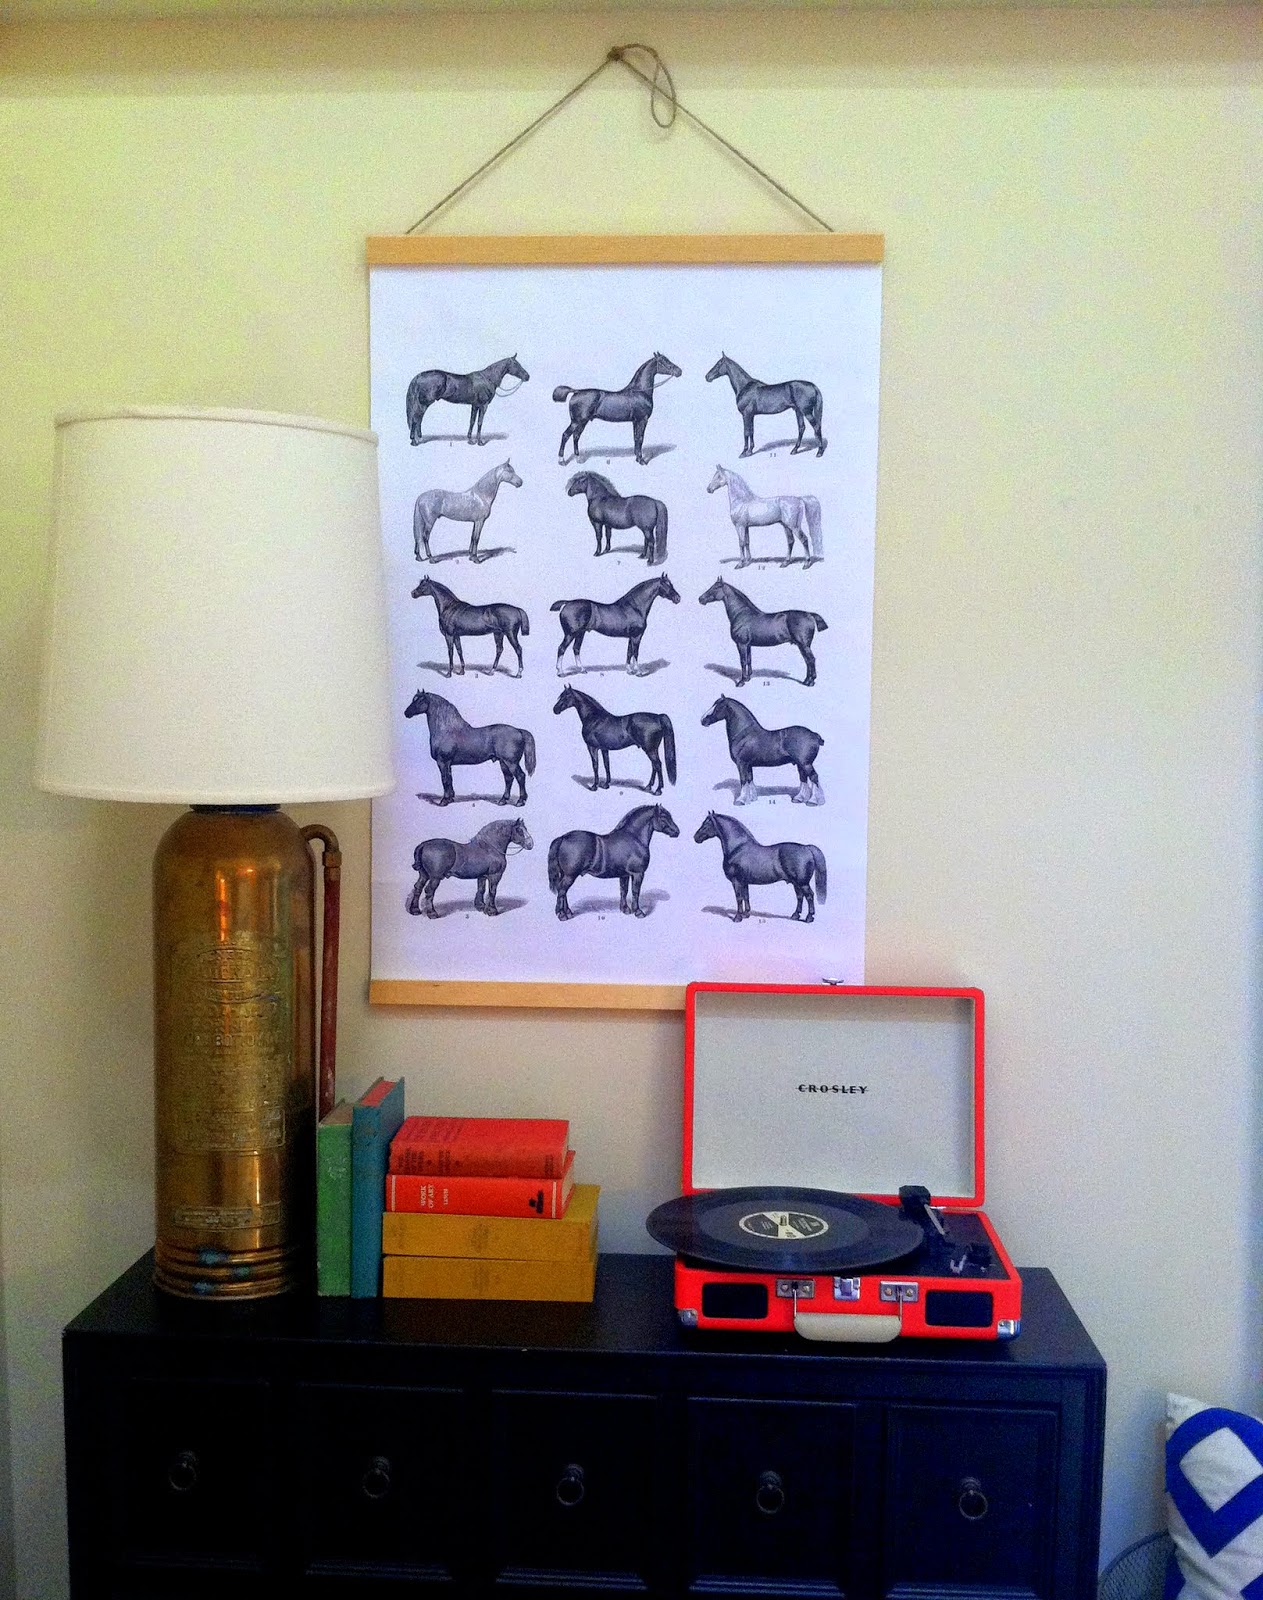
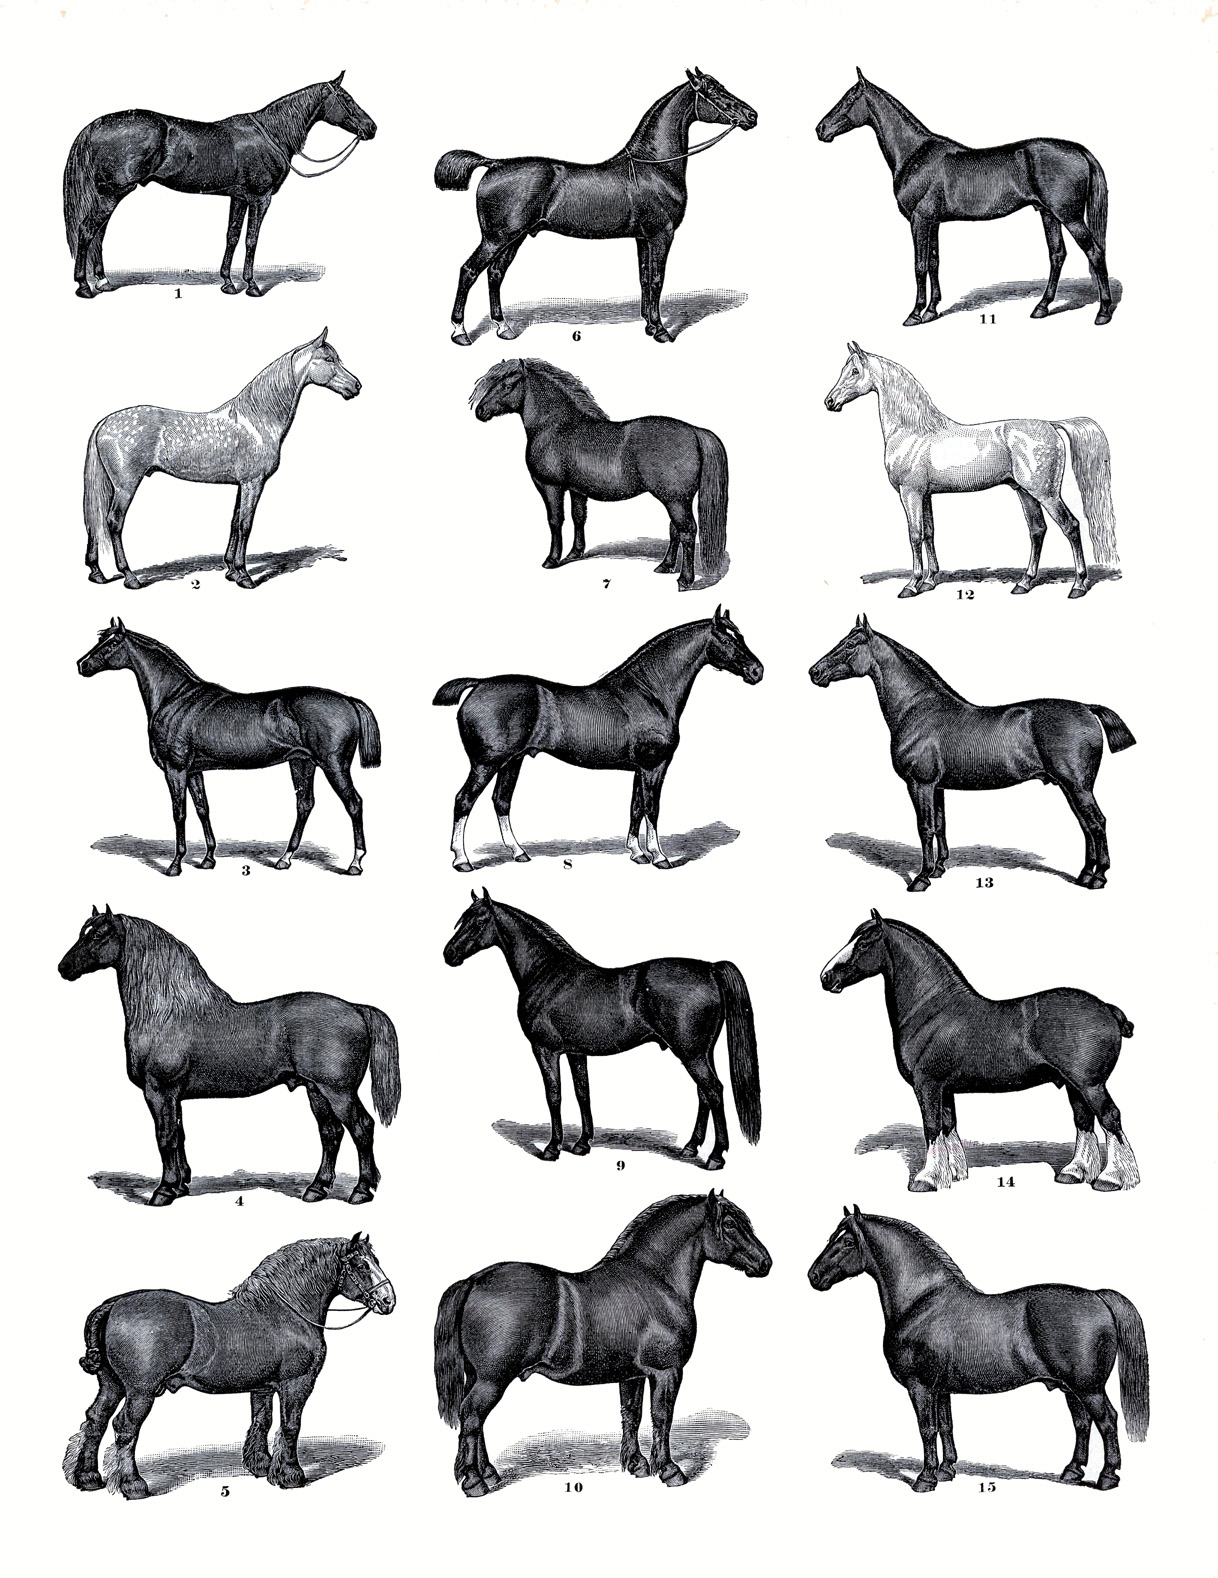
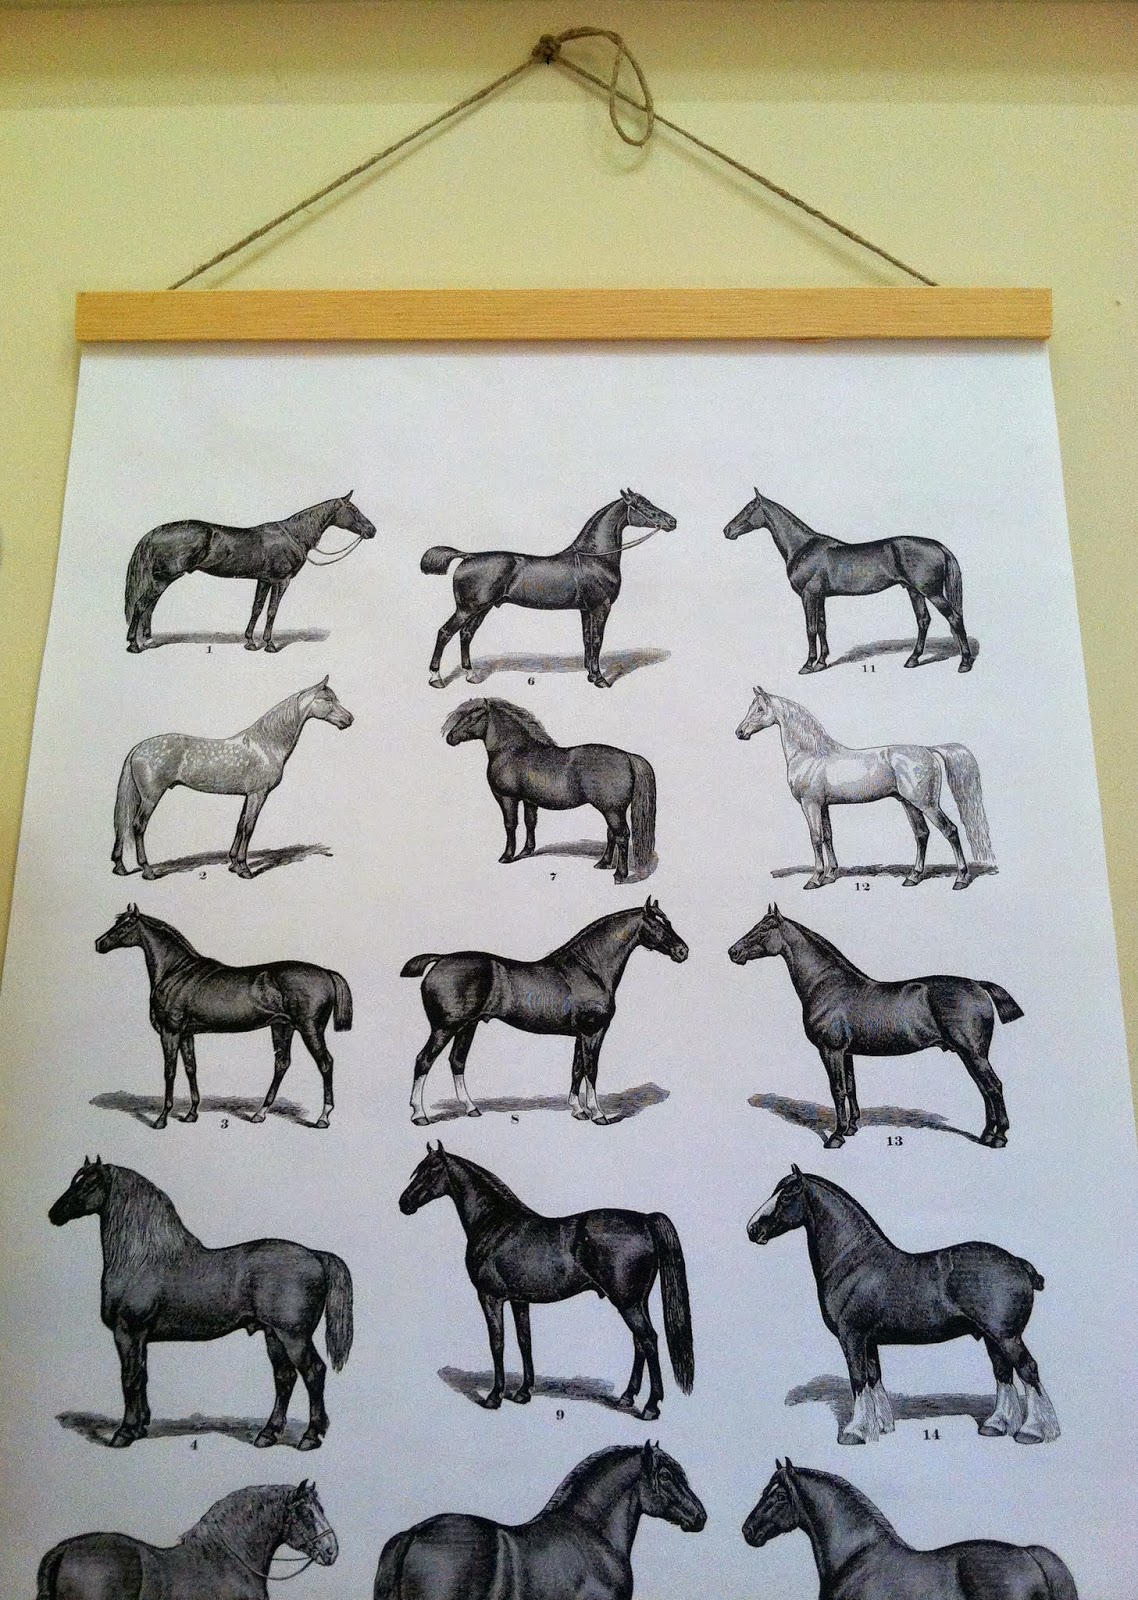
To get my trial run started, I needed to find something to have printed.  So I made a wish to The Graphics Fairy and she happily granted with a FREE equestrian-themed printable


The thing about engineer prints is they only print in black and white.  So I was careful to chose a print that was meant to be that way and went to Staples with the 8.5x11 pdf on a thumbdrive.  I was skeptical of the printing quality since I was attempting to blow up the document to such a large size, but as my luck would have it Staples was having a sale - 24" x 36" engineer prints for $3.  Figured it was a good enough price to pay for a test run.  And let me tell you, I was pleasantly surprised by the quality of the image.

 Now that I had my giant engineer print, I need a way to hang it up.  Buying a giant frame to fit it kind of defeated the purpose of such a cheap print.  So I consulted pinterest for more ideas and found these gems (pun intended ;)

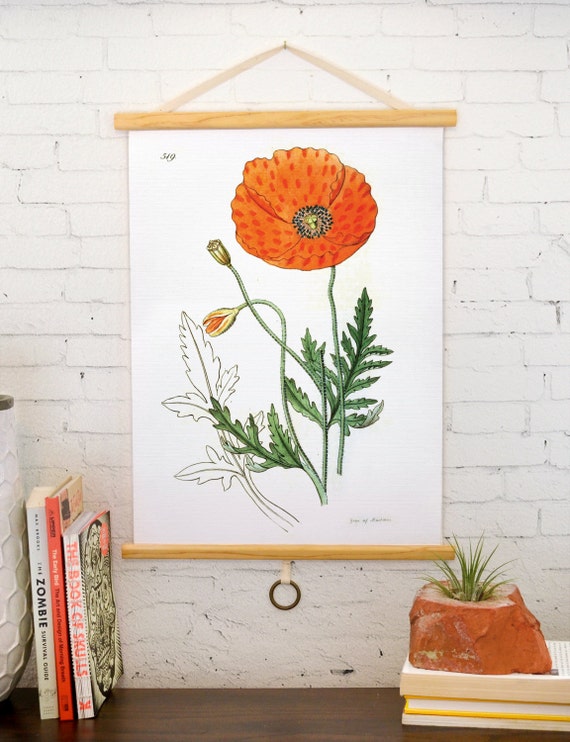
{Source 1: Apartment Therapy}  {Source 2: Curious Prints}

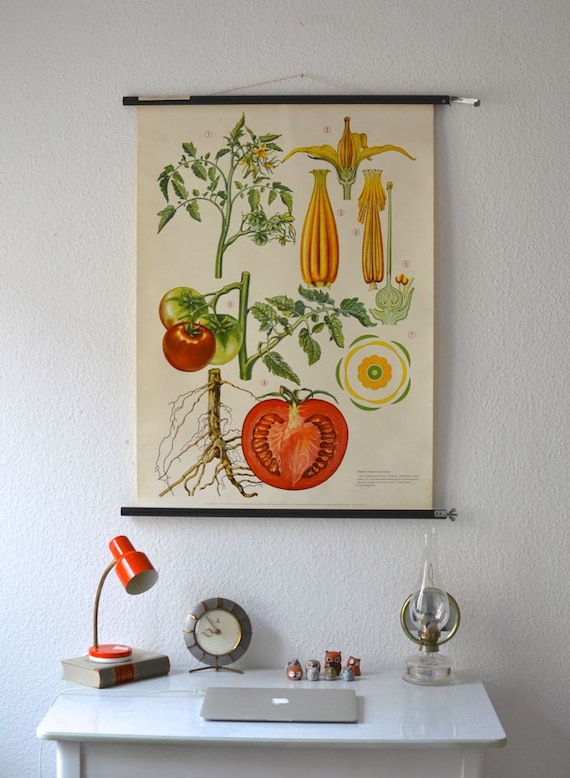
{Source 3&4: Mighty Vintage}

I was going to make my print into a faux pull-down chart!  

I swung by the hardware store and found some cheap, simple molding for about $0.79 a foot.  I cut it into four pieces 24" in length at the complimentary cutting station in the molding aisle.  Don't be intimidated to use a hand saw at one of these stations - molding is soft and cuts easily.  But I'm sure you can always ask one of the employees to help if needed.  {Side note: after I did this project I even found that some home improvement stores sell craft wood in a nearby aisle that are already cut to 24" or 36" in length.  Even better!} 

Complete recap of materials needed: 
Engineer Print {24" x 36"} 
4 pieces of molding cut 24" each 
Staple Gun, loaded
Twine

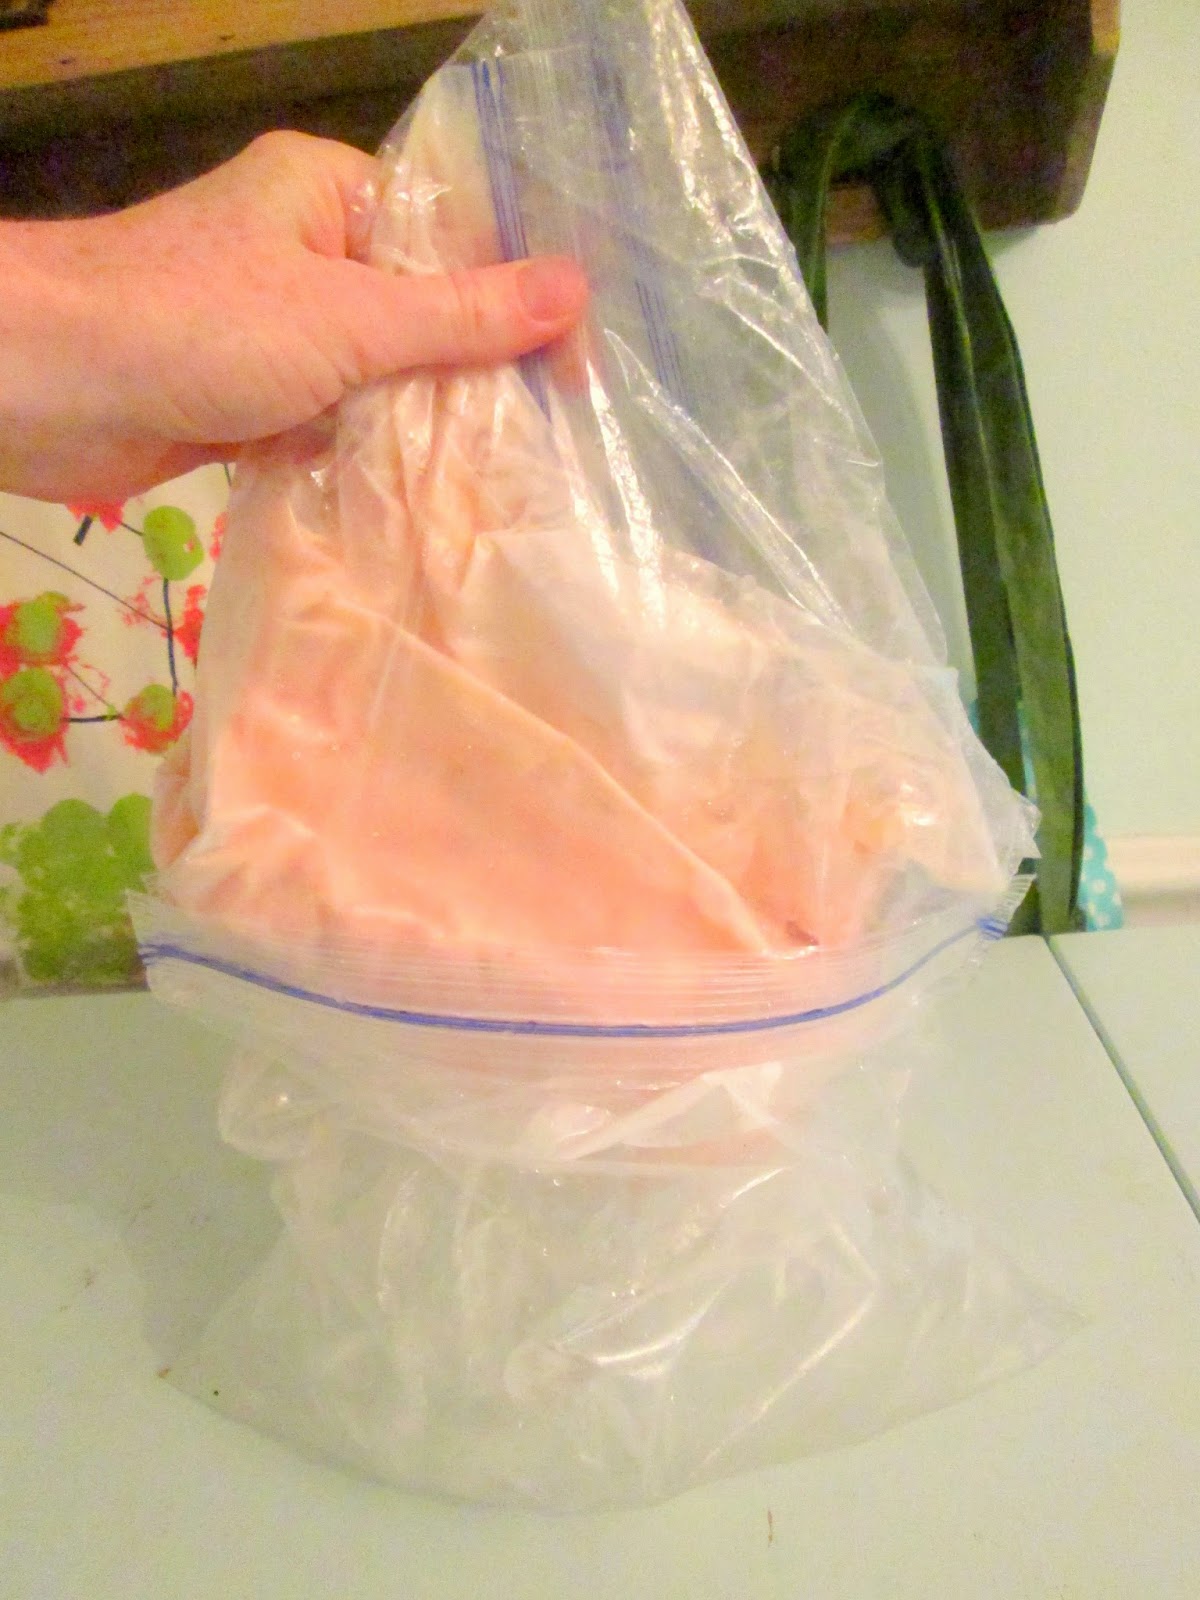
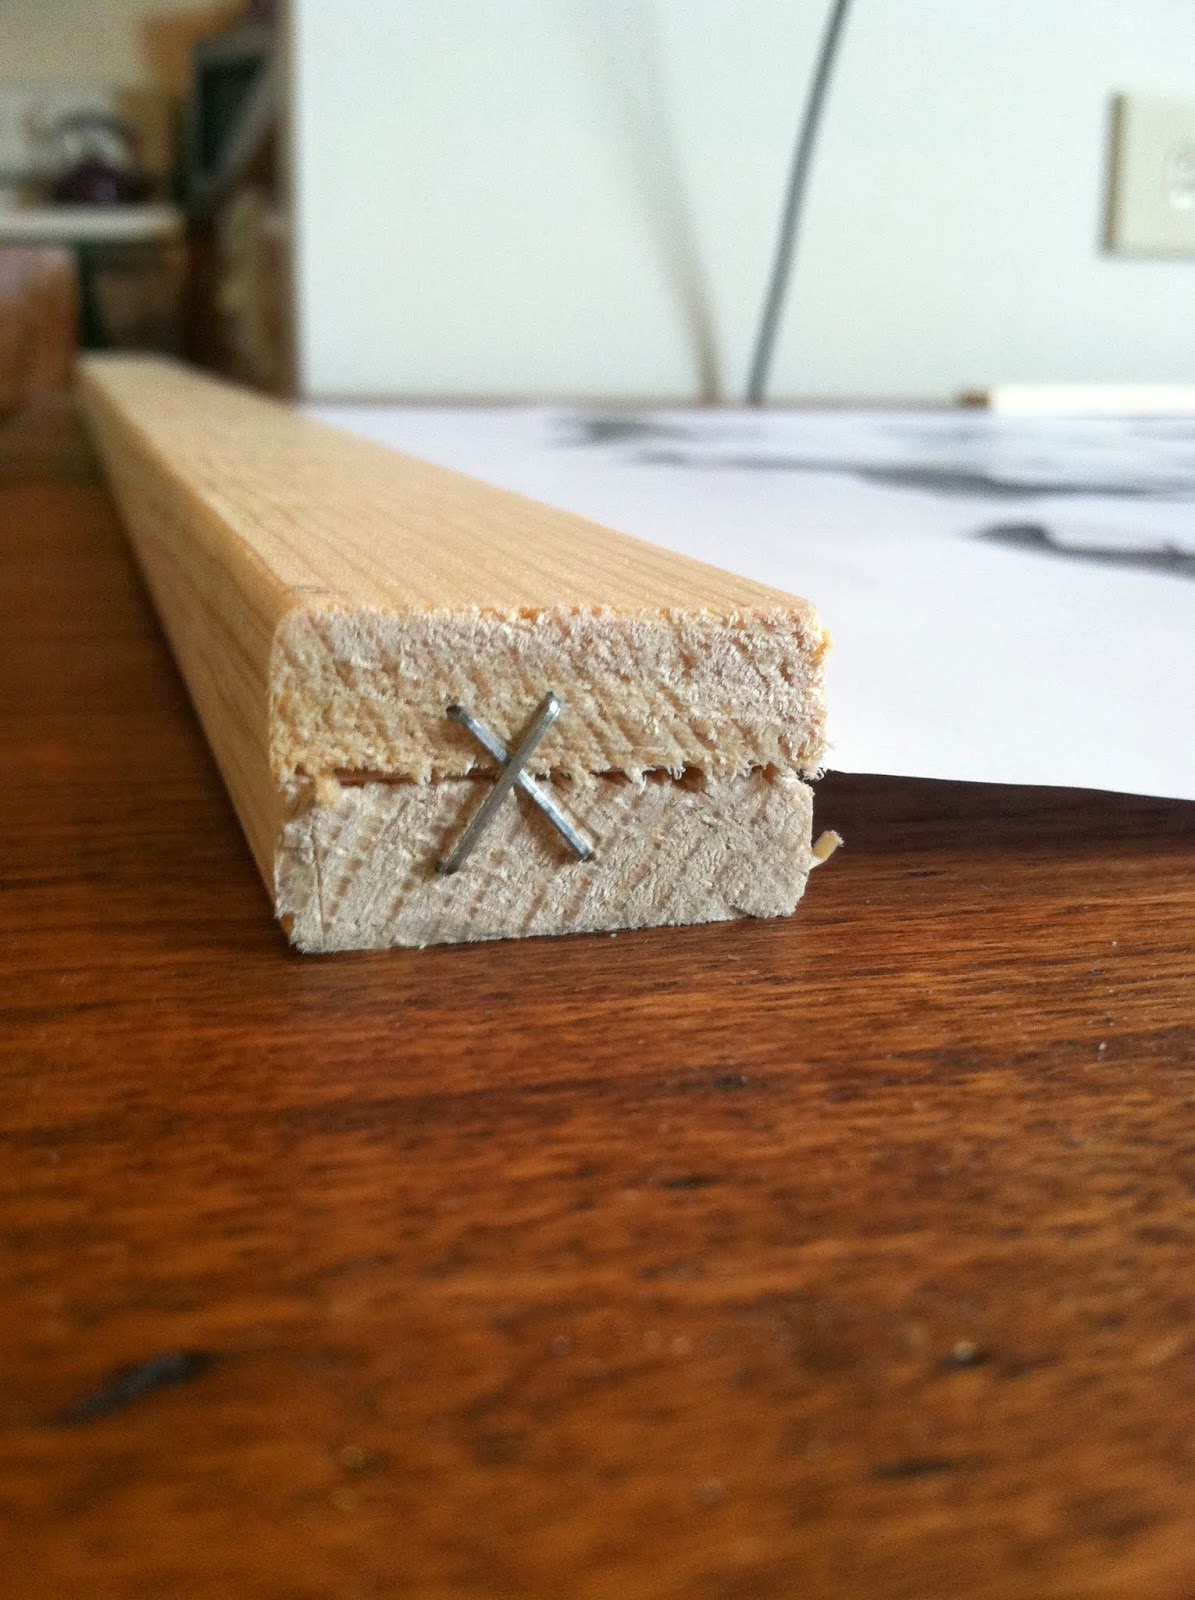
Materials now gathered, it was time to assemble.  I lined up the top of the print and stapled it front-side-up along the molding.

Then I sandwiched the print between another cut piece of molding on top and stapled the sides in a cross pattern.  I suppose I could have glued it too, but this has been holding fast for a couple weeks now.  I did the same to the bottom of the print with the remaining two pieces of 24" molding.

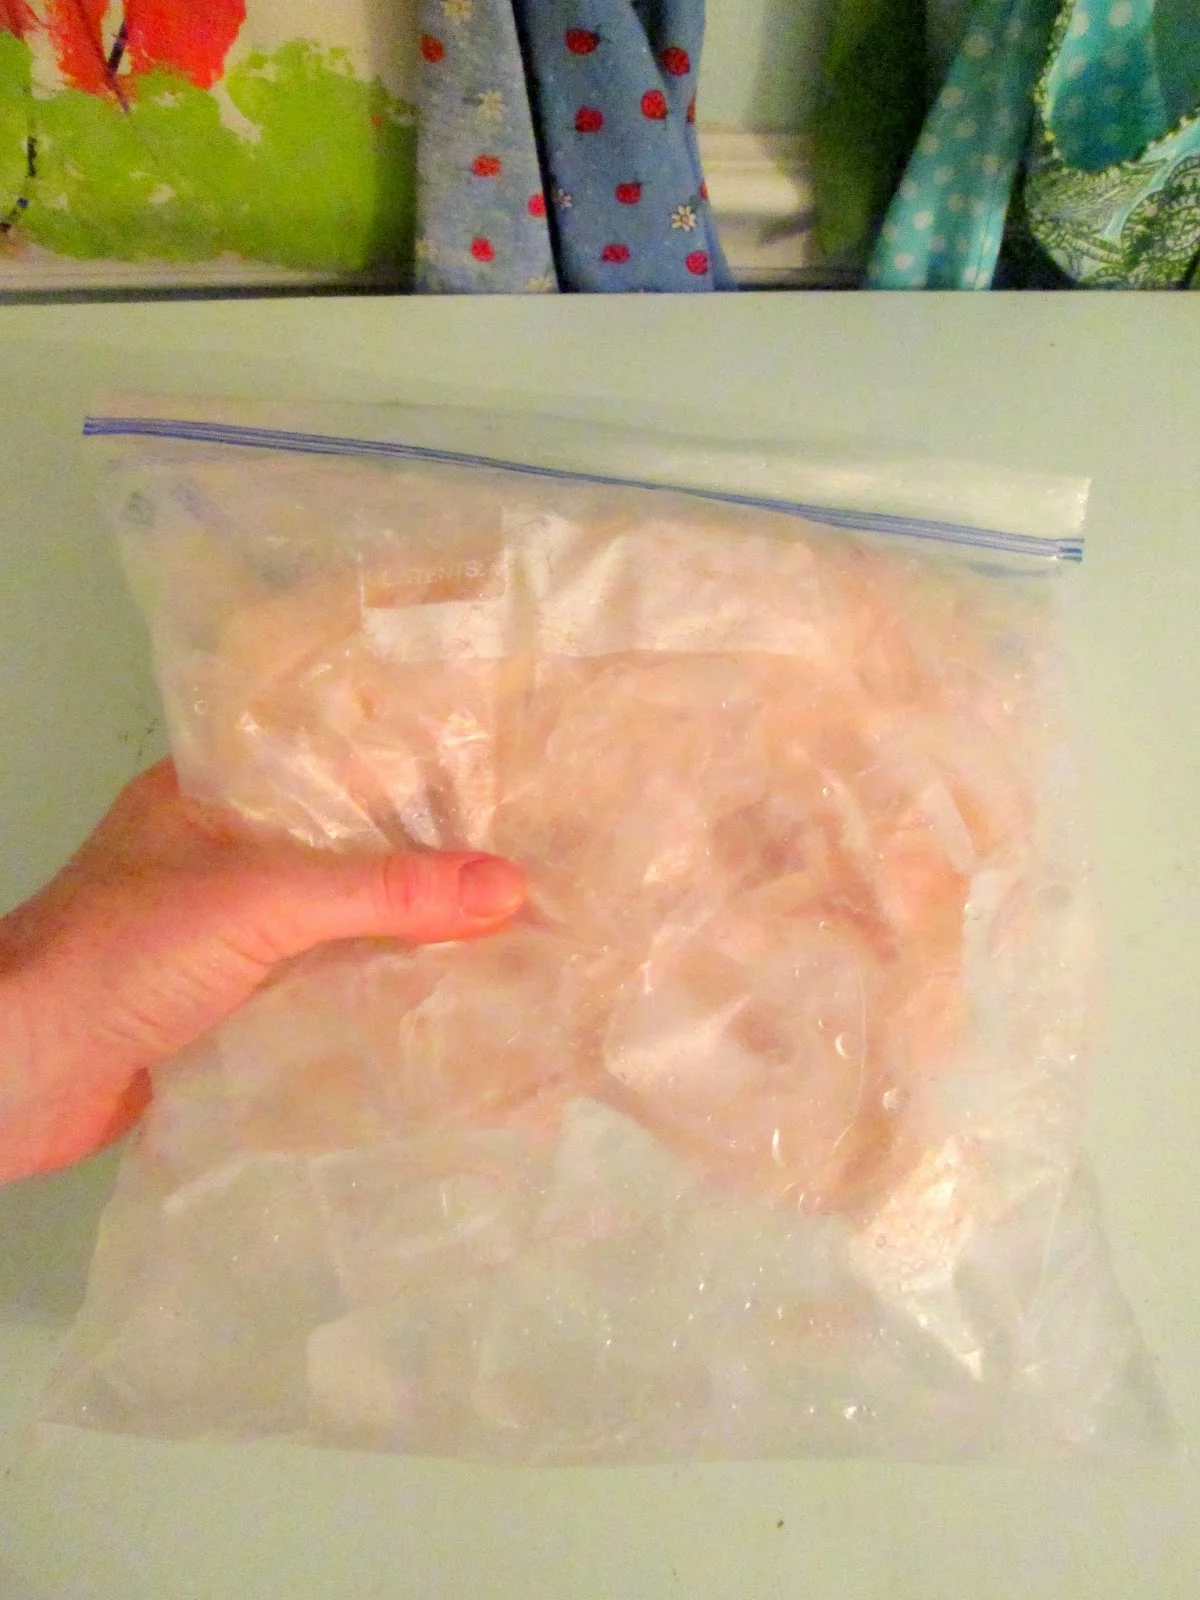
To get it ready to hang, I measured and cut a the length of twine I needed and tied the ends - stapling it onto the back of either end of the top pieces of molding and right above the knot.

Viola!  Giant wall art for just under $10 {$3 for the print + $6.32 for the molding}.

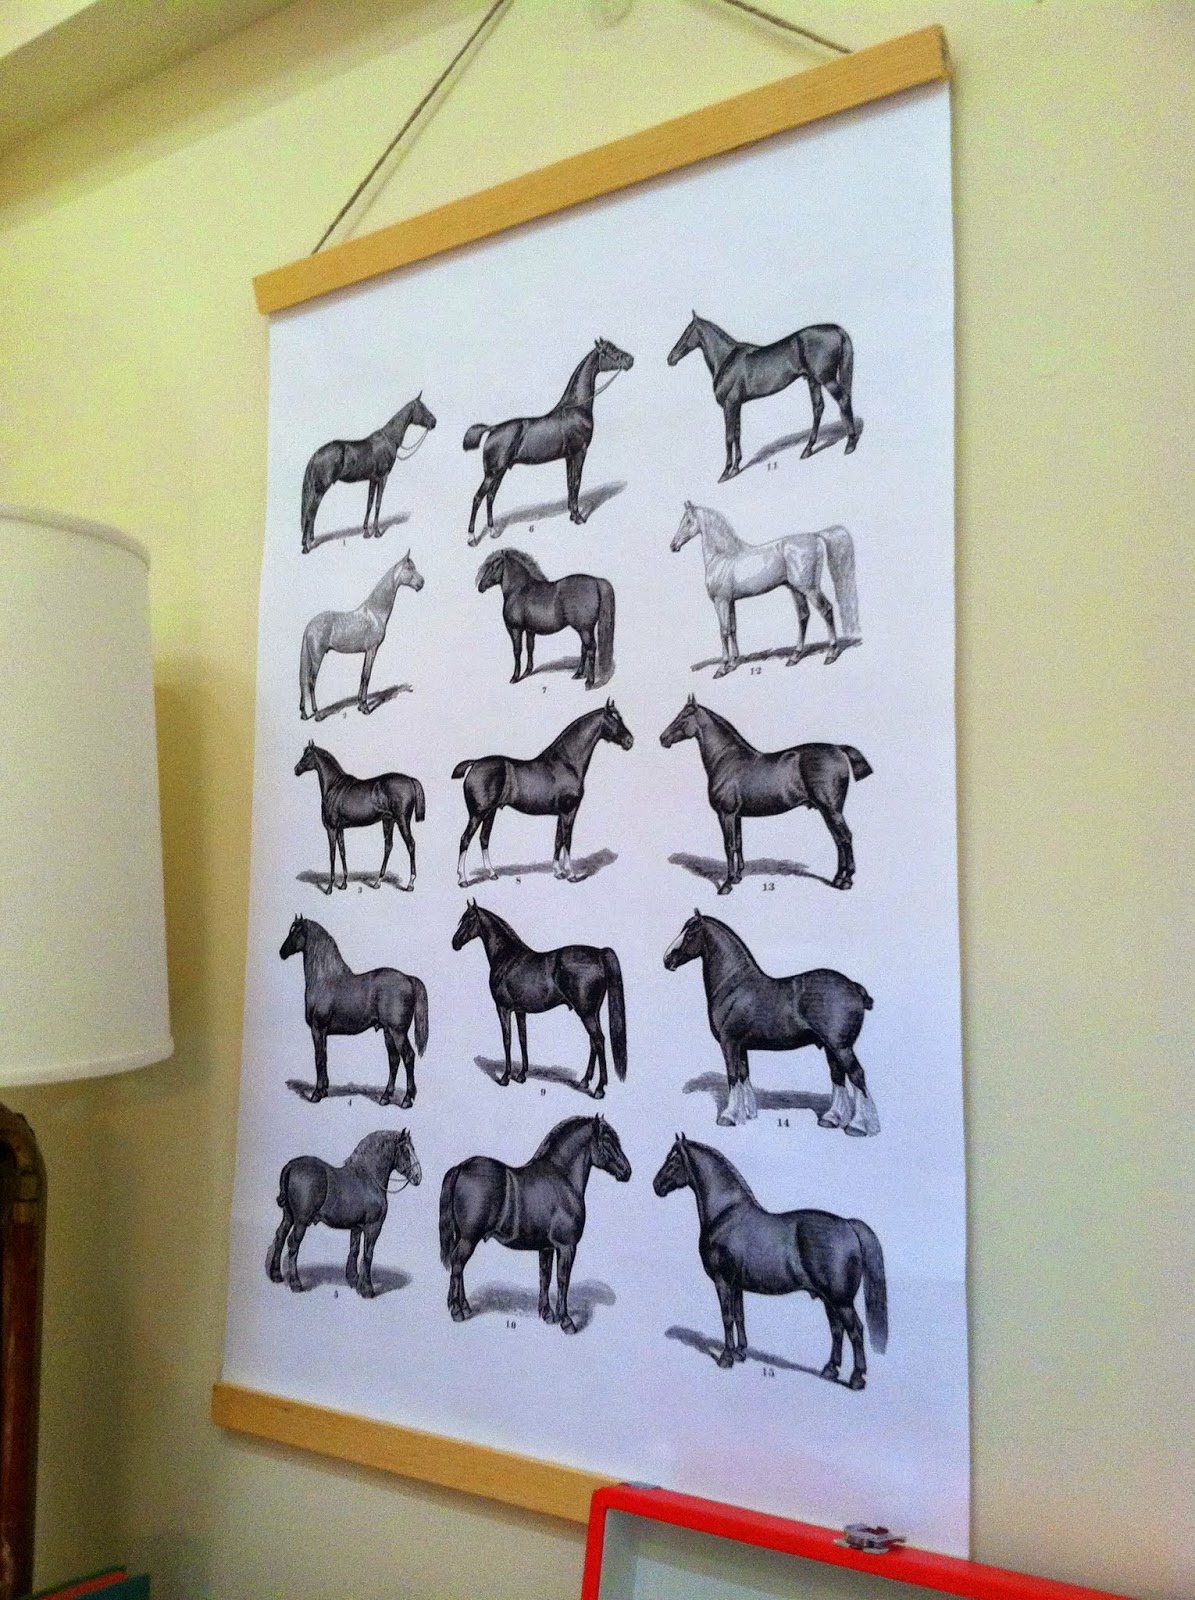
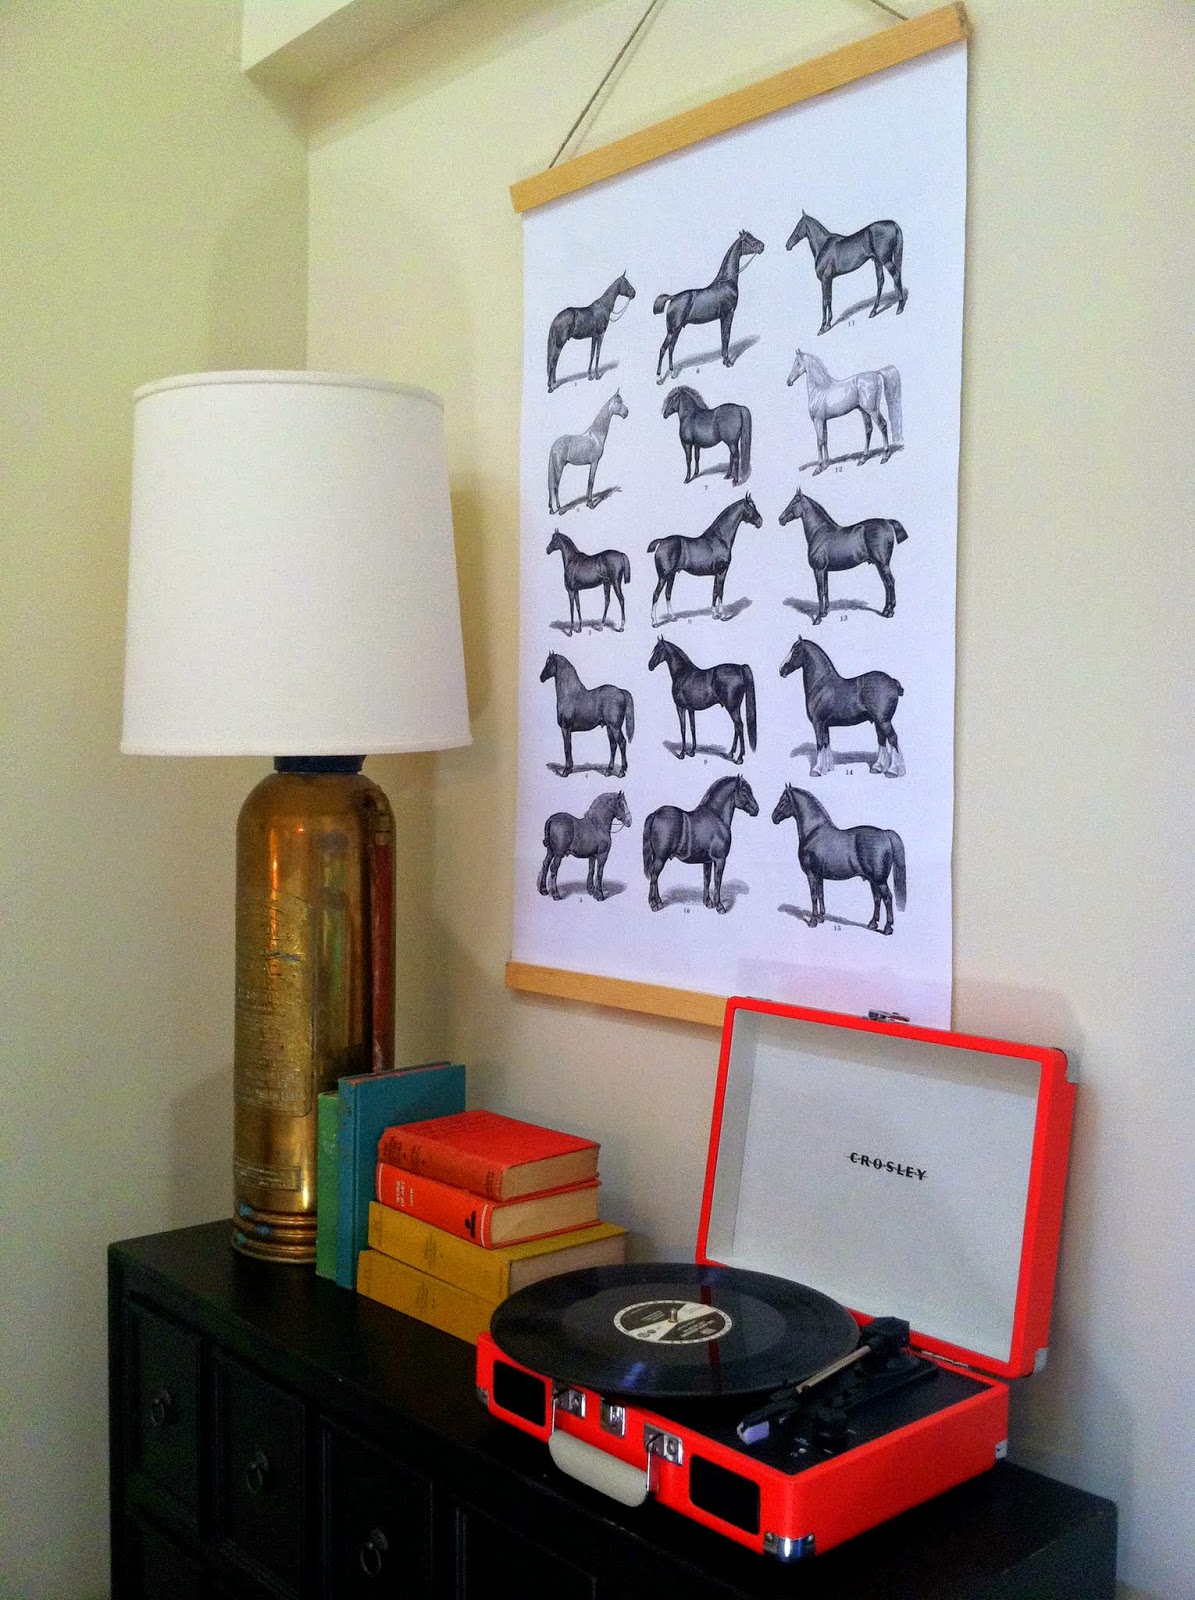
I'd say it's a pinterest win instead of a pinterest fail!

Happy Wednesday,

~Cate

This post was published under Chelsea's Garage, now affectionately known as StyleMutt.

Easy homemade froyo

Hi there! I don't often share recipes on here but this one is just so easy and refreshing. Enjoy!

Homemade Frozen Yogurt

Ingredients:
1 container of plain or vanilla yogurt
2 cups of strawberries, (or fruit of choice), sliced
1 ripe banana
1/4c honey
*1tbsp vanilla only if using plain yogurt

Step 1: Pour all of your ingredients into a large ziplock bag, (I double bagged just to be safe), and seal shut. Then squish everything around to get the ingredients all mixed together.

Step 2: Stick your sealed bag of ingredients into another ziplock bag half filled with ice and salt. Seal shut.

Step 3: Squeeze bag for about 10 minutes to get froyo mixture cold and firm. Or, place in freezer and check in to squeeze throughout the day whenever you think of it. ;)

That's it! This was a really special thing to do with my 4yr old son, Colin. He loved pouring the ingredients in the bag and squishing everything around. He's not always the first to volunteer with hands-on stuff, so it was a very sweet moment together.

Delish!

Thank you for stopping by! Cate will be back tomorrow with another clever Wednesday post you won't want to miss!

~Chelsea

This post was published under Chelsea's Garage, now affectionately known as StyleMutt.

Evolution of a front entrance {in an open floor plan!}

Hi dear readers! I always enjoy a good before & after, but our front entrance is a three-part story with a before, middle, and after.  We have what is called an open floor plan on our main floor. This means there are no walls creating separate spaces between our front entrance, living room and dining room. They're all one, beautifully airy shared space. Open floor plans have become quite the trend in architectural and interior design, but figuring out how to work the shared spaces to create separate but cohesive ones takes a touch of strategy. I'd love to share a short series of posts discussing various arrangements with open floor plans, how to float furniture, and the spaces that inspired me, but today's is about a specific area in our open floor plan that I had some trouble with for a while: The front entrance. 

I wanted to have a defined entry way for both guests and us to stop upon walking in and unload. We don't have a shoes-off policy, but I wanted a cozy spot, warm and welcoming, for folks to hang keys, purses, jackets, winter accessories, etc. The closest closet we've got to our front door is across the room, so not the most convenient, (especially for kids with dirty shoes). 

What we had when we moved in was this nook behind our front door that has this weird, low arch cut into the wall - An arch that drops over 5 feet on the other side into our basement; not ideal for crawling and teetering little ones, (we had 10 month old twins and one on the way when we moved in so this was just not going to work for us). It was an awkward spot to me and my first priority was covering that toddler-kiss-of-death in our wall.

Move-in day in September 2010

Play #1: We immediately backed this big ol' bookcase up against the wall to cover the arch and protect the kids, (and then people voiced concern about the bookcase falling on the kids. New parents just can't catch a break!). It was kind of an eyesore in our light and airy open floor plan, and definitely an eye sore if you were sitting in the basement staring at the back of the bookcase, (not to mention it blocked natural light).

Christmas 2010. Photo skills are in the natal stage.

Play #2: Acquire this antique cabinet from a friend, paint it grey to go with our light and airy space, and cover 3/4 of the arch. We figure the kids won't think to crawl up onto the cabinet and climb through. Place a stack of books in front of peeking arch just in case, (because books are a great barrier between young children and danger).

Fall 2011

Play #3: I see an inspiring picture on Pinterest and a vision is forming. I grab some branches from outside to build upward interest, move my homemade paper wreath elsewhere, and replace it with this fabric-stapled-to-frame masterpiece... Books are successfully saving the childrens' lives so they stay.

Summer 2012

Play #4 - Checkmate: The vision is complete! Matt's a rockstar and helps me 'seal' the open arch with chicken wire. We move the coat rack, (made from thrift store spoons screwed to a floating shelf I had), above the arch to hang jackets and hats. I luck out by finding this vintage fire-engine-red toolbox sitting outside this dumpy antique shop for a few bucks, (it happens to be the perfect size for my little ones to use as a bench to pull shoes on and off). I create the funky yarn heart art, (how-to here), and arrange a few branches in a jar just for fun.

2014

We used a staple gun and muscle to stretch the chicken wire tight against the sides of the arch and attach it to the wall.

The basket I found on clearance at Target and painted the bottom white, (inspired by baskets I'd seen by Serena and Lily at the time).

It was quite the process finding something that we feel comfortable with, that's functional, and is in tune with the rest of our home. It's no longer an eyesore, but now a fun, breathable nook that I love seeing when we first walk into our home. And more natural light to our basement doesn't hurt either!

Have you had any challenging nooks or corners in your home? How did you tackle the issue? Share and link, (if you have one), in comments below or on Facebook!

Thanks for stopping by!

~Chelsea

This post was published under Chelsea's Garage, now affectionately known as StyleMutt.