Peek-A-Week #5 {Two-Toned Table}

Happy Memorial Day all!  We are so thankful to all those who serve, have served, and gave their lives for our country.  As a diplo-brat myself, I have had the honor of meeting a lot of wonderful service men and women in my travels.  Wherever you are serving today, I hope that you are safe and know we at Chelsea's Garage are grateful for all that you have done.

For all you readers here on the "home front," I have another sneak-peak for you!  Since the June 7th Garage Sale is also my debut, Chelsea and I thought I should do this week's peek-a-week.  

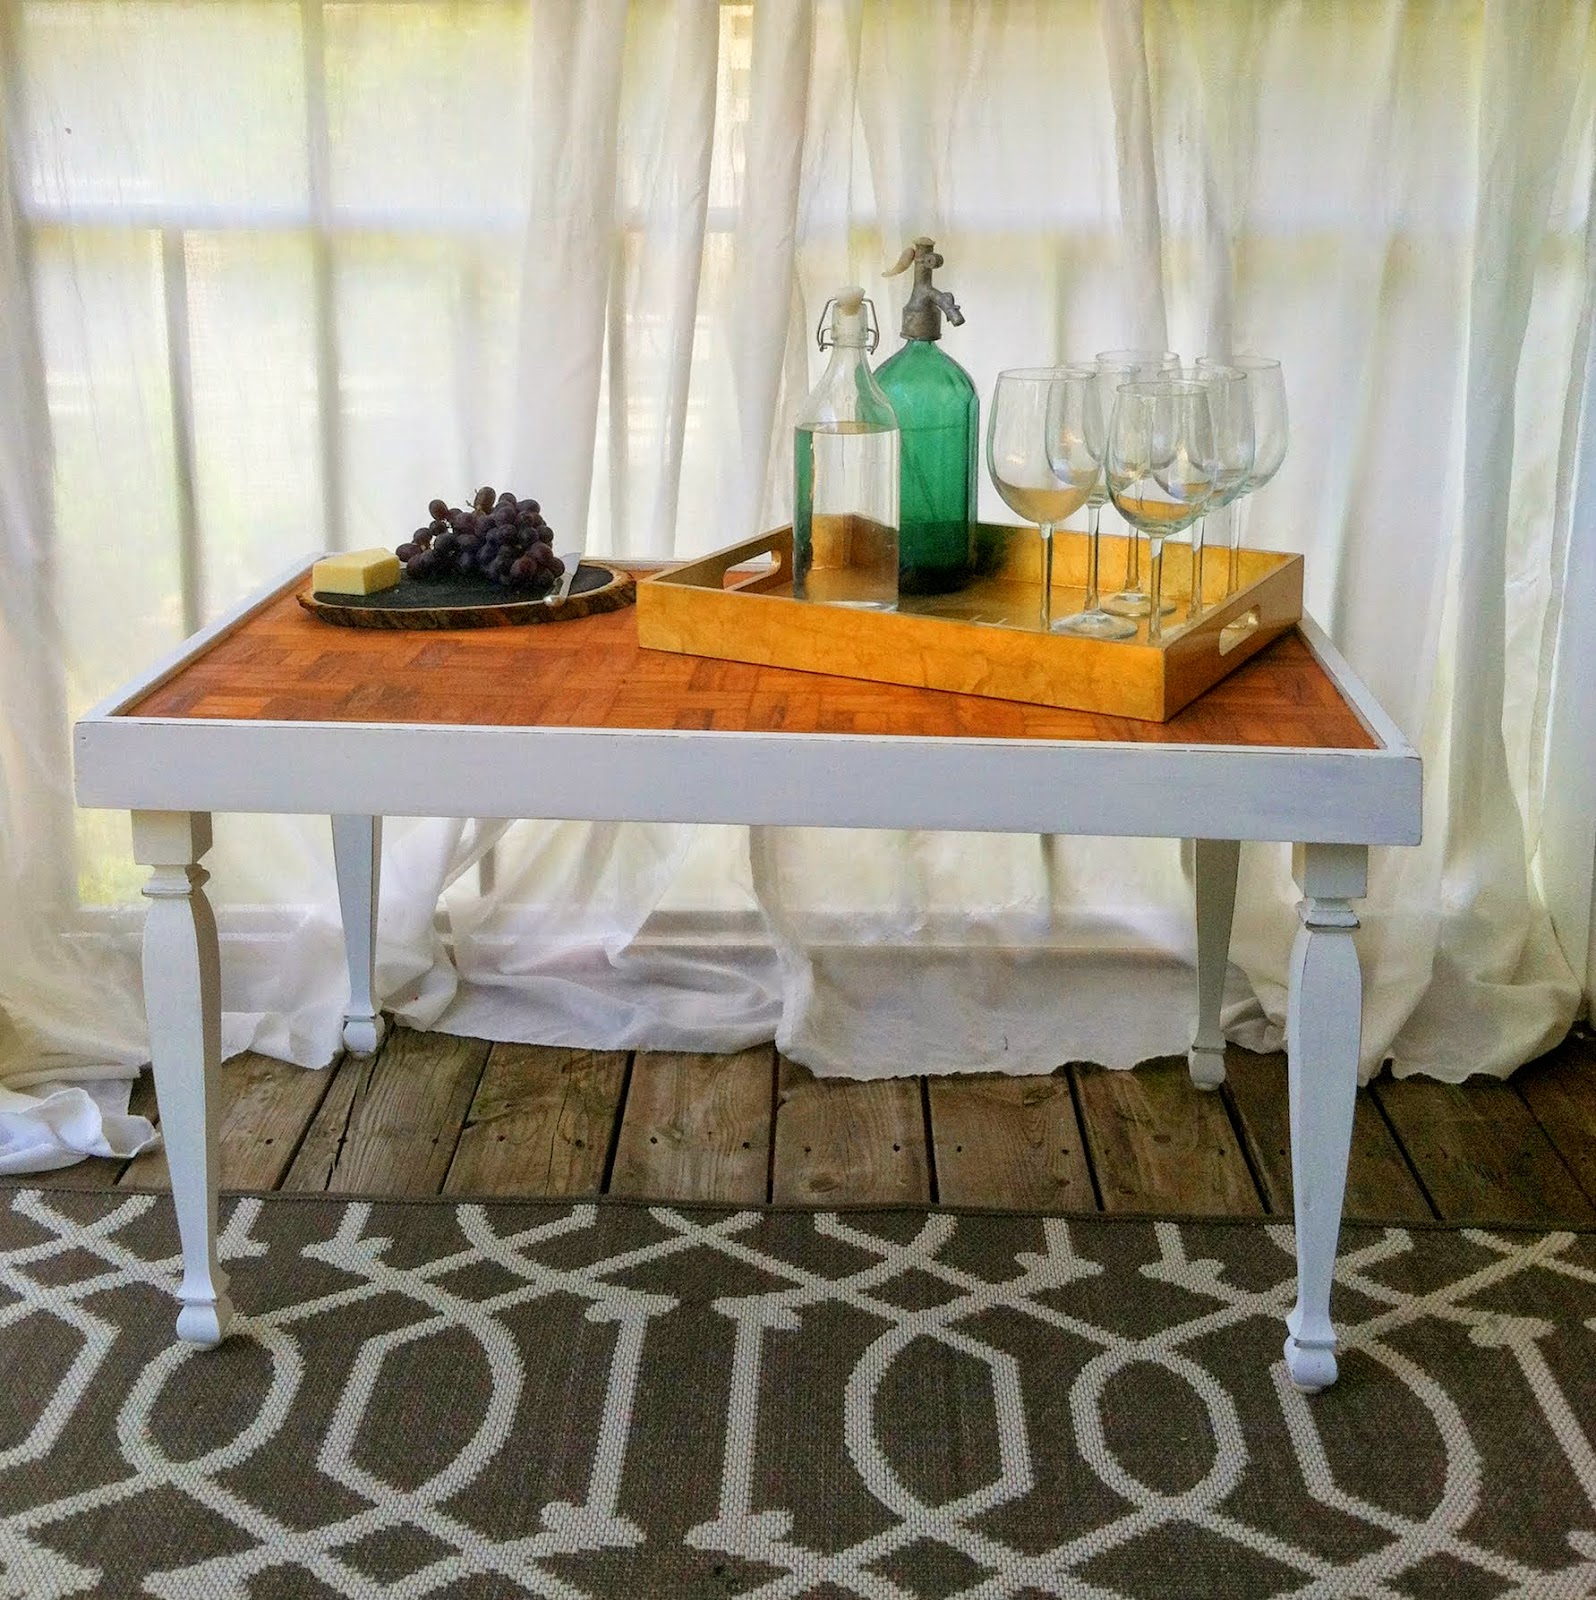
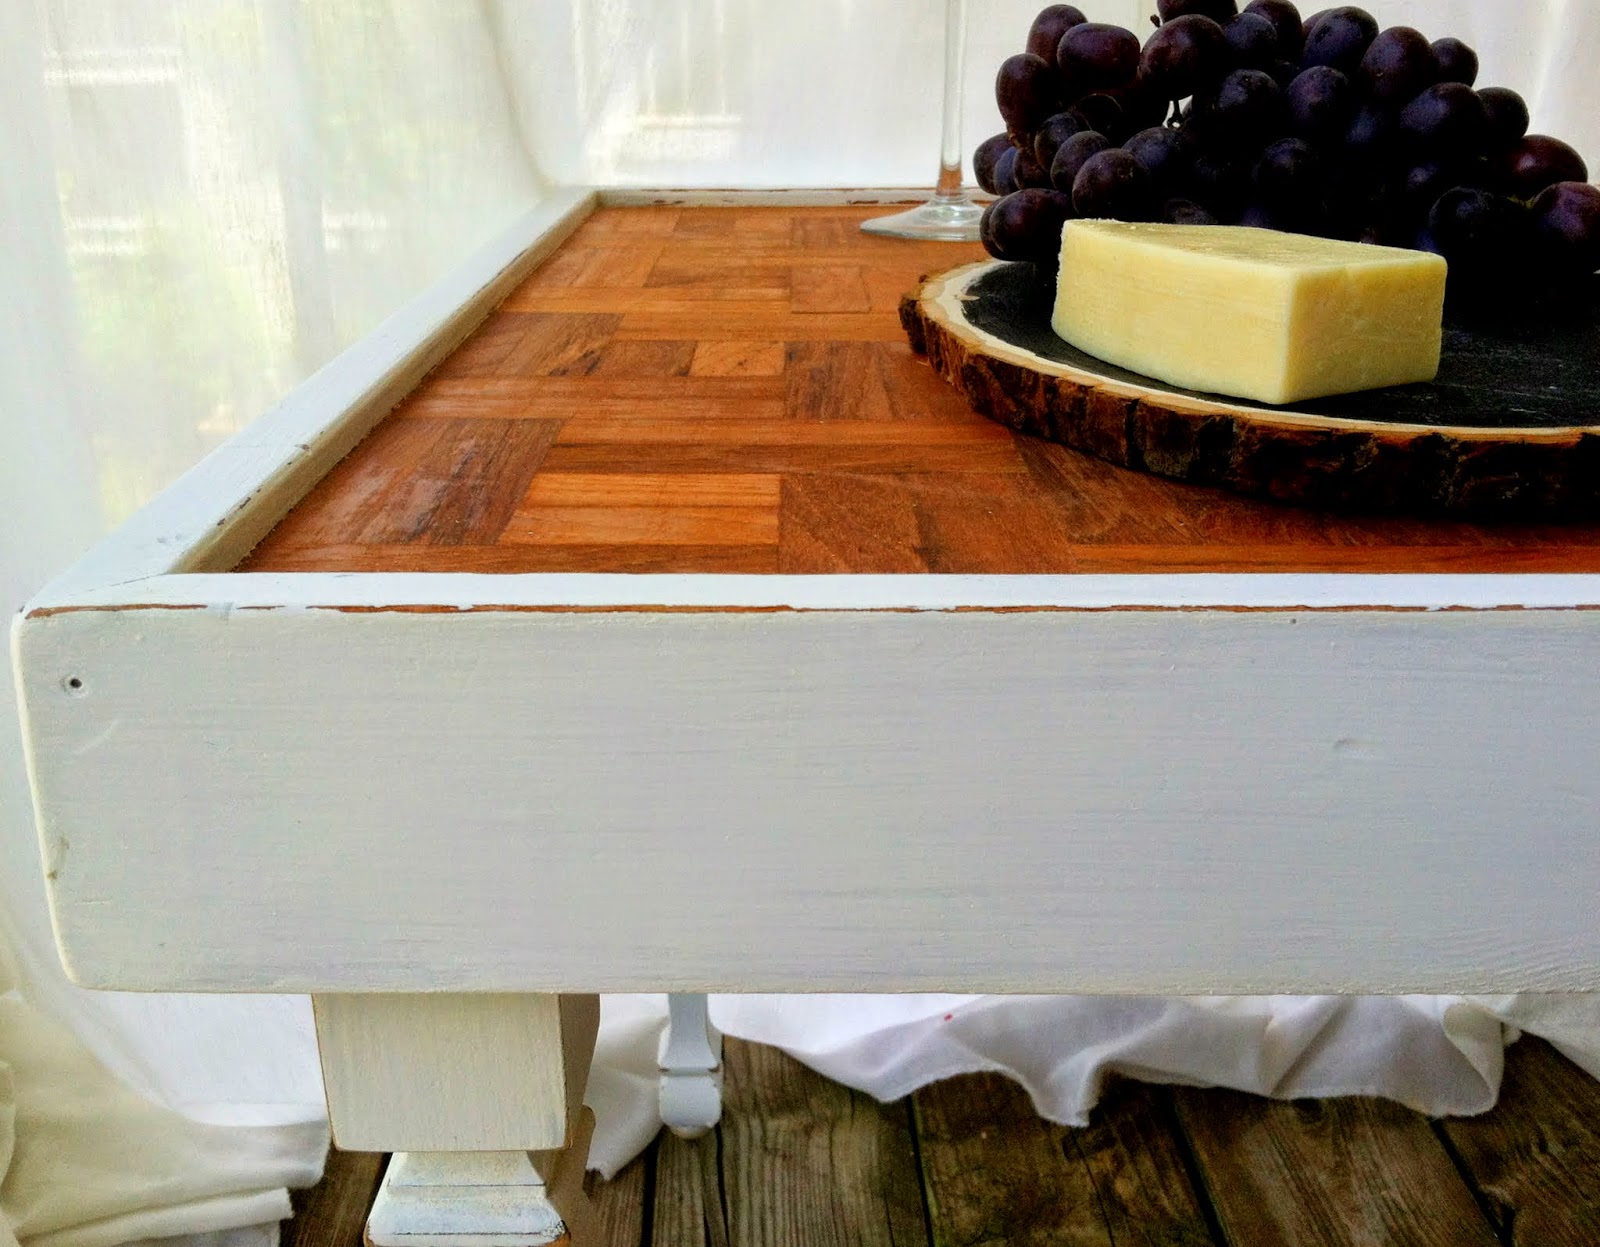
Voila!  A two-toned coffee table.

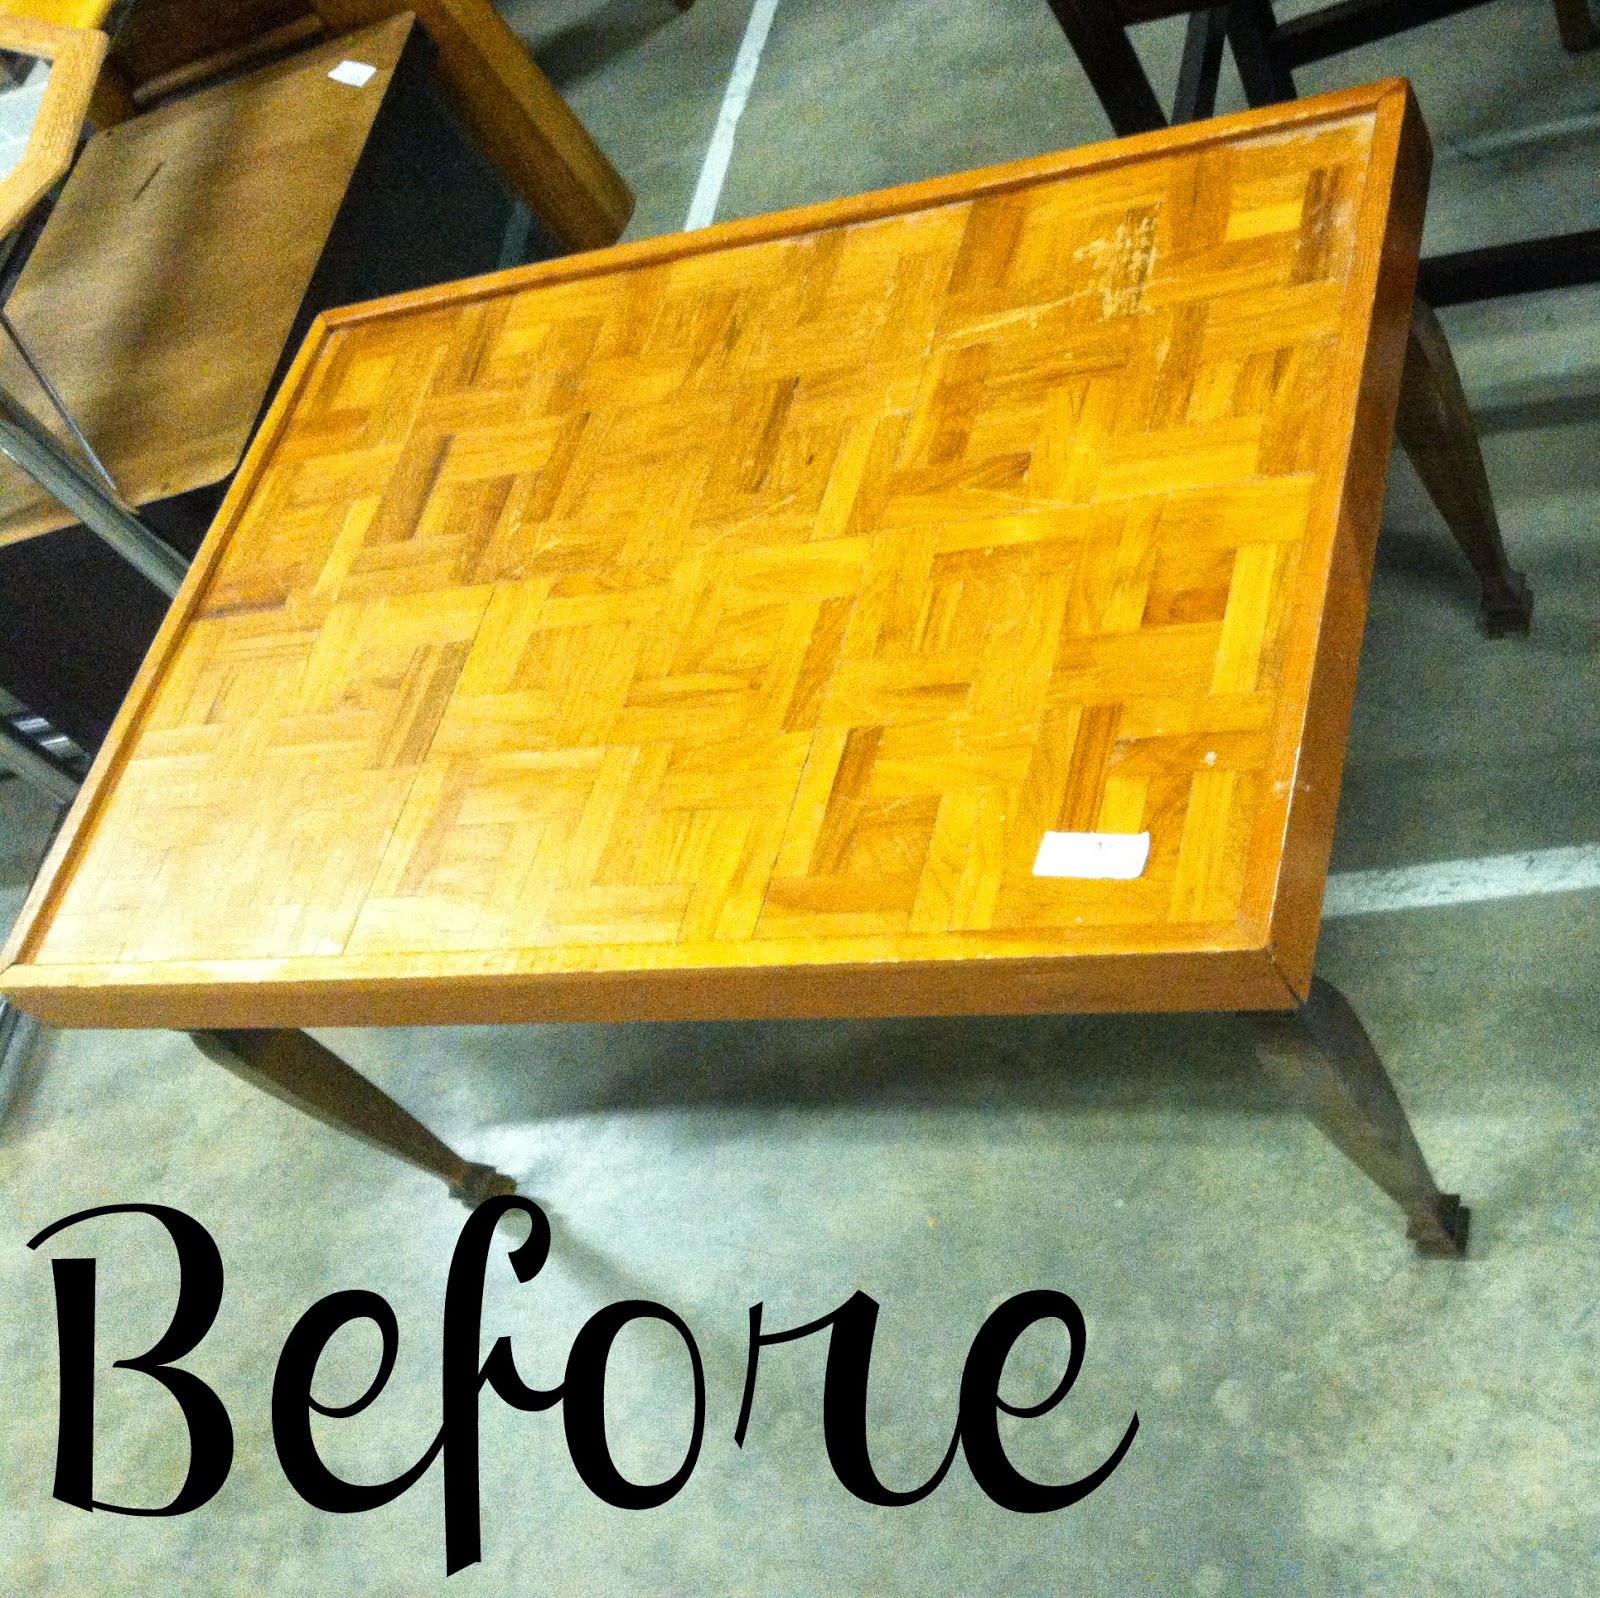
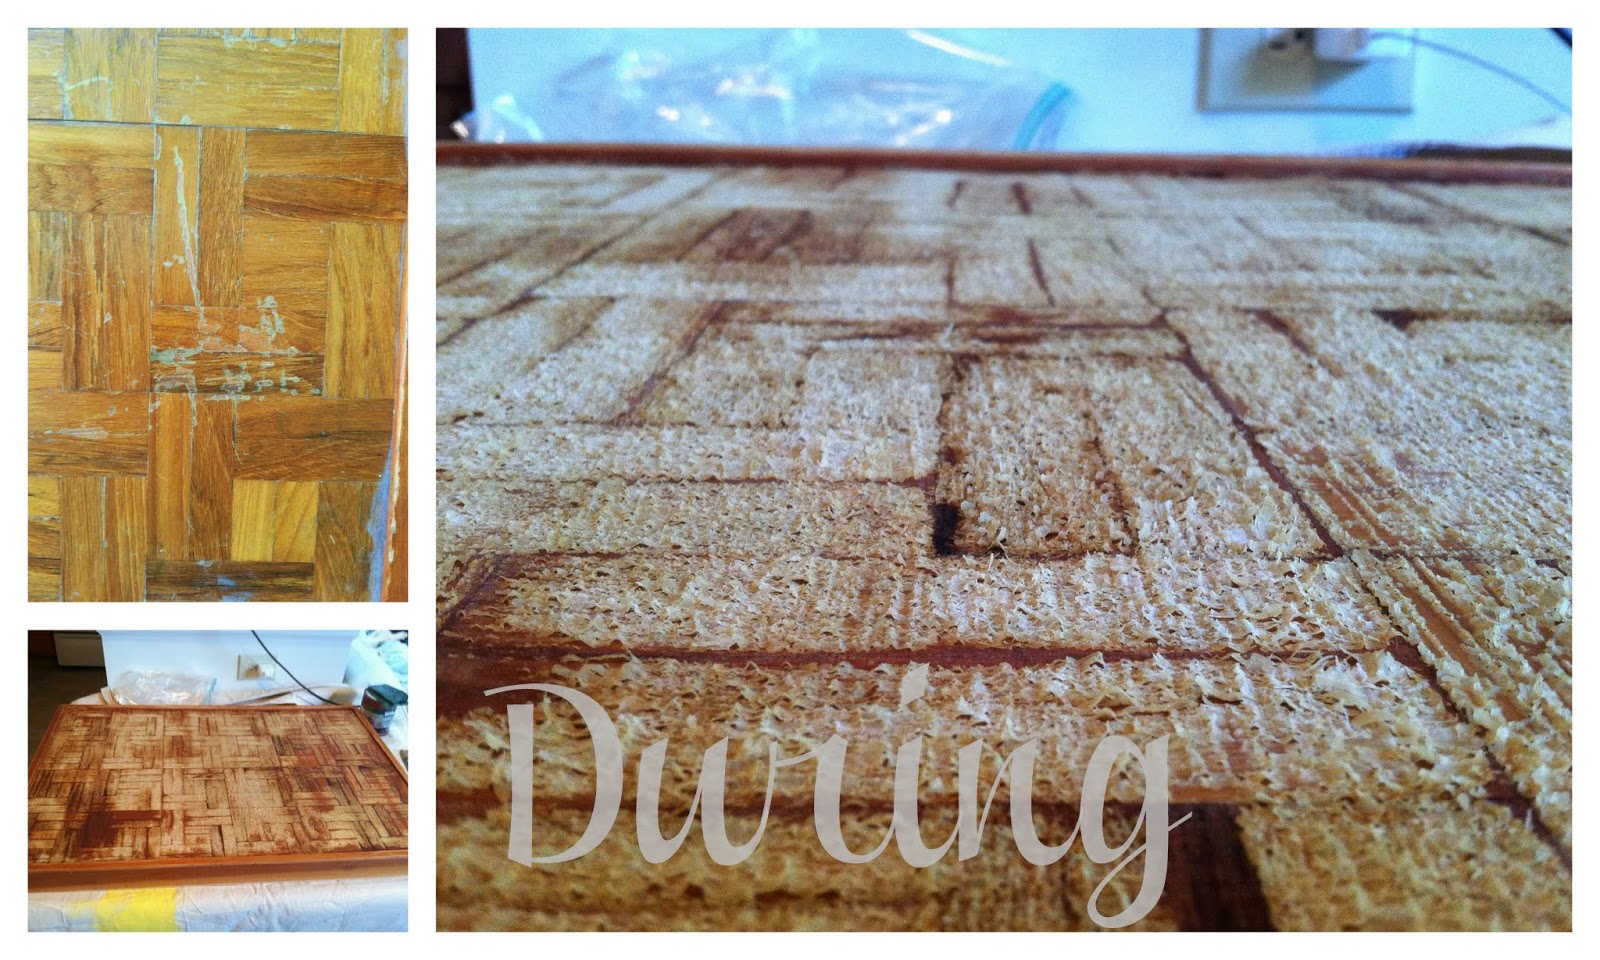
When I found this table at local thrift store, it was an outdated yellow mess.  But underneath all that scratched-up polyurethane was a beautifully intricate weave design.  So I applied my trusty Citristrip and let it do its magic.  After a couple of hours, that polyurethane flaked right up and was easy to scrape off so I could stain the natural wood.  You can see some pics of the process below.

From yellow to handsome-fellow (see what I did there ;)

I re-stained the top with a warm Colonial Maple Minwax stain and painted the trim and legs with a crisp white homemade chalk paint.  I would have used some Annie Sloan Pure White, but I was too impatient to run out and get some.  I did, on the other hand, have a generic flat white and some Plaster of Paris - the two key ingredients in a homemade chalk paint recipe I found on LiveLoveDIY.

Now the inlaid design has been restored to its natural glory.

Just a touch of distressing to revive the lines of the piece.

Anyone for a cocktail party?

I know what you're thinking... That re-finished table top looks YUMMY!

And that reminds me!  Did we mention we will have refreshments at our June 7th Chelsea's Garage Sale?  As if you needed another reason to stop by...  

FIFTH Chelsea's Garage Sale
June 7th
9am - 3pm
Contact us for the address - located in Herndon, VA

Hope to see you there!

~Cate

This post was published under Chelsea's Garage, now affectionately known as StyleMutt.

Roped in sisal {DIY desk and lamp}

Happy Friday, ya'll! We're workin' with rope again today! Yeehaw! I'd like to think I would have been a darn good cowgirl if, you know, I hadn't grown up in suburbia Northern Virginia. Oh, the what-ifs... (actually, I was responsible for two dozen horses by myself one weekend when I was 10 years old and working at a horse farm in exchange for riding time. The weekend wasn't a complete disaster)

Earlier this week I shared how to hang art with sisal rope in order to add visual substance to an empty wall:

Moving onto furniture, I've got two more ideas for our handy sisal rope! 

1. Trim a recovered seat:

One of the first DIYs I learned was how to recover a seat. My parents gave us an extra staple gun that they had, which is really the only tool you need. That, and a screwdriver to remove the seat cushion from underneath. Once your seat is off, you can remove the existing fabric, (though that isn't always necessary), and then place your seat top-down on the new fabric. Pull the fabric moderately tight over the edges of your seat and staple away! Once your new fabric is attached and you've trimmed off any longer edges and ends, you can screw the seat back on. This is where I wash my hands and call it a day since I don't know the first thing about making or attaching piping cord. Depending on your seat, sisal rope might be the perfect answer!

For this project I plugged in our hot glue gun to let it 'pre-heat' and then measured and cut the proper length of rope I would need to wrap entirely around the seat. After I was done cutting the rope, the glue gun was ready. It was best to work slowly in one small 4" section at a time as the glue dries so fast! I just made a 4" strip of glue along the seam of the seat and then pressed the rope right over the line of glue. I love this alternative to piping cord and it was super easy!

2. Rustic roped lampshade

While the glue was still hot I decided to experiment with this stripped lampshade that was collecting dust in our garage. I pre-cut all the pieces of rope that I would need and set them aside within reach, working in small sections at a time. This project was a little more tedious as I had to go super slow with the glue to ensure it didn't drip off the wire frame. The end result though looks so cool! It totally has that rustic-chic Pottery Barn vibe going on. Pop in a little Edison bulb and it's a unique, sophisticated floor lamp!

Surprise! These pieces will be available at the June 7 sale.
9am - 3pm
Contact me for the address if you'd like to stop by!

As always, thank you so much for reading and have a wonderful weekend! 

~Chelsea

This post was published under Chelsea's Garage, now affectionately known as StyleMutt.

Right-Brained vs Left-Brained: How I Organize Jewelry

A while back I read an article in Real Simple magazine called Organizing for Your Personality.  

The article diagnosed the difference between left and right-brained people and was illustrated with photos of how each differs in organizational style.  Left-brain organizers like order and each thing has its perfect place.  Right-brain organizers like to sprawl out, display, and draping pieces in unusual places.  I remember ripping out every-other page to save for future inspiration (this was pre-pinterest mind you).  And when I took their little "Which Side Do You Think With" quiz, I found out that surprise, surprise... I'm a mix of both.  So lets see with these 4 examples below just how this right-brained-left-brained-ness manifests in my own jewelry organization. 

Photos from Organizing for Your Personality by Deb Schwartz, Real Simple Magazine

1} Right-Brain: a hand-towel stand to display bracelets

When I found this towel stand at a thrift store it was originally brass.  At the time, I was not in love with brass like I am now but I liked the bird on the top.  So I spray painted it a glossy white to give it a ceramic effect.  Now it is a handsome holder for my bangles and caters to my right-brain need to drape my jewelry in an unusual place.

2} Left-Brain: a printers drawer to organize your favorite pieces

Printers drawers are multi-compartment trays originally used to hold the alphabetical character blocks for old printing presses.  The various compartments are perfect lefty organizational tool for small knickknacks of all shapes and sizes.  Growing up, I had one hanging on my wall displaying everything from found objects, to figurines, to my coin collection.  Now it proudly sits on my dresser and corrals all my jewelry in tidy little quadrants - keeping earrings in their pairs and organized by color.  Selecting the perfect accessory for my outfit is as simple as a quick browse.  Plus there's something soothing about seeing everything in its place.

3} Right-Brain: a window shutter to hang long necklaces

A few of my pieces were too chunky or would get tangled sitting in the dainty storage compartments of the printers drawer.  So to appease my right-brain, they drape willy-nilly off an old window shutter.  Found at my local Habitat for Humanity Restore, the shutter now shows off my biggest statement pieces.  Hang it next to a mirror to allow for easier accessory decision making ;)

4} Left-Brain: a file organizer to hold clutch purses  

Finally, my left-brain would like to present: the file organizer.  With all the cute desktop organizers out there, you really can't go wrong by teaming them up with a good purse collection.  And envelope clutches are the PERFECT size to sit in a file organizer.  Nice.  And.  Tidy.

I found my "ETC." vertical-standing desk organizer at a Home Goods. 

Which side do you think with?

~ Cate

This post was originally published on Chelsea's Garage, now affectionately known as StyleMutt.