Hi guys! Okay, bear with me. I have been told by my sweet, funny, awesome, HONEST husband that I am an extremist. I call things the best or the worst. Favorite or least favorite. Scalding hot or ice cold. Perfect or horrible. You catch my drift. He's even challenged me to try using words like "good", "fine", "bad", "nice". I love him so very much. But, today I cannot accept his challenge. Why? Because this IS my favorite post yet. For real.
With summer rolling up fast and a handful of overnight guests on our calendar, I wanted to do something in our guest room. Anything. Anything at all to perk it up.
First off, here is our basement:

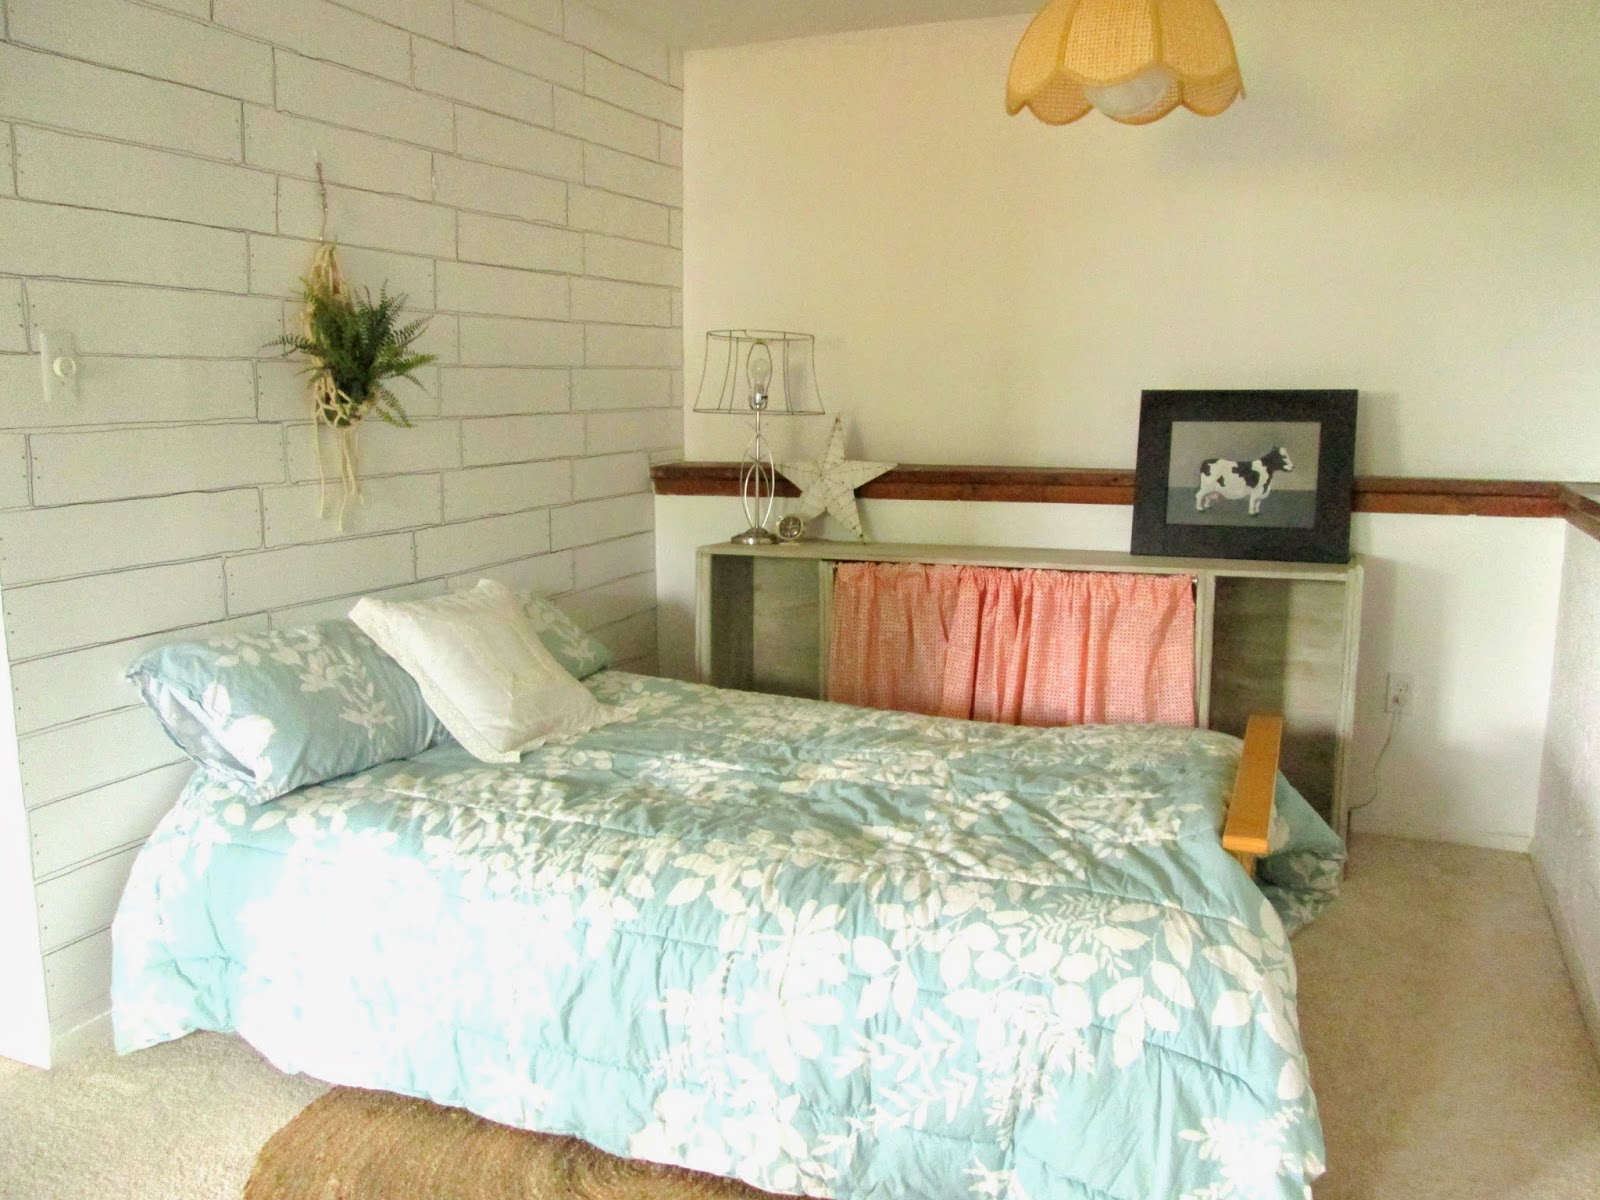
But I haven't showed you what's around the corner because, well, there hasn't been much to show. This is what we've had going on around the corner: our honorary guest nook:

There's a full bath down here and zero kids waking up at 5:30am, so it makes sense to use this space for guests. But it's always been blahze, (made up french word, pronounced blaa-zay: means boring in french). I think guest rooms should be fun and different! This is the room where you can really stretch your creativity and try things you might not necessarily try elsewhere in your home! If things go horribly wrong it's not like YOU have to sleep in it after-all. ;)
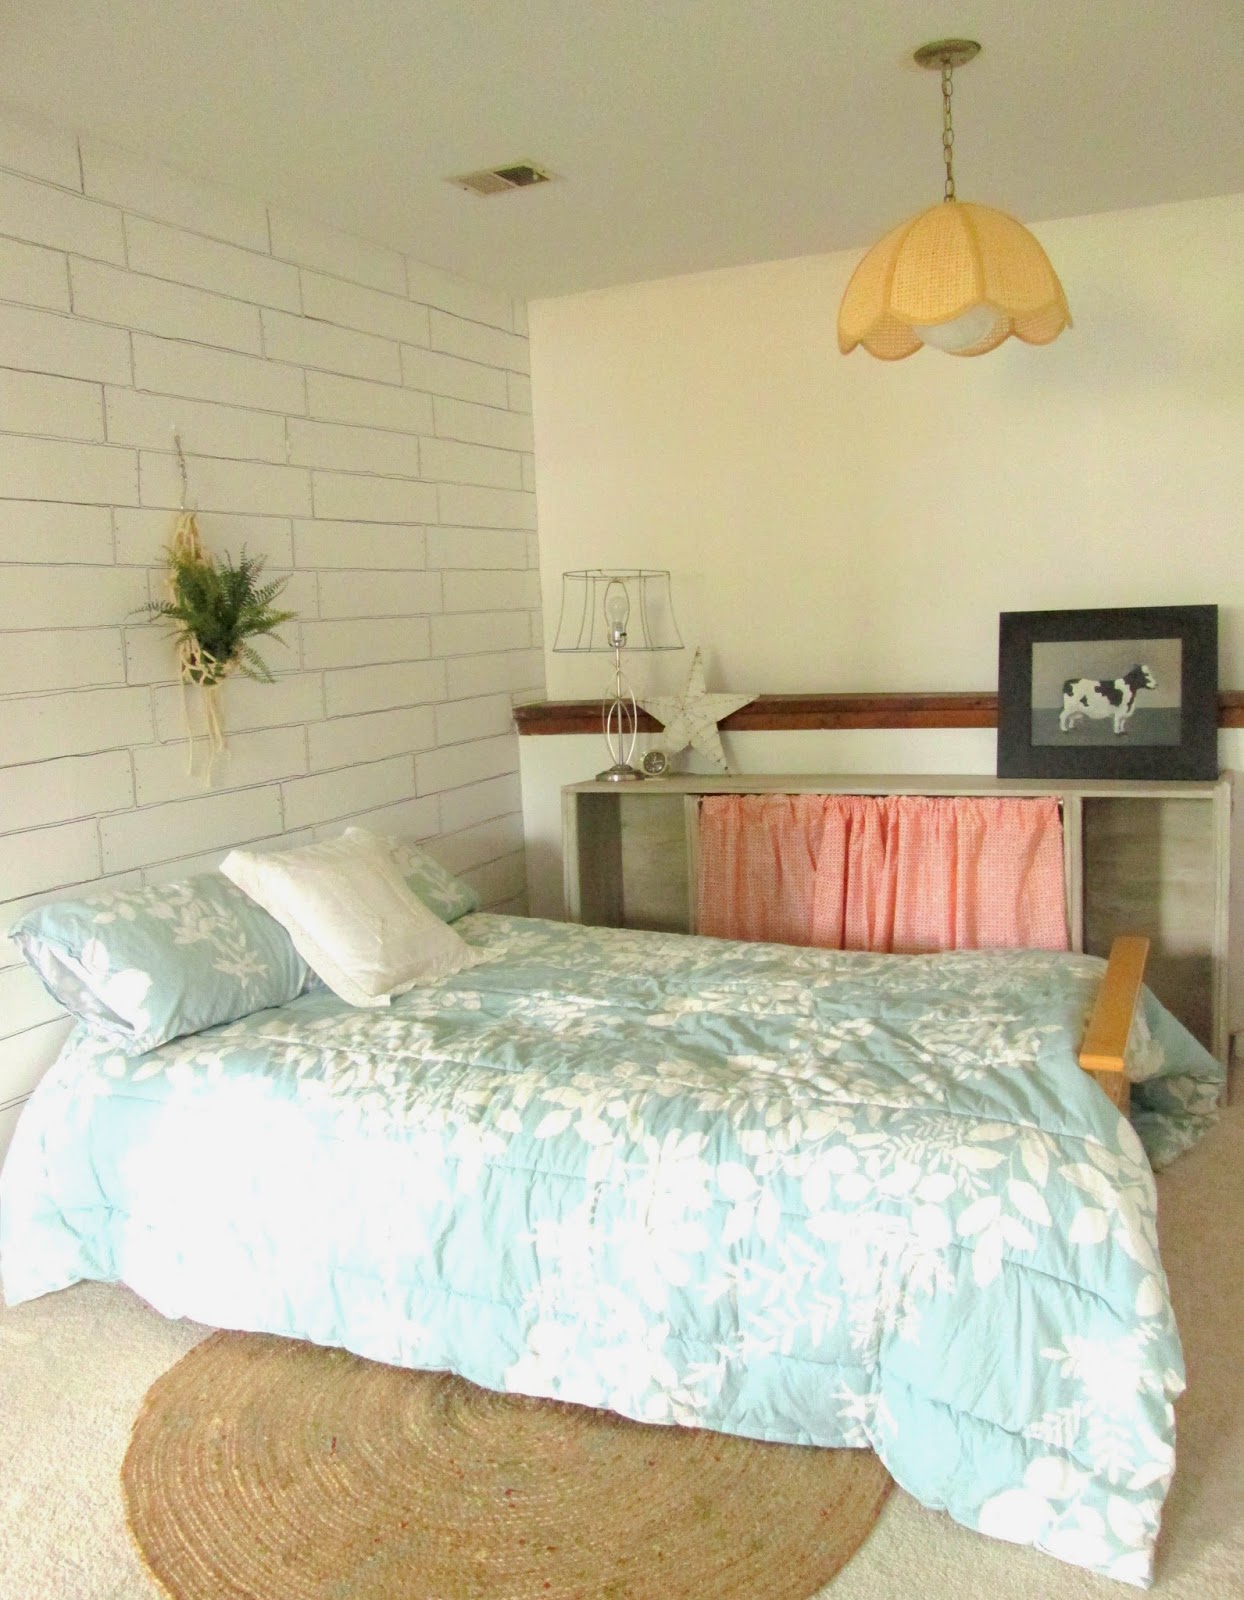
It took me exactly 90 total minutes split up by three separate projects to fix up our guest room from what you see above, to this:


Project #1:
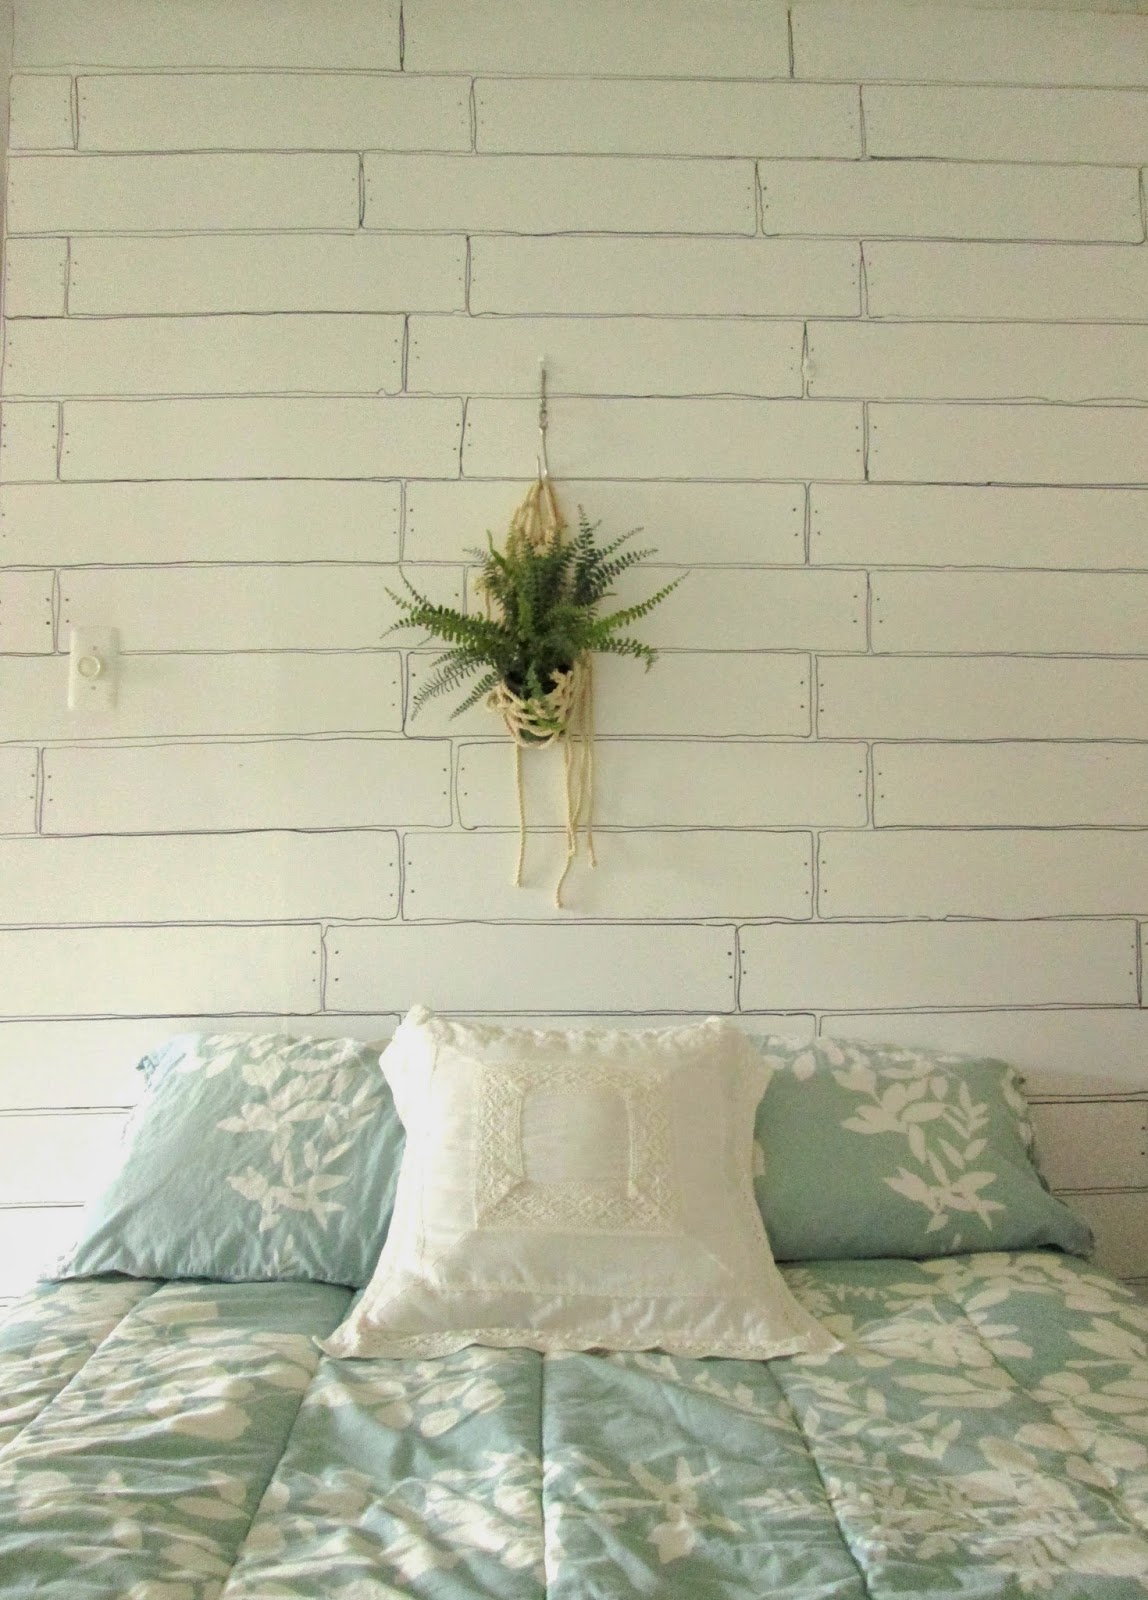
Sharpie plank wall
Supplies:
-piece of cardboard cut to your preferred size, (I tried to make mine about 4" to emulate actual planks)
-Sharpie
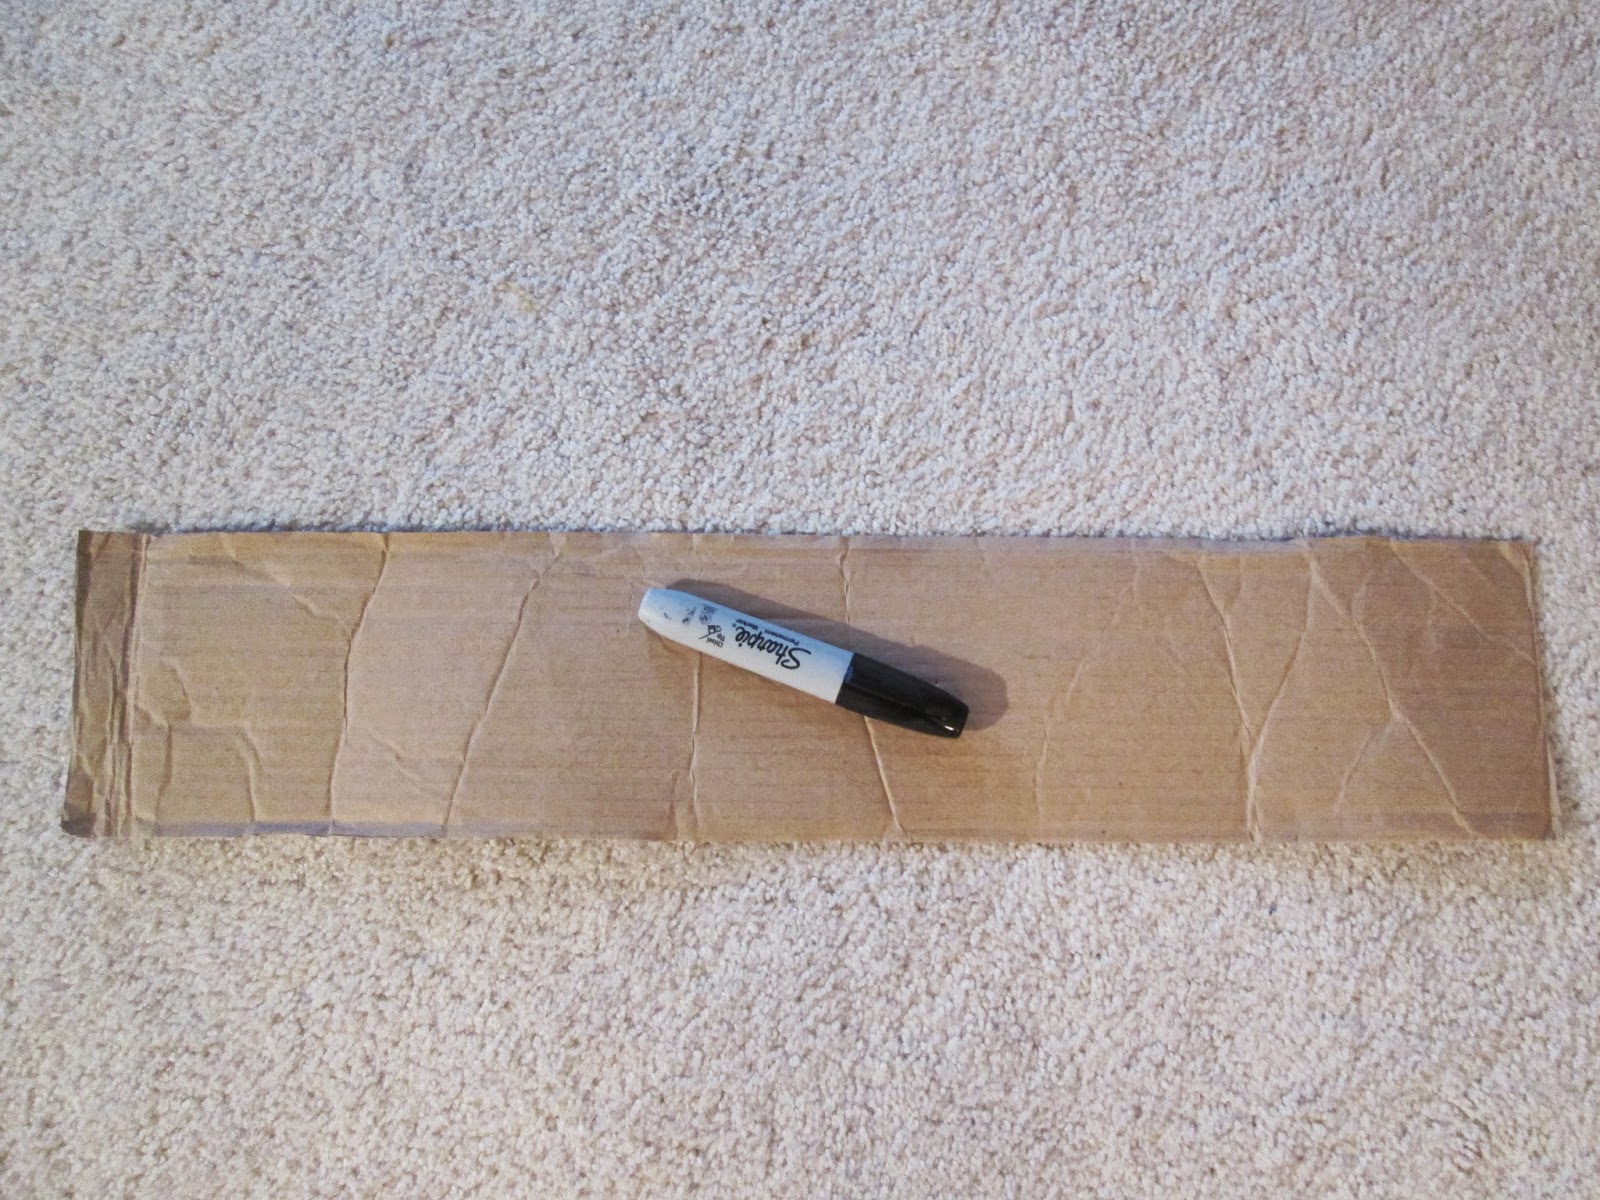
How-to:
Start at a top corner. Hold your cardboard strip onto the wall with one hand, and with the other trace your cardboard with the Sharpie. When you've traced the whole cardboard strip, remove it and add two little dots at either end of your 'plank' to look like nails.

If you're thinking to yourself that this looks so fake, you would be correct. I was definitely not going for realistic when I decided to draw planks on this accent wall with a Sharpie. It's just fun, whimsical and gives this space a real focal point! If you like the idea but not the faky-ness, you could always purchase plank wallpaper and do up an accent wall that way! Or, install actual planks.
Project #2
Turn bookcase into sideboard

Supplies:
-brute strength
How to:
First, be sure you have cleared some room - enough for the height, (which will become the length), of your bookcase. Then, very carefully, turn your bookcase over on it's side. Use those metal shelf bracket holders to secure your shelves on each side so they don't flop over. We have ugly office supplies and storage in our bookcase, (now sideboard), so I used a tension rod fixed between two shelves and hung a curtain, (which, is actually a pillowcase from Target cut right down the seam!)


Project #3
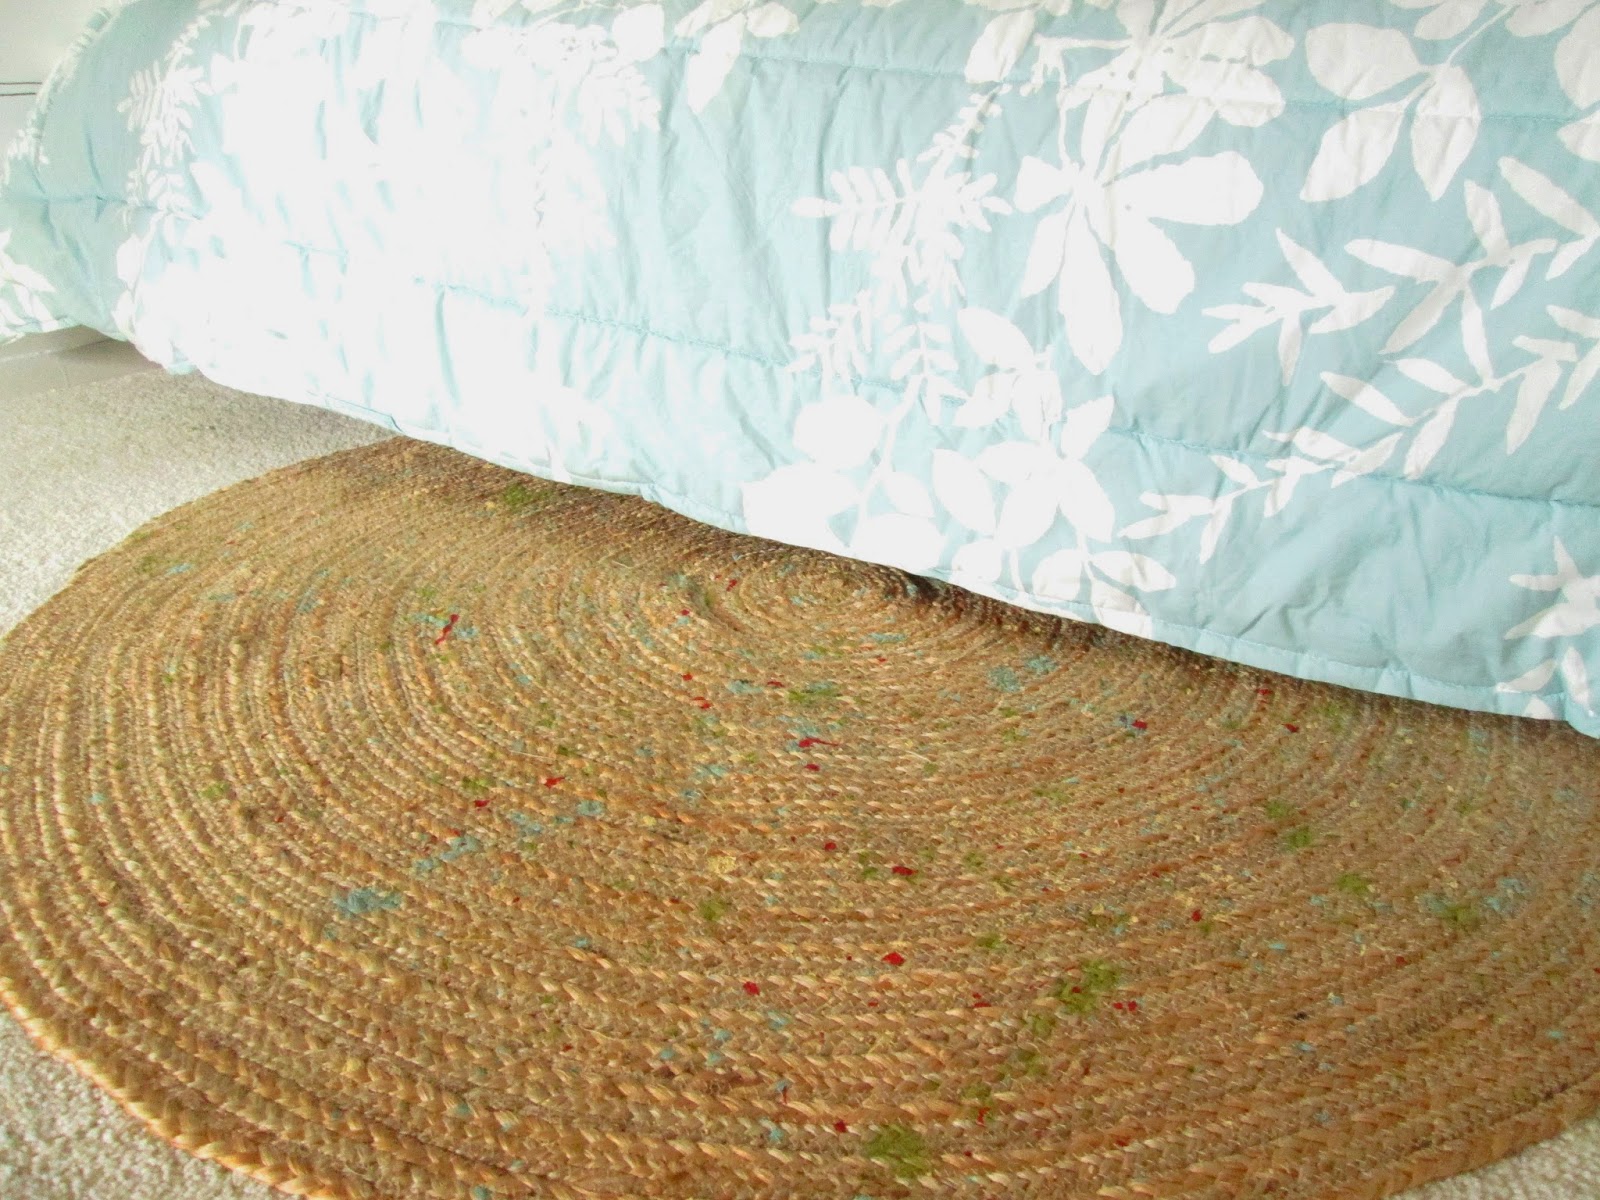
Paint splattered rug

Supplies:
-watered down paint
-brush, (I used a 3")
How-to:
Spread your rug out over a protected surface outside. Pour your paint into a plastic cup and add a dallop of water, enough to make your paint moderately thin. Dip your brush about an inch into the thin paint, then hold it over your rug and shake the paint all over. I used yellow, red, aqua, and green.
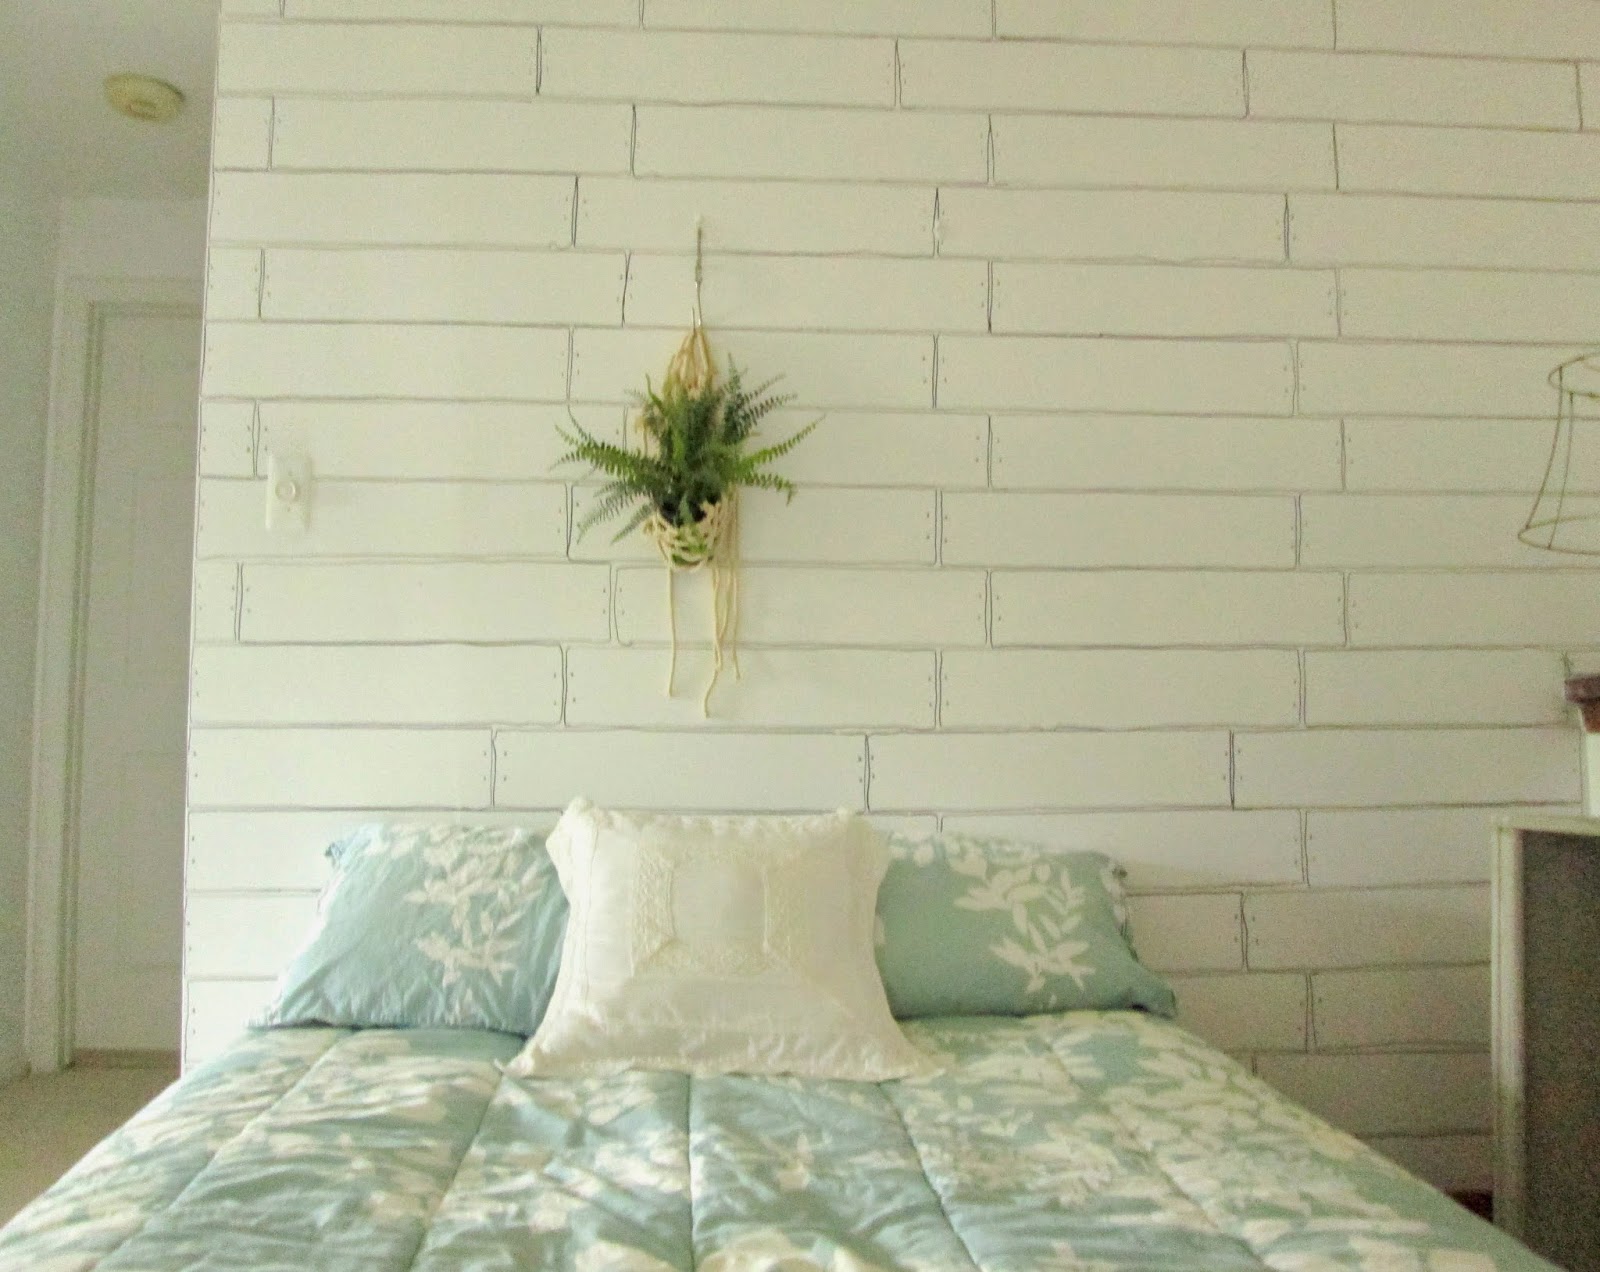
There you have it! Three easy projects that make this room a truly special space now. Here are some more photos of the nook:


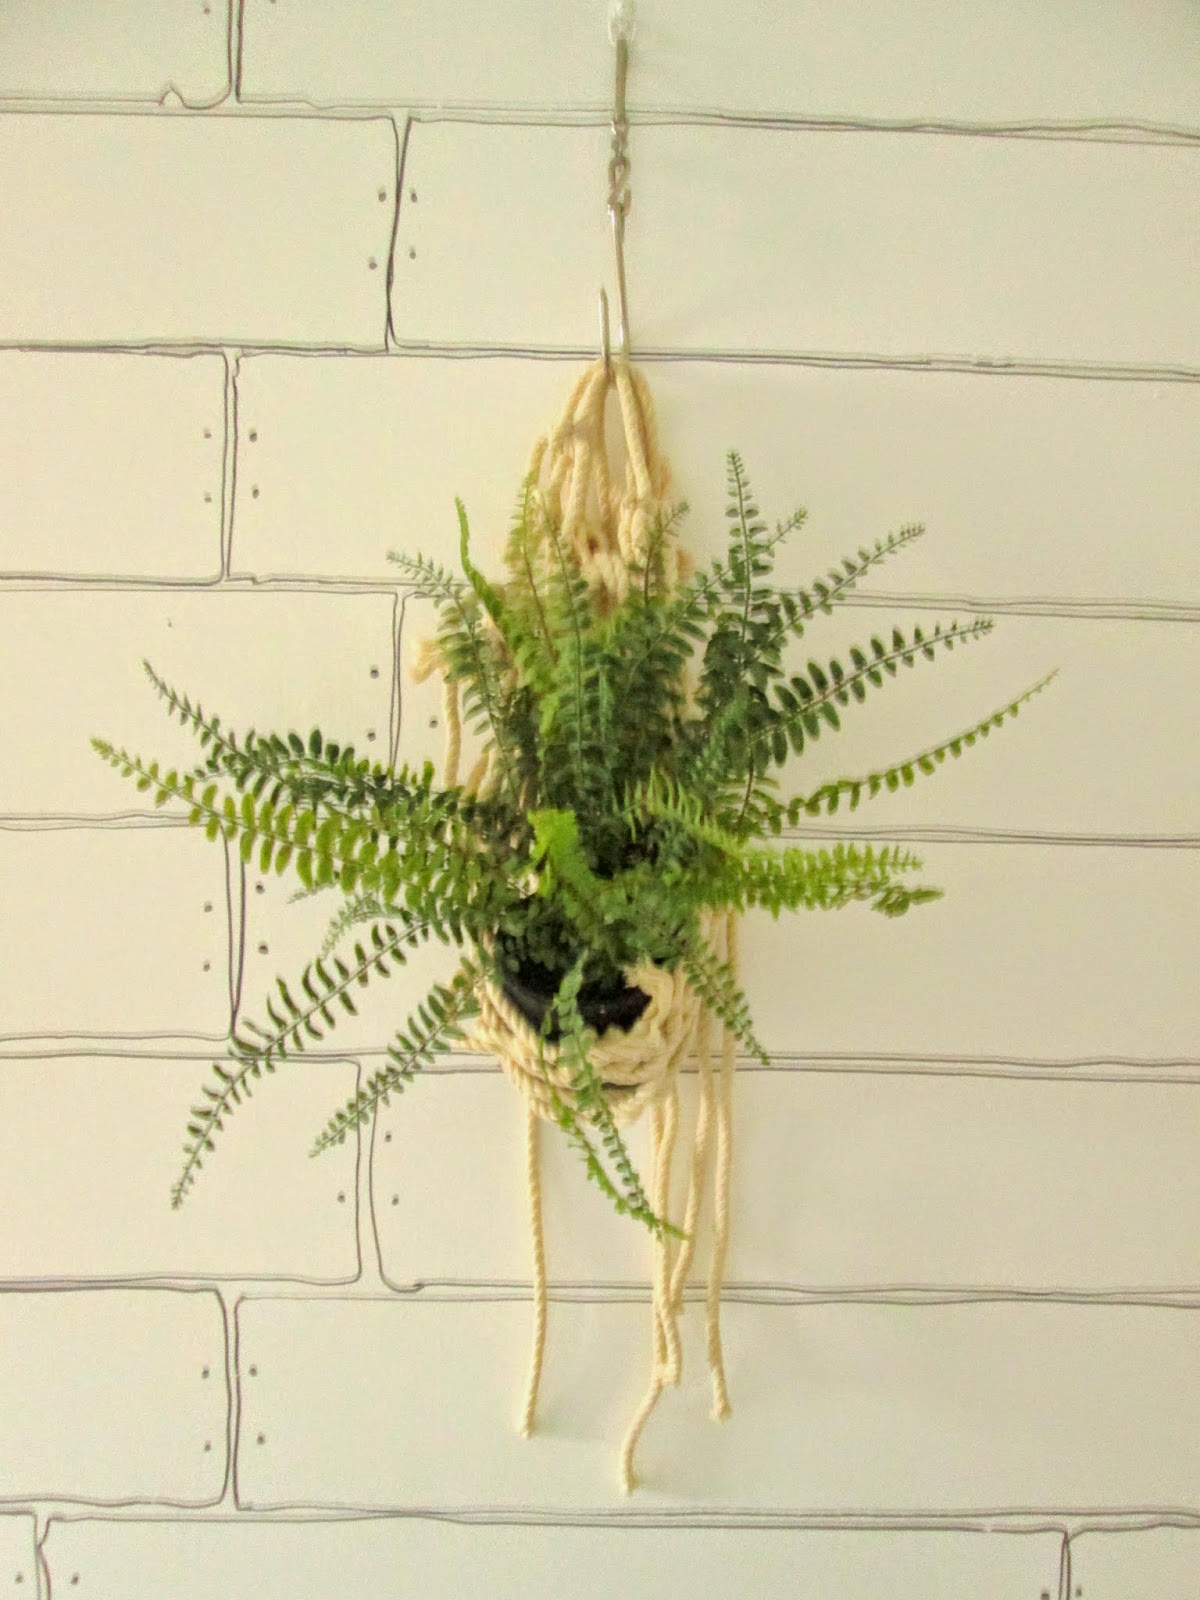
I made another 'macrame' planter from our hammock to hang over the bed. (see how-to here) With an elaborate wall behind the bed, I didn't want to make it too busy with a large headboard. Bringing in a bit of natural greenery is just the touch to liven up the space and keep it fresh. And since this space gets very little natural light, I used a faux fern. No need to water or move the plant around to follow the light. No worrying about dirt spilling on guests heads in their slumber. Easy peasy.

It always amazes me how even the simplest of ideas and projects can have such an impact on a room. I love this space now; it fits in with the rest of our home. Our guest room is officially open for business and we can't wait to show our visitors to their room while they stay!
If you happen to try any of these ideas, or have already, please link in a comment below or email me your photos!
Thank you so much for stopping by!
~Chelsea
P.S. Don't forget!
Chelsea's Garage sale #5!
Saturday, June 7
9am-3pm
Email me for the address if you're interested!
(located in Herndon, VA)
This post was published under Chelsea's Garage, now affectionately known as StyleMutt.