Tufted Mid-Century Modern Bench

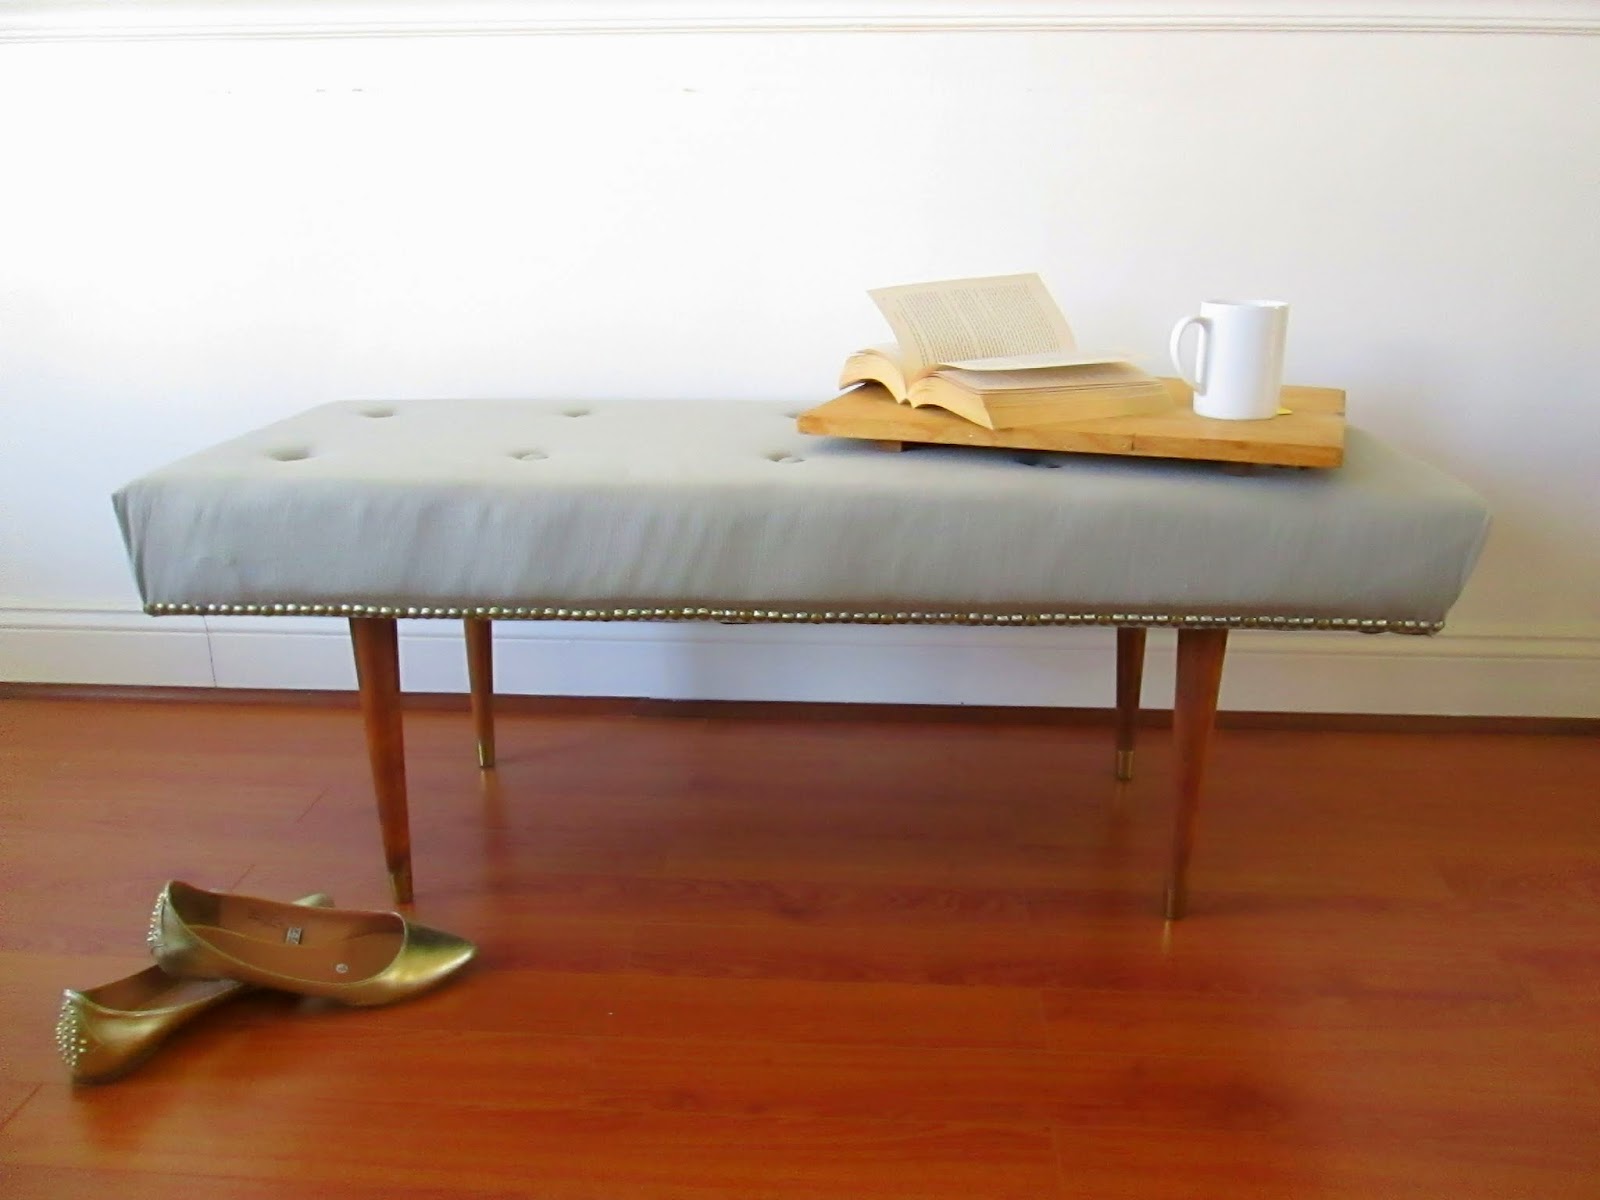
What?!  That's right readers, my first piece is available for sale on Chelsea's Garage!  The hope that I would start offering merchandise has been a long time coming - since I first started guest blogging in October.  Now the day has finally come and what could be more worthy of an inaugural sale than this table-to-bench transformation?

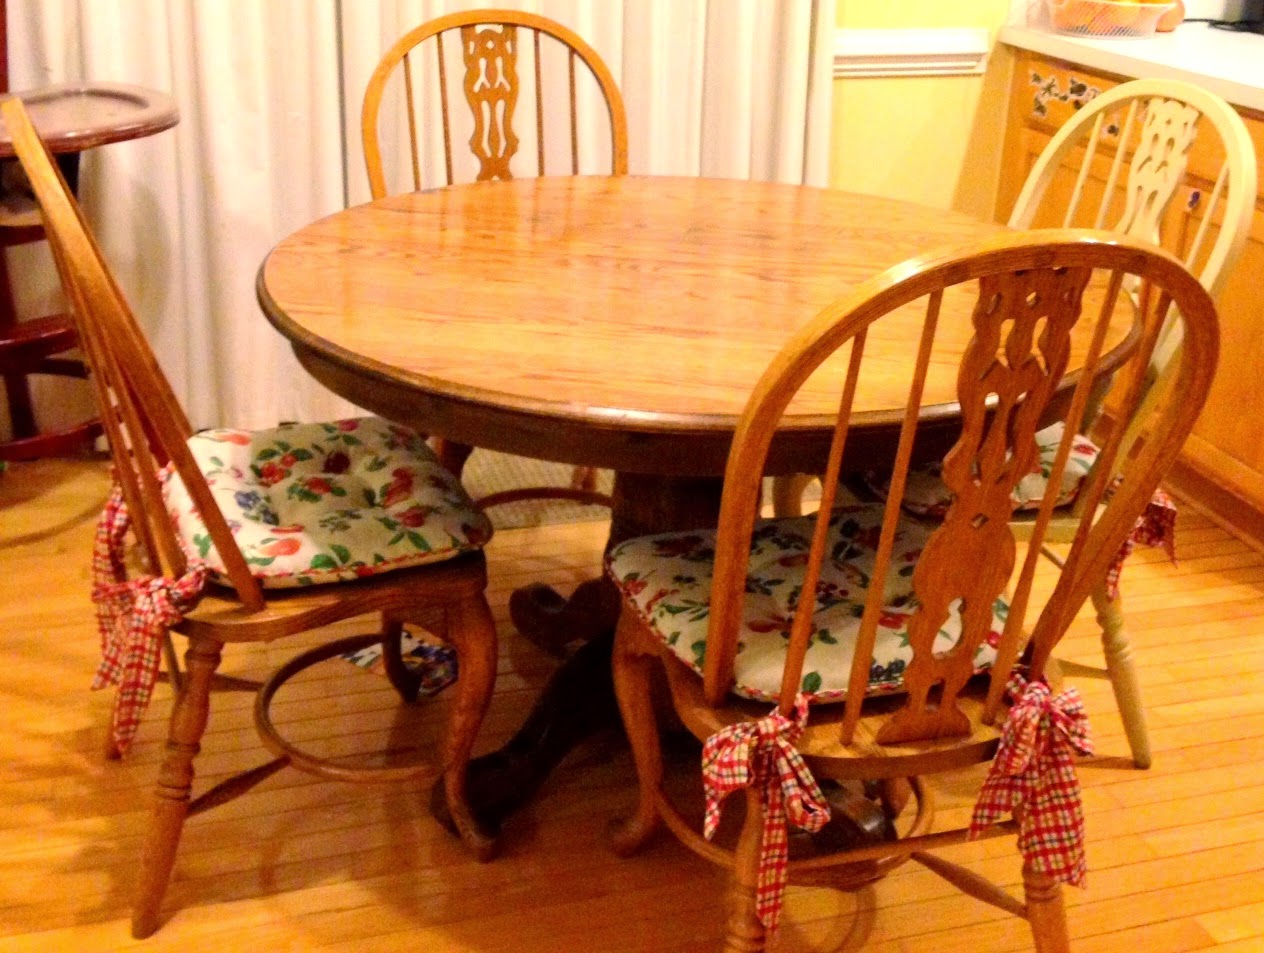
 This bench started out as an odd little table in a thrift store.  I almost passed it up because it had all sorts of problems - had it not been for the brass feet and price tag.  

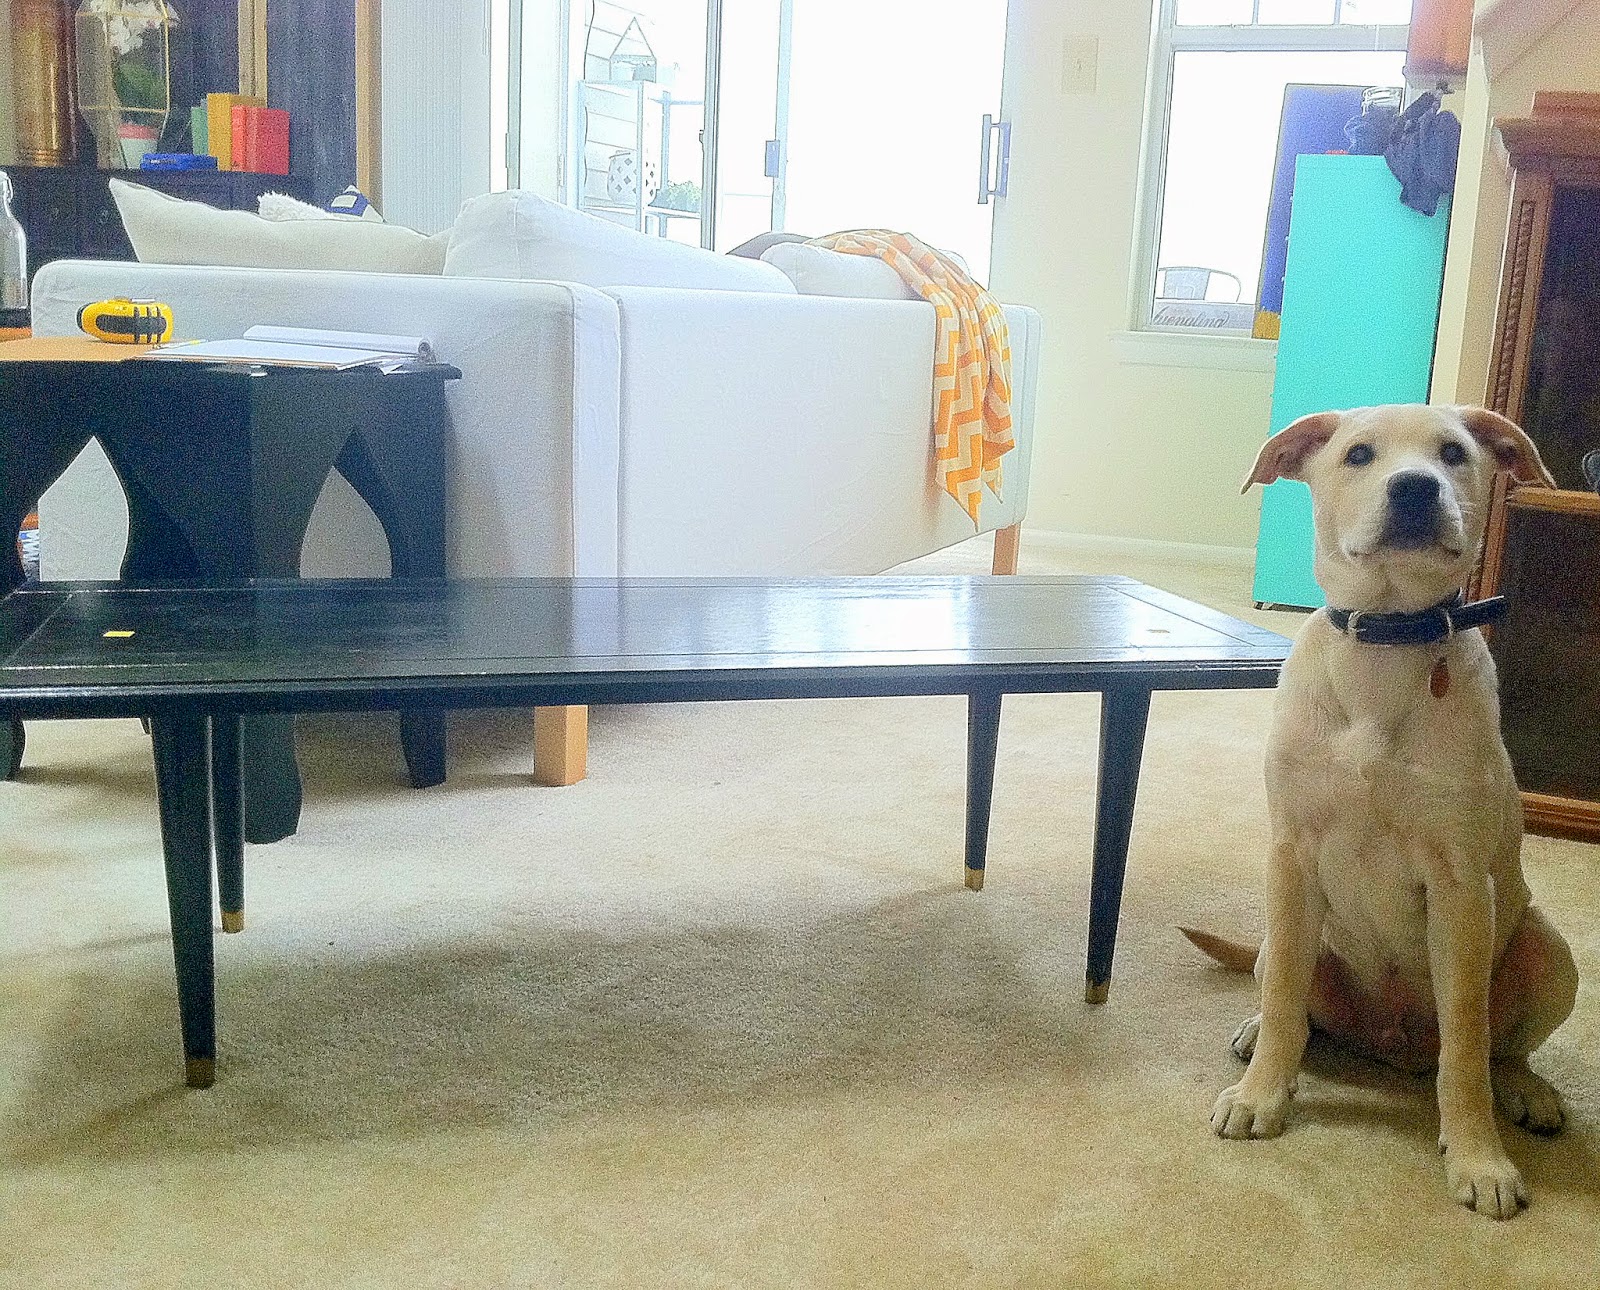
1} It was really short for a coffee table.  An awkward dwarf of a table. Way too low to the ground.  Look how it makes our petite puppy mutt look like a full-size purebred.   


2} It had an AWFUL paint job.  Whoever was trying to TLC this before I got my hands on it, did not bother to tape off the gorgeous brass feet before shellacking it.  What a crime!

So I had no choice but to start by stripping the paint off the table legs.  Based on the lines there's a good chance that in a past life, this table was once a handsome warm-toned wood mid century modern piece.  I wonder what would have possessed someone to paint it an oily black...  Stripping it was a grueling process involving a lot of chemicals with intense smells.  If you find yourself in a similar paint-job pinch, I followed the instructions on Liz Marie and was pleased with the results.  

While the legs were undergoing their chemical peel, I went about making the cushion.  I bought 4" high density foam and grey linen fabric from JoAnn's and had the foam cut to the table top's dimensions.  I secured the fabric around the foam by stapling it to the underside of the table top.

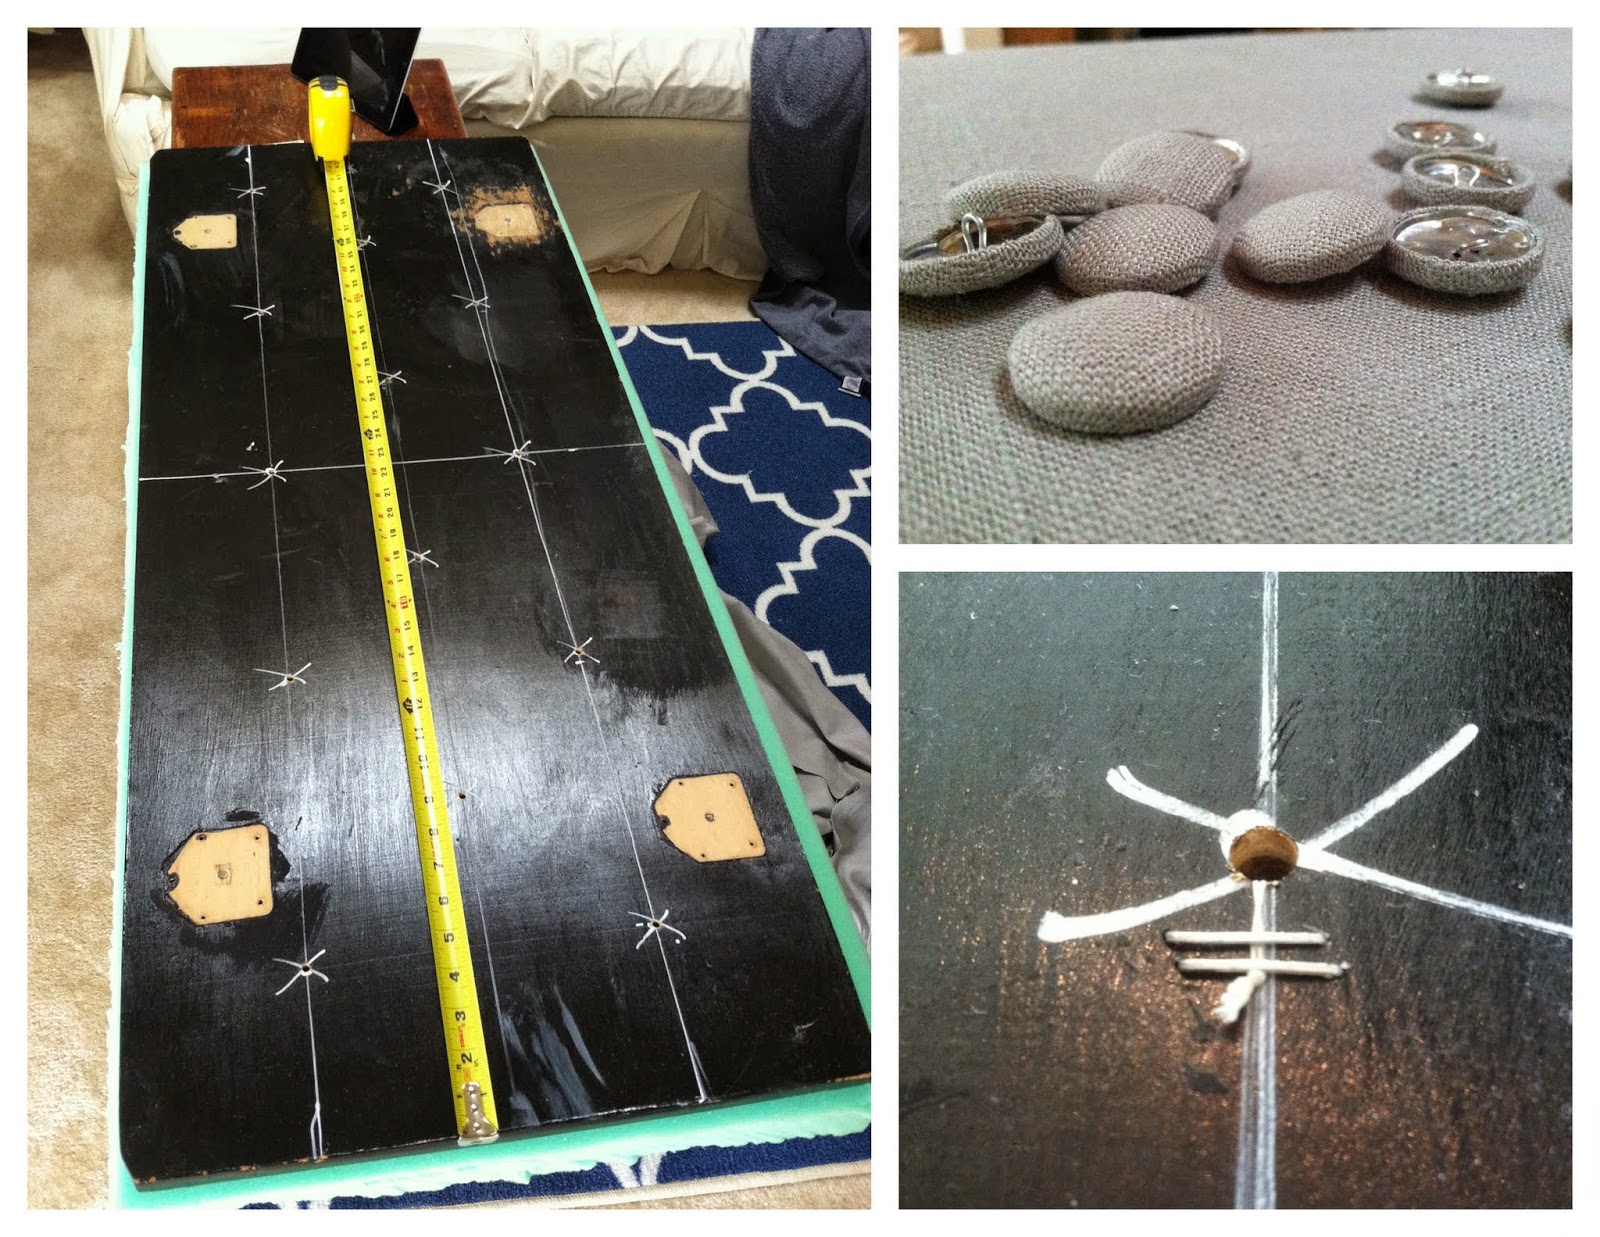
When the covering was done and the corners were tucked, it was time to add the buttons. I prepped the button-hole placement following these guidelines from Salvage Love.  Before I covered the cushion,  I mapped and measured where I wanted to drill holes for the button thread.  Using some left-over fabric and a button-cover kit, I made buttons to match, making sure to staple down the knots to the side of each pre-drilled hole.

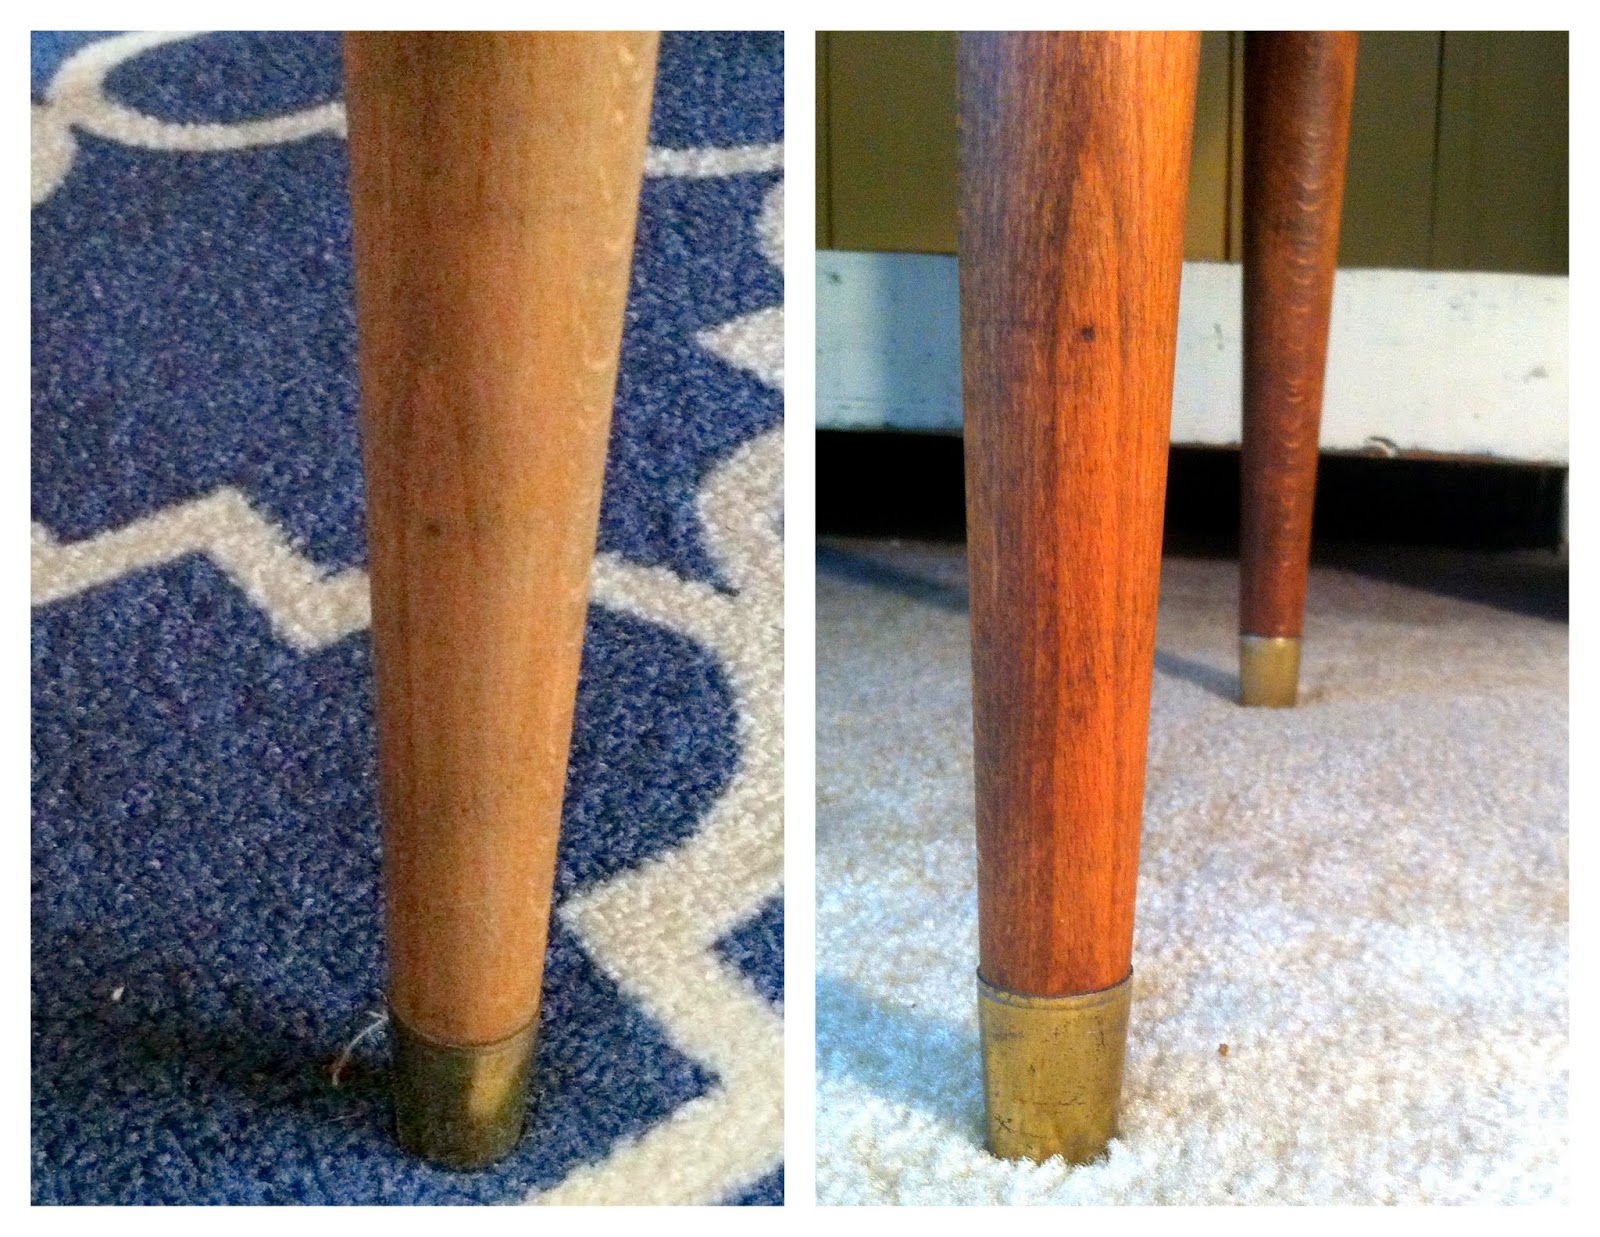
Now it was time to check in again on my table legs.  While I was working on the re-upholstery, the stripping chemicals were loosing the oily paint's grip.  I was then able to scrape off the old paint and give them a couple coats of fresh stain.  The picture on the left is post-strip and on the right is 3 coats of Cherry Maple Stain.  They've gone from winter pale to summer tan!

Finally it was time to accessorize: with nail head trim!

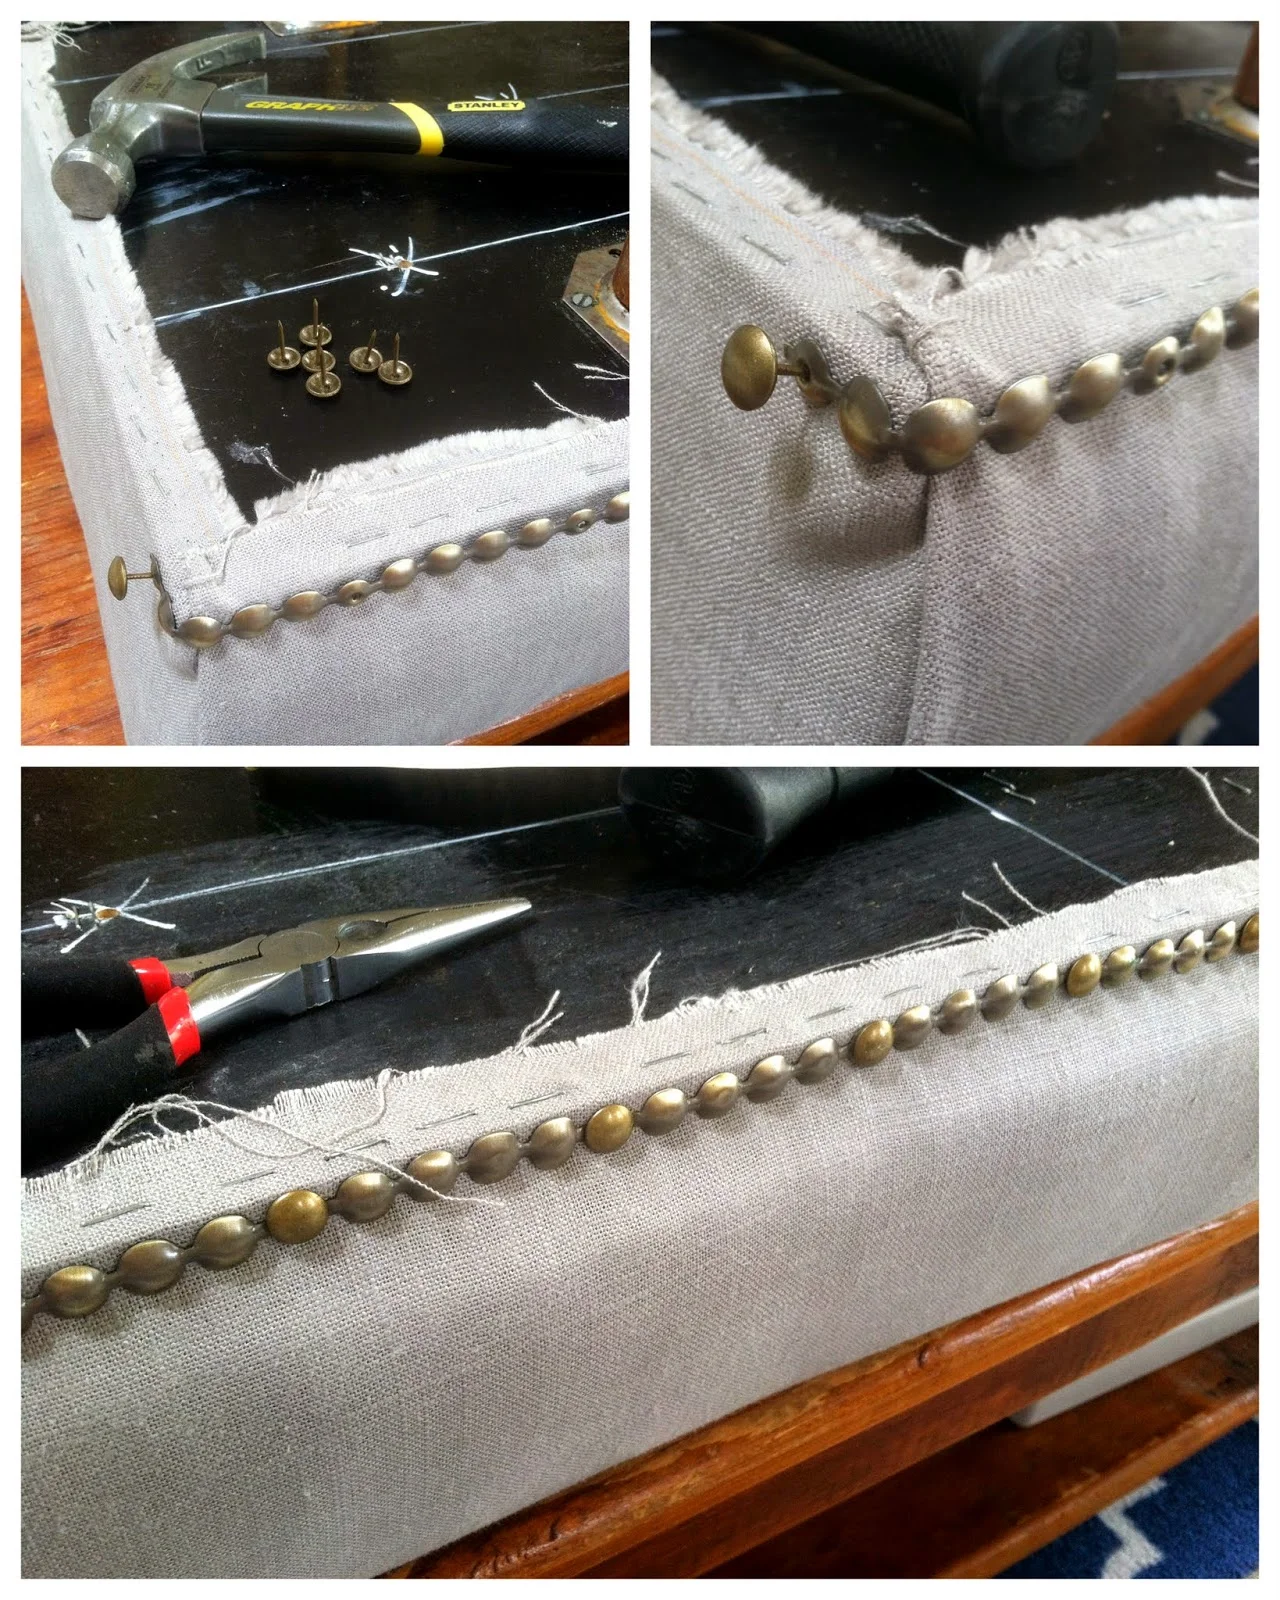
I chose what I thought was a brass finish that matched the brass feet.  However, when I opened the package I found that the nail head strip had two different finishes.  But I embraced the happy accident and decided I liked the combo because it played on the silvery fabric too.

The last touch before re-attaching the legs was to staple on a dust cover to protect the button holes and and loose strings from the fabric's edges.

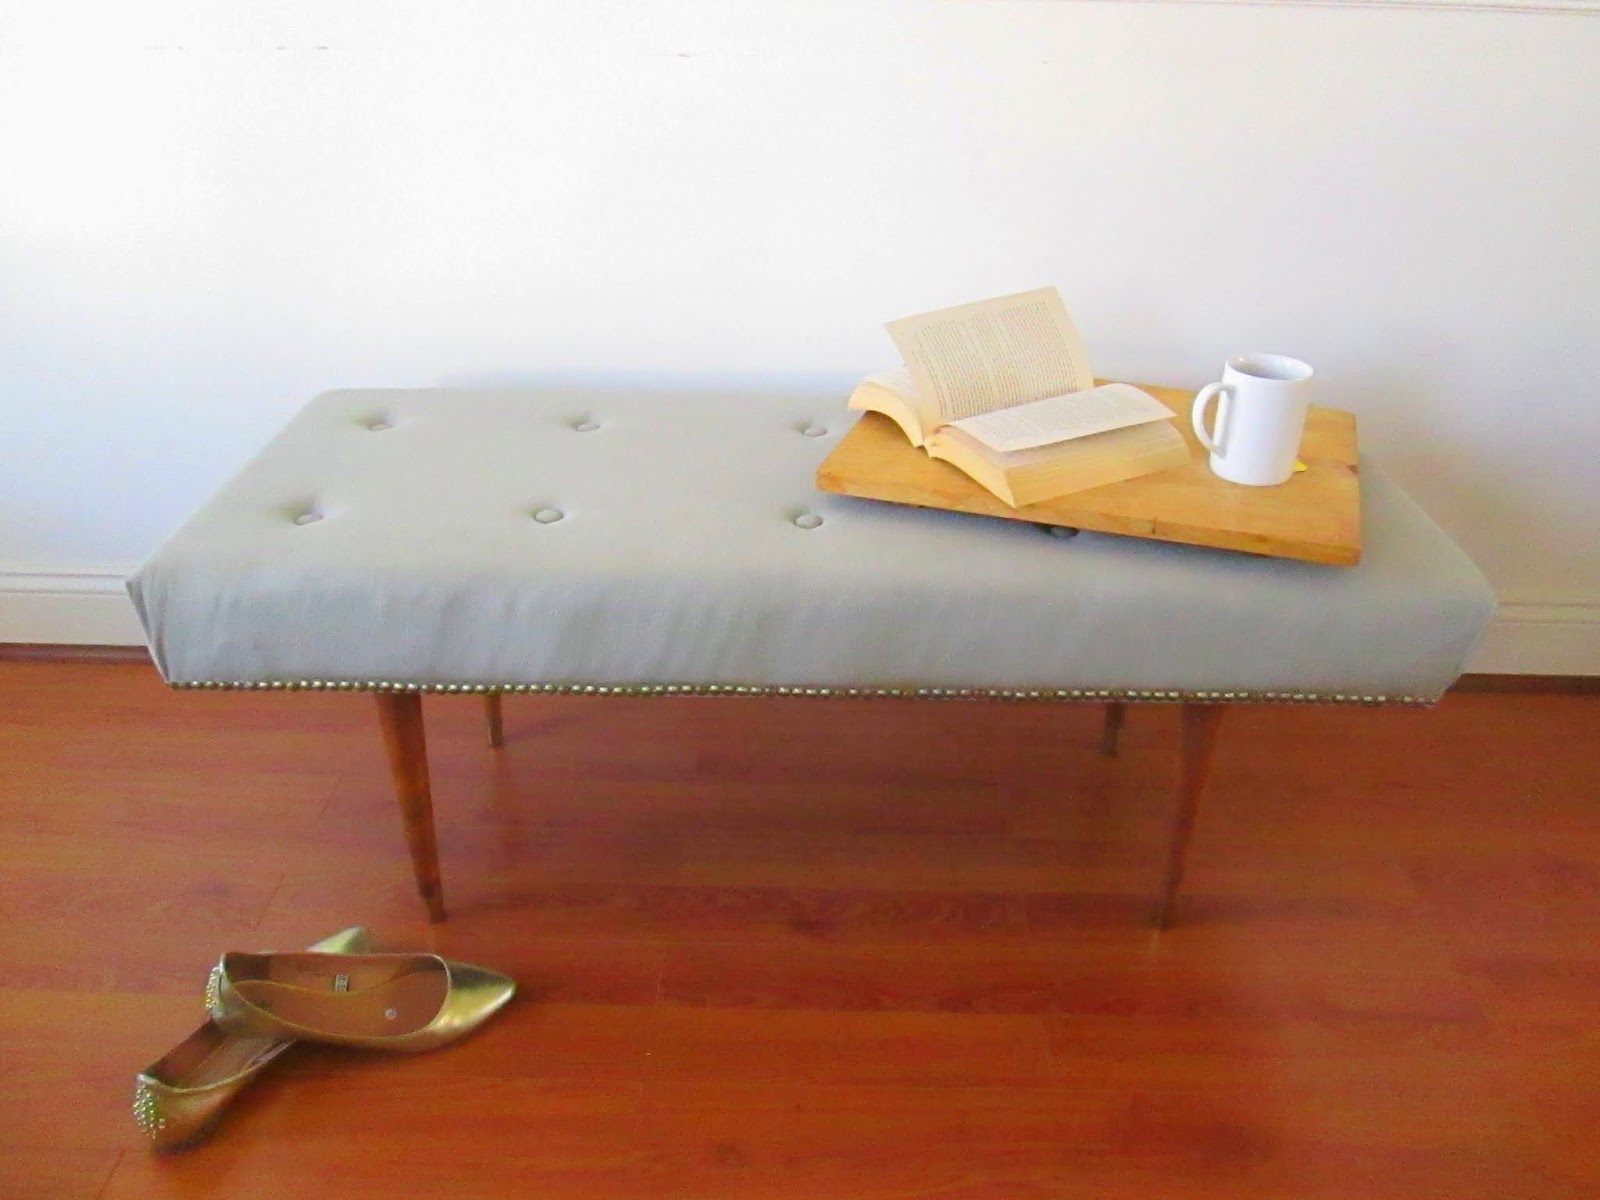
Just for kicks, here some pics of it styled in our apartment.  {Consider this a sneak peak tour of our living room.}

46"L x 17"H x 19"D
SOLD

Available for pick-up in Northern Virginia.  If you are interested in this piece or have a coffee table you'd love to repurpose as a bench, feel free to contact me directly at cate@stylemutthome.com.

~Cate

This post was published under Chelsea's Garage, now affectionately known as StyleMutt.


Transformation of a tired dining set {Before & After}

Hi friends! I'm SO excited today; not only is there a beautiful, brand-new transformation to show you, but I'm also overwhelmed to share that Apartment Therapy featured our Home Tour yesterday! What a humbling and exciting experience. Here is the link on their site if you're interested! The kids were excited about two things in-particular: seeing their beds and our beta fish, Gill. :)

So, I've been working like a mad woman to have this 5-piece custom ordered dining set finished in a timely fashion. It was brought over by a friend who has two young children; I don't know about you, but I would not be super interested in having to eat on the floor with my toddlers while my dining set was MIA. Getting them to sit still IN SEATS is tough enough! I definitely worked some odder-than-usual hours to get this set finished and back to it's young and busy home!

Here is the tired, worn-out set BEFORE:

The first order of business, as always with a custom order, was discussing my friend's style. In order to determine the best direction to go with her dining set, I really needed to get a feel of her unique home decorating style. Along with some beautiful pictures she sent from around her home, the first three words she used to describe her style were "casual", "cottage", and "country". BINGO! I knew that we needed to use Chateau Grey, by Annie Sloan Chalk Paint, and Old White, also by ASCP. Chateau Grey can really fool you if you haven't seen a sample of it before cracking open the can. It's not what one would call a grey, but rather a soft, natural sage green. A little bit of green with a little bit of white, and some natural wood mixed in = a perfect dining set combination for my casual, cottage, country friend!

AFTER

Along with painting and gently distressing the chairs and table base, I also removed the old finish on the table, (accomplished by 60 grit sandpaper and an electric sander), and re-stained and re-sealed the table top. No more scratches or worn patches! (Important note: I stained this table top in Minwax Early American. After editing the photos to help the color of the chairs come through, the table top looks very red. It's absolutely NOT a red wood stain, but a natural, saturated oak color).

Mason wanted to say Hi. Sweet boy.

So there you have it! A NEW casual, cottage, country dining set for a beautiful young family! 

Thank you for stopping by!

~Chelsea

This post was originally published on Chelsea's Garage, now affectionately known as StyleMutt.

Time away and upcoming fun!

Hi friends! It's been a while, eh?! So grateful for some time away over these last couple weeks. And especially thankful for a beautifully creative friend and sister-in-law who shared her genius ideas with all of us while I was away! Just in case you missed them, you can see Cate's latest ventures herehere, and here.

Two weeks ago Matt and I packed up the van, loaded the kids and drove 17 hours down to sunny Florida to visit my in-laws. The time away spent relaxing and playing with my family was worth every minute of the drive. But still, I want to kiss the person who invented portable DVD players on the lips. On. The. Lips.

Here are some highlights from our vacation!

The water; I have a hunch our kids may be part fish.

Helping Nana with everything!

Catching beasts, (aka bass), in the canal behind the house.

Sunset beach date with my Matt

Watching this little love, who doesn't care for the sand, be brave and make the most of our time at the beach.

It was wonderful. Praising Jesus for blessing us with a vacation. What a treat! 

And while we were away I got an email from an Apartment Therapy photographer who was interested in shooting our house for the site! The only time that worked for both of us happened to be a day and a half after we got home. Whaaaaat?! It was almost a "Check please!" moment. But, Natalie, the photographer, was so kind and definitely helped ease my nerves about having the kids around, getting the house ready, etc. It was a push for sure, but Matt and I were able to use that short time to get the house cleaned and camera ready. What an honor to have our home featured on such an inspirational source! I can't wait to see it! Once it's up on their site I'll link up here on the blog so you can check it out!

Natalie was truly awesome. She showed the kids the camera and even let them take a few pictures!

Coming up; an exciting announcement from Cate and me that local friends won't want to miss! Hint, keep June 7th open.

Thanks for stopping by!

~Chelsea

This post was originally published on Chelsea's Garage, now affectionately known as StyleMutt.