Pretty succulent centerpiece

January 28, 2013

What a difference a year makes! We had daffodils popping up in our garden due to the mild temps, so we transplanted the bulbs and brought them in to unleash. Definitely no daffodils trying to emerge this year...

But we're not without any popping fresh greens, either.

During a quick trip to Home Depot with my littles, (and my Mom!), we picked up 3 different real succulents, (because the fake ones are over 3 times the price)! 

These three ranged from $1.99 - $3.99ea.

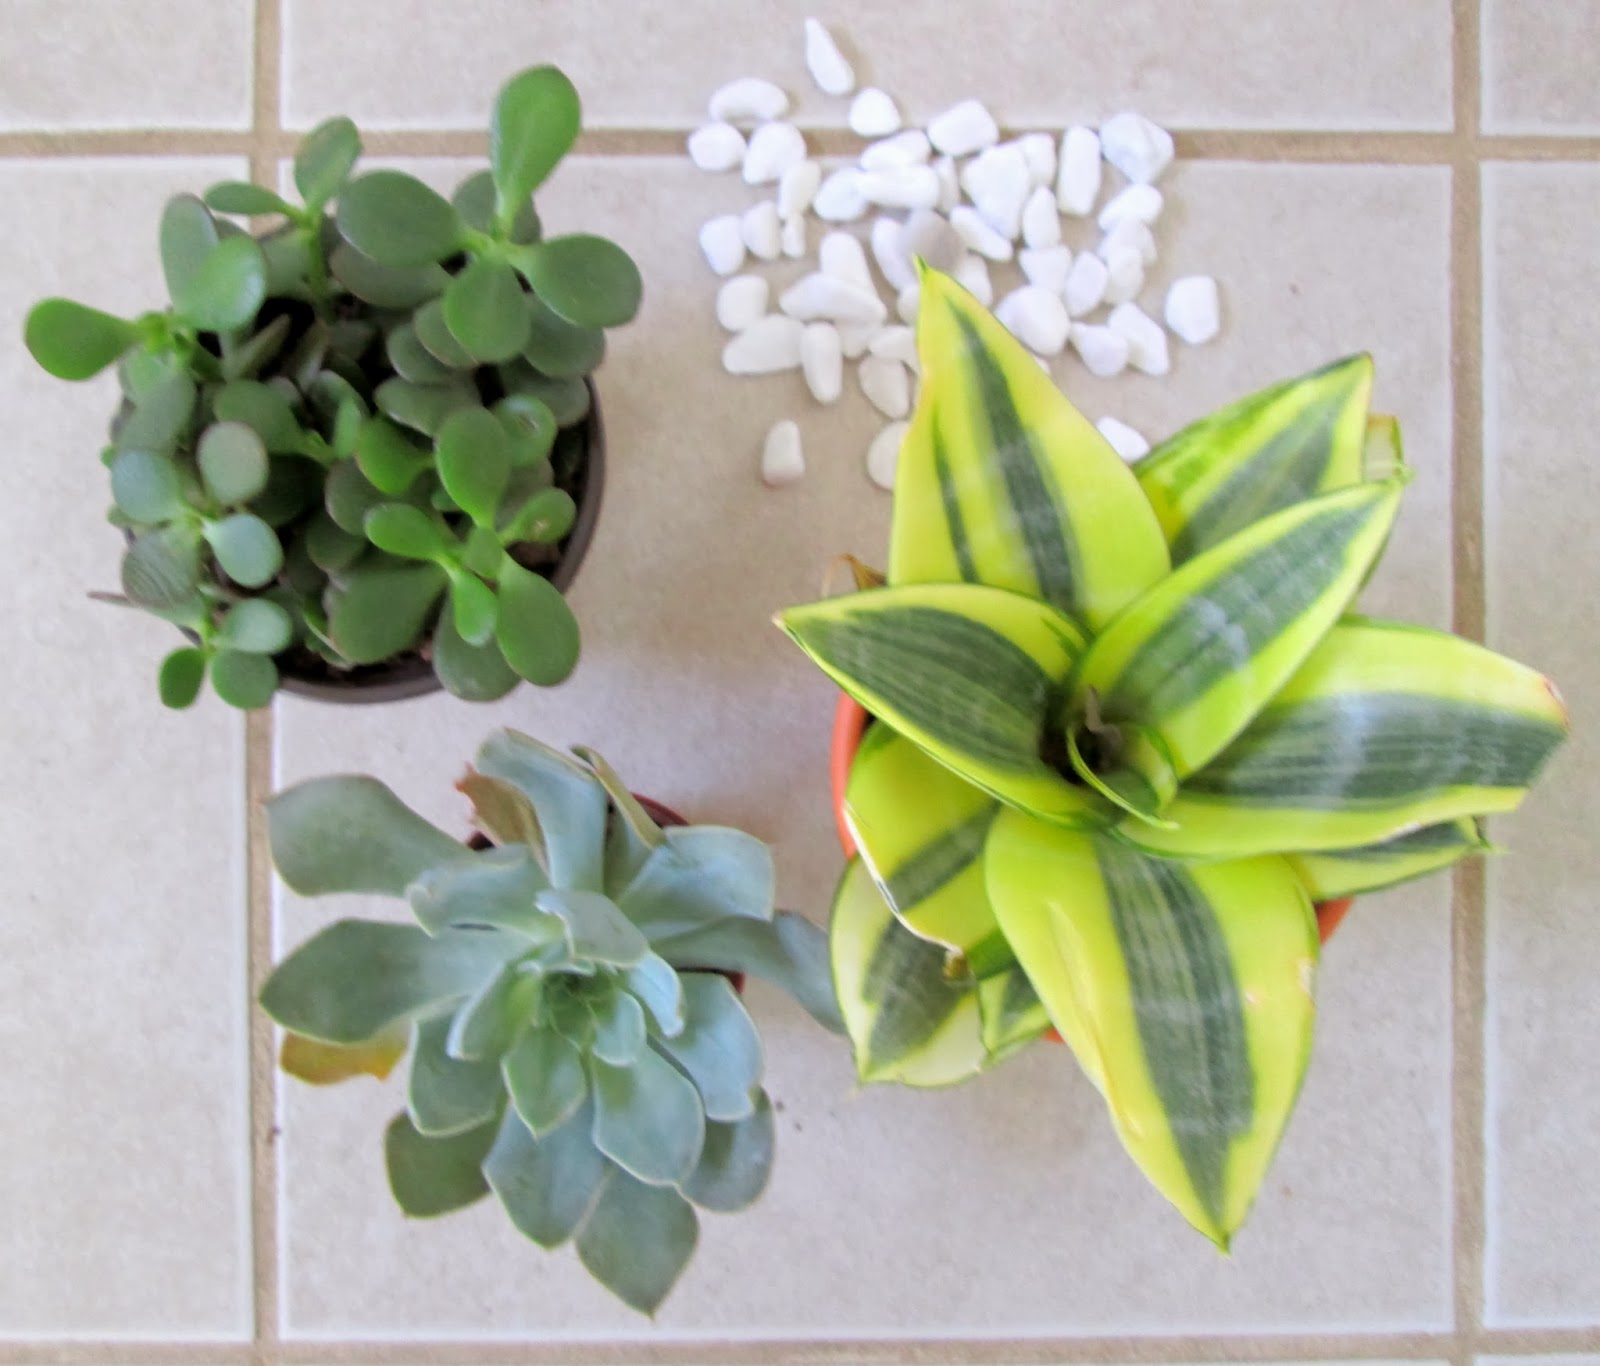
I did a bit of research beforehand to learn how to take care of succulents. They like dry soil, sun, and do well in a shallow dish. I wanted to use a pretty green glass bowl I found at the thrift store a while back, but since it doesn't have holes for drainage I poured some rocks in first so the soil could sit on top of those, allowing water to drain into the rocks.

I had plenty of help ;) And I scooped a couple handfuls of rocks out after this picture. That was too many - I really just wanted a couple layers of rocks.

Then I added soil on top of the rocks

I dug three shallow holes and stuck the plants in. I haven't watered once, and it's been a week! I read that in the winter they go dormant, so they only need water 1-2 times a month. I don't know how I feel about that but I will trust those who know (wayyyyyy) more than me!

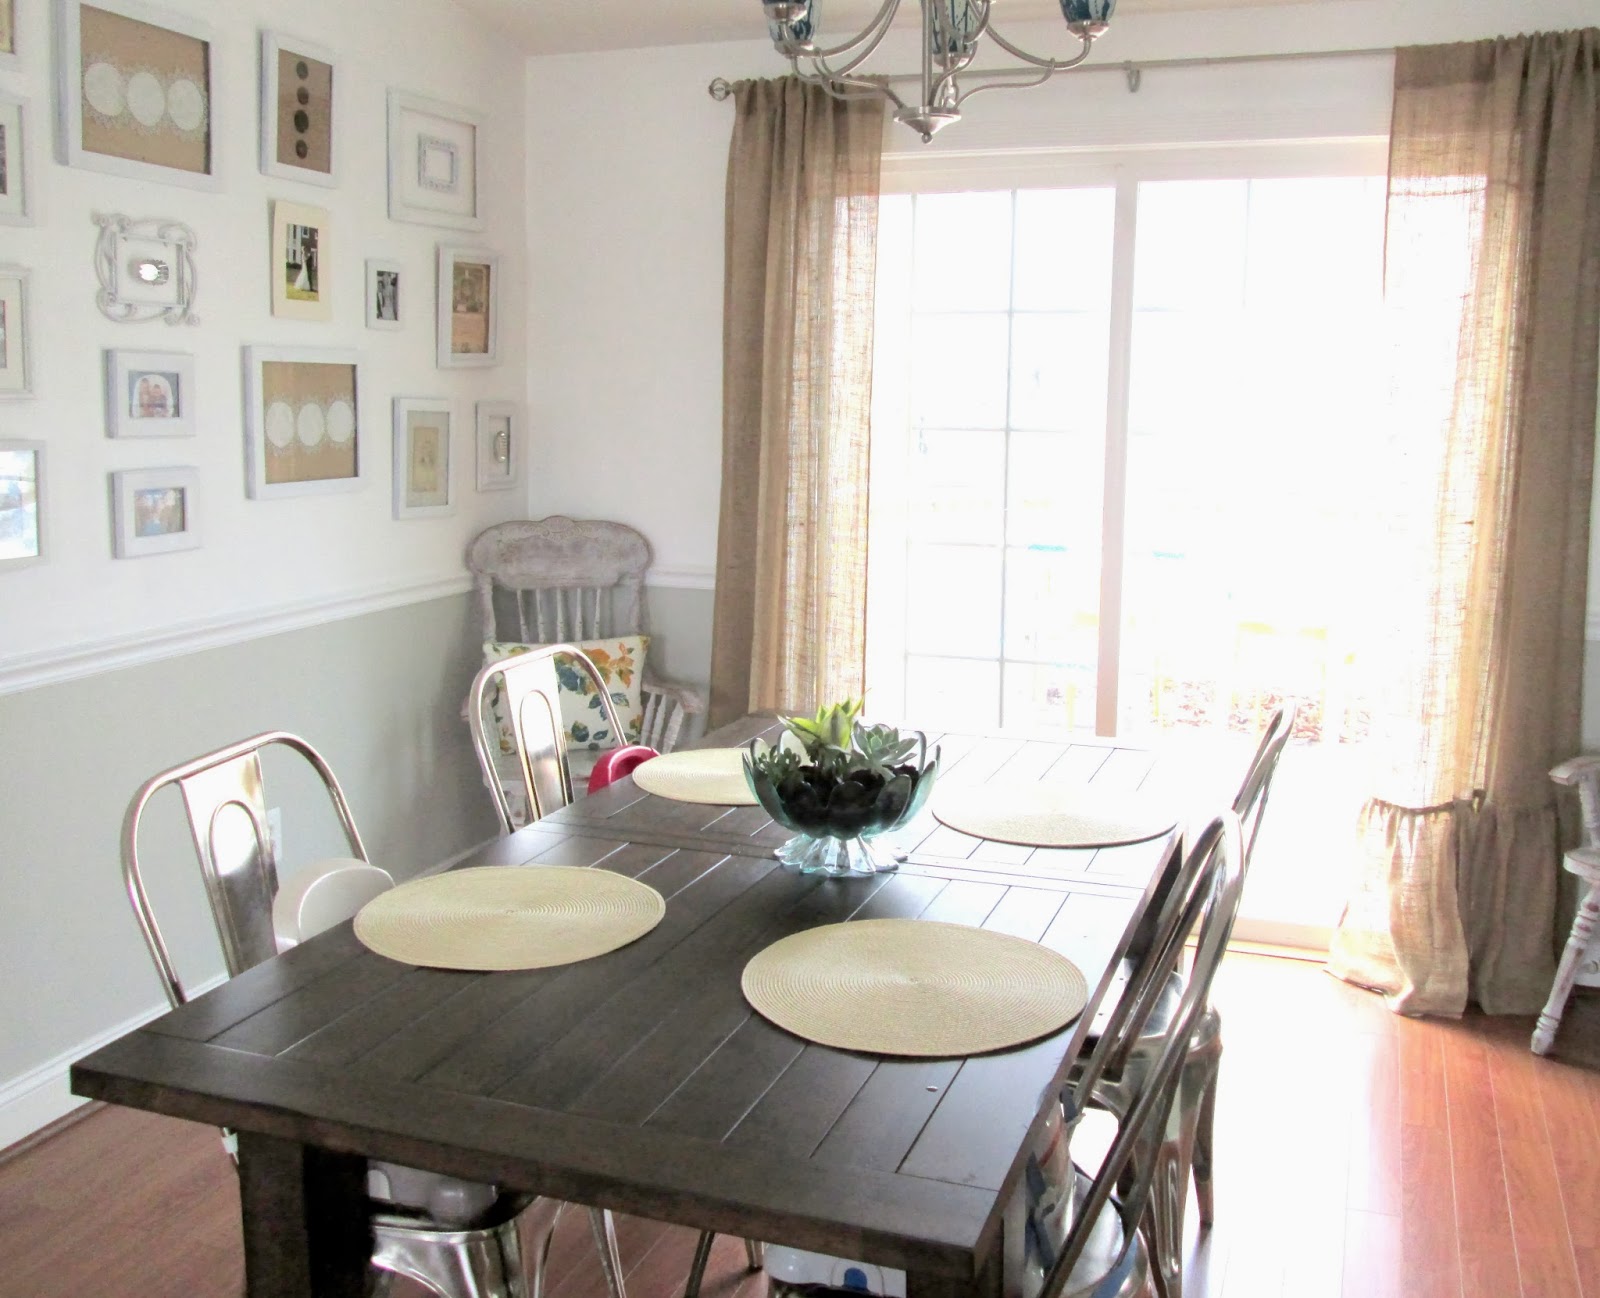
I love how this centerpiece turned out but only time will tell if it was successful! Anyone green thumbs out there have any suggestions to keep these babies happy?

Thanks for reading!

~Chelsea

This post was originally published on Chelsea's Garage, now affectionately known as StyleMutt.

Featured by One Kings Lane!

Hi friends! I've got some exciting news to end the week! Now, some of you have been following this blog for a couple years, others of you may have just stumbled on it recently. Regardless of how you found Chelsea's Garage or how long you've been checking in, it means a lot to me that you do - which is why I get so excited to share fun news with you! You are kindred spirits who enjoy creativity and have inspired me greatly.

It's such a pleasure to share with you that One Kings Lane featured the statement chair I wrote about in this post in their Home Decor article, DIY - Sitting in Style, which went live on their site this past Wednesday! Their design team selected me along with five other super creative DIY-ers, giving me the top honor!

When OKL reached out inviting me to write about my favorite statement chair to help them promote their new Home Decor Resource, I never imagined they would feature my project on their site! To have my little blog recognized by such an inspirational company as One Kings Lane is astounding to me, and I couldn't be more grateful to them for the encouragement they've expressed to the work I'm doing.

The featured chair:

This news sure warmed up the frigid week and I'm already looking forward to another possible project with One Kings Lane coming up this Spring! 

I see 40s and 50s in the forecast for this weekend, so unless someone wants to claim this piece, (which I introduced in this post) as a custom order now....I'll be starting on it in French Linen, (by Annie Sloan Chalk Paint). :) Can't wait to show you once it's finished!

 *Nevermind - piece has been claimed! Stay tuned for it's awesome transformation - it'll knock your socks off!

Have a great weekend!

~Chelsea

This post was originally published on Chelsea's Garage, now affectionately known as StyleMutt.

It's the little things {My favorite detail in our living room!}

Hey guys! I know you are probably sick and tired of seeing posts on our living room at this point in the week, (full photo post of the transformation here in case you missed it), but this one is my favorite! There's a small detail in the living room that I doubt anyone has noticed from the photos, but it's a detail that makes all the difference to me as I live in and around the space.

See it?

Probably not! I barely can unless I'm looking right at it.
Look closely at the bottom edge around the chairs.

Pom-pom trim!

I just can't seem to leave well enough alone sometimes. And there have absolutely been times when I've realized that and undone something I've done. But this time it was an added touch that really feels good and right.

Here are the chairs before, (IKEA Ektorp Jennylund chairs)

There was nothing at all wrong with these chairs before. Nothing. But being as our main floor is a big open floor plan with the living room and dining room spilling into one another, the backs of these chairs are staring you in the face when you're at the dining table. And since these two armchairs are mostly floating off of the carpet, I wanted to add something a little interesting to them.

I found this .5" white pom-pom trim here

My first step was figuring out where I wanted to attach it - the outside of the slipcover, or the inside. I used push-pins to get a visual for how both options would look:

Inside won! I love how the little white pom-poms peek out from underneath, like another layer of the chair.

I cut about 7-9" strips of trim to make it easier to attach underneath the chair, (since I was gluing with Liquid Stitch, not sewing).

Then I made a 7-9" length of glue with my tube of Liquid Stitch, just hitting the backside edge of the slipcover.

And finally, gently lay the strip of pre-cut trim over the line of glue.

I didn't remove the slipcovers for this project. I just gently flipped the bottom edge up, one side at a time around the chair.

Finished product! 

(hello lil' dust bunny)

So like I said; it's a little thing! But to me, a totally worth it little thing.

Now those factory made Ikea slipcovers are uniquely ours!

Thank you for reading!

~Chelsea

This post was originally published on Chelsea's Garage, now affectionately known as StyleMutt.