One A Week {Pom-pom wreath}

Hi friends! Kicking off my One A Week series where I'll post one Christmas DIY project tutorial each week until Christmas is today's project, the pom-pom wreath!

I saw this wreath on Anthropologie's website and was fascinated. Indeed, their Fluffed Wool Wreath, ($128), is cozy, festive perfection. And, naturally, their wreath looks like it was created from tufts of wool brushed straight off a sheep. Seriously! I am pretty sure they have someone in a factory somewhere just brushing the sheep all day long, and another person next to them picking up the tufts and gluing them onto wreath frames. Nonetheless, it makes for a beautiful wreath.. And it didn't seem too hard to make with yarn. I already knew how to make yarn pom-poms from a kids costume project, and until I saw the Anthrpologie wreath, I hadn't thought of sticking them on a wreath!
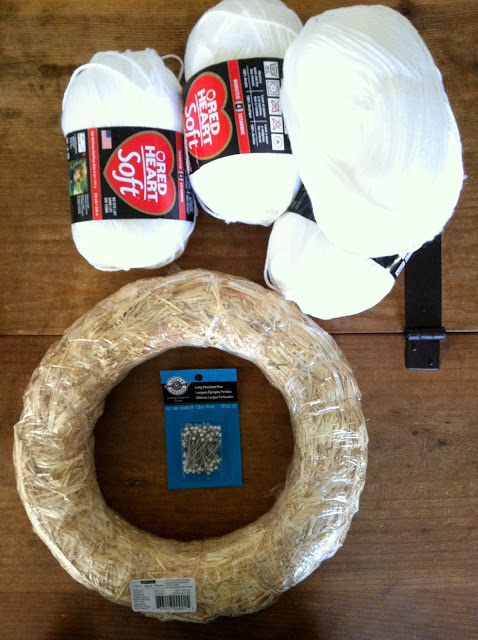
Supplies:
-1 hay wreath from Michaels, (keep it wrapped in plastic or you'll have a hay mess on your hands) $3.49
-2 spools of yarn, (I picked up 4 not knowing how many I'd need, 2 was enough) $2.50 on sale
-1 pack of ball-tipped pins, (I grabbed a 100 pack and probably used about half) $3 something
-1 pair of scissors

{DISCLAIMER} I was definitely working on this little project while catching up on some Say Yes To the Dress, hence, all the photos taken on my cozy throw covered lap.

Step 1: Wrap yarn around your hand about 30-40 times...it doesn't really matter that you do it the same  number every time.

Step 2: Remove the bundle from your hand but keep it together, like a donut, and snip the yarn about 7" from your bundle.

Step 3: Snip the 'tail' right at the bundle. Lay the tail out flat and then place your 'donut' bundle right on top of it, (sorry the picture for this step is inaccurate. You want your 'donut' to be right in the middle on top of your snipped 'tail'. I must have been so engrossed in my sappy reality show that I wasn't paying attention to the other side of the camera lens...)

Step 4: Tie the tail around the center of your bundle in a tight knot

Step 5: Weave your scissors through the loops and cut them open. Repeat on both sides

Step 6: Snip any extra length from your 'tail' and now you've made a pom-pom!

Step 7: Stick a ball-point pin through the middle of the pom-pom

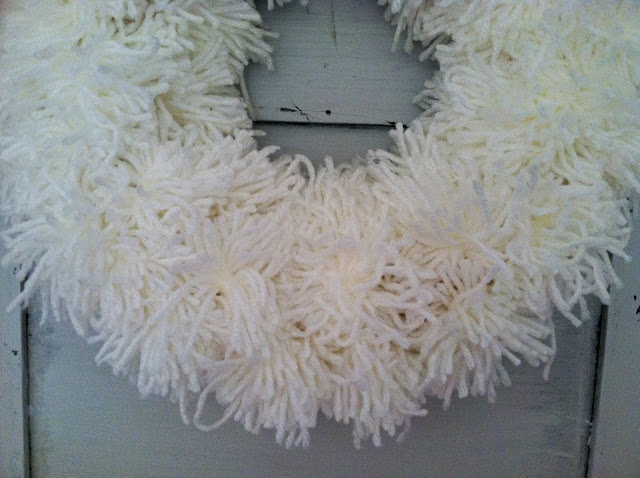
Step 8: Attach your pom-pom to the wreath by sticking the pin through the wreath frame

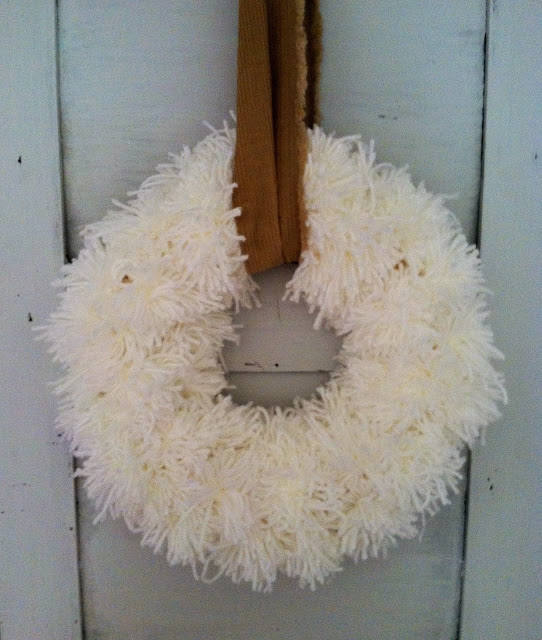
Now just hang it any way you want! I used a strip of camel colored corduroy I had leftover from patching my boys' pants in the knees.:)

If you happen to try this, please, please email me pictures!

Thank you for stopping by!

~Chelsea

This post was originally featured under Chelsea's Garage, now affectionately known as StyleMutt.

One A Week {DIY for Christmas}

Hi friends! Well, the season is soon approaching to deck our halls and I couldn't be more excited! I know there are some out there who loath people like me; People who start playing Christmas music too early, (there is never a wrong time to listen to Michael Buble's Christmas album), people who start shopping too early, (I did find some fun wrapping paper on clearance at Target that I loaded up on), and people who start  talking about it too early. If you're in this boat, please don't sink mine. The reason I am starting this One A Week series now is because I've got a handful of DIY Christmas projects that may be fun to work on now so that we can just enjoy and celebrate the holiday when it's here.

So, starting this week I will be posting one Christmas do-it-yourself decoration each week until...Christmas, (or almost Christmas)! None of the projects are complicated and the longest one takes less than than 2 hours.

What's comin' up:

~Pom-pom wreath (my version of an Anthropologie knock off)
~Crepe paper wreath
~Pom-pom garland
~Festive holiday sign
~Cardboard & scrap paper ornaments
~Wheat spray wreath

No way do I assume anyone would actually do all or any of these. Your schedules fill up this time of year, I know. Just wanted to put these ideas out there for anyone itchin for a little project, that's all. And IF you happen to try any of these, definitely email me pictures! I'd love to see your handiwork!

Thanks for reading!

~Chelsea

This post was originally featured under Chelsea's Garage, now affectionately known as StyleMutt.


New product love! {Miss Mustard Seed milk paint}

This came for me in the mail recently

I felt like an 8yr old version of myself on Christmas morning!

Anyways, if you've been following this blog for a little while you may have figured out that I use a lot of Annie Sloan Chalk Paint to refinish furniture. This has nothing to do with discontent with the product, I just wanted to try something different. I have read and seen how milk paint flakes and chips off - a finish I adore but is impossible to achieve with Annie Sloan Chalk Paint; they're just chemically two different kinds of paint. It was time to try the chippy milk paint.

Miss Mustard Seed milk paint comes in powder form and then you mix what you need with warm water. This is something that will take some getting used to as far as consistency and quantity. The directions said to mix 1 part powder with 1.25 parts water. I started with a half cup of powder and the appropriate amount of water and found it a bit thick. This covered my tester piece, (a 60"L credenza), with one coat. My second 'batch' of paint came out a bit thin. I'll have to play with it some more, but ultimately, it achieved exactly the look I was hoping for. As I learn more about how to work with it, I will definitely share!

{While waiting for the first coat to dry, this started happening. It was thrilling! I think part of the lure of milk paint is how unpredictable it is. It peeled heavily in some areas, not at all in others.}

I'm beyond pleased with the product. Miss Mustard Seed milk paint comes in a variety of colors and neutrals, similar to Annie Sloan Chalk Paint. I intend to use both products now as I discern which pieces will look better with which finish.

{Credenza painted in 'Grainsack}

 SOLD

Thank you for reading!

~Chelsea

This post was originally featured under Chelsea's Garage, now affectionately known as StyleMutt.