Repost: Paper Wreath Tutorial!

Hi! Today I am re-posting one of my most frequently checked-out DIY tutorials - the bookpage wreath! I posted this tutorial last November but wanted to get it up a bit earlier this year. It's just such a beautiful wreath that is fun to leave up for a longer season. It doesn't scream 'holiday' but gives off an understated warmth and coziness of the holiday season. And if you try this or any other homemade wreath projects, please take some pictures along the way - in a month or so I'd love to share your beautiful creations here on Chelsea's Garage!

How to make a bookpage wreath
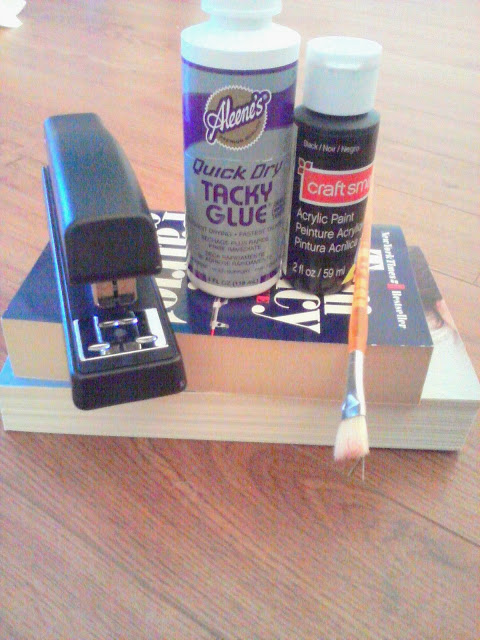
Supplies:
-2 books of slightly different colored pages for a bit of contrast in your wreath
-Stapler
-Craft glue
-Black paint & small brush
-13"-14" foam wreath frame

Step 1:

Paint the outside of the pages of your books black. This will give each individual page of your wreath a little punch so you can see the contrast

Step 2:

Tear out pages one by one and shape into a cone. Staple the ends. I make the outer edge of cones on the wreath like this....

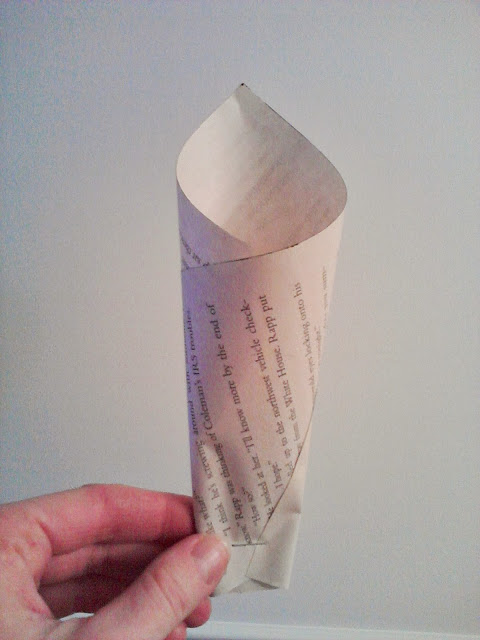
...then I make all the other 'layers' of cones in the wreath like this, with a double fold at the bottom of the cone.

Step 3:

Drag a strip of glue across the bottom of your cone

Step 4:

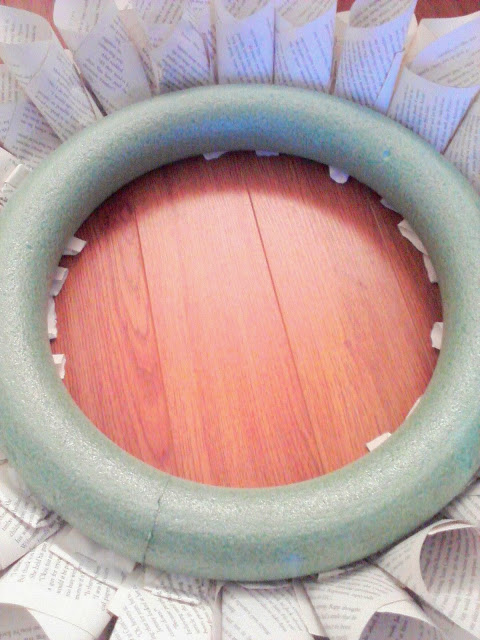
Stick the cone on your wreath frame, tucking in each cone one next to the other, working from the outside of your frame towards the inside. When you are starting a new 'layer', make sure you are tucking the cones in close to the previous layer so you don't have bare spots.

*As you work your way in, your cones will start facing the inside of the frame, as you can see in this picture. Once it looks like you can no longer see much green of the frame, do one final layer just as you have been doing, but face the cones outward. I tried to get a couple pics of what I'm talking about...look at the inside of this wreath - you can see how the very inside cones are facing out, and the layer of cones above them are facing in.

 Your beautiful final product!

 The photo above is a year old and that wreath was given to a friend. The photo below is a recent shot of the wreath I made almost 3 years ago; I love how it has aged to a deeper color over the past few years, (I leave it up year-round)!

This is one of my favorite DIY projects. I got my books at a thrift store for pennies a piece, the black paint and glue I already had here at home, (but you can purchase them at Michaels for just a few bucks), and the wreath frame was around $10 at JoAnns Fabrics, (they are a few bucks more at Michaels, around $13, I think). So it's a very inexpensive project that looks worth much, much more.

Thank you for stopping by!

~Chelsea

This post was originally featured under Chelsea's Garage, now affectionately known as StyleMutt.

DIY pillows: 5 minutes + $5

Hi friends! Today I'm sharing a project that is DIY at its best.

You know what these are?

Placemats. 

Lined ones...

Which happen to be on clearance right now at Target.

And thanks to the inspiration from the Lovely Etc. blog, I'm going to pass along the fantastic idea of making them into pillows!

Step 1: Find some inserts.

(I used a couple 14x14" pillows from around the house that I wasn't using - these are from thrift stores so they cost $3 each)

Step 2: Cut open one end of the placemat

Step 3: Stuff in your pillow

Step 4: Sew your open end shut

Step 5: Decorate!

Group shot!

Since I do not have a sewing machine it took me closer to 10 minutes to make each pillow. If you do this with a machine it would easily be a 5 minute project, (though 10 minutes for beautiful pillows at $5 is still awesome)!

And for some Merry and Bright pillows for the upcoming holidays...

Thank you for stopping by!

~Chelsea

This post was originally featured under Chelsea's Garage, now affectionately known as StyleMutt.

Distressed Mint Buffet, {the detailed transformation}

Hi friends! Today I've got an awesome transformation of a really dull piece with lots of potential into something extraordinary. I took lots of pics along the way so you could really see what goes into a makeover and take notes for yourself if this is an interest of yours as well. To start, you need a piece of furniture.:) I look for things that are structurally sound, heavy, sturdy, but also just really interesting. Chunky pieces typically catch my eye and unique details that set a piece apart from others I've seen. (Things that don't matter to me: type of wood, color, hardware, scratches/nicks/chips)

This large buffet I found at Goodwill hit everything on my checklist for a piece to transform

Though seasonally appropriate at the moment, the iron leaf knobs were not lining up with my vision for this piece. 

So I easily removed them with a screwdriver.

The new hardware I got required smaller holes, which meant I needed to fill in the existing holes.

I plugged the old holes up with Elmers Wood Filler.

While I waited for the wood filler to dry and harden I got to work sanding the edges of my piece just to smooth over all the rough spots. I used 120 grit sandpaper.

Once my wood filler hardened I could sand it down smooth. Sand in all directions; circular motion, left to right, up and down - you want to make sure it is a completely smooth surface.

After all the sanding was done I brushed on my first coat of paint. In this case my first coat was Duck Egg by Annie Sloan Chalk Paint. First coats of paint do not have to look good. You can paint like you did in third grade.:)

After my first coat dried I began my second coat - for this piece I layered two colors, so my second coat was Spring Mint by Behr. On large surfaces like the top, I like to brush in circular motion followed by an even back and forth motion.

Once the paint dried completely I distressed along the edges, corners, and areas of the larger surfaces using a medium grit sanding block. After wiping the dust off I used a clean rag to wipe on an even coat of Minwax Polyurethane clear semi-gloss.

After the sealer dried all that was left to do was replace the drawers and doors, attach the new hardware, (after careful measuring), and bring the finished piece inside for it's glamour photos!

{66"L x 29"H x 19"D}
Piece has sold. Please contact me if interested in something similar!

Thank you for stopping by!

~Chelsea

This post was originally featured under Chelsea's Garage, now affectionately known as StyleMutt.