Chunky, rustic chair

Happy Friday, yo. 

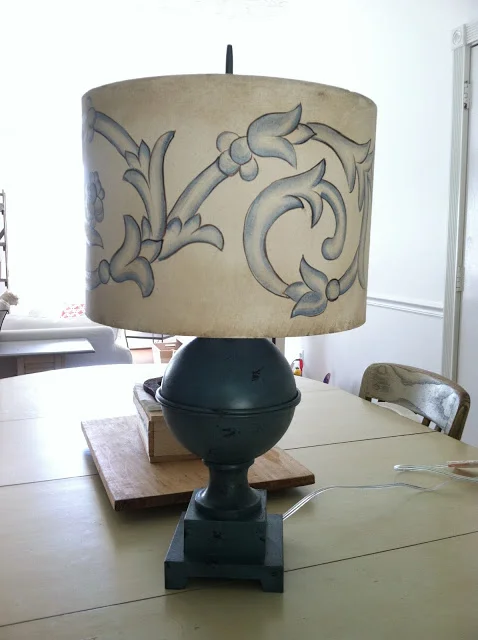
Rounding out our week is a chair that was dropped off recently with a pretty cool request; to refinish it similarly to how I did this large 6-drawer dresser last week. Oh, the pressure! 

With no particular plan in mind, I tried some different things - some which worked, some which didn't. The end result, however, nails the vision beautifully.

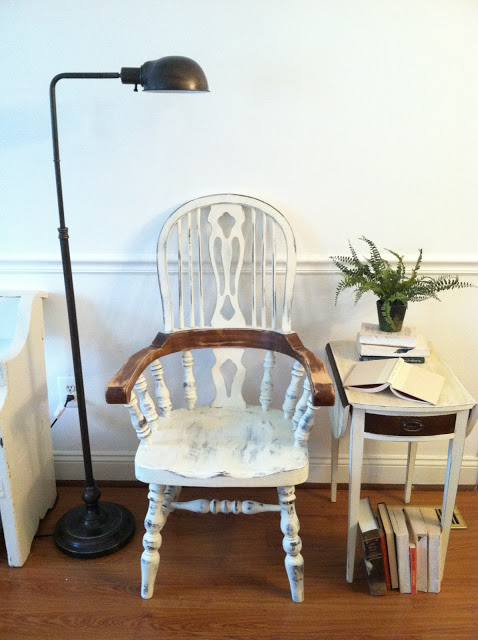
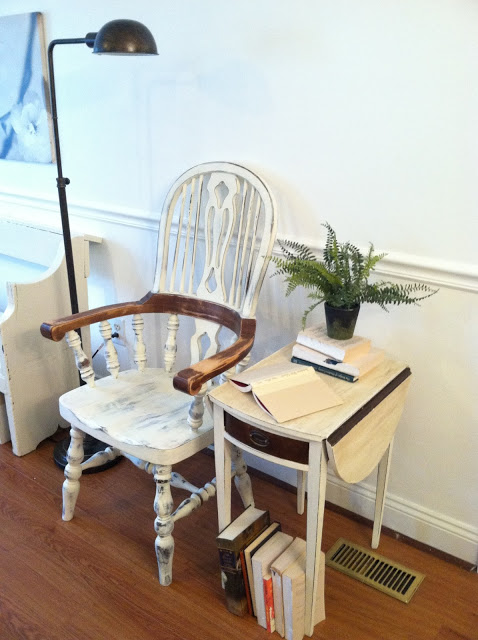
I just love me a solid, chunky chair! {The accent table is available for sale}

The low down:
-I used Old White by Annie Sloan chalk paint to cover the entire piece, except for the armrests
-The armrests I gave a good sand using 120 grit sandpaper
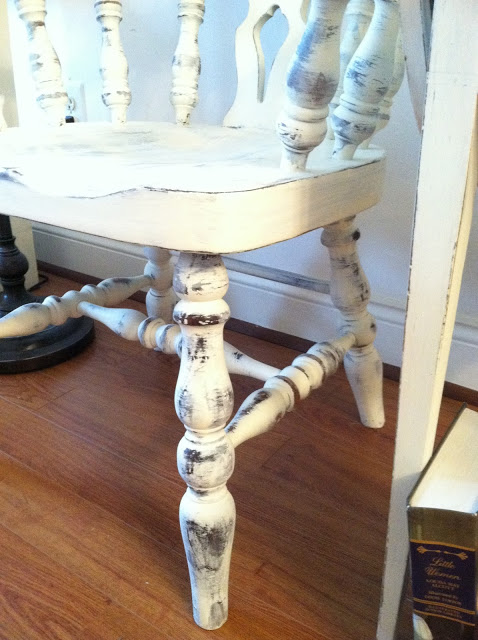
-I distressed the entire piece using steel wool - an excellent tool for curvy legs and spindles
-After distressing, I went over the entire piece with a whitewash, just to soften the distressed areas, which seemed too harsh. I dipped the end of my brush in water, shook it out, then dipped very slightly in the Old White paint, and then brushed the wash on. This makes the wood look weathered and bleached, like its been sitting outside in the sun.
-I finished by sealing the piece in soft clear wax, (over the painted portion), and Polyurethane clear semi-gloss, (covering the armrests).

And because it's Friday I wanted to throw in a highlight from my week: Finding Colin's hospital bracelet! When redoing Shire's room I switched her dresser, which meant her old one got the boot. When I was cleaning it out right before it's new owner came to pick it up, I found this tiny hospital bracelet! Shire's is in a folder but I couldn't find Colin's. The twins were born premature at 34 weeks and were 4lbs 1oz and 4lbs 13oz. Colin was the heavier one, but holding his tiny hospital bracelet in my hand reminded me just how itty bitty they were. I say bracelet, but they were actually worn on their ankles during the 3+ week stay in the NICU.

Thank you for reading and have a safe and wonderful weekend!

~Chelsea

This post was originally featured under Chelsea's Garage, now affectionately known as StyleMutt.

Color mixing: Chateau Grey + Duck Egg

Hi friends! Today I've got a really cool custom order I had this week which required some color mixing. The inspiration: this totally amazing lamp found by my client at Tuesday Morning. Isn't it beautiful!

The idea was to create a color that would compliment the deep saturated turquoise of the lamp base and tie together some of the soft colors around my client's living room. After a bit of thought I pulled out Annie Sloan's Duck Egg and Chateau Grey chalk paints.

Chateau Grey is a beautiful mossy green and Duck Egg is an aqua with a touch of grey.

(I always use a chopstick to mix colors)

(50/50 mixture on the right, 1pt Duck Egg/3pts Chateau Grey on the left - we used the color on the left)

I first tried a 50/50 mix, but ultimately it was a bit too blue for this project. The 1pt Duck Egg to 3pts Chateau Grey was a beautiful color next to the inspired lamp.

And our custom color in all its glory painted on this most awesome cubbied coffee table:

On deck for tomorrow is another inspired custom order - this time the inspiration was derived from a piece I just finished last week!

Thanks for reading!

~Chelsea

This post was originally featured under Chelsea's Garage, now affectionately known as StyleMutt.

Vaselifts!

Hey guys! I've got a couple fun pieces I've been busy with this week and will be showing you by Friday, but I thought I'd stop in really quick to show you some quick and creative ideas for your vases!

We've got so many things blooming around our yard, both welcome, and less welcome...

(Shire is cleaning up on the clovers. She thinks they're beautiful and I find her beautiful sitting outside picking them.)

 I've been going through every last clear glass vase that I have. We have shelves and cabinets and boxes that look like this:

I thought it would be fun to do a little makeover with some of our vases, especially since quite a few are holding nothing more than bloomin' weeds...

My supplies for this project were nothing more than a stash of Washi tape and my favorite little girl ever. It was a fun little project for her and she got to use full reign of her artistic freedom with where and how she wanted to lay each piece of tape, (which I ripped off the rolls and just stuck onto the edge of the table).

Finished products!

Over the 4th of July we had the pleasure of a visit from my sis-in-law and her family. She brought me one of her own creations - a simple clear glass vase which she wound rubber bands around and spray painted! After the spray paint dried she unwound the rubber bands and this was the swirly masterpiece.

I love how the light from the window comes through the clear glass swirls created by the rubber bands! So fun and easy!

So, nothing ground breaking - but a couple very creative, very quick vaselifts for you to try at home for displaying your own blooms, (or weeds).

Off to finish up a few pieces which I hope to have up here by Friday! Thanks for stopping by!

~Chelsea

This post was originally featured under Chelsea's Garage, now affectionately known as StyleMutt.