Paris Grey sideboard

Happy Friday!

It was my recent good fortune to find this mighty sideboard while out thrifting with my brother's girlfriend, Cate. Our cart and arms were full as we were about to step in line, but then I made a beeline across the room as soon as I spotted this piece. Sideboards such as this might be one of my favorite furniture types to refinish. They are so versatile and among my most highly requested. After a bit of inspection I mentally checked off all my requirements; sturdy, functional, beautiful/unique detailing, and affordable. Done deal :)

The detailing on the doors of this piece inspired me to go with Paris Grey by ASCP. Though a large and substantial piece, the details give it an air of elegance and romance that I wanted to hype up with a soft and airy hue.

New again

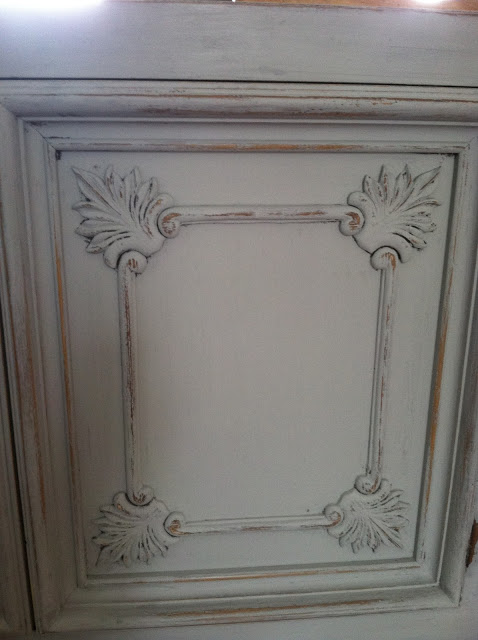
 I have always enjoyed the contrast of a soft grey and cream together. I decided to use Country Grey, (which really is more of a lovely cream, also by ASCP), along the edges of the cabinet doors for a subtle differentiation.

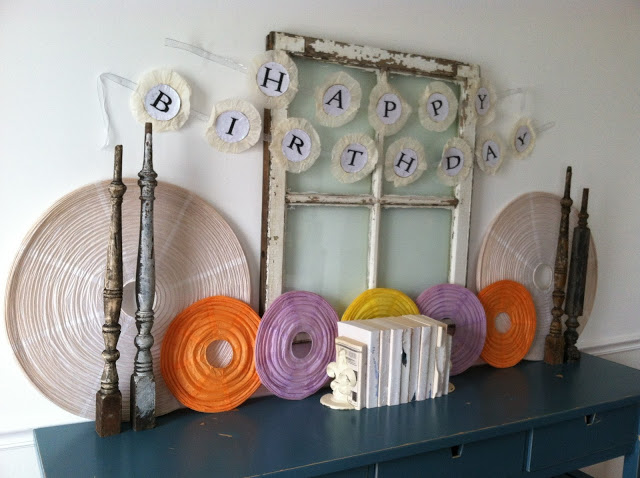
Putting together these small vignettes are really too much fun for me. This little exertion of creativity is a welcome contrast to changing diapers and scraping food stuck in the crevices of our dining table :) The silvery string was a last touch - and totally unnecessary - but I like things a little off beat.

So there ya have it! This piece will be available at the next Chelsea's Garage sale! Date TBD.

The low-down on this piece is pretty simple:

-2 coats Paris Grey

-Taped the inside and outside of the doors and painted one thin coat of Country Grey along the door edges

-Used a fine sanding block and steel wool to distress

-2 coats of clear wax on the top surface, 1 coat over the rest of the body.

This piece is linking up to: Blue Egg Brown Nest

Have a beautiful weekend!

Speaking of weekend.....The Reston 10 miler is on Sunday! The race and the distance are really nothing important; what's important is the cause. I am running to bring awareness to an awesome foundation called AHOPE for Children. In short, AHOPE rescues and cares for the wee ones of Ethiopia who have the least amount of hope; the precious orphans affected by HIV. Every little bit can help make a difference for this incredible ministry that relies on support to care for the growing number of children they are taking in. Besides providing medical treatment, AHOPE also educates their children so they may be productive, successful adults in their country. How cool is that?! If you have any interest in either a one time or monthly donation to AHOPE for Children, please visit my fundraiser, (below), Running for AHOPE, or see their website here and follow the Donate Now instructions. 

LINK TO FUNDRAISER

Thank you so much for reading! 

~Chelsea

This post was originally featured on Chelsea's Garage, now affectionately known as StyleMutt!

Quickest party decorating idea ever!

Hey everyone! Hope you had a fabulous weekend! We threw a little birthday shin-dig at our house for my brother and I learned a really fun party decorating trick that I couldn't wait to share! You know those paper lanterns that are all over the place? We were given some a year or so ago by a friend and I've hung them up for every birthday party we've held here, but this time I decided to just keep it simple and kept the lanterns flat!

Don't they look cool together?! The big white ones on the ends were another thrift store score last weekend for less than $2 ea! They were unused, unopened from Ikea!

The Happy Birthday banner I made for a special birthday party for my Mom 3 years ago. It has now been hung for 14 different birthdays, I believe, (including one in Florida) - and is still in great shape! Made from cereal box cardboard, silver ribbon, ivory crepe paper, and glitter glue.

Hanging it is one of my favorite birthday traditions now :)

Why bother gathering and displaying balloons when they're fun enough to kick around on the floor!

A fun treat for little ones, (and keeps them out of trouble at a party)!

Anyway, I just wanted to pass along the easiest party decorating idea I've ever stumbled upon.

Thank you for stopping by!

~Chelsea

This post was originally featured on Chelsea's Garage, now affectionately known as StyleMutt!

If at first you don't succeed...

Hi All! It has been a b.u.s.y. week, let me tell ya. I'm running my fanny off in the mornings training for a 10 mile race that's coming up on March 3, (check out this fundraiser I'm running for here or at the link to the left), and then after giving lots of attention to my kiddos, feeding them lunch, and getting them all down to nap, I'm mustering up every last ounce of energy to finish some projects in the garage each afternoon, (and that's just the first half of the day)! But it's okay. This is a phase of life I will never have again and I don't want to waste the abundance of energy the Lord seems to be supplying me with at the moment!

There's been a surprising flow of custom orders in this typically slow season of the year, but I'm also working on building a fantastic stock for the next Chelsea's Garage sale event! The date is not set and rarely ever is until about a month before, but at the moment I am looking at mid-April. Already we've got some ahhhh-mazing pieces that I am so stinkin excited about. That's what is the best part of our Chelsea's Garage sales. Every single piece is intentional; I only bring home pieces that I find beautiful, unique, functional, and totally something I'd want in my own home. In fact, at the last sale I ended up kicking myself for selling a particular piece that I suddenly realized I really should have kept! I refinish each piece exactly how I want so I can stand behind it and be proud of the work.

That's what this post is about today; standing behind each piece, no matter the size, and being proud of the job accomplished. A little while ago I posted this table that was really kind of a tester for a new paint color I was given at Christmas.

As soon as I started brushing on the paint I knew I didn't like it. But I kept going with it because, well, I thought maybe it would grow on me. As soon as I was done I knew it just wasn't me.

The whole thing looked too abrupt. The bright teal atop the bright white was not my best choice. I really prefer softer, more earthy tones. When a friend came over one afternoon and was looking around at some pieces in the garage, I heard myself making fun of this poor little table and laughing at it! Now, this table could very well sell this way. There have been a very small handful of pieces that have sold in the past that I didn't truly love...and I've learned that getting paid for a job that I'm not all that proud of does not feel good at all. I want my customers and clients to feel like they're getting a true gem with every piece of mine that they take home.

To me this was no gem, and certainly not something I would keep in our home. It's not horrible, just not my particular style.

So, I set this table up in my work space once again for a re-do.

Now, I can stand behind it and feel so much better when someone deems it worthy of coming home with them.

It's not a large piece by any means, but anything that I'm going to stick a Chelsea's Garage price tag on had better be worthy of the space it takes up in my small garage! I think this softer monochromatic finish shows off the shape of the piece better. The muddy gray, distressed to reveal black undertones, gives this table a rich element of sophistication that I strive to achieve with all the pieces that I have free reign over.

A couple of my little ones enjoying a leisurely breakfast in the background.:)

The low-down:

-Spray painted in flat black

-Brushed on 2 coats of Paris Grey ASCP

-Mixed about 2TBSP of dark wax with about 1/4c Valspar Clear Mixing Glaze, (mix well until you've got an even consistency), and brushed over the entire piece for a richer, aged finish

-Used a very slightly damp sponge to wipe over my glaze mixture with clear wax to even out the finish and remove some of the dark wax where it was a bit much, (clear wax acts like an eraser over dark wax)

-Used a medium sanding sponge to smooth out the table top and lightly distress the edges, then used steel wool to lightly distress the legs

-Just because I really like the element of shine on such a small piece with such pretty detailing on the legs, I brushed on a coat of polyurethane clear high-gloss. This was not necessary for the purpose of protecting this table's finish since it already had clear wax; this step was purely for the shine.:)

Thanks for reading along as I thought out loud with this one! And please know that I appreciate styles and looks that are different from my own. I know many of you may even have preferred how the table looked the first go-around! I love that - personal style should be as unique as our DNA! If you liked the table before, the color used was Annie Sloan's 'Florence'. Go grab a can and have some fun!

~Chelsea

This post was originally featured on Chelsea's Garage, now affectionately known as StyleMutt!