Rustic Burlap bar stools

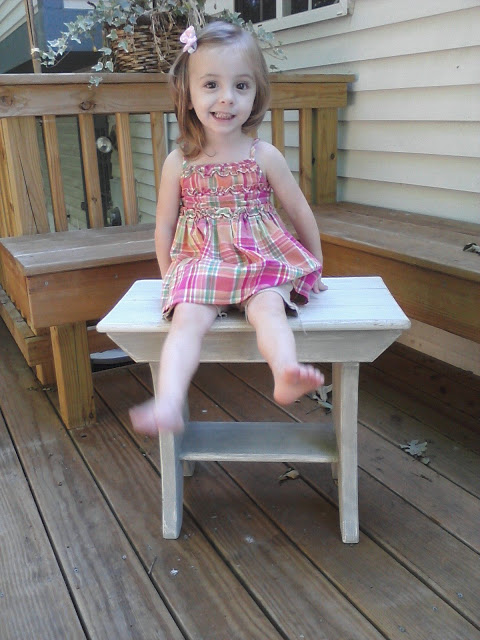
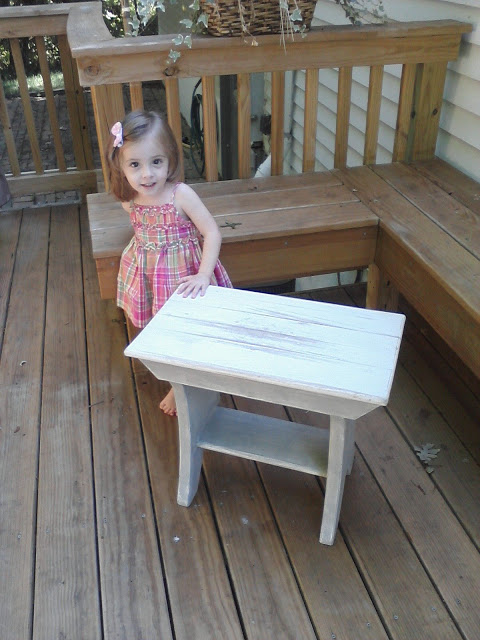
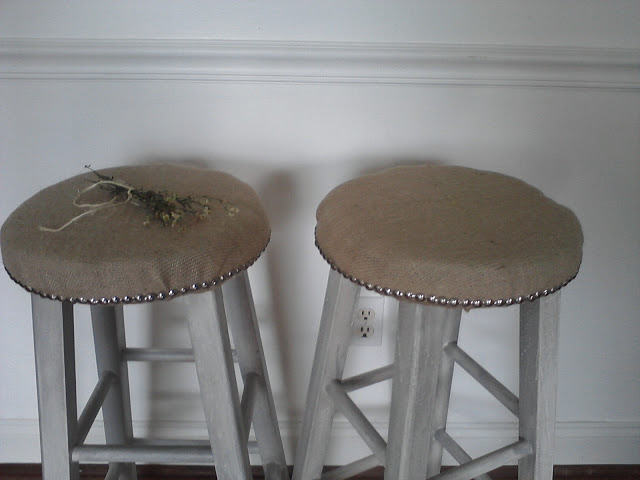
Well, today I hit the nail on the head. Literally. I have had this pair of bar stools for a long time and had already refinished them. You may remember these from a while back? Anyways, something wasn't right - They just weren't 'me'. Even though these stools are to be sold I love the freedom of non-custom orders to do absolutely anything I want to a piece. Every piece that I have free reign with should reflect me and be something I would put in my own home. The first time around with these stools just missed the mark.

But, the good news is......PAINT CAN BE CHANGED!!!!!!

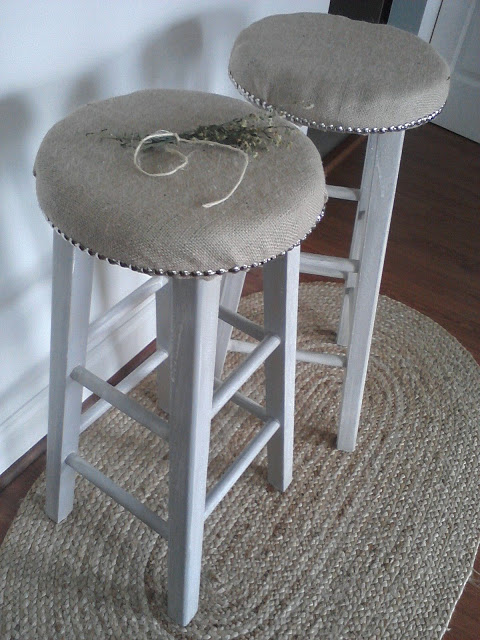
So this week I got to work stripping, sanding, spray painting, whitewashing, stapling, hammering; the whole nine yards. The result, I think, was totally worth the time to re-do and make it right.

{ah yes, much better}

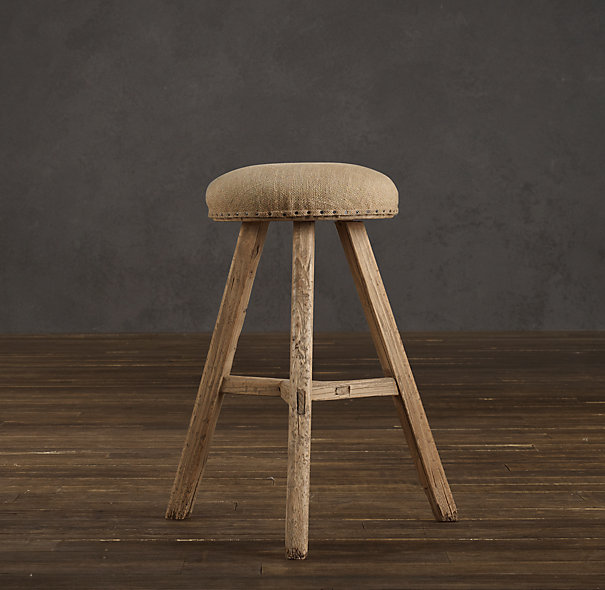
My inspiration for refinishing these stools, (again), was this photo I found through a google search from Restoration Hardware. Their 19th C Rustic Stool is no longer available, but I loved the idea of burlap and exposed nail head trim. I also loved the driftwood texture of the wood and since we JUST spent a long weekend at the lake house I was extra motivated to create that look on my stools.

{Brilliant!}

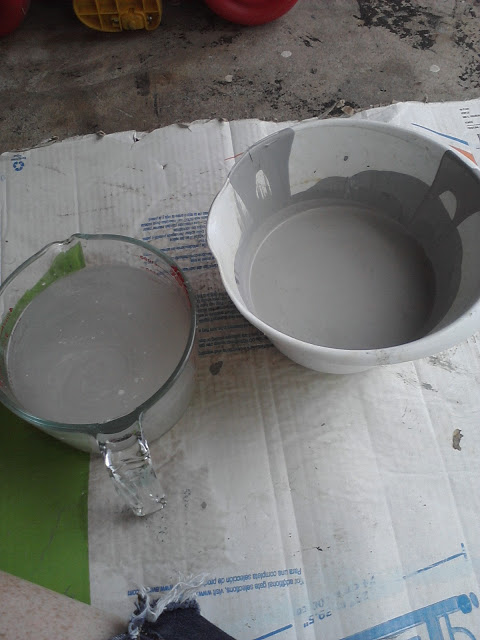
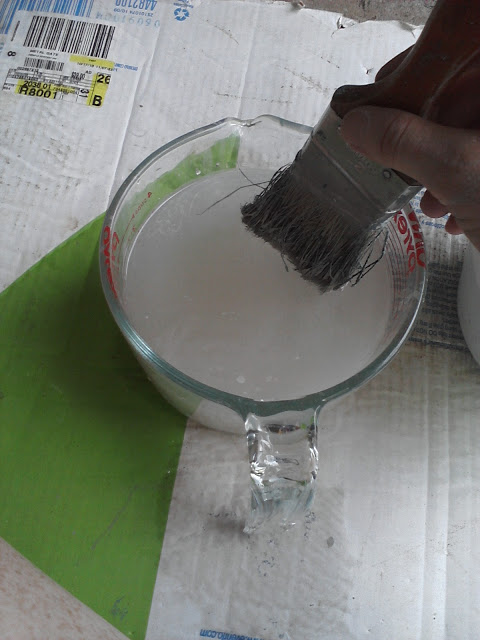
I wanted more of a contrast between the burlap seat and the wood of the frame, so I mixed a very light gray rather than brown, though you could easily get that authentic 'driftwood' look with a light shade of brown. First, I spray painted my frames in white, (after stripping them of the old color). If you want to do this in brown, like above, then paint a base coat of a very light shade of brown - more of a tan. Then fill a bowl with your top paint color, (should be darker than your base color - I used a very light gray, if you want a real 'wood' look, then use a darker brown), and another bowl with some water.

Dip the end of your brush into the water, then shake it out

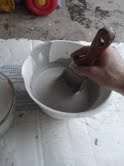
Then dip the end of your brush into the paint and let any large drips fall off, (sorry so blurry!)

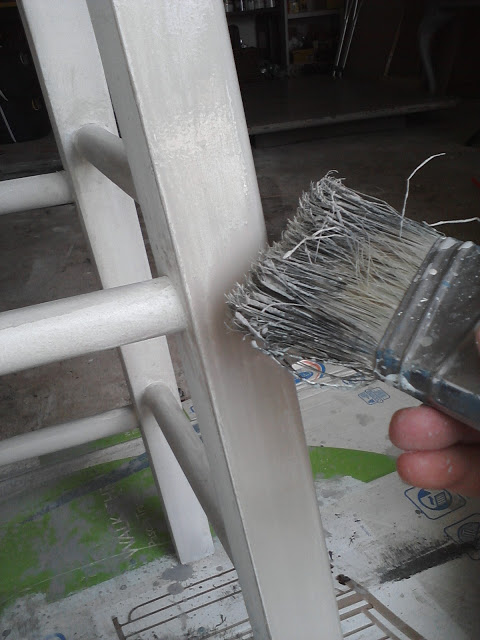
Brush your watery paint on in long stokes. Watch for splatters! Thin paint flies far :)

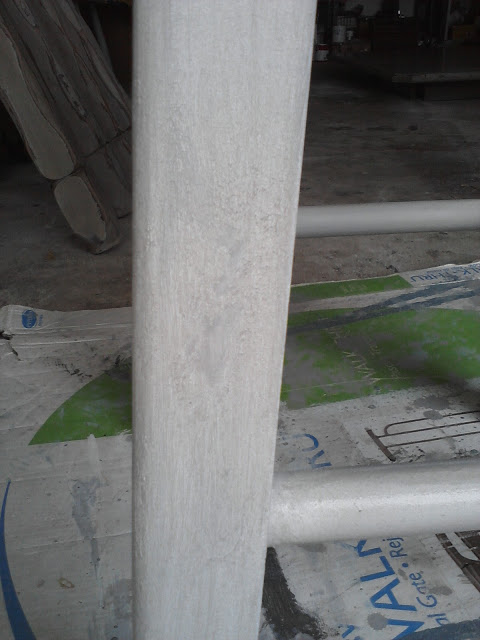
The result when it dries; a worn patterned look to your wood. Finish by gently rubbing fine sandpaper, (I used 220 grit), over every square inch.

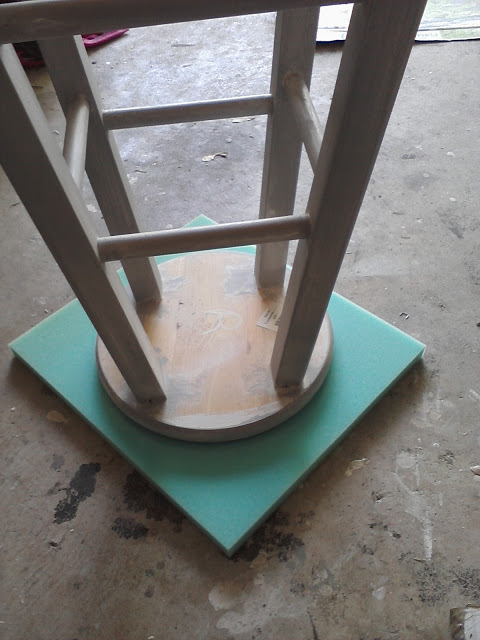
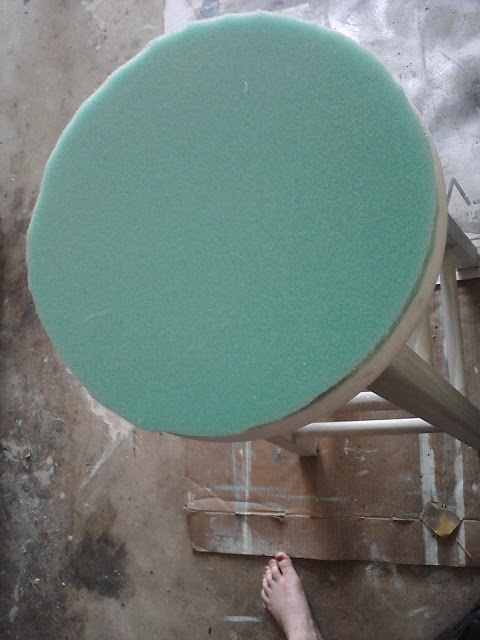
I also made the seat cushions from 1.5 inch thick seat padding, (JoAnn fabrics), and burlap. I layed the top of the seat on top of the padding and scratched with a pen the outline of the seat.

Then I cut and glued it onto the seat using all-purpose craft glue.

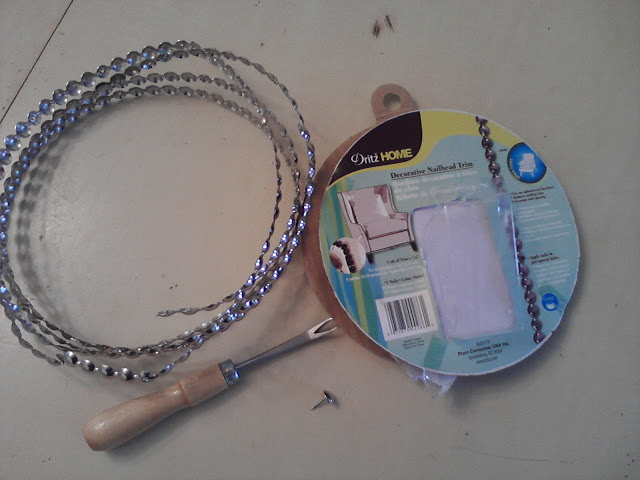
I attached the burlap with a staple gun and then the nail head trim along the bottom side of the seat using a 'chain' like trim from JoAnns, (brand Dritz Home, pictured), - which was technically cheating, but I made a mess of trying to nail in each tack individually! Every 4th 'nail' on the chain had a hole so I could hammer in a real nail which keeps the trim attached secure and tight to the seat.

It just felt so good to remake these stools in a look that feels natural to me. What a joy it was to find an inspirational style and work it out to make it my own.


{Available for sale}

We are going to be up rooting our front yard this weekend to dig out all our current bushes and shrubs that are both overgrown and outdated. Kind of scary to go to a blank slate but SO exciting! I have no green thumb whatsoever so I'm hoping to learn a lot as we re-landscape our yard.:) Any tips out there?

Next week I have several new pieces coming in for a custom job. I can't wait to hear what the new 'orders' will be and share some good before and afters!!!

I hope you have a wonderful weekend!

~Chelsea

Fabric tassles - July DIY home accessory

Hello, hello! While I'm not one to ever feel obligated to post on my blog, I also don't like to be silent here in blog land for too long. While there may have been crickets chirping on my blog recently, it's been anything but quiet here at our home base. We had an adventurous 4th of July up in Lititz, PA where some of my husband's family is from. This small town celebrates the 4th like nobodies business, let me tell ya.

{Wooden train at the park = huge hit with my boys. All of them.}


After we were all partied out in Lititz we were off to Somerset, PA for a lovely wedding of my cousin, Laura. We sang, danced, played cards, swam, ate, drank, hiked, golfed (the boys), and had an overall fantastic time together.

{hmm, it appears sticking out your tongue just isn't as adorable when you're over the age of 3...but still fun none the less!}

And finally, after we exhausted ourselves fully, we made our way home. It just so happens that during our trip I broke my foot, (my first broken bone ever)! I have a big clunky boot to wear over the next 6 weeks but have been somewhat cleared to do anything I want that is comfortable for me. I had intended to paint our kitchen cabinets this week, but I am thinking that project may have to wait just a few weeks until my foot is not as tender. I do plan to resume furniture painting as soon as possible as there are some really cool pieces awaiting their own makeover that I cannot wait to show you!

In the mean time, I took the past few days to try a fun home accessory project that I had seen awhile ago on the inspirational blog, In the Fun Lane and wanted to share with you. It's super easy, super cheap, (if not free), and just a fun little touch that you can really add anywhere in your home! May I present....FABRIC TASSELS!


You start with any kind of fabric you want - burlap, lace, linen, cotton, fleece...you name it, it can be made into a tassel. I've used old curtains, pillowcases, sheets, cloth napkins; various fabrics I've had around the house from other projects. Any size, whatsoever. For this demo I used a vintage cloth napkin, (I found this stack of 8 at an antique store for just under $4; all 8 will be turned into little tassels to hang off of Shire's dresser knobs when we move her to her own room - pics will most definitely be posted when it's done!)


{fold fabric in half and cut slits straight up until you're about an inch or so from the fold}

{Open your fabric}

{Roll it up}


{Fold in half and tie with ribbon, twine, yarn, whatever you've got}

{hang in a fun spot to enjoy...over a kitchen chalkboard}

{kitchen cabinets}

{Dresser or TV console}

{Adorn a mirror}

{Adorn a doorknob}

{Jazz up a plain looking plant stand...or give a distraction from the very obviously fake plant ;) }

{Turn a factory made Ikea headboard or foot board into something original}

There are so many ways to use fabric tassels! When it comes to home decorating I don't like things to look or feel over decorated and cluttered with layers and layers of accessories. That being said, I frequently like to change out my accessories. I am constantly replacing things and moving things around in our home. It's exciting to have new ideas for using things or how to decorate the same pieces of furniture I've had for a long time in a way that makes them feel fresh and new again.

Oh yeah, and while I'm on the topic of fresh and new, I decided to do something about our guest quarters that for almost 2 years has been nothing more than a little alcove in our basement. We currently have a futon and the pieces of our kids' future bunk beds all squished into this one small space, (the bunk bed mattresses are in storage, the wood pieces would not fit). Though this set up is temporary until we actually use the bunk beds as....beds....I couldn't wait any longer to set up a space that may actually leave our guests wanting to come back!

{Can you see where the pieces of the wood bunk bed were placed?}

{Bunk bed latter is being used as a 'headboard', 2 of the 3 underside drawers are being used as bedside tables, and 1 drawer is in the right side corner being used as a shelf for a mini library with some of my personal favorite reads, some faux flowers, and a vanilla candle - a favorite scent (simple and yummy)}

{I had these three square frames with fabrics that caught my eye just stapled right on...I hadn't found a way to use them until now! The linens were all mixed and matched from the thrift store - and washed in HOT and double rinsed!}

{Right now I am really loving layering different fabrics. It isn't something I know how or desire to do all throughout my home, but for this small space, I think it really worked. It was fun to put together and, hopefully, is a very warm and inviting space for our dear guests who brave a night, or more, with our crazy clan!}

Thanks for stopping by!

~Chelsea

Indoor/Outdoor Table

With our temps dipping from the blazin' 100s down into the mid 70s, (my favvvvorite range), I got inspired to work on a fun indoor/outdoor table that's been in the garage well over a month now. Already painted a creamy white and in excellent sturdy condition, there was little I wanted to do to change this cutie.
I grabbed my brush and dug around in the back of my stash of paints for the perfect color I knew would be fitting for this piece. It's a very light grayish-blue, (Bayou by Behr), and I dry brushed it on to stay consistent with the already weathered look. Once dry I lightly distressed all angles and edges to allow an outline of white to be seen.

I used a fine sanding block to give a more worn look to the top.

It was fun 'staging' this little table/bench outside and just letting the surrounding nature act as the decor. My Shire had some staging ideas of her own as well.:)
 I confess I've never done her hair this way, but I love it! I usually pull it back tight in a secure hairband. I was thinking that I don't want her to end up like me, always having to have her hair completely off her face. I like this softer look on her. :) But I digress...


Pretty cute little table, huh? Or bench.:)

~Chelsea