Dresser turned Quaint Entertainment Center

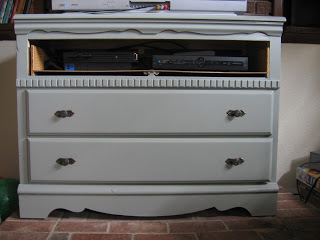
If you are here to see a dresser transformed into an entertainment center, please see this post with a much better transformation!!! The one below is the first one I ever tried and not the quality I expect from myself and my business these days. On that note, please enjoy my first ever try  at using a dresser as an entertainment center. Boy, have I come a long way since this post! :)

Here's the deal: I promised the big reveal today, and it is HERE, but after I promised you I would show you today, Husband informed me that we are getting a brand spankin' new tv which will arrive this weekend. So, I am still showing you our dresser turned entertainment center today, but I might snap a few pics once the new tv is on and the whole thing looks nice and sleek all together. This might be the last 27" box tv to leave someone's home. Anyone else have a box tv out there? Anyone? Anyone?

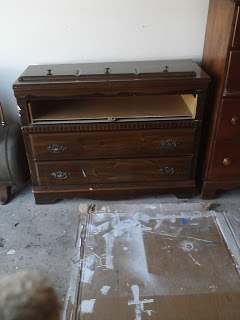
Well anyway, here is what I picked up a few weeks ago at my trusty Goodwill:

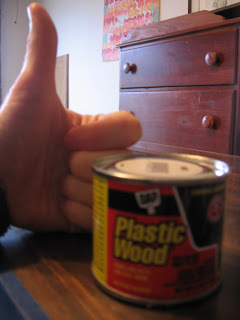
We immediately removed the top drawer and 'defaced' it so we could still use the inside of the drawer to keep the media boxes. We also had to replace the hardware on the two lower drawers because one handle was broken. *Tip* - if you want to replace hardware for a quick makeover on any piece and you need to fill in old holes, use this:
Hardening Plastic Wood, (I like the brand Dap)

NOT this: Non-hardening Wood Puddy

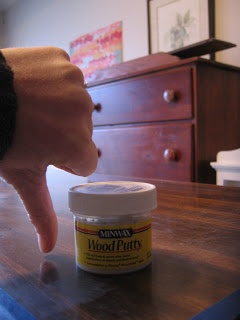
The wood puddy leaves a little 'bubble' where the hole used to be, no matter how much you sand. Since it's non hardening it's very difficult to seal the hole. You want to apply a liberal amount of hardening plastic wood, wait for it to harden and then sand it down really smooth. You don't just want to sand over your filled in holes, but the entire drawer/door so you really get an even finish.
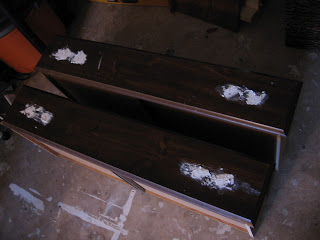
(photo before sanding)

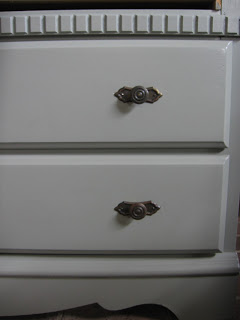
After the sanding, painting several coats of 'Bayou', (a beautiful, neutral muddy-green), sealing with water-based Polycrylic clear gloss spray on sealer, and adding on the new hardware, this piece was ready to come inside!


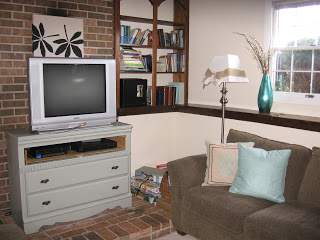
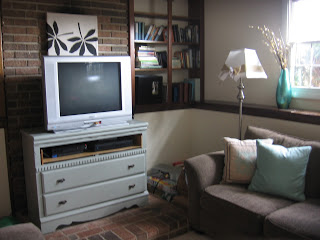
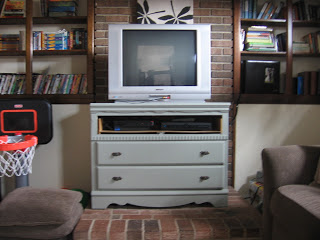
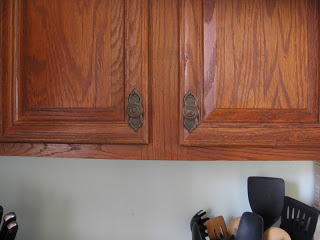
The hardware was free! We will be redoing our kitchen soon, (which I will track on here), and I have already removed some of our cabinet doors. We just took the knobs from four cabinets and added them onto the drawers of the dresser.
Previously on the cabinets:

Rotated, now on the dresser:

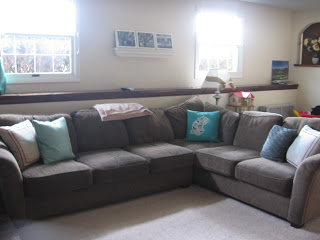
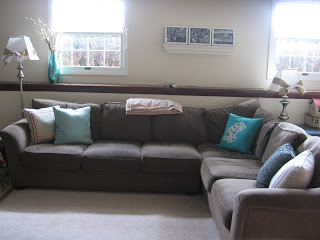
And here are some pictures of the basement, in case you were curious:


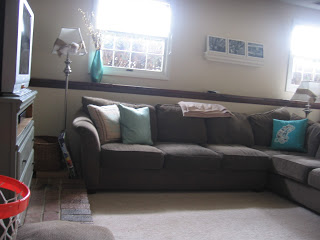
I'm very excited to have the room looking a bit more complete with this 'new' set up for media stuff. I am always looking for dressers about this size as they are so versatile! I'm sure I'll have more posts about dresser transformations coming soon :)

Have a fantastic weekend and thank you for visiting!

Painted Gift Wrap

I know I said we would have a big reveal today, but it looks like it will be one more day until we can move it inside and give it a proper welcome with my camera. So today I'm just going to chat about gift wrap! I don't think of myself as crafty, but I do like to get creative now and then especially when it saves me some money. My girl Shire and I are heading up north for a bridal shower this weekend and we had fun finding a gift yesterday. I was about to drop nearly $10 on some beautiful wrapping paper and ribbon, but decided to pocket my cash and see what we had at home.

If you're like me, you have a rather large stash, probably several years old, of wrapping paper. We're talking baby girl shower paper, baby boy shower paper, birthday girl paper, birthday boy paper, and don't even get me started on how many rolls of old Christmas paper I have. Ridiculous! However, aesthetics are everything to me which is why it's difficult to pass up beautiful gift wrap. You could give me some old shoelaces but if they are wrapped beautifully I couldn't care less. So, when I got home yesterday and saw that I had nothing appropriate for a bridal shower, I pulled out a roll that was solid white on the other side and a few more supplies that I have stashed from previous projects:

Stencils, acrylic paint, paint markers, heart cookie cutter, and twine

I wrapped the gift in the white side of the orange polkadot gift wrap, then started making some hearts in purple, the brides main wedding color, using the cookie cutter and the purple paint marker.

Then I used the acrylic paint and stensils to add some more design around the hearts, wrapped the pretty package with twine and voila! Custom made gift wrap!


I realize some of my supplies aren't normal things to just 'have around', but they're inexpensive investments that will pay for themselves when you don't have to purchase gift wrap anymore! (For Christmas gift wrap this year I may just use my Christmas cookie cutters of a snowman, angel, star, Christmas tree and bell!)

Tomorrow, I promise, we'll have a fun reveal :) Thanks for reading!

Geometric Table, Check!

Wednesdays are always fun for us here at Chelsea's Garage- it's the only morning I do not go to the gym! We typically go to a playgroup with some friends, but on this particular day we had to miss out on the fun to do some shopping!
Luckilly, my crew does not mind the car!

Today we drove about an hour, round trip, just to pick up some of this:

Heard of it? Apparently it's all the craze. Soon, I'll be showing you my first piece with chalk paint and I'll let you know if the drive, (and moolah), was worth it!

The main project for today was working on this geometric side table with awesome potential!
A little 'Bayou' paint took it from this:

to this...

and finally, this!


It is now available for sale so if you like what you see, let me know!

This one is for you, Husband. Thanks for lending me the hat, not that you had a choice ;) Go Eagles!


Thank you for stopping by! Tomorrow we'll reveal a finished piece that we've been working on for the past week so be sure to check back in!